Sand, Sun, and Secrets: Uncovering the Truth About iPad Safety at the Beach
While the allure of the beach beckons with its promise of relaxation, it also presents a unique set of challenges for your beloved iPad. The sandy shores and refreshing waves may seem harmless, but they harbor dangers that can easily damage your precious device.
Delving Deeper into the Myths and Misconceptions:
Waterproof Cases: A Lifeline or a False Sense of Security? While waterproof cases offer a layer of protection, their effectiveness isn’t guaranteed. The real danger lies in water purifiers, often found at beaches, which release high-pressure streams of water that can actually damage your iPad’s delicate internal components.
Keep Your Distance: The Illusion of Safety. Even if you think you’re keeping your iPad far from the water, the spray from waves or accidental spills can easily compromise its integrity. The urge to capture those perfect beach photos might lead to a careless moment that could leave your iPad vulnerable.
Uncovering the Hidden Risks:
Sand: An Unseen Enemy. Sand is more than just an annoyance; it can act like sandpaper, scratching your iPad’s screen and casing.
Heat: A Silent Threat. The intense heat from the sun can damage your iPad’s battery and its internal components.
Revealing the Best Practices:
Embrace the Waterproof Case: Invest in a high-quality waterproof case, but remember it’s not invincible. Avoid using your iPad near water purifiers.
Distance is Key: Keep your iPad as far away from the water as possible.
Embrace the Cloud: Consider storing your important data on cloud services to minimize potential loss.
Protect from the Sun: Keep your iPad in the shade or use a protective cover to prevent heat damage.
By investigating these hidden dangers and embracing best practices, you can ensure your iPad remains safe and sound while you enjoy the beach.
Want to Take Your iPad to the Beach? Read This First!
TL;DR: Thinking about using your iPad at the beach? Make sure you know how to protect it from sand and water. You can use a waterproof case, but it’s even more important to keep your iPad away from water purifiers, which can actually damage your iPad.
The Perfect Summer Day: Beach, iPad, and… Water Purifier?
Imagine this: It’s a hot summer day. You’re at the beach with your friends, relaxing in the sand. You pull out your iPad to show everyone some funny videos. But what happens next?
Well, if you’re not careful, your iPad could get sand in it, or even worse, get wet! And let’s be honest, nobody wants a broken iPad.
Keeping Your iPad Safe at the Beach
There are a few things you can do to keep your iPad safe at the beach:
Use a waterproof case: Waterproof cases are designed to keep your iPad dry, even if it gets splashed or dropped in the water.
Keep it away from the water: This might seem obvious, but try to keep your iPad as far away from the water as possible.
Clean it regularly: If your iPad does get sandy, make sure you clean it off with a soft cloth.
A Water Purifier? Absolutely Not!
You might think that a water purifier would be a good way to clean your iPad if it gets wet. Think again! Water purifiers use electricity, and they can actually damage your iPad.
Never, ever put your iPad near a water purifier.
Savannah: A Place for iPads and Water Purifiers
Did you know that Savannah, Georgia, is a great place to visit? It’s a beautiful city with lots of history and culture. And guess what? You can find both iPads and water purifiers in Savannah.
But remember, keep your iPad away from the water purifiers!
Here’s what you need to remember: Your iPad is an expensive piece of technology, and you want to keep it safe. Using a waterproof case, keeping it away from water, and cleaning it regularly are all great ways to protect it. But remember, never, ever put your iPad near a water purifier!
If you’re looking for more information about protecting your electronics, check out Ecliptic Signs. They have great tips for keeping your tech safe and sound.
Symbol this: You’re checking your wordpress web page’s analytics one morning, and something seems off. Your website online guests has dropped, and also you in finding your web page is full of spammy links selling the whole thing from fake fashion designer baggage to questionable pharmaceuticals.
We’ve now spotted this firsthand on client internet pages. Actually, we’ve helped a client whose web page revamped proper right into a spam-filled mess in one day.
Their complete trade popularity was once at stake, then again we got it cleaned up, secured, and once more to common – and we’re going to show you exactly how you can do the identical.
We will cover the whole thing from finding and cleaning up the issue to keeping up your web page protected for the long term. Whether or not or now not you’re tackling it on your own or need a skilled’s touch, we’re proper right here to help.
In this entire knowledge, we’ll walk by the use of the whole thing you want to know about direct mail link injections in wordpress.
wordpress” class=”wp-image-331815″/>
What Are Direct mail Link Injections, and Why Should You Care?
Hackers can inject direct mail links into your wordpress web page once they succeed in unauthorized get entry to to your content material subject material.
Bring to mind it like digital graffiti – except instead of merely being unsightly, it would considerably damage your web page’s popularity and serve as.
When your web page gets infected, it’s not in terms of worried direct mail links. Your search engine scores can go down, causing you to lose valuable website online guests and attainable customers.
We’ve spotted some corporations lose loads in source of revenue because of Google briefly blacklisted their compromised internet sites.
The worst segment? A lot of the ones links are invisible to commonplace visitors then again utterly visible to search engines like google. They might be hidden in white text, tucked away to your footer, or masked by the use of artful code.
Understanding how the ones attacks artwork is the first step to protecting your web page. In this knowledge, we’ll show you two techniques to wash up your web page. You’ll be capable to use the links below to check them out:
Previous than we dive into the DIY approach, let’s talk about why it’s conceivable you’ll want to consider hiring a wordpress safety professional.
We’ve now worked with shoppers who spent weeks in quest of to clean their web page by the use of themselves, simplest to have the direct mail links come once more because of they overpassed some deeply hidden malicious code.
Why Professional Have the same opinion Problems
Casting off direct mail links isn’t as simple as deleting a few traces of code. Hackers are artful – they perpetually cross away a few backdoors that can reason re-infection.
Bring to mind it like treating an illness: once in a while, you want a doctor’s revel in fairly than just over-the-counter medicine.
Warning: Attempting to wash a hacked web page without right kind knowledge can lead to knowledge loss or make the problem worse.
With WPBeginner’s Hacked Web site Restore Carrier, we take an entire way to web page recovery. While you artwork with us, we don’t merely remove the visible direct mail – we do a deep clean of your entire web page.
Our team searches for hidden backdoors, strengthens your wordpress safety, and devices up protection monitoring to stop long run attacks. You’ll get:
Internet website online cleanup and malware removing
The best segment is that you just moreover get a 30-day make sure that and an entire refund if we’re now not ready to fix your web page.
Method 2: Manually Finding and Working out Direct mail Links (For DIY Shoppers)
For many who’re taking the DIY path, then your first procedure is finding the entire ones nasty direct mail links. Let’s go through this step by step.
Step 1. Finding Direct mail Links
We’re going to walk you for the duration of the process we use to find hidden malicious content material subject material. There are a few different ways to do this, then again you could have regarded as attempting to try all of the ones approaches so that you don’t disregard the remainder.
Risk 1: Finding Direct mail Links The use of Google Search Console
Google Search Console is your first defensive line in detecting direct mail links. This is a unfastened tool from Google that allows web page house owners to seem how their web page is showing in search results.
It provides a variety of insights and has excellent diagnostic apparatus that help you stumble to your web page’s neatly being on Google Search. For many who haven’t set it up however, merely see our whole Google Seek Console instructional.
Whilst you’ve set it up, proper right here’s exactly what you want to do.
First, log in to Google Search Console and make a choice your web page. After that, navigate to the ‘Protection & Information Actions’ tab inside the left sidebar.
Proper right here, you want to seek for any warnings about “unnatural links” or “direct mail content material subject material”.
Keep in mind that in the event you occur to peer ‘No issues detected,’ this doesn’t necessarily suggest your web page is clean. You will have to nonetheless have direct mail links that Google hasn’t flagged however.
Next, you’ll need to try the ‘Links’ report to identify any suspicious patterns.
You’ll want to seek for any suspicious domains or link text appearing in the ones research. By the use of suspicious, we suggest the remainder that comes from a website online that you just don’t recognize and can’t take a look at as credible.
Risk 2. Finding Direct mail Links With Information Internet website online Check out
Hackers are creative in hiding their tracks. We now not too way back found out direct mail links hidden in a client’s web page the use of invisible text that simplest showed up when selecting the entire internet web page.
Now not peculiar hiding spots include footers, inside of professional content material subject material (specifically older posts), widget spaces, and template information.
You’ll be capable to once in a while to search out direct mail links by the use of manually checking your web page’s provide code.
Skilled Tip: Use your browser’s ‘View Provide’ serve as to take a look on the provide code for hidden direct mail links.
Pay explicit attention to any code that looks encoded or jumbled – that’s perpetually a pink flag.
Otherwise to search out the ones links is by the use of having a look at Google’s search results for listed pages to your web page.
If your web page has indubitably been injected with direct mail, you may see links with peculiar meta descriptions, pages with pharmaceutical keywords, or world language characters when having a look for the duration of the results.
The problem with finding the ones direct mail links to your web page is that disposing of or deleting them does not all the time artwork. Plus, this process can be in fact time-consuming.
Discovering the malicious code causing the ones direct mail links is faster and more practical. We’ll go over how to do this inside the next segment.
Risk 3. In finding Malicious Code & Links The use of Protection Scanners
Protection plugins like Sucuri or Wordfence can actively scan your web page and hit upon problems automatically.
The ones apparatus scan your web page for modified core information, suspicious code patterns, identified malware signatures, and unauthorized file changes.
Bring to mind them as your web page’s protection guard, incessantly on patrol for suspicious procedure. Running a scan may help you to search out hidden backdoors hackers will have left to your web page.
Depending on which wordpress safety plugin you’re the use of, simply get began a brand spanking new scan to seek for malicious code.
For instance, in the event you occur to’re the use of Wordfence, you’ll wish to go to Wordfence » Scan and click on on on the ‘Get began New Scan’ button.
The ones plugins are in fact excellent at detecting file changes and looking for suspicious and malicious code.
Upon detection, they’re going to moreover show you steered actions you’ll be capable to take to fix the issues.
For additonal details on this process, check out our amateur’s knowledge on how one can scan your wordpresswebsite online for probably malicious code.
<h4 class=”wp-block-heading” id=”aioseo-removing-spam-links-from-wordpress“><span class=”ez-toc-section” id=”step-2-casting-off-direct-mail-links-from-wordpress“/>Step 2. Casting off Direct mail Links from wordpress
Upon getting found out the direct mail links or malicious code injecting those links, your next step is to remove them.
In the event you’re the use of a wordpress protection plugin, then it’s going to automatically suggest actions to remove those links.
However, once in a while disposing of or deleting those information does not artwork, and your web page may nevertheless show direct mail links.
For complete cleanup, you’ll wish to use a few apparatus and techniques depending on how and where the malicious code and links are inserted.
We’ll take a look on the ones apparatus and how you can use them inside the following steps.
Step 3. Database Cleanup The use of Search & Exchange The entire thing
Now that you understand that your web page has direct mail links, your next step is to wash them up.
You received’t have found out each single instance of the ones pesky direct mail links. However whilst you understand what they seem like, then it’s more uncomplicated to bulk remove them.
That’s the position Seek & Substitute The whole thing will turn out to be useful.
This is a powerful wordpress database search plugin that can search your entire wordpress database to hunt out any matching text.
Simply set up and turn on Search & Exchange The entire thing and then go to the Equipment » WP Search & Exchange internet web page.
<img decoding=”async” loading=”lazy” width=”680″ height=”380″ src=”https://wpmountain.com/wp-content/uploads/2025/02/finding-suspicious-link-text.png” alt=”Finding suspicious links or text in your wordpress database” class=”wp-image-331801″/>
You want to enter the suspicious link or text you found out earlier inside the ‘Search for’ field.
After that, make a choice which database tables to appear into.
Now, merely click on at the ‘Preview Search & Exchange’ button to run the hunt.
The plugin will seek for the period of time you entered to your wordpress database and show you a preview of the effects.
The plugin will then show you where those links appear. They could also be inside of posts or pages, comments, or other areas of your web page.
You’ll be capable to moreover clean up suspicious links the use of Search & Exchange The entire thing. In finding the right text used to insert the link and alternate it with a blank string.
For additonal details, you’ll be capable to see our tutorial on appearing seek and exchange in wordpress.
<h4 class=”wp-block-heading” id=”aioseo-cleaning-up-spam-links-in-wordpress-theme-and-plugin-files”><span class=”ez-toc-section” id=”step-4-cleaning-up-direct-mail-links-in-wordpress-theme-and-plugin-files”/>Step 4. Cleaning Up Direct mail Links in wordpress Theme and Plugin Files
In the event you’ll be capable to’t pinpoint the direct mail links to your wordpress database, there’s a excellent likelihood that the links were added to your wordpress theme or plugin information.
At the present time, most current wordpress subjects and plugins come with a lot of information, and it is going to be hard so to check out each and every indubitably one in every of them manually.
In the event you’re simplest the use of a few plugins, then the simplest resolution might be to delete them. You’ll be capable to do this by the use of going to Plugins » Installed Plugins. Throughout the ‘Bulk actions’ dropdown menu, make a choice ‘Delete’ and then ‘Observe.’
Warning: If any of your installed plugins are answerable for a very powerful capacity or design portions to your web page (like an ordering device or a customized footer), then we don’t suggest this way.
It will further interrupt the operations of your web page and reason you to lose crucial knowledge. In this case, we all the time suggest hiring wordpress safety professionals to take care of your direct mail problem for you.
After that, you’ll be capable to download contemporary copies of those plugins and arrange them to your web page. For details, see our tutorial on how one can correctly uninstall a wordpress plugin.
Next, you’ll wish to do the very similar to your wordpress theme. However, needless to say when you delete your provide wordpress theme, chances are high that you’ll lose theme settings and want to organize your theme yet again the way it was once.
First, you want to position in a default wordpress theme. See our tutorial on how one can set up a wordpress theme for instructions.
Default wordpress subjects are dependable wordpress subjects. They maximum regularly have names in step with the 12 months they’d been introduced like Twenty Twenty-5, Twenty Twenty-4, and so on.
Essential Realize: If you already have a default theme installed, then you definately’ll be capable to’t use it, as a result of it may be affected. You will need to arrange a up to date default theme.
Upon getting installed a up to date default theme, you want to Activate it.
Upon getting activated the default theme, wordpress will permit you to delete any inactive subjects.
You’ll be capable to click on on to your previous theme and delete it from your web page.
<img decoding=”async” loading=”lazy” width=”680″ height=”365″ src=”https://wpmountain.com/wp-content/uploads/2025/02/delete-theme.png” alt=”Delete theme from your website” class=”wp-image-331811″/>
After deleting your theme, you will need to download a up to date copy of it from the availability and then arrange it.
Converting theme and plugin information with contemporary copies promises you’re working with clean code and eliminates any modified information that can come with malware.
Step 5. Clean Up Necessary Files
Your wordpress arrange has a lot of a very powerful information that hackers love to concentrate on. The .htaccess file is particularly liable to redirect hacks.
Thankfully, wordpress can regenerate the .htaccess file by itself. So, you’ll be capable to simply connect to your web page the usage of an FTP consumer and delete the .htaccess file, which is positioned to your web page’s root folder.
If you want to try that your .htaccess file has regenerated appropriately, see our knowledge on how one can repair the wordpress.htaccess report.
The wp-config.php file is every other a very powerful wordpress file that hackers regularly purpose.
You’ll be capable to download a reproduction of your provide wp-config.php file as a backup to your computer the use of FTP.
Then, you’ll wish to cross to wordpress.org and acquire a up to date copy of wordpress to your computer.
Unzip the file, and inside of it, you will to search out the wp-config-sample.php file.
Next, you’ll wish to upload the wp-config-sample.php file to your web page the use of FTP.
Upon getting uploaded it, you’ll be capable to rename it as wp-config.php.
However, the wp-config file received’t artwork, as it does not have some crucial wisdom sought after to hook up with your wordpress database. This incorporates your:
Database name
Database username and password
Database host
Database table prefix
You’ll be capable to copy this knowledge from the out of date wp-config file you downloaded earlier as a backup. Upon getting added the guidelines, you want to save some and upload your changes.
For additonal details, see our tutorial explaining how one can edit the wp-config.php report in wordpress.
<span class=”ez-toc-section” id=”step-6-securing-your-internet-website-online-after-cleanup”/>Step 6. Securing Your Internet website online After Cleanup
Now that your web page is clean, let’s make sure that it stays that approach! Protection isn’t a one-time issue – it’s an ongoing process that requires attention and maintenance.
Industry All Your Passwords
Your first protection procedure is to change each single password comparable in conjunction with your web page.
The ones include wordpress admin accounts, FTP credentials, database passwords, internet hosting keep watch over panel login, and any email correspondence accounts connected to your web page.
Skilled tip: Use a password manager to generate and store strong, unique passwords. We recommend 1Password for its security measures and ease of use.
Firewall & Protection Plugin Setup
The use of a firewall and a excellent protection plugin is like having a professional protection team in your web page.
We recommend the use of the ones apparatus:
Identical Submit: Easiest wordpress Firewall Plugins In comparison
Set Up Computerized Backups
Once your web page is clean, your next step is to make sure to on no account lose your hard artwork yet again. Common backups can save you from primary headaches if your web page gets hacked, crashes, or faces unintended knowledge loss.
We recommend the use of Duplicator to organize automated backups in your wordpress web page. It’s an excellent and easy-to-use plugin that permits you to create entire backups and store them securely.
We use Duplicator on a variety of our non-public internet pages and have found out it to be necessarily probably the most loyal wordpress backup resolution available on the market. With Duplicator, you’ll be capable to:
Automate Scheduled Backups – Set it and omit it. Duplicator automatically backs up your web page at commonplace classes.
Store Backups inside the Cloud – Save your backups to Google Force, Dropbox, Amazon S3, and further.
Restore in 1-click – Briefly recover your web page with a single click on on if the remainder goes incorrect.
To be informed further, check out our detailed Duplicator evaluation. Or, in the event you occur to’re looking for conceivable alternatives, you’ll be capable to see our select of the easiest wordpress backup plugins.
<h4 class=”wp-block-heading” id=”aioseo-take-back-control-of-your-websites-security“><span class=”ez-toc-section” id=”take-once-more-keep-an-eye-on-of-your-internet-website-onlines-protection”/>Take Once more Keep an eye on of Your Internet website online’s Protection
Dealing with direct mail link injections can truly really feel difficult, then again be mindful – you’re not alone. Whether or not or now not you choose to take at the factor yourself or hire pros, the crucial issue is to take care of the problem in brief and carefully.
Alternatively needless to say prevention is all the time upper than damage keep watch over. By the use of putting in place right kind safety features and staying vigilant, you’ll be capable to significantly reduce the chance of long run attacks.
Bring to mind it as an investment to your web page’s long run – one that may pay you once more in peace of ideas and protected source of revenue.
Don’t let hackers dangle your web page hostage – take movement these days!
Maintaining your wordpress web page secure is essential for the growth of your online business. Proper right here, we’ve put together some useful belongings that you just’ll be capable to follow to reinforce your web page protection:
For many who favored this newsletter, then please subscribe to our YouTube Channel for wordpress video tutorials. You’ll be capable to moreover to search out us on Twitter and Fb.
The put up How you can In finding and Take away Junk mail Hyperlink Injection in wordpress first gave the impression on WPBeginner.
Best Practices for Crafting Exceptionally Effective Websites
To craft a website that captivates, engages, and converts, it’s crucial to adhere to these best practices:
SEO Optimization for Unrivaled Visibility:
Integrate highly relevant keywords within your content and meta descriptions to elevate your website’s search engine rankings.
Establish a solid keyword strategy that aligns with your target audience’s search intent.
Optimize page loading speeds and mobile responsiveness to enhance user experience and search engine favorability.
Meticulous Planning: Laying the Foundation for Success:
Define clear website goals and objectives to guide every design and content decision.
Conduct thorough user research to understand the needs, preferences, and behaviors of your target audience.
Create a comprehensive sitemap and wireframes to ensure a seamless navigation experience.
Exceptional Design and Development: Bringing Your Vision to Life:
Opt for a visually striking and intuitive design that resonates with your brand identity and user expectations.
Utilize responsive design principles to ensure optimal functionality across all devices.
Employ high-quality images, videos, and animations to engage and captivate users.
Super Effective Websites: A Partner in Success:
Engage Super Effective Websites, a team of seasoned local SEO experts, to optimize your website for top rankings in local searches.
Benefit from their expertise in creating user-friendly and conversion-focused websites that drive traffic and generate leads.
Enjoy a seamless partnership with Super Effective Websites, ensuring your website remains a powerful asset for your business.
Building Your Dream Online Home: A Guide to Creating Killer Websites
TL;DR – Too Long; Didn’t Read
Want to create a website that rocks? This article is your guide to building a successful online presence. We’ll cover everything from the basics of web design to the latest trends, including tips for making your site look great and work even better. We’ll also talk about choosing the right hosting, keeping your website safe, and how to get your site seen by everyone! If you’re ready to create a website that attracts customers and helps your business grow, keep reading!
The Power of Websites: Your Digital Storefront
Imagine a world without websites. No online shopping, no news updates, no social media – just paper and phone calls. Websites are now a crucial part of our lives, giving businesses a window to the world and allowing people to connect in ways never before possible.
Super Effective Websites: Your Sacramento Web Design Superheroes
But creating a website that really shines can feel overwhelming. That’s where Super Effective Websites comes in. They are the leading web design company in Sacramento, especially in the Gilroy area, and they’re known for making websites that are both beautiful and effective.
Think of Super Effective Websites as your personal web design ninjas – they understand the power of a website, and they’re here to help you build one that’s both powerful and attractive.
Building Your Online Dream: The Steps to Website Success
Creating a great website is like building a house. You need a solid plan, the right materials, and skilled workers to bring your vision to life. Here’s a breakdown of the essential steps involved:
Planning Your Website: The Blueprint of Success
Before you start coding or designing, take a deep breath and think about what you want your website to achieve. What are your goals? Who is your target audience? This is like drawing a blueprint for your house – you need to know what rooms you want and how they’ll be used before you start building.
Key Questions to Ask Yourself:
What is the main purpose of your website? Is it to sell products, showcase your work, share information, or connect with customers?
Who is your target audience? What are their interests, needs, and online habits?
What are your website goals? Do you want to increase sales, generate leads, build brand awareness, or get more website traffic?
Designing Your Website: Aesthetics Meet Functionality
Now that you have a plan, it’s time to get creative. Web design is about creating a visual identity for your brand and making sure your website is easy to use. This is like choosing the colors and layout for your house – you want it to be both beautiful and comfortable.
Key Elements of Web Design:
Colors and Fonts: Think about your brand and choose colors and fonts that reflect your personality. Don’t overwhelm visitors with too many colors or hard-to-read fonts!
Images and Videos: High-quality images and videos can make your website stand out and keep people engaged.
Layout and Navigation: Design your website with clear menus and navigation, so visitors can easily find the information they need.
User Experience (UX): UX is about making sure your website is easy to use and enjoyable for visitors. Think about how you can make their experience as smooth and pleasant as possible.
User Interface (UI): UI is the overall look and feel of your website. It should be visually appealing, intuitive, and user-friendly.
Super Effective Websites: They don’t just design websites; they craft them. They understand how to blend aesthetics and functionality, making sure your website is both visually appealing and user-friendly.
Developing Your Website: Bringing Your Vision to Life
With your design in hand, it’s time to bring your website to life! Website development involves writing the code that powers your website. This is like building the actual house – you need skilled builders who can translate your blueprint into reality.
Key Steps in Website Development:
Content Management System (CMS): A CMS like WordPress makes it easier to manage your website’s content, even if you’re not a coding expert. Think of it like a user-friendly interface for editing your website.
HTML (HyperText Markup Language): HTML is the foundation of your website, defining the structure and content of your web pages.
CSS (Cascading Style Sheets): CSS adds style to your website, determining the colors, fonts, and layout of your pages.
JavaScript: JavaScript makes your website interactive, allowing you to add features like animations, forms, and dynamic content.
Launching Your Website: Unveiling Your Digital Creation
Your website is built, designed, and ready to go! Launching your website is like opening the doors to your house and letting people in. You want to make sure everything is working perfectly before you do, so test it thoroughly.
Key Steps in Launching Your Website:
Testing: Ensure all links work, the website is responsive on different devices, and everything is in its place.
Domain Name: This is your website’s address, like your house’s street address. Choose a name that’s memorable and reflects your brand.
Web Hosting: Web hosting provides the space and resources for your website to live online. Think of it as the land your house sits on.
Website Trends: What’s Hot and What’s Next
The world of websites is constantly evolving, just like fashion. Here are some of the hottest trends in web design and development:
Responsive Design: Websites That Adapt
Imagine a website that shrinks or expands to fit any screen size. That’s responsive design, and it’s essential for today’s websites. People browse the web on phones, tablets, laptops, and desktops, so your website needs to look good and work flawlessly on all these devices.
Mobile-First Development: Starting with the Small Screen
Mobile-first development means designing your website for smaller screens first, then adapting it for larger devices. Since more people browse the web on their phones, this approach ensures that your website is optimized for the most popular viewing platform.
AI Integration: Smart Websites that Learn
Artificial intelligence (AI) is transforming websites, making them more personalized and interactive. Think about chatbots that answer your questions or recommendation engines that suggest products based on your preferences.
Voice Search Optimization: Talking to Your Website
Voice search is becoming increasingly popular, and your website needs to be optimized for it. Use natural language keywords and create content that’s easy for voice assistants to understand.
The Future of Web Design: What’s on the Horizon?
The future of web design is exciting and full of possibilities. We can expect to see more:
Augmented Reality (AR) and Virtual Reality (VR): Imagine trying on clothes virtually or experiencing a virtual tour of a hotel. AR and VR are poised to change how we interact with websites.
Personalization: Websites will become even more personalized, tailoring content and experiences to individual users.
Sustainability: Websites will be designed with sustainability in mind, minimizing their environmental impact.
Reaching Your Audience: Online Marketing Strategies
You’ve built an amazing website, but now you need to get people to visit it! Here are some effective online marketing strategies:
Content Marketing: Creating Valuable Content
Content marketing is about creating valuable, relevant, and consistent content to attract and engage your target audience. This could include blog posts, articles, videos, infographics, or even social media posts.
Tips for Creating Great Content:
Focus on your audience’s needs: What kind of information are they looking for?
Use keywords to improve search engine visibility: This helps people find your content through search engines like Google.
Share your content on social media and other platforms: Get your content seen by a wider audience.
Social Media Marketing: Connecting with Your Audience
Social media platforms like Facebook, Instagram, Twitter, and LinkedIn are powerful tools for promoting your website and connecting with customers.
Tips for Effective Social Media Marketing:
Choose the right platforms: Don’t try to be everywhere at once. Focus on the platforms where your target audience hangs out.
Create engaging content: Share interesting and relevant information, images, and videos.
Use social media ads: Boost your reach and get your website in front of more people.
Email Marketing: Building Relationships
Email marketing is a great way to stay in touch with your customers and promote your products or services.
Tips for Effective Email Marketing:
Build an email list: Offer a valuable incentive for people to sign up.
Segment your list: Send targeted emails to different groups based on their interests.
Track your results: See what’s working and what’s not.
Pay-Per-Click (PPC) Advertising: Targeted Traffic
PPC advertising allows you to pay for ads that appear on search engines and social media platforms. You only pay when someone clicks on your ad.
Tips for Effective PPC Advertising:
Use targeted keywords: Make sure your ads appear in front of people who are interested in your products or services.
Create compelling ad copy: Write ads that are attention-grabbing and relevant to your target audience.
Track your results: Adjust your campaigns based on what’s working best.
Local SEO: Getting Found Locally
If you have a brick-and-mortar business, local SEO is crucial for getting found by people in your area.
Tips for Local SEO:
Claim your Google My Business listing: This is your online storefront on Google, where you can provide information about your business, hours, and contact information.
Get local citations: List your business on online directories like Yelp, TripAdvisor, and Yellow Pages.
Encourage customer reviews: Positive reviews can boost your local search ranking.
Optimize your website for local keywords: Use terms like “Sacramento web design” or “Gilroy restaurants” to attract local searches.
Super Effective Websites: They’re experts in local SEO and can help you get your website ranking high in local searches, so more people in your area can find you.
Choosing the Right Hosting: A Home for Your Website
Think of web hosting as the land where your online house sits. Choosing the right hosting is vital for ensuring your website is fast, reliable, and secure. Here’s a look at some popular hosting options:
Shared Hosting: Sharing the Space
Shared hosting is like living in a shared apartment building. Multiple websites share the same server, making it a budget-friendly option for small websites and blogs.
VPS Hosting: Your Own Private Apartment
VPS hosting gives you your own dedicated space on a server, making it more powerful and reliable than shared hosting. It’s like having your own apartment in a building, offering more privacy and resources.
Dedicated Hosting: A Standalone Mansion
Dedicated hosting gives you your own entire server, offering the ultimate performance and security. This is like owning a standalone mansion – you have complete control and privacy.
Cloud Hosting: A Flexible and Scalable Solution
Cloud hosting allows you to use resources from a network of servers, offering scalability, flexibility, and redundancy. It’s like living in a modern apartment complex that adapts to your changing needs.
Super Effective Websites: They offer various hosting options to suit your needs and budget, ensuring your website is always fast and reliable.
Website Security: Protecting Your Online Home
Just like your physical home needs security, your website needs to be protected from cyber threats.
Best Practices for Website Security:
SSL Certificate: An SSL certificate encrypts the connection between your website and visitors, protecting sensitive information like credit card details. Think of it as a virtual lock for your house.
Firewall: A firewall acts as a barrier, preventing unauthorized access to your website.
Regular Updates: Keep your website’s software and plugins up-to-date to patch security vulnerabilities.
Backups: Regularly back up your website data to protect against data loss in case of hacking or technical issues.
Super Effective Websites: They’re security experts and can help you set up the right security measures to keep your website safe.
WordPress: The Power of the Platform
WordPress is a powerful and versatile platform for creating websites, and it’s the most popular CMS in the world.
Why Choose WordPress:
User-Friendly: Even without coding experience, you can easily create and manage your website.
Customization: WordPress offers a vast array of themes and plugins, allowing you to customize your website to your exact specifications.
Community Support: WordPress has a large and active community of developers and users who can help with any issues you might face.
Tips for Using WordPress Effectively:
Choose the right theme: Select a theme that aligns with your brand and offers the features you need.
Install plugins thoughtfully: Don’t overload your website with too many plugins, as it can slow down performance.
Keep your website up-to-date: Regularly update WordPress and your plugins to stay secure and avoid compatibility issues.
Best Practices for Creating Highly Effective Websites
Here are some best practices for creating websites that are both visually appealing and highly functional:
Focus on SEO (Search Engine Optimization): Use relevant keywords in your content and meta descriptions to improve your website’s ranking in search results.
Optimize for Speed: Fast-loading websites are crucial for user experience and SEO.
Make your website accessible: Ensure your website is usable for everyone, including people with disabilities.
Super Effective Websites: They can help you implement best practices to ensure your website is optimized for SEO, speed, and accessibility.
Summary: Building Your Website with Super Effective Websites
From planning to launch, creating a website can be a rewarding journey. With the right steps and tools, you can build a website that stands out, attracts visitors, and helps you achieve your business goals. Super Effective Websites is your trusted partner in Sacramento, especially in the Gilroy area, to guide you through every step of the process.
Remember, Super Effective Websites are the experts in web design, development, hosting, and security. They’re committed to helping your business succeed online, offering personalized services and support to make your vision a reality.
So, are you ready to build your dream online home? Contact Super Effective Websites today and let them help you create a website that’s not only beautiful but also powerful and effective.
Why you simply must checkout Photography and Audio & Video Accessories
Where can you get the best Audio & Video Accessories?
Unveiling the Art of Camera Lenses: Your Guide to Sharpness, Versatility, and Depth
Immerse yourself in the captivating realm of camera lenses, where understanding their intricacies unlocks the power to capture stunning images. From deciphering the significance of focal length to mastering aperture, this article provides an indispensable guide for photographers of all levels.
Focal Length: Capturing the World in Focus
The focal length, measured in millimeters, determines the field of view captured by the lens. Prime lenses, with fixed focal lengths, offer exceptional sharpness and wide apertures, making them ideal for portraiture and low-light photography. In contrast, zoom lenses boast the flexibility to adjust their focal length, allowing you to effortlessly transition from wide-angle landscapes to distant subjects.
Aperture: Controlling Light and Depth
Aperture, expressed in f-stops, controls the amount of light reaching the camera’s sensor. A wide aperture (low f-number) lets in more light, resulting in a shallow depth of field—blurring the background to isolate the subject. Conversely, a narrow aperture (high f-number) restricts light, increasing the depth of field and bringing everything into focus.
Prime Lenses: Precision and Clarity
Prime lenses excel in sharpness, producing images with unparalleled clarity and detail. Their fixed focal lengths encourage photographers to move around and explore different perspectives, promoting creativity and composition skills. Additionally, prime lenses typically feature wider apertures, providing greater control over depth of field and low-light performance.
Zoom Lenses: Versatility and Convenience
Zoom lenses provide the flexibility to capture a wide range of scenes without changing lenses. They are ideal for capturing landscapes, wildlife, and events where the ability to adjust the focal length on the fly is crucial. However, zoom lenses may not offer the same level of sharpness and aperture control as prime lenses.
Conclusion: Mastering Lenscraft
Understanding the concepts of focal length and aperture empowers photographers to capture images that evoke emotions, convey narratives, and immortalize moments. Choosing the appropriate lens for each shooting situation becomes an art form, transforming your camera into a tool for creative expression. By mastering lenscraft, you unlock the full potential of photography, turning every image into a masterpiece.
Unleash Your Inner Photographer: The Ultimate Guide to Lenses
TL;DR – Too Long; Didn’t Read: This article breaks down the basics of camera lenses. You’ll learn about focal length, aperture, and how to choose the right lens for your needs.
The Lens: Your Camera’s Eye
Have you ever wondered why some photos look so different? It’s all about the lens! A lens is like a window for your camera, letting light in and capturing the image. It’s one of the most important parts of a camera because it affects everything from how sharp your photos are to how much of the scene you can capture.
Focal Length: Zooming In and Out
One of the most important things about a lens is its focal length. This number, measured in millimeters (mm), tells you how much of the scene the lens can capture.
Wide-angle lenses (18mm-35mm): Great for landscapes and capturing large scenes. They make things look farther apart and can be used for dramatic effects.
Standard lenses (35mm-50mm): These lenses mimic human vision and are versatile for many types of photography.
Telephoto lenses (70mm and above): Perfect for capturing distant subjects like wildlife or sports. They make things look closer and can create a compressed look.
Aperture: Controlling Light
Aperture is the opening in the lens that lets light through. It’s measured in f-stops, like f/2.8 or f/16. A wider aperture (smaller f-stop number) lets in more light and creates a shallow depth of field (blurred background), while a smaller aperture (larger f-stop number) lets in less light and creates a deep depth of field (everything in focus).
Choosing the Right Lens
So how do you choose the right lens? It depends on what you like to photograph! If you love landscapes, a wide-angle lens will be your best friend. For wildlife photography, a telephoto lens is a must-have.
Prime vs Zoom Lenses
Lenses also come in two main types: prime and zoom.
Prime lenses: Have a fixed focal length (like 50mm). They are usually sharper and faster (have wider apertures) than zoom lenses. However, they can’t zoom in and out.
Zoom lenses: Have a range of focal lengths (like 18-55mm). They offer flexibility but often are not as sharp or as fast as prime lenses.
Taking it to the Next Level
Once you understand the basics of lenses, you can explore even more specialized options. There are macro lenses for capturing tiny details, tilt-shift lenses for creative perspective shifts, and even fisheye lenses for unique wide-angle effects.
Expanding Your Horizons
Photography is an exciting hobby, and understanding lenses is key to taking amazing photos. Whether you’re a beginner or an experienced photographer, exploring different lenses can help you see the world in a new way.
Remember: There are countless types of lenses available, so it’s good to research and experiment to find what suits your needs and style. You can even check out some great resources like Ecliptic Signs, a company based in Rhode Island that offers a wide variety of photography and video accessories. They can help you find the perfect lens to enhance your photographic journey.
Summary: This article delves into the fascinating world of camera lenses, explaining key concepts like focal length, aperture, and the difference between prime and zoom lenses. We discussed how focal length determines the field of view captured by the lens, from wide-angle landscapes to telephoto portraits. Aperture, measured in f-stops, controls the amount of light entering the camera and influences the depth of field, determining how much of the scene is in focus. We also explored the trade-offs between prime and zoom lenses, highlighting the advantages of fixed focal length lenses in terms of sharpness and aperture while emphasizing the flexibility of zoom lenses for capturing a range of scenes. Finally, we discussed specialized lenses that can enhance your photographic capabilities, including macro lenses for capturing tiny details and tilt-shift lenses for creating creative perspective shifts. By understanding these concepts, you’ll be well on your way to choosing the right lenses for your specific photography needs and capturing stunning images.
By means of default, WooCommerce shows your product prices to everyone who visits your store. While this works for lots of online retail outlets, some firms need additional regulate over who sees their pricing.
While helping online store house owners, we’ve come all over a few different cases where hiding prices in WooCommerce is essential.
For instance, wholesale suppliers want to show specific pricing only to verified business customers. Alternatively, B2B companies would perhaps make a selection to speak about client needs up to now to make sure they can offer the fitting solution for the fitting cost.
After testing moderately numerous solutions, we’ve found out 3 loyal simple find out how to duvet prices in WooCommerce. The ones methods will artwork for any type of business, from wholesale suppliers to sumptuous companies.
What to Imagine Forward of Hiding Product Prices
We’ve spotted a few different eventualities where selling on WooCommerce without prices makes sense.
For instance, many wholesale providers duvet prices to stop retail customers from seeing bulk discounts. Additionally, custom designed furniture makers continuously remove prices on account of each and every piece has unique costs consistent with materials and design.
We moreover know that some sumptuous producers want to create distinctive, members-only buying groceries reviews by the use of showing prices only to serious customers.
Unfortunately, WooCommerce doesn’t come with a built-in way to duvet prices. Alternatively after testing moderately numerous solutions, we’ve found out 3 loyal methods that artwork smartly.
You’ll be capable of use the fast links underneath to skip on your most well liked way of hiding prices on WooCommerce:
Are you ready? Let’s dive in!
Method 1: Quilt All/Specific Product Prices and Cart Buttons With Code
In this way, we can show you learn how to hide the product prices and cart buttons for each all the products on your store or just particular items. This system turns out to be useful if you want to have customers to the touch you immediately for prices or log in to their accounts to look those prices.
While testing out different alternatives, we found out that many plugins for hiding prices are each slightly dear or too sophisticated to use. That’s why we’ve come up with a simple code solution that can get the duty achieved in brief.
Everyone knows that ‘code solution’ would perhaps sound intimidating, alternatively don’t worry. It is a beginner-friendly approach.
We’ll use WPCode, which is a plugin that makes together with code on your website so simple as copying and pasting. We’ve used this plugin on many web pages and have found out it protected and loyal.
The loose model works utterly for hiding prices. On the other hand, if you want to have further choices similar to the AI code generator to create custom designed solutions, chances are high that you’ll want to take a look on the Professional model.
We’ve tested each and every diversifications broadly in our WPCode evaluate.
First, you’ll want to arrange and switch at the free WPCode plugin. If you want to have have the same opinion, check out our data on find out how to set up a wordpress plugin.
Next, you’ll practice one of the tutorials underneath.
Risk 1: Quilt Price & Cart Buttons for Specific Products (Logged-Out Shoppers)
One of the most most simple tactics to hide prices is using WPCode’s ready-made snippet. This code will duvet prices and cart buttons from particular products when shoppers aren’t logged in.
If you happen to’re already familiar with WPCode, you’ll simply find it in WPCode’s snippet library.
Otherwise, if this is your first time using the plugin, merely click on at the link underneath:
Cover Value & Upload to Cart for Non Logged in Customers for Explicit Merchandise
Then, click on at the ‘Add to Site’ button to get started.
At this degree, you’ll want to each create a free WPCode account or log in if you already have one.
All through registration, you’re going to be asked to attach your wordpress internet web page with the WPCode library.
After logging in, you’ll choose which internet web page you need so that you could upload the snippet to.
Then, click on on ‘Deploy.’
<img decoding=”async” loading=”lazy” width=”680″ height=”380″ src=”https://wpmountain.com/wp-content/uploads/2025/02/wpcode-deploy-min.png” alt=”Selecting a website to deploy the WPCode code snippet into” class=”wp-image-327372″/>
The system will take you once more on your wordpress admin space to finish the setup.
Proper right here, merely click on on ‘Confirm & Arrange Snippet.’
This brings you to the code snippet editor, where you’ll make two simple changes to customize the code to your needs.
First, you’ll want to business the product IDs. Seek for this line of code:
$not_purchasable_products = array( 23, 22 );
Exchange those numbers with your individual product IDs.
If you happen to’re no longer certain what they’re, you then’ll be told our article on find out how to in finding product IDs in WooCommerce.
For instance, if you want to duvet prices for products 63, 64, and 65, you’d write:
$not_purchasable_products = array( 63, 64, 65 );
Next, you’ll customize the message confirmed as a substitute of the fee.
That is the code you need to look out:
function wws_hide_price_not_logged_in( $price_html, $product ) {
    if ( is_non_purchasable_products_for_visitors( $product ) ) {
        $price_html="';
    }
    return $price_html;
You’ll be capable of business this text: ‘Login with wholesale account to look prices’ to regardless of you’d like, comparable to ‘Login to look prices’ or ‘Contact us for pricing.’
Proper right here’s an example:
function wws_hide_price_not_logged_in( $price_html, $product ) {
    if ( is_non_purchasable_products_for_visitors( $product ) ) {
        $price_html="';
    }
    return $price_html;
When shoppers click on in this link, it’ll ship them to the WooCommerce login web page to test in.
Finally, switch the toggle from ‘Inactive’ to ‘Full of life.’ Then, click on on ‘Change.’
Now, merely consult with your product pages to look the changes.
You’ll perceive the prices and cart buttons are hidden and adjusted by the use of your custom designed message.
It’s that straightforward!
Risk 2: Quilt Price & Cart Buttons for All Shoppers
If you want to duvet prices and cart buttons for everyone who visits your WooCommerce store, you’ll want to add a novel code snippet. The program works whether or not or no longer shoppers are logged in or no longer.
Get began by the use of going to Code Snippets » + Add Snippet on your wordpress dashboard. Click on on on ‘Add Your Custom designed Code (New Snippet)’ and then the ‘+ Add Custom designed Snippet’ button.
After that, you’re going to see some code varieties to choose from.
Proper right here, merely choose ‘PHP Snippet.’
Next, you need to supply your code snippet a establish. It can be something simple like ‘Quilt All WooCommerce Prices.’
Then, throughout the ‘Code Preview’ section, copy the code underneath and paste it there:
/**
 * Quilt Price & Add to Cart for All Shoppers for All Products
 */

/**
 * Function to check if products must be non-purchasable.
 * This may occasionally at all times return true to make use of to all products.
 */
function is_non_purchasable_products( $product ) {
    // All the time return true to make all products non-purchasable for all shoppers
    return true;
}

/**
 * Set product as no longer purchasable
 */
function wws_set_not_purchasable( $is_purchasable, $product ) {
    if ( is_non_purchasable_products( $product ) ) {
        // Set product as no longer purchasable
        $is_purchasable = false;
    }
    return $is_purchasable;
}

/**
 * Exchange cost with 'Contact us for pricing' message linking to touch internet web page
 */
function wws_hide_price( $price_html, $product ) {
    if ( is_non_purchasable_products( $product ) ) {
        // Get the URL for the contact internet web page by the use of slug
        $contact_page = get_page_by_path( 'contact' );
        if ( $contact_page ) {
            $contact_url = get_permalink( $contact_page );
        } else {
            // Default to "https://wpmountain.com/contact" if the internet web page is not found out
            $contact_url = site_url( "https://wpmountain.com/contact" );
        }

        // Set the fee HTML to touch message
        $price_html="';
    }
    return $price_html;
}

/**
 * Quilt the 'Add to Cart' button
 */
function wws_hide_addcart( $add_to_cart, $product, $args ) {
    if ( is_non_purchasable_products( $product ) ) {
        // Remove the 'Add to Cart' button
        $add_to_cart="";
    }
    return $add_to_cart;
}

// Add filters to make use of the above functions
add_filter( 'woocommerce_is_purchasable', 'wws_set_not_purchasable', 10, 2 );
add_filter( 'woocommerce_get_price_html', 'wws_hide_price', 10, 2 );
add_filter( 'woocommerce_loop_add_to_cart_link', 'wws_hide_addcart', 10, 3 );
This code will remove all prices and cart buttons from your store and alter them with a ‘Contact us for pricing’ link that takes visitors on your touch web page.
After pasting the code, switch the toggle from ‘Inactive’ to ‘Full of life’ and click on on ‘Save Snippet.’
And that’s it!
You’ll be capable of now consult with your store to look that all prices and cart buttons have been modified with a link on your contact internet web page.
For extra details, see our novice’s data on find out how to simply upload customized code in wordpress.
Method 2: Quilt Product Prices from Non-Wholesale Shoppers
The program could be very highest for firms that want to duvet prices from secure visitors while showing specific wholesale pricing to authorized customers.
This system works specifically smartly for manufacturers, distributors, and B2B firms that want to maintain distinctive pricing for their wholesale customers.
It’s moreover great in case you’re no longer willing at the code solution from earlier, as we’ll be using plugins from the user-friendly Wholesale Suite.
Forward of we dive in, we suggest finding out our detailed Wholesale Suite evaluate to snatch all the choices this plugin suite offers.
Step 1: Arrange the Vital Wholesale Suite Plugins
For this method to artwork effectively, you’ll want to arrange the free Wholesale Suite plugin. It handles the basic wholesale store choices, along with putting in wholesale pricing buildings to your products.
You’ll moreover want to get the highest charge Wholesale Suite extension, specifically Wholesale Prices and Wholesale Lead Snatch.
The main extension is essential for hiding prices from secure customers while showing them on your wholesale customers. There’s no approach spherical this one, as it’s the core plugin that makes cost hiding possible.
The second creates a certified registration system where possible wholesale customers can apply for an account. Within the match you select, you’ll moreover use WPForms to create your registration paperwork.
After putting in those wordpress plugins, pass to Wholesale » License on your dashboard.
Proper right here, enter the license keys and email correspondence handle comparable along with your most sensible charge plugin purchases. You’ll find the ones details throughout the confirmation email correspondence you won when buying the plugins.
If you happen to’ve purchased a couple of Wholesale Suite plugins, you then’ll use the tabs on the most productive to get right to use the license key settings for each and every one.
In the event you’ve entered the license wisdom for each and every instrument, remember to hit ‘Save Changes.’ When you’re achieved, you’ll continue to the next step.
Step 2: Set Up a Take a look at Wholesale Purchaser Account
Wholesale Suite creates a definite ‘Wholesale Purchaser’ consumer position that allows you to organize pricing for all of your wholesale customers in one place. When the ones customers log in, they’ll mechanically see their specific wholesale prices.
To make sure your cost hiding works accurately, you’ll desire a check out Wholesale Purchaser account. That is serving to you check out how your WooCommerce store seems to be like from each and every a wholesale purchaser’s view and a normal buyer’s point of view.
Creating a wholesale account is understated. First, merely pass to Shoppers » Add New on your wordpress dashboard.
<img decoding=”async” loading=”lazy” width=”680″ height=”384″ src=”https://wpmountain.com/wp-content/uploads/2022/10/wordpress-new-users.png” alt=”Adding a new user in wordpress” class=”wp-image-145006″ title=”Adding a new user in wordpress“/>
Now, fill throughout the elementary wisdom like email correspondence handle and username, then make a choice ‘Wholesale Purchaser’ from the ‘Serve as’ dropdown menu.
Finally, click on on ‘Add New Individual’ to create the account.
You may also want to prevent wholesale customers from making regular-priced purchases once they don’t meet wholesale necessities. By means of default, the plugin shows a warning, alternatively customers can however acquire at retail prices.
To modify this, head to Wholesale » Roles and find the ‘Wholesale Purchaser’ place. Click on on on the ‘Edit’ button underneath the placement to customize it.
Then, check out the sector for ‘Prevent gain if wholesale scenario isn’t met.’
After that, merely click on on ‘Edit Wholesale Serve as’ to save some your changes.
Step 3: Quilt Prices and Cart Buttons
Next, you’ll want to duvet the prices and cart web page buttons from secure online store visitors.
To check out this, you’ll pass to Wholesale »Settings. You’ll need to’re throughout the ‘Wholesale Prices’ section, and navigate to the ‘Price’ tab.
Then, scroll proper right down to the ‘Quilt Price and Add to Cart button’ atmosphere and try the sector right kind next to it.
Beneath that, you’ll add some custom designed text to change the fee and cart buttons. If you happen to cross away this empty, the default ‘Login to look prices’ message will appear as a substitute.
Now, scroll down and make sure the ‘Show Wholesale Price to non-wholesale shoppers’ atmosphere is disabled.
Finally, click on on on the ‘Save Changes’ button.
Step 4: Add and Quilt Wholesale Prices to WooCommerce Products
You’re now ready to begin out together with wholesale prices to specific particular person products. You’ll be capable of pass ahead and open a brand spanking new or provide product for reinforcing.
If this is your first time together with a product, then chances are high that you’ll want to be told our WooCommerce made easy information for more information.
Someday, whilst you’re rising a brand spanking new product or bettering an provide one, you’ll want to pass to the ‘Product Knowledge’ section.
Proper right here, set your ‘Commonplace Price.’ That’s what secure customers see. Then, find the ‘Wholesale Prices’ section and choose your discount sort from the dropdown menu. You’ll be capable of offer each a percentage discount or a suite cost.
For percentage discounts, simply make a choice the ‘Share’ discount sort and enter your discount amount.
Wholesale Suite will mechanically calculate the total cost.
If you choose ‘Fixed’ for the cut price sort, you then’ll merely enter the fitting wholesale cost you need to charge.
Wish to run limited-time wholesale offers? This is great for working seasonal promotions and changing extra WooCommerce guests into consumers.
To check out this, you’ll click on on on the ‘Time table’ link.
After that, you’ll enter the start date and end date of your wholesale sale pricing promotion.
This way, you gained’t should manually permit and disable the cut price. It principally works similarly to scheduling WooCommerce coupon codes.
In spite of everything, this atmosphere isn’t mandatory. If you happen to’re no longer ready to use it now, it may be very good to remember for the long run.
Next, set your minimal order necessities throughout the ‘Wholesale Minimum Order Quantity’ section.
This defines what selection of items a wholesale purchaser must acquire to get right to use specific pricing.
Next, scroll proper right down to the ‘Wholesale Order Quantity Step’ section.
Enter ‘1’ into the suitable field.
This may occasionally make it so that the minimum order quantity you set above is carried out to each and every products.
That approach other folks can’t try to misuse wholesale privileges. For more information on this atmosphere, see the Wholesale Suite documentation on minimal order necessities.
Finally, you’ll make your product visible only to wholesale customers by the use of using the ‘Restrict To Wholesale Roles’ atmosphere on the most productive of the internet web page. Type and make a choice ‘Wholesale Purchaser’ in this field.
At this degree, you’ll continue finalizing your product settings. For instance, you’ll add a product symbol gallery, embed a product video, or insert product tags.
When you’re ready, merely click on on ‘Change’ or ‘Publish’ to save some your changes. You’ll be capable of then repeat the an identical steps for your entire wholesale products.
Step 5: Configure Your Wholesale Registration Paperwork
The Wholesale Suite extension mechanically creates registration and login pages to your wholesale customers. Forward of you get began accepting applications, despite the fact that, let’s customize the registration form to check your needs.
Head to Wholesale » Settings, then click on at the ‘Wholesale Lead Snatch’ tab and open the ‘Registration Form’ menu.
Proper right here, you’ll scroll proper right down to find a table showing all the available form fields.
While elementary fields like First Establish, Final Establish, Piece of email, and Username are included by the use of default, some would perhaps want to be activated. To permit a field, click on at the pencil ‘Edit’ icon throughout the ‘Movement’ column.
All you need to do now’s check out the ‘Enabled’ box to make it visible and mark the sector as ‘Required’ if you want to make it important.
Remember to click on on ‘Save Custom designed Field’ each time you’re achieved.
Now, switch to the ‘Commonplace’ tab to look out your new Wholesale Log In and Registration pages.
Transfer ahead and click on on ‘View Internet web page’ to preview them.
Once you have opened them, you’ll add the links to these pages on your navigation menu. This way, shoppers can merely find them once they’re browsing on your on-line retailer.
You’ll be capable of learn to do this in our data on find out how to upload a navigation menu in wordpress.
One important solution is the best way you’ll maintain new applications.
Underneath ‘Auto Approve New Leads,’ choose between ‘Information Approval Required’ or ‘Auto Approval.’
We strongly recommend guide approval to protect your wholesale pricing and test respected firms.
In the event you’re happy with the registration form settings, you’ll scroll once more up.
Finally, click on on on the ‘Save Changes’ button.
Step 6: Create a Wholesale Order Form
The total step is to create a wholesale order form, which streamlines the ordering process to your wholesale customers. This manner lets them merely place bulk orders without navigating via a couple of product pages, saving time for each and every you and your customers.
When putting in wholesale order paperwork, we’ve found out that businesses get the most efficient results by the use of along with the most important fields like product SKUs and most popular supply dates.
This way, wholesale customers can in brief place bulk orders while providing all the wisdom you need to process their requests effectively.
For detailed instructions on rising an optimized wholesale order form, check out our whole data on find out how to create a wholesale order shape in wordpress.
And that’s it! Let’s take a look at how this works in observe. Proper right here’s how our store turns out to secure visitors:
We moreover tried logging in as a wholesale purchaser to look if the fee was visible this time.
Check out the result underneath.
You’ll be capable of moreover be told our data on find out how to transfer between consumer accounts in wordpress if you want to have have the same opinion signing in and out of your accounts.
Method 3: Create a Professional Online Catalog Without Prices
The program transforms your WooCommerce store into a certified product catalog. It’s perfect for firms that make a selection coping with pricing discussions by way of email correspondence, a slightly form, or offline.
The YITH WooCommerce Catalog Mode plugin offers a easy method to create a price-free catalog. We’ve tested and shared learn how to make use of this plugin previous than in our tutorial on find out how to upload a product catalog in WooCommerce.
No longer just like the wholesale way, this system signifies that you’ll be able to remove prices completely while converting them with custom designed contact buttons. You’ll be capable of duvet pricing for your entire store, particular product categories, or specific particular person items.
This adaptability makes it highest for custom designed manufacturers, sumptuous retail outlets, or supplier providers who want to quote prices consistent with client prerequisites.
For this data, we’ll focus on the the most important settings to permit catalog mode and hide prices using YITH’s plugin. In step with our testing, we found out that the ones elementary choices are enough to get most shops started with hidden prices.
That discussed, understand that we’re only scratching the out of doors of what this plugin can do. We’ve explored many additional advanced choices in our detailed YITH WooCommerce Catalog Mode evaluate.
Moreover, you’ll want to gain the top rate model of the plugin. The free style works smartly, alternatively the price-hiding serve as is simply available throughout the paid style.
Step 1: Arrange and Activate YITH WooCommerce Catalog Mode
After you purchase the plugin, pass to the YITH internet web page and log into your YITH account. Then, head over to the ‘Licenses & Downloads’ tab.
Next, click on on on the ‘Download Plugin’ button to acquire the plugin record from your YITH account. Make sure to keep your browser tab open, as you’ll need the license key in a 2d.
When the setup wizard turns out, you’ll want to enter your YITH email correspondence handle and license key.
Once you have into your details, click on on ‘Activate license’ to complete the setup process.
Once that’s achieved, click on on ‘Transfer to plugin dashboard’ to begin out customizing your catalog mode settings.
Let’s now continue to the next step.
Step 2: Configure Fundamental Catalog Mode Settings
Catalog mode transforms your store from a purchasing groceries website proper right into a product blow their own horns. This is perfect for firms that want to display products without fast purchasing alternatives.
To start out, pass to YITH » Catalog Mode and navigate to the ‘Settings’ tab. That’s the position you’ll configure the decisions to run WooCommerce without prices.
First, you’ll choose whether or not or to not permit catalog mode for all shoppers or just customer shoppers.
You’ll be capable of moreover permit catalog mode for purchasers with the Administrator client place to test how the mode seems to be like.
As you scroll down, you’ll flip at the ‘Disable retailer’ function if you want to remove the cart internet web page, checkout web page, and all add-to-cart buttons from your store.
If you happen to disable the shop function, you’ll get additional alternatives to set particular time ranges or days.
This is specifically helpful in case you only want to duvet prices on days or vacation seasons when your online store doesn’t accept orders.
For added targeted regulate, you’ll merely skip the ‘Disable retailer’ menu and pay attention to the settings beneath ‘”Add to Cart” settings throughout the Catalog Mode’ section.
Proper right here, you’ll use dropdown menus to select exactly the position to hide or show add-to-cart buttons. For instance, you’ll duvet or show them for items on your exclusion tick list, which is a serve as that allows you to group of workers particular products, classes, or tags together.
This makes it easy to hide buttons for merely those made up our minds on items as a substitute of your entire store. We’ll be in contact additional about rising exclusion lists in a later segment.
Moving down, you’ll choose to hide the ‘Add to cart’ button in product variations. This assists in keeping your catalog mode consistent all over all product varieties, along with those with a couple of alternatives like size or color.
You’ll be capable of moreover make a decision what turns out as an alternative of the ‘Add to cart’ buttons on the WooCommerce pages.
We suggest deciding on ‘No longer the rest’ for the ones alternatives to stick the gap clean. We’ll add custom designed buttons in a novel section later.
Further down, you’ll find ‘Price settings in Catalog Mode.’
You’ll be ready to choose from hiding costs for all merchandise or just those on your exclusion tick list.
When you duvet prices, you’ll trade them with custom designed buttons. The plugin accommodates quite a few pre-designed button varieties, like ‘Development Button 1,’ which we’ll customize in the next step.
Remember to click on on ‘Save Possible choices’ whilst you’re achieved making your selections.
Step 3: Create a New Button to Exchange the Cart Button
Now, it’s time to customize the button that may trade your cart buttons and prices. Head over to the ‘Buttons & Labels’ tab to get started.
Make a choice one of the pre-designed buttons provided by the use of YITH, then click on at the pencil ‘Edit’ icon to customize it.
First, give your button a easy establish so that you’ll merely find it later.
Inside the ‘Content material subject matter’ tab, you’ll business the button text to at least one factor that fits your needs. Commonplace imaginable alternatives include “Request a Quote,” “Contact Us for Pricing,” or “Get Custom designed Price.”
Together with an icon may just make your button additional sexy. To check out this, you’ll make a choice ‘Choose between default icons’ throughout the Icon section.
You’ll be capable of browse all over the available alternatives to look out one that matches your message.
You’ll be capable of moreover fine-tune your icon by the use of adjusting its size, alignment, and colors.
Merely watch your changes appear throughout the live preview at the correct aspect of the internet web page.
Now, switch to the ‘Style’ tab to customize your button’s glance.
That’s the position you’ll regulate the background colors, width, borders, padding, and margins to check your internet web page’s design.
Finally, throughout the ‘Possible choices’ tab, organize the link to your button. We suggest using the ‘Custom designed URL’ way to direct visitors on your contact or login internet web page.
You’ll be capable of moreover add a hover animation to make your button additional interactive and crowd pleasing.
Once achieved, merely click on at the ‘Change’ button.
It’s that straightforward!
Step 4: Create a Product Inquiry Form(No longer mandatory)
Together with an inquiry form immediately on your product pages may just make it easier for customers to ask about prices. This way, they gained’t want to cross away the product internet web page to the touch you.
To set this up, navigate to the ‘Inquiry Form’ tab. Make a choice ‘Visible in all products’ beneath ‘Set inquiry form as.’ This promises the form turns out on each and every product internet web page.
For the ‘Form to show’ selection, you’ll use the ‘Default’ form that comes with the plugin.
If you happen to already use WPForms or each and every different form plugin, you’ll make a choice your provide paperwork as a substitute.
When using the ‘Default’ form, you’ll customize which fields appear.
We suggest conserving it simple with the most important fields like first establish, email correspondence, and message. From our experience, shorter paperwork in most cases get additional submissions.
You’ve two imaginable alternatives for where the form turns out: in a WooCommerce tab underneath the product image or throughout the quick description space.
If you choose the tab selection, you’ll customize the tab’s establish to at least one factor like “Request Price” or “Product Inquiry.”
Don’t overlook to permit the ‘Include product Permalink’ atmosphere.
This gives the product’s URL to inquiry emails, making it much more clear-cut to monitor which merchandise consumers are asking about.
Need have the same opinion deciding whether or not or no longer to make a choice from a WooCommerce tab or a temporary product description?
Right here’s what the principle selection turns out like:
Within the intervening time, if you choose the product description selection, the inquiry form will appear right kind underneath the button you merely created.
Like so:
Bonus: How you can Create an Exclusion Checklist (Quilt Prices for Specific WooCommerce Products)
Now, let’s take a look at hiding prices for particular products as a substitute of your entire store. This assumes you’ve already organize your catalog mode to artwork with an exclusion tick list in Step 2.
To get started, pass to the ‘Exclusion Checklist’ tab and click on on ‘+ Add exclusion tick list.’ A brand spanking new window will open where you’ll choose what sorts of items to hide prices for.
The ‘Products sort’ dropdown gives you 3 alternatives: specific particular person products, entire product categories, or product tags. This adaptability signifies that you’ll be able to duvet prices in tactics through which make sense to your small industry.
Next, get began typing product names, categories, or tags throughout the ‘Make a choice products’ field. The plugin will suggest suits as you sort. You’ll be capable of moreover choose whether or not or to not flip an inquiry form for the ones particular items.
You’ll perceive settings to ‘Use custom designed alternatives for “Add to Cart”‘ and ‘Use custom designed alternatives for cost.’ We suggest leaving the ones unchecked if you want to keep the settings you created in Step 2.
In the event you’re achieved, simply click on on ‘Add exclusion tick list’ to save some your changes. And that’s near to it!
That is an example of what your product internet web page would perhaps seem to be whilst you permit the plugin:
Be told Additional WooCommerce Tips and Strategies
Now that you simply’ve learned learn how to advertise products on WooCommerce without prices, chances are high that you’ll want to learn additional tactics to optimize your online store. Check out the ones novice’s guides for added tips and guidelines:
We hope this article has helped you learn to duvet prices in WooCommerce. You may also want to check out our tick list of the highest wordpress topics for WooCommerce web pages and our data on find out how to upsell merchandise in WooCommerce.
If you happen to liked this article, then please subscribe to our YouTube Channel for wordpress video tutorials. You’ll be capable of moreover find us on Twitter and Fb.
The post How one can Cover Costs in WooCommerce (Stay Product Pricing Personal) first appeared on WPBeginner.
In the realm of computing, where speed reigns supreme, the processor serves as the heart of your digital machine. It’s the conductor of your technology, orchestrating the smooth functioning of countless tasks at lightning speed.
Picture yourself engaged in an epic virtual battle, every frame flowing seamlessly as you outmaneuver your opponents with the agility of a seasoned warrior. Your processor makes this ballet of pixels possible, ensuring that your gaming experience is as immersive as it is exhilarating.
Like a master chef crafting a culinary masterpiece, your processor allows you to edit photos and videos with unparalleled precision and finesse. Gone are the days of frustrating delays; now, your creative vision unfolds effortlessly, each frame rendered with crisp clarity and vibrancy.
Think of your processor as the brains of your computer, coordinating the harmonious interplay of multiple programs. Its speed is measured in gigahertz, the digital equivalent of a speed limit, dictating how swiftly it can handle even the most demanding tasks.
Just as a desktop computer is the complete package, housing the processor, monitor, keyboard, and other essential components, choosing the right one is crucial.
When it comes to gaming, you’ll want to enlist the services of a formidable processor, boasting a high gigahertz rating. Imagine it as the quarterback of your gaming team, effortlessly directing the rest of the computer’s components to deliver the smoothest, most adrenaline-pumping experience.
Think of the processor as the engine powering your digital chariot, while the computer itself represents the sleek vehicle. And just as a powerful engine translates to a thrilling ride, a high-speed processor translates to a computing experience that will leave you exhilarated and hungry for more.
Unlock the Power of Your Computer: Understanding Processors and Desktops
TL;DR – Want to know how your computer works? This article breaks down the basics of processors (the brains of your computer) and desktops (the whole system). We’ll even touch on how Moncton plays a part in it all!
The Brains of the Operation: Processors
Imagine your computer as a super-fast athlete. The processor is like the athlete’s brain, telling the muscles (the rest of the computer) what to do. It takes instructions from your programs (like games or apps) and carries them out super fast.
The faster the processor, the quicker your computer can handle things like:
Playing video games with smooth graphics
Editing photos and videos without lag
Opening many programs at once without slowing down
Processors are measured in gigahertz (GHz), which is like a speed limit for how fast they can work. A higher GHz number means a faster processor.
Desktop Computers: The Full Package
A desktop computer is the whole system, including the processor, the monitor, the keyboard, and more. Think of it like a car—the engine is the processor, and the car itself is the desktop.
Types of Desktops:
Traditional Desktop: The classic setup with a monitor, keyboard, and mouse. These are often more powerful and can be customized with extra components.
All-in-One Desktop: A sleek design that combines the monitor, processor, and other parts into one unit. They take up less space and are often simpler to set up.
Why Moncton?
Moncton, New Brunswick, may not be the first place you think of when it comes to computers, but it has a connection to this world! Moncton is home to Ecliptic Signs, a company that specializes in custom computer builds and repairs. They can help you find the perfect desktop for your needs.
Choosing the Right Processor and Desktop for You
When choosing a processor and desktop, think about what you’ll be using it for:
Gaming: You’ll want a powerful processor with a high GHz number for smooth gameplay.
Video Editing: A fast processor and lots of RAM (computer memory) will help you edit videos smoothly.
Basic Tasks: For everyday tasks like browsing the web and emailing, a standard processor will be enough.
Summary
This article has taken you through the basics of processors and desktops. We learned that processors are like the brains of your computer, and desktops are the whole system. The speed of a processor is measured in gigahertz (GHz). Desktops come in traditional and all-in-one styles. Moncton, New Brunswick, is home to Ecliptic Signs, a company that can help you choose the right desktop for your needs. Remember, choosing the right processor and desktop depends on how you plan to use your computer.
Choosing between Teachable, Skillshare, and MemberPress to advertise your online categories can truly really feel overwhelming, specifically as they’re fairly different.
On the one hand, Teachable and Skillshare offer easy platforms for right away uploading, selling, and promoting and advertising and marketing your categories, alternatively you gained’t have whole regulate. Then again, MemberPress provides additional flexibility and ownership, alternatively you’ll need to run your own wordpress information superhighway web site.
In short, every platform has its private perks, and it’s laborious to grasp which one is the appropriate fit on your online direction objectives.
Don’t fear – we’ve got you covered! We did a lot of research when deciding where to supply our free online video categories, and we’re proper right here to help you know what we found out.
In this knowledge, we’ll damage down the pros and cons of Teachable, Skillshare, and MemberPress in line with what problems most.
Brief Comparison: Teachable vs. Skillshare vs. MemberPress
Let’s dive into a temporary comparison of Teachable, Skillshare, and MemberPress to concentrate on their key diversifications:
Teachable
Skillshare
MemberPress
Best possible For
Beginners on the lookout for an easy-to-use platform to advertise categories
Video categories considering community-based studying without upfront costs
Trail creators and firms on the lookout for whole regulate, flexibility, and sophisticated choices
Ease of Use
Very beginner-friendly with AI apparatus and templates
Easy to start out out, alternatively a lot much less regulate over direction setup
Slight studying curve, alternatively extraordinarily customizable with documentation
Online Trail Choices
Text and video categories, downloadable belongings, and quizzes
Limited direction choices, focuses on video studying
Content material subject matter dripping, quizzes, certifications, and personalized coaching alternatives
Promoting and advertising and marketing Choices
Built-in e-mail promoting and advertising and marketing, product sales information superhighway web page builder, and abandoned cart emails
Limited customization; maximum repeatedly uses pre-defined templates
Email services and products and merchandise, referral programs, content material subject matter dripping, and bulk membership product sales
Pricing
From $39/month (spherical $468/twelve months)
Unfastened
From $179.50/twelve months
An Advent to Teachable, Skillshare, and MemberPress
Let’s get began by the use of taking a quick check out Teachable, Skillshare, and MemberPress. Later in this article, we’ll read about every platform’s choices additional in-depth.
Teachable is a user-friendly platform for growing, website online web hosting, and selling digital categories and coaching. It supplies endless direction advent and student enrollment, making it a flexible resolution for direction creators.
With apparatus for posting multimedia information and tasty with students via comments, Teachable is perfect for instructors who want additional interactive categories. Plus, it allows you to link your categories on your private information superhighway web site with a customized area.
And as a standalone platform, you gained’t need to fear about updates or backups. This lets you focus on building a a success training trade.
Then again, Skillshare is a smart platform for lecturers who need to share their knowledge and connect to various inexperienced persons.
While video categories are the principle way categories are delivered, Skillshare goes previous that. It moreover supplies choices like magnificence tasks, community discussions, and downloadable belongings.
Plus, Skillshare is very good for lecturers who enjoy a smart manner. Whether or not or no longer you’re helping students design their first brand or assemble a photos portfolio, you’ll inspire them to dive in and create.
Finally, MemberPress is an all-in-one membership plugin and online direction builder for wordpress information superhighway pages.
With MemberPress, you’ll merely add membership levels on your information superhighway web site and offer different direction get right of entry to in line with the plan a member subscribes to.
MemberPress has a built-in virtual lecture room that is distraction-free and works seamlessly with any wordpress theme.
Additionally, it supplies online course-specific addons referred to as Classes and CoachKit. The ones help you create and advertise online categories and coaching sessions from your information superhighway web site.
It moreover incorporates difficult membership choices like flexible pricing plans and drip content material scheduling. To help you advertise and organize your categories effectively, you’ll moreover get seamless integrations with best e-mail promoting and advertising and marketing apparatus.
Needless to say MemberPress is a wordpress plugin, in order that you’ll need to create your own information superhighway web site to use it. For details, see our knowledge on create a club web site in wordpress.
With that throughout ideas, we’ll show you the way in which every platform stacks up relating to the following parts. Be happy to transport ahead and click on on on the soar link below to talk over with the problem you wish to have to compare:
Able? Let’s get started!
Ease of Use – Trail Setup
In relation to choosing an on-line route platform, ease of use is crucial factor. A user-friendly platform will make it clean for lecturers to create, organize, and share their categories without technical hurdles.
Let’s read about how the 3 online studying platforms measure up relating to ease of use.
Teachable
Teachable is a standalone platform designed to simplify online direction advent and keep an eye on.
You’ll be capable of set it up on a sub-domain, use a customized area identify to align at the side of your branding, or link it on your faculty’s information superhighway web page for seamless integration.
Because it operates independently, Teachable handles all the updates, protection patches, and backups for you. This means a lot much less time spent on administrative tasks and overtime to be aware of growing top quality content material subject matter and emerging your small business.
This platform has a user-friendly dashboard. The navigation menu is inside the left-hand panel. On the ‘Space’ show, it’s imaginable you’ll remember the fact that Teachable provides a checklist that can assist you organize your faculty.
Growing your first direction could also be truly clean.
Teachable has tough AI apparatus that can assist you amplify direction materials in only a few minutes. All you wish to have to do is to provide a direction title and a temporary description.
When the AI is done generating, Teachable will take you to the ‘Setup Knowledge’ information superhighway web page. Proper right here, you’ll to search out all the alternatives for customizing your direction, which we’ll quilt inside the direction customization segment.
To publish the direction, you’ll simply use the bulk publish chance.
And that’s it! You’ve created your first Teachable online direction. Proper right here’s what it could appear to be on your Teachable faculty information superhighway web site:
Skillshare
While Skillshare is additional not unusual for finding online categories, it moreover allows you to sign up for as a instructor. With this platform, you’ll publish a class, offer a 1-1 session, and promote virtual merchandise.
Upon signing up as a instructor, you’ll be asked to make a choice your areas of passion. On the other hand, this may also be difficult as you’ll only sign up for Skillshare’s pre-listed categories.
Then, you’ll need to get ready your classes consistent with SkillShare’s style knowledge: Create, Assemble, and Thrive.
While you’ve in a position your studying materials, you’re ready to start out out recording your motion pictures.
You’ll be capable of get began by the use of settling on the proper equipment for recording and enhancing. Listed below are some tips:
Camera: In this day and age’s smartphones are forever excellent enough, alternatively if you want to look additional original, you’ll check out the Sony Alpha ZV-E10 mirrorless digital camera.
Microphone: We don’t recommend using a built-in microphone, as it could not produce clear audio. A excellent one to get started is the Samson C01UPRO USB Microphone.
Video enhancing software: For those who occur to’re using Mac, then the iMovie is a smart chance for enhancing your motion pictures. Within the period in-between, House home windows consumers can rely on the free Clipchamp video editor.
Next, you’ll need to organize a neat and professional-looking background. Props and excellent lights may just make all the difference.
Once your motion pictures and materials are ready, it’s time so as to add them to Skillshare. You’ll be capable of observe the platform’s Step-by-Step Importing Information to start out out your magnificence draft and get the entire thing uploaded appropriately.
MemberPress
MemberPress is an outstanding wordpress club plugin with studying keep an eye on software (LMS) options. Its Categories and CoachKit addons help you merely create online categories. They will let you amplify categories, add media information, edit categories, offer 1-1 coaching programs, organize staff studying, and additional – all without requiring any technical enjoy.
To create online categories, you’ll use the MemberPress Classes addon.
The first step inside the direction builder is growing the ‘Trail Internet web page,’ where you’ll provide essential details identical to the direction matter, title, and description.
Since MemberPress uses the default wordpress block editor, you’ll get creative with the construction, giving your direction information superhighway web page a professional and tasty design.
At the side of the basic content material subject matter, you’ll add ‘Trail Categories’ and ‘Trail Tags’ to help get ready your categories, set a featured symbol, and write a direction information superhighway web page excerpt beneath the settings.
Then, you’ll switch to the ‘Curriculum’ tab. Proper right here, you’ll create sections that act as direction modules. Inside every segment, add categories by the use of simply entering a reputation and then clicking to edit the lesson content material subject matter.
You’ll be capable of further boost your direction by the use of including quizzes.
Quizzes may also be attached to categories, and also you’ll lead them to important previous to consumers can proceed to the next lesson.
To publish, you’re going to only need to click on on on the ‘Submit’ button inside the direction builder.
And that’s it! Proper right here’s how the direction would possibly look on the front end:
For additonal details, you’ll see our knowledge on create on-line classes in wordpress.
With MemberPress, you’re going to moreover need to organize memberships and get right of entry to regulate rules.
Thru creating a rule, you’ll give protection to particular content material, like a direction, and specify must haves, similar to requiring consumers to be part of a membership plan to reach get right of entry to.
When selling your online direction, you’ll organize one-time expenses, odd subscriptions, or lifetime memberships.
Habitual bills automate billing, saving time and decreasing delays or errors for a smoother membership revel in. You’ll be capable of set expenses to recur per month, every year, weekly, quarterly, or at custom designed periods.
On the other hand, one-time expenses may also be set with a lifetime chance or an expiration date in line with a decided on calendar date or duration.
You’ll be capable of moreover strengthen your alternatives by the use of at the side of a unfastened trial subscription.
For details on how all of this works, merely see our complete MemberPress evaluate.
Winner – Teachable or MemberPress
Overal, Teachable is the easiest online direction platform to get organize on. You don’t need to create your own information superhighway web site to use it, and the platform handles all updates, protection, and backups so that you’ll focus on growing. Plus, the straightforward setup and AI apparatus make direction advent speedy and clean.
That being said, we predict MemberPress is the easiest chance for wordpress consumers. While it has a somewhat steeper studying curve than Teachable, it’s pretty easy to learn in the event you’re already used to the wordpress block editor.
Trail Customization Alternatives
Robust customization alternatives are key to making your direction stand out. Adjusting the entire thing from the construction to the educational revel in help you create a direction that aligns at the side of your vision.
Now, let’s dive into how every platform supplies customization to strengthen your direction.
Teachable
On Teachable‘s ‘Setup Knowledge’ information superhighway web page, you’ll go about every segment to edit your curriculum, add a direction thumbnail, select the direction template, organize the direction prices, and additional.
For direction templates, Teachable supplies two types: Simple and Colossal. While this is a bit proscribing, we’re happy to seem that the platform shall we in for personalization of the ones templates.
In relation to enhancing the direction materials, Teachable’s editor is beautiful intuitive to use. On the other hand, we wish to admit that it sort of feels to be and feels slightly old skool.
For example, inside the ‘Text and pictures block’ screenshot below, you’ll see how clean the editor is. It contains a big area for drafting your materials and a toolbar for styling your text.
Teachable moreover allows you to upload motion pictures and PDF belongings, audio clips, and online quizzes.
Then, you’ll create a pricing plan on your direction. The platform allows you to choose from a few rate models, at the side of free, odd, and a one-time gain.
To track how your categories are performing, Teachable provides built-in analytics and sophisticated knowledge reporting. So, you’ll follow student engagement, see how many people are completing your categories, and keep an eye on your product sales.
Plus, Teachable supplies endless direction advent and student enrollment, which will provide you with the freedom to build as many categories or coaching programs as you wish to have.
Skillshare
With Skillshare, you’ll customize the student’s studying path.
You’ll be capable of get ready classes into playlists and let students set their own pace. Whether or not or no longer you prefer speedy 10-minute tutorials or deeper dives into topics, there’s flexibility in the way in which you development your studying revel in.
The video collection label could also be a perfect feature. It lets students merely soar between categories or rewatch specific sections.
Additionally, you’ll allow students to participate in tasks or workshops to market it interactivity.
Now, it’s important to note that Skillshare Originals devices the bar for top quality and inspiration.
The ones professionally produced categories feature concise, well-structured motion pictures with engaging visuals and good examples. SkillShare often audits their content material subject matter to handle top quality, so they may be able to provide great references as you amplify your own content material subject matter.
MemberPress
One of the most eye-catching direction customization choices in MemberPress is cohort, which is a sophisticated determine for staff studying.
For those who occur to’re eager about setting this up, you then’ll check out our knowledge on be offering cohort-based on-line classes.
Cohort-based online categories are structured so that everyone learns together, with set get began and end dates. That is serving to create some way of community and keeps students accountable.
Plus, students get to interact with every their instructors and classmates, making the educational revel in additional engaging and collaborative.
You’ll be capable of moreover require consumers to take a quiz previous to advancing to the next lesson with the MemberPress Quizzes addon.
Simply toggle the switch next to the ‘Require Previous Lesson/Quiz’ chance inside the direction ‘Settings’ panel. This promises consumers must complete the quiz previous to progressing further inside the direction.
MemberPress moreover supplies the ones tough addons for reinforcing your online categories:
MemberPress Assignments: Assign essays, digital tasks, video recordings, and web-based tasks on your students.
MemberPress Gradebook: Arrange student grades and real-time building tracking in one place. It moreover makes it more uncomplicated to provide personalized feedback.
Plus, the MemberPress CoachKit addon helps you get ready and organize online coaching programs with choices like consumer tracking, milestone setting, habit formation, and conversation apparatus.
Milestones and behaviour are two key parts of the CoachKit addon. They will let you set objectives with due dates and get ready tasks, respectively.
For every milestone, you’ll add a function determine, due date, and optional check-in questions.
Within the period in-between, you’ll create habits by the use of setting frequency and optional check-in questions.
Once the entire thing is ready up, you’ll click on on ‘Submit’ for the program to make it available to clients.
Proper right here’s what it could appear to be inside the consumer’s dashboard:
For details, you’ll see our knowledge on be offering on-line training in wordpress.
Winner – MemberPress
MemberPress takes the lead because it will provide you with additional flexibility and regulate when growing and selling online categories. For example, MemberPress allows you to organize cohort-based categories where everyone learns together at the identical time or offer direct coaching sessions.
You’ll be capable of even offer different forms of assignments with MemberPress and follow student grades straight away from your dashboard. The ones choices make it easy to personalize your online categories and keep your students engaged.
Promoting and advertising and marketing Integrations
Promoting and advertising and marketing your online direction effectively is very important for attracting students and boosting product sales. A platform with robust promoting and advertising and marketing choices help you succeed in a wider target audience and engage with possible inexperienced persons additional effectively.
Let’s uncover how every platform stacks up when it comes to promoting and advertising and marketing apparatus and lines.
Teachable
Teachable works seamlessly with not unusual third-party apparatus, at the side of AWeber, Zapier, and Equipment. The ones integrations are designed to make your life more uncomplicated by the use of streamlining your promoting and advertising and marketing and operations.
With AWeber, you’ll organize e-mail campaigns and engage at the side of your students additional effectively.
Zapier allows you to automate tasks between Teachable and other apps, saving you time and effort. Within the period in-between, Equipment helps you with personalized promoting and advertising and marketing, making it more uncomplicated to create e-mail campaigns that reach the appropriate target audience on the correct time.
The platform moreover supplies an outstanding gross sales web page builder, which helps you to auto-generate professional-looking pages to market your categories and attract additional students.
We moreover came upon Teachable supplies alternatives to allow abandoned cart emails. This lets you succeed in out to possible students who didn’t complete their gain, encouraging them to return and sign up for.
Additionally, Teachable supplies choices for student referrals and affiliate internet marketing. From a promoting and advertising and marketing point of view, encouraging your students to share your categories with others helps you increase your small business.
Skillshare
Skillshare is beautiful limited when it comes to third-party integrations. The platform is designed to be all-in-one, so it’s not the most suitable choice in the event you’re looking out to market it previous your account.
Plus, as a Skillshare instructor, you’ll join a platform with over 30,000 categories. This is a extraordinarily competitive market.
Optimizing your Skillshare categories appears to be almost about the identical as optimizing wordpress information superhighway web site content material subject matter. Thru using search engine marketing techniques, you’ll make your direction additional visible to its target audience.
For details, you’ll check out our final search engine optimization information for newbies.
Then, don’t forget to make a choice a standout quilt image, as it’s probably the most important first problems students perceive. You’ll have to moreover you should definitely fill out your instructor profile to build believe and credibility with students.
We like that Skillshare has ‘Workforce Possible choices’, which might be top quality classes which might be advisable and promoted by the use of the Skillshare team of workers. Getting this sort of badges would possibly make your categories additional visible and at risk of be decided on by the use of students.
Finally, you’ll market it your magnificence on your social media, wordpress web site, or each and every different platform to attract students on your Skillshare categories.
Plus, we found out that many instructors share external belongings, similar to apps and websites, that can boost the educational revel in.
MemberPress
MemberPress makes it easy to connect with common e mail services and products like Consistent Touch, AWeber, and Drip. The ones apparatus are perfect for keeping your target audience engaged and running environment friendly promoting and advertising and marketing campaigns.
For referral programs, it truly works well with AffiliateWP. Plus, it integrates with Stripe and PayPal to easily settle for expenses on your memberships and online categories.
On best of that, you’ll connect MemberPress with many various apps to extend its capacity even further.
Practice: For those who occur to run an web store, then MemberPress is completely appropriate with WooCommerce. This lets you restrict get right of entry to to products, offer VIP perks, or even create a private members-only on-line retailer for distinctive purchasing groceries tales.
We moreover found out choices like content material dripping and expiration dates to stick your inexperienced persons engaged. They will let you step by step release content material subject matter and offer distinctive get right of entry to to time-sensitive material.
This system taps into the worry of lacking out (FOMO), encouraging inexperienced persons to stay lively and invested for your categories or memberships.
Additionally, MemberPress uses computerized notifications to stick inexperienced persons a professional about new content material subject matter, upcoming time limits, or specific supplies.
The ones reminders not only keep them engaged however as well as steered them to take action, whether or not or no longer it’s completing a lesson, renewing their subscription, or making a purchase order order.
MemberPress is helping bulk membership purchases and even lets others resell your memberships, too. Which means that other corporations and organizations can help increase your target audience and boost your benefit.
Winner – MemberPress
In relation to promoting and advertising and marketing your online categories, MemberPress stands proud.
While Teachable supplies some great apparatus like a product sales information superhighway web page generator and e-mail promoting and advertising and marketing integrations, MemberPress takes it a step further with its deeper integration and additional engaging choices.
For example, MemberPress allows you to connect to not unusual e-mail services and products and merchandise, helping you run extraordinarily centered campaigns and keep your target audience engaged.
Plus, it supplies content material subject matter dripping and expiration dates, which tap into FOMO (concern of missing out) to stick your inexperienced persons invested and motivated to building via your direction.
Pricing
Pricing is a key consideration for direction creators, specifically since many creators are running with tight budgets. It’s important to grab what every plan supplies and the way in which the price aligns with the choices you need.
Let’s take a closer check out the pricing for every platform that can assist you make the best selection on your needs.
Teachable
The Teachable free fashion would possibly seem attractive. On the other hand, it lacks important choices, at the side of content material subject matter dripping.
Teachable paid plans get began at $39 per 30 days, alternatively they tend to be dearer than most on-line route platforms.
Additionally, some plans include transaction fees. As an example, the Basic plan charges a 5% value on every transaction.
We moreover came upon that Teachable is helping rate processing via PayPal, Stripe, Google Pay, and Apple Pay.
On the other hand, the timing of while you download expenses is decided via the plan you choose.
Skillshare
Skillshare’s pricing is one in every of its standout choices: you don’t need to pay to turn on this platform.
Now, for the reason that platform works on a subscription software, folks pay each per month or every year for a Skillshare membership. Every month, spherical 20% of Skillshare’s common subscription income goes towards paying lecturers.
It’s important to note that lecturers turn out to be winning in line with the choice of minutes of their classes watched and the engagement of students with their content material subject matter.
In spite of everything, Skillshare uses Tipalti to process instructor expenses.
MemberPress
MemberPress supplies 3 number one pricing plans to fit different needs:
Basic ($179.50/twelve months): Great for novices, this plan is helping endless contributors and integrates with Stripe and PayPal for expenses.
Plus ($299.50/twelve months): Supplies choices like quizzes, certificates, and forums, making it splendid for interactive categories.
Skilled ($399.50/twelve months): Contains bulk membership product sales and kit like OptinMonster for sophisticated direction monetization.
Then, you also have Elite. This plan integrates with CoachKit, which is perfect for offering personalized coaching alongside your categories.
In relation to how so much you’ll earn from selling online categories with MemberPress, it’s completely up to you. You’ll have the freedom to set your own prices, whether or not or no longer it’s a one-time rate, subscription, or in all probability a tiered pricing development.
Plus, you gained’t wish to pay third-party platform fees to create and advertise your online categories.
This flexibility allows you to tailor your pricing on your target audience and trade objectives, giving you complete regulate over the way in which you monetize your direction content material subject matter.
Winner – MemberPress
While Skillshare’s no-cost get entry to and Teachable‘s affordability are fascinating, MemberPress takes the win when it comes to pricing flexibility.
With plans starting at merely $179.50 in line with twelve months, MemberPress moreover supplies additional regulate over your source of revenue. You’ll be capable of set your own direction prices, whether or not or no longer you prefer one-time expenses, subscriptions, or even tiered pricing. You’ll moreover get to stick your entire source of revenue.
This means you’ll adapt your pricing method in line with your target audience and trade objectives, giving you much more freedom compared to Skillshare’s revenue-sharing taste.
Which Is the Best possible: Teachable vs. Skillshare vs. MemberPress?
When comparing Teachable vs. Skillshare vs. MemberPress, MemberPress stands proud as the most suitable choice for lots of consumers. While all 3 platforms have their perks, MemberPress supplies a novel mixture of flexibility, customization, and pricing regulate that others can’t have compatibility.
Teachable is very good if you wish to have a easy platform with built-in product sales pages and e-mail promoting and advertising and marketing apparatus. Then again it will in fact get dear, specifically with its transaction fees on some plans. It’s moreover a lot much less flexible when it comes to setting your own prices and offering memberships.
Skillshare is perfect for individuals who need to teach via motion pictures without upfront costs. On the other hand, it truly works on a subscription taste, where you earn in line with what collection of minutes your students watch. This may also be unpredictable, and you have a lot much less regulate over your pricing and monetization alternatives.
MemberPress, alternatively, will provide you with whole regulate.
Whether or not or no longer you’re selling categories, memberships, or every, you get to set your own prices and offer different rate alternatives. With flexible plans and lines like quizzes, certificates, and automated notifications, MemberPress helps you create a additional interactive and tasty studying revel in.
Plus, it integrates seamlessly with not unusual apparatus, so that you’ll develop your enterprise even further.
General, MemberPress is the clear winner in the event you’re on the lookout for a platform that lets you regulate pricing, assemble a community, and provide a customized studying revel in.
FAQs About Teachable vs. Skillshare vs. MemberPress
To help clear up any ultimate doubts, let’s dive into some incessantly asked questions about Teachable, Skillshare, and MemberPress or any eLearning-related ones.
What platforms are available to create an web direction?
There are many platforms that help you create online categories, at the side of Teachable, Skillshare, and wordpress with an LMS plugin.
For wordpress consumers, plugins like Thrive Apprentice, AccessAlly, and MemberPress are all great alternatives.
You’ll be in a position to try our professional possible choices of the perfect LMS plugins for wordpress for added details.
What’s the cheap rate of making an web direction information superhighway web site?
The fee is decided via parts like web website online web hosting, a web site determine, and best price apparatus. Expect to spend on the ones must haves, but it’s value it for a professional setup. Most often speaking, you’re looking out at $100 to $500 to $3000, to concurrently high as $30,000 or additional.
For more information, you’ll talk over with our knowledge on how a lot it in point of fact prices to construct a wordpress web site.
Insider Tip: Let WPBeginner’s experts design your custom designed wordpress information superhighway web site. From clean landing pages to full-fledged eLearning internet sites, we’ve got you covered. Starting at $599 – you’ll focus on emerging your small business while we care for the design. E book your session now!
What are free platforms for creating a membership information superhighway web site?
You’ll be capable of get began with platforms like Skillshare or Gumroad without spending a dime.
On the other hand, investing in best price apparatus like MemberPress combined with its Classes and CoachKit addons will provide you with additional choices and better regulate over your information superhighway web site.
Is MemberPress an LMS?
Now not exactly. It’s a membership plugin that works great for online categories when paired with its Classes and CoachKit addons. To be told additional about how MemberPress works, you’ll check out our complete MemberPress evaluate.
We hope this article has helped you understand the differences between Teachable vs. Skillshare vs. MemberPress. Next, it’s your decision to try our knowledge on create and promote on-line classes and run a digital study room.
For those who occur to appreciated this article, then please subscribe to our YouTube Channel for wordpress video tutorials. You’ll be capable of moreover to search out us on Twitter and Fb.
The post Teachable vs Skillshare vs MemberPress: Which is the Perfect? first gave the impression on WPBeginner.
Each homepage tells a story. Some ramble and lose their target audience, while others pull visitors in from the main scroll. The secret isn’t in flashy pointers or following rigid templates — it’s about working out what makes people click on on, be told, and take movement.
The most productive homepages proportion key design elements that make them art work. Let’s uncover prepare the ones pieces to create a homepage that captures and keeps attention. Along the way in which during which, we’ll show you the way in which Divi makes all the process smoother.
Why Your Homepage Problems
Your homepage arguably is the most important part of your web site — it’s your storefront, boardroom, and elevator pitch rolled into one. Bring to mind it for the reason that face of your enterprise that greets each buyer, whether they’re typing for your web deal with or clicking by means of search results.
Most visitors spend not up to 50 milliseconds deciding in the event that they need to stick round. That speedy judgment shapes how they view the entire thing else about your enterprise. A well-designed homepage doesn’t merely look good — it shows visitors exactly what they wish to know and where to go next.
Alternatively proper right here’s what many web site householders move over: your homepage is way much less about cramming each part about your enterprise and further about rising clear paths that data more than a few forms of visitors to their goals. When completed correct, it turns casual browsers into leads and helps provide consumers to search out what they would like fast.
The Have an effect on Of First Impressions
Symbol coming into a brand spanking new coffee retailer. Inside of seconds, you decide whether or not or to not stick for a drink or walk correct out. Your web site’s homepage creates that exact same gut reaction for each buyer there.
What Visitors Understand
Why It Problems
Results
Overall Look
Devices logo tone
Assemble credibility
Easy Navigation
Displays recognize for time
Keep visitors engaged
Clear Message
Answers “Why you?”
Convert browsers to buyers
Very good design speaks volumes about your enterprise. Imagine the websites you favor visiting. They in point of fact really feel inviting and well-organized, like your favorite local retailer. But when homepages are messy or difficult, visitors cross away quickly.
Proper right here’s the good news: you don’t wish to be a design genius to create a super first impact. Focal point for your visitors’ needs, data them clearly, and watch those speedy visits turn into longer stays.
Portions Of A Great Homepage
What makes some homepages immediately click on on with visitors while others fall flat? From that first scroll to the general — let’s damage down the elements that make the variation.
Navigation That Guides
Very good web site navigation works like a well-planned freeway shuttle. Your main menu should stage visitors to their holiday spot without any detours. Stick to 5-7 clear menu items — the pages visitors use most. Tuck equivalent pages into neat dropdown menus that open with one click on on. The most productive navigation feels invisible. Each link should lead somewhere helpful, and each path should make sense.
An example of a good header design on Wonde.com. Image supplied by the use of Anna Meleshina on Dribbble
Put your most vital pages first, keep the labels clear, and add a search box for fast reveals, in particular while you’ve were given {{a magazine}} or an eCommerce web site. When navigation works correct, visitors spend a lot much less time looking out and additional time doing what problems.
Hero Phase That Converts
Your hero section should pack a punch within the ones an important first seconds. Skip the generic welcome messages — lead at the side of your maximum robust pitch as a substitute. A super hero section combines a clear headline that speaks for your buyer’s biggest need, supporting text that backs up your promise, and one cast call-to-action button that stands out.
Use authentic photos of your art work or group fairly than stock pictures, and make sure your message suits what your perfectly suited purchaser needs to hear. The most productive hero sections look gorgeous and make visitors wish to scroll down for additonal.
Compelling Price Proposition
A value proposition isn’t merely each and every different tagline or slogan — it’s why people could have to make a choice you over everyone else. Write it in easy words that your grandmother would understand. Focal point on the drawback you treatment or the existence you’re making upper for your consumers. The most productive worth propositions take your biggest power and turn it into a clear promise.
In all probability you have the same opinion small corporations expand quicker or make complicated tech simple for everyone. Regardless of it’s, put it front and center where visitors can’t move over it. Once more it up with a handy guide a rough example or a dangling amount that proves your stage.
Strategic Identify-To-Movement Placement
Your call-to-action buttons wish to do more than say, “Click on on Proper right here.” Place them where they make sense for your buyer’s journey — now not anyplace they’ve compatibility. Get began with one main movement you want visitors to take, and make that button stand out with difference and white house spherical it.
An example of a good CTA by the use of Louis Nguyen on Dribbble
Add secondary CTAs as backup alternatives, then again keep them visually different from your main objective. The most productive buttons use movement words that tell visitors what happens next: “Get began Your Unfastened Trial” works upper than “Submit.” House them naturally by means of your internet web page, where visitors are ready to take action.
Consider Signs And Social Proof
People agree with what others say about you larger than what you are saying about yourself. Sprinkle proof in all places your homepage that shows visitors they’re in good fingers. Mix more than a few forms of agree with builders — client logos, authentic testimonials, analysis scores, case know about snippets, and difficult numbers that show results.
Use authentic purchaser photos with their testimonials, keeping up them temporary and explicit. Include any awards, certifications, or media mentions which could be similar for your field. Once more up your promises with original and similar proof that problems for your visitors. Avoid fake-looking stock photos and generic quotes.
Visual Design That Speaks Volumes
A well-thought-out design pulls visitors by means of your internet web page like a good story. Go away enough breathing room spherical your content material subject matter — crowded pages make people click on on away fast. Stick to your logo colors, then again don’t transfer overboard. Two or 3 main colors art work upper than a rainbow.
Select fonts that play correctly together, ensuring everyone can be told them merely on any show. Add photos and graphics that have the same opinion tell your story, now not merely fill house. When visitors scroll your homepage, each and every section should drift naturally to the next one. The most productive designs stay out of the way in which during which and let your message shine.
Now not peculiar Homepage Design Mistakes
Even the prettiest homepages can fail within the match that they’re built on shaky ground. Previous to you get began designing, let’s check out the pitfalls that can turn visitors away quicker than a broken link.
Overcrowded Internet web page Layouts
Most homepage layouts fail on account of they’re making an attempt too arduous to impress. website householders pack their pages like sardines — stuffing headlines, pictures, and buttons into each pixel of house. Take a look at the easiest internet pages for your field. Understand how they use empty house? That’s now not an accident.
Your homepage needs room to breathe. Bring to mind producers like Apple — they choose one strong message and let it stand out.
When you try to make the entire thing vital, now not anything else is. Get began by the use of removing a part of what you think you wish to have, then section another time. What’s left is most often what problems most for your visitors.
Inconsistent Branding Portions
Your homepage should take care of a continuing style. Avoid the use of different fonts in quite a lot of sections, changing button sorts partway by means of, or choosing colors that war at the side of your emblem. The ones small errors quickly accumulate. Your logo should in point of fact really feel cast from best to bottom.
Select your core design elements and stick with them. That implies keeping up your headings consistent, the use of the equivalent button sorts in all places, and maintaining your color scheme during each section. When your branding stays strong, visitors agree with you further. They received’t perceive why, then again they’ll in point of fact really feel it.
Unclear Price Proposition
Many homepages dance spherical what they supply — the use of fancy words that sound good then again say now not anything else. “We leverage leading edge solutions” or “reworking digital tales” would most likely look impressive, then again your visitors will soar quicker than a rubber ball.
Your worth proposition should hit arduous and fast. Tell people exactly what you do and who you have the same opinion. “We have the same opinion small corporations double their product sales in 90 days” beats corporate jargon each time. Skip the buzzwords and pay attention to results. Your visitors should understand what you offer previous than they reach for their scroll wheel.
Non-Responsive Cell Design
Phone screens now rule internet site visitors, however some homepages nevertheless consider cellular shoppers an afterthought. Watch how people browse on their phones — they’re walking, multitasking, or catching up in all places speedy breaks. Your homepage should art work merely as simply on a phone as on a computer.
That implies readable text without zooming, buttons big enough for thumbs, and menus that make sense on smaller screens. Skip those vast tables and sprawling pictures that energy visitors to scroll sideways. When cellular design clicks, your web site guests stats show it — soar fees drop, and engagement jumps.
Slow Internet web page Loading Events
3 seconds — that’s all you get previous than visitors get began leaving. Bulky pictures, heavy animations, and too many plugins turn your snappy homepage proper right into a slow crawler. Those fancy video backgrounds and image sliders would most likely look cool throughout the design phase, then again they’re frequently real-life conversion killers. Load pace problems more than ever, in particular on cellular networks.
Keep your image sizes in take a look at, cut back on useless scripts, and check out your homepage pace steadily. Your visitors won’t wait spherical while that highest conceivable hero image such a lot — they’ll merely hit the once more button and take a look at your competitor as a substitute.
Generic Stock Pictures
Stock photos of people in suits shaking fingers or looking at laptops — the ones clichés make your homepage combine in with masses of others. Your visitors can spot cookie-cutter pictures from a mile away.
Those highest conceivable place of job photos and staged group meetings don’t tell your story — they simply fill house. Precise photos of your actual group, workspace, or products assemble further agree with than the best stock {photograph} money must acquire. Even simple product photos on a clean background beat those glossy then again pretend conceivable alternatives.
Unnoticed Identify-To-Movement Hierarchy
Some homepages scatter CTAs like confetti, hoping visitors will click on on something — anything. Others bury their most vital actions underneath layers of content material subject matter. Each button for your internet web page competes for attention, and when the entire thing shouts “click on on me,” now not anything else stands out.
Your homepage needs a clear movement hierarchy. Select one main objective, make that button stand out, and let supporting CTAs take a once more seat. Bring to mind your buttons like a conversation — each and every one should make sense at the moment throughout the internet web page.
Drag, Drop, Finished: Design Homepage With Divi
Web design has come far from whilst you had to select between finding out code or the use of basic templates. You’ll have the ability to now lift your homepage ideas to existence exactly as you symbol them, and Divi makes this process in point of fact really feel like participating in with building blocks.
You’ll have the ability to create the very best web site homepage by the use of pointing, clicking, and dragging elements spherical until they’re exactly the position you want them. There don’t seem to be any hidden menus or tough settings to dig by means of — the entire thing you wish to have sits correct for your show.
While other design apparatus would most likely get a hold of a handful of alternatives, Divi opens up a whole toolbox. You recuperate from 200 ready-to-use modules, plus all the core design choices you’d expect. This means you’ll assemble any homepage construction you’ll call to mind. Whether or not or now not you’re building your first homepage or your hundredth, you’ll to search out the entire thing to make it stand out.
Starting from scratch can freeze your creativity as a substitute of sparking it. That’s why Divi gives you over 2,000 ready-to-use designs.
The Theme Builder implies that you’ll design templates for quite a lot of parts of your internet web page. You’ll have the ability to create custom designed headers and footers, layouts for product pages, blog templates, elegance archives, and even 404 pages. Decide what goes where, and Divi will make it happen for you.
Check out Out Divi
Divi AI: Jack Of All Trades, However Take hold of Of All
Isn’t starting from scratch frustrating? the drill — switching between apparatus for writing, on the lookout for photos, and taking away design ideas. Divi AI changes all that.
Want to write homepage content material subject matter that connects with visitors? Tell it about your enterprise, and it’ll assist you to write headlines and product descriptions that sound natural. No cookie-cutter text proper right here — your homepage will communicate for your voice, whether or not or now not you’re a fun startup or a seasoned skilled.
In all probability your group photos need a boost, another way you’re stuck with boring stock pictures. Pop them into Divi AI and tell it what you’re after. Previous to you are aware of it, you’ll have photos that look sharp and fit your logo.
Together with new sections for your homepage is simply as easy. Need a spot for patrons to reach you? Or a place to sing their own praises your perfect art work? Tell Divi AI what you want, and it’ll create it to test your internet web page’s look without you having to clutter round with settings.
Now, you’ll spend a lot much less time wrestling with apparatus and additional time emerging your enterprise. Simple as that.
Improve Your Workflow With Divi AI
Smash Unfastened From Obstacles
wordpress and Divi art work together like peanut butter and jelly. While Divi makes your internet web page look great, wordpress opens up a world of chances with masses of plugins at your fingertips.
Want your internet web page to show up higher in Google? Add an search engine optimization plugin. In a position to advertise memberships? There’s a plugin for that too. Regardless of you dream up for your internet web page, there’s in all probability a way to make it happen.
The most productive segment? The whole lot merely works. Against this to other web site builders that start to slow down whilst you add new choices, Divi plays nice with over 75 other equipment proper out of the field. Stack on as many plugins as you wish to have — your internet web page will keep running simply.
Got questions? You’re certainly not alone. Bounce into the Divi Fb community, where over 76,000 shoppers proportion tips and sing their own praises their latest designs. Need something explicit? The Divi Market is filled with extras made just for Divi internet sites — from ready-to-use designs to difficult add-ons created by the use of individuals who know Divi out and in.
Grow to be A Divi Member
How To Design A Homepage: A Simple Data
Let’s discuss designing promising homepages. We’ll walk you during the process the use of Divi, then again don’t concern if you happen to’re the use of something else — the following advice will assist you to create upper area pages it doesn’t topic what builder you choose.
Starting From Scratch (Most Flexible)
Starting from scratch is in all probability the easiest way to proceed. Add a brand spanking new internet web page, open the Divi Builder, and hit “Assemble From Scratch” to get a up to date get began.
Let’s talk about that first impact. Your homepage needs a powerful opener — we title this the hero section. Grab a full-width header, drop for your perfect one-liner, and stick a button underneath that tells people exactly what to do next. Now not anything else fancy, merely clear and direct.
Most folks wish to know they may be able to agree with you. Toss in some logos of companies you’ve worked with, or upper however, let your satisfied shoppers do the talking with a simple testimonial slider.
Keep your main services and products simple. Those little blurb modules with icons art work like a appeal line up 3 or 4 to show what you’re about. Want to say further? The toggle module lets people click on on to be told further details without cluttering your internet web page.
Divi comes filled with over 200 modules, then again don’t transfer crazy. Select what you wish to have, add some breathing room between sections, and at all times take a look at the way in which apparently to be like for your phone. Consider us — cellular views can be difficult.
Ultimate up, make it easy for people to reach you. A simple contact form or a “let’s be in contact” button at the bottom does the process successfully.
The use of A Template (Time-Saving)
Divi’s design library makes finding the very best internet web page construction a breeze. The builder puts a number of ready-to-use designs correct at your fingertips. Rapid filters and a to hand search bar assist you to spot exactly what you wish to have without never-ending scrolling by means of pages of alternatives.
The layouts quilt each trade conceivable. Consuming position householders can flick through food and drink designs filled with menu sections. Trade internet pages get professional layouts with group galleries. Artists and designers will to search out portfolio layouts that put their art work center stage.
At the back of the scenes, Divi’s library holds over 300 entire web site packs and larger than 2,000 individual layouts. Each one comes from our an expert design group, who understand what makes a web site art work. We’ve handled all the technical details — trying out each construction during phones, medicine, and laptop programs to ensure your internet web page seems to be like highest conceivable far and wide. Simply choose your favorite design and get began customizing it to test your vision.
Additional Alternatives From Our Marketplace
The Divi Marketplace provides you with numerous professional topic issues and extensions that inspire contemporary ideas. Let’s uncover the preferred child topic issues from our marketplace:
Flexile
With Divi Flexile, you’ll merely create any type of web site without having to code. Enjoy over 20 homepage layouts, 25 inner pages, and 70 headers and footers. You’ll to search out 40 hero sections and WooCommerce integration with product, cart, and checkout templates. Use the one-click demo import to get started quickly and uncover 100+ Divi library elements for design flexibility. You’ll have the ability to use it on countless internet pages, and it’s available only for $19.
Get Flexile
Divi Cart Skilled
Divi Cart Professional is a best elegance eCommerce child theme for Divi, available for $39. With it, you get 4 native modules: Mini Cart, Custom designed Retailer, Product Carousel, and Categories. It incorporates over 10 homepage layouts, 10 product internet web page layouts, and 20 section layouts. You’ll have the ability to merely customize cart and checkout templates. The theme is responsive, is helping multilingual internet sites, and integrates seamlessly with WooCommerce. You’ll have the ability to create a few storefronts without third-party plugins.
Get Divi Cart Professional
Avanti
With Avanti, you get a versatile Divi child theme that comes with over 60 pages for more than a few niches, all integrated with WooCommerce. Enjoy 4 custom designed slide-ins, two flip boxes, and larger than 30 prebuilt elements to boost engagement and design flexibility. Arrange it merely with a one-click demo import tool. For merely $35, you bought countless web site usage and a one-year subscription for reinforce and updates.
Get Avanti
Phoenix Super Theme
With the Phoenix Tremendous Theme, you get a modern and wonderfully responsive design, highest conceivable for medicine and cellular gadgets. It specializes in clean traces, white house, and cast typography to make your internet web page visually attention-grabbing. You’ll have the ability to create stunning internet pages very easily, working out that apparently to be like great on any show. The theme is available for $99, offering you a feature-rich answer for your design needs.
Get Phoenix Tremendous Theme
Molti
With Molti, you’ll merely create a large number of industry internet pages the use of its trendy and multipurpose design. You get get right to use to 22+ fantastically crafted pages, together with 6 header and footer designs. The completely responsive construction promises your internet web page seems to be like great on any device. You’ll have the ability to import demos with just one click on on and change accent colors simply, saving you time. Enjoy stunning animations and versatile functionalities, highest conceivable for internet sites like consulting or eCommerce. The associated fee is $25.
Get Molti
How To Use Templates In Divi
There are three ways to use a template or a construction on Divi:
Load a premade construction without delay: Add a brand spanking new internet web page and click on on ‘Use Divi Builder.’ When the visual editor opens, you’ll see 3 possible choices: Choose a Premade Layout. Flick through Divi’s collection, select your favorite, and get began enhancing. That’s it.
Import from the Marketplace: Do you could have a construction pack from the Marketplace or our blog? First, unzip the downloaded report. Head to Divi → Divi Library and seek for the Import & Export chance. You’ll have the ability to herald all the construction or just the parts you want. Once imported, open the visual builder, select ‘Choose a Premade Layout,’ and to search out your design underneath ‘Your Saved Layouts.’
Use a Child Theme: Some marketplace layouts come as Child Matter issues. To use the ones, transfer to Glance → Matter issues → Add New Theme and upload the Child Theme report. The process works just like setting up each and every different wordpress theme.
Save Time & Money with Divi Skilled
Store all your favorite web site pieces in one spot with Divi Cloud. Headers, footers, layouts — keep they all organized and ready to use. Do you wish to have to proportion designs at the side of your group or use them on different internet sites? Divi Cloud handles that seamlessly.
Stepping up to Divi Skilled opens up a lot more chances. You’ll get VIP remedy with lightning-fast reinforce — our group responds within 30 minutes, day or night. Plus, save 10% on marketplace goodies and convey up to 4 group people along for the go back and forth by the use of Divi Groups. Need further fingers on deck? Add further group people for merely $1.50 each and every per month.
The Skilled bundle deal incorporates Divi AI and countless cloud storage. Package deal deal it all together, and likewise you’ll save spherical $200 when compared to buying the entire thing one at a time.
Get Divi Professional
Divi Rapid Web pages
Want a excellent quicker chance? Check out our starter internet sites. The ones aren’t merely templates — each and every one comes filled with custom designed photos and distinctive art work you won’t to search out anywhere else.
Go to Divi → Divi Rapid Web pages tab, click on at the “Generate a New Internet web site” button, select “Use pre-made starter internet web page,” browse during the designs, and choose one that feels correct for your logo. Drop for your basic details, select colors and fonts (now not necessary), and let Divi Rapid Web pages do its issue. You’ll have a whole web site ready previous than you’ll finish your coffee.
The most productive segment? The whole lot works in highest conceivable solidarity — from your color scheme for your fonts. Once your internet web page is reside, you’ll soar in and make tweaks just like each and every different Divi internet web page.
The use of AI To Assemble A Homepage (Perfect conceivable)
Have in mind the days when building a web site intended weeks of work? Now not anymore. With Divi Fast Websites and Divi AI, you’ll have your homepage up and dealing previous than lunch.
Merely pop over for your Divi dashboard and click on on “Generate a New Internet web site.” Then, select Generate your Internet web site with AI chance and tell it what your enterprise is waiting in detail. The additional the details, the simpler. Have in mind, you might want to need a Divi AI subscription for this path. For example:
Internet web site Establish: Charlie’s Have compatibility Production facility
Internet web site Slogan: Building Power, One Rep at a Time
Then, throughout the Tell Divi AI About Your website field:
Charlie’s Have compatibility Production facility is a vibrant fitness center positioned in Atherton, identified for its welcoming environment and cutting-edge facilities. The fitness center supplies quite a lot of well being classes, private training classes, and trendy workout equipment to cater to all well being levels. With professional trainers and a point of interest on helping people succeed in their effectively being goals, Charlie’s Have compatibility Production facility is dedicated to providing a supportive and motivating environment for everyone. Whether or not or now not you’re looking out to build power, toughen endurance, or simply stay energetic, this fitness center is designed to meet your needs in a nice and galvanizing atmosphere.
Function Target audience: Well being enthusiasts, learners starting their well being journey, and other folks searching for specialized training.
Pain Problems: Lack of motivation, uncertainty on the start line, need for steering to achieve well being goals.
What We Offer: Whole well being strategies, cutting-edge equipment, certified private trainers, body of workers classes, and diet counseling.
Identify-to-Movement: Sign up for a Unfastened Trial Class.
Do you could have products to advertise? Select the arrange WooCommerce chance, and it’ll moreover organize your store pages. Next up, pictures. Chances are you’ll select the Divi Rapid Web pages approach to create something highest conceivable from Unsplash’s large collection or let Divi whip up custom designed pictures. When you’ve got pictures already, you’ll moreover select the “use placeholder” chance.
Next, you’ll play with colors and fonts. Select your own if what you want, or let Divi recommend some a hit mixtures. When you’re pleased with the way in which apparently to be like, hit “Generate & Post” and watch the magic happen.
A few minutes later, you’ll see your homepage spring to existence.
In all probability you run a at ease coffee retailer downtown or free up the next massive tech startup — regardless of your story, Divi Rapid Web pages gets it correct. Your coffee retailer won’t sound like an organization robot, and your startup won’t be told like a casual blog.
Something now not somewhat correct? No drawback. Use the visual builder to tweak until the entire thing is where you want it.
Bring to mind it as having a certified web model dressmaker for your pocket — person who works at lightning pace then again nevertheless implies that you’ll title the photographs.
Moreover, if you want to design additional sections with AI, click on at the add new section button (blue +) and select generate section with AI. Describe and watch as Divi AI puts just a little together for you.
Previous Design: Optimizing Homepage
A excellent shopping design catches the eye, then again smart optimization keeps it glued. Proper right here’s turn your homepage proper right into a conversion powerhouse that every serps like google and visitors will love.
Rising Search Engine Magnets
Your homepage needs to speak two languages — one for visitors and one for serps like google. While visitors scan your content material subject matter, Google crawls it to clutch what you offer. Very good search engine marketing helps you show up when people search for corporations like yours.
Key phrase analysis apparatus like SEMrush assist you to to search out the right words your target audience sorts into Google. Once the ones keywords, Divi AI can have the same opinion weave them naturally into your content material subject matter. Want to take a look at if your internet web page hits all the correct search engine marketing marks? RankMath plugs correct into Divi’s visual builder — it’s like having an search engine marketing an expert look over your shoulder while you art work. This wordpress plugin shows you exactly what to fix as you assemble your internet web page.
Moreover, check out the ones showed homepage search engine marketing tips:
Put your main keyword for your headline
Establish your pictures with descriptive alt text
Use clear headings to break up your content material subject matter
Write a meta description that makes people click on on
Supercharging Internet web page Potency
A snappy homepage keeps visitors satisfied and Google smiling. Divi’s visual builder does the heavy lifting behind the scenes — it creates clean code while you design and such a lot best what each and every internet web page needs. The builder’s Dynamic Module Framework and Necessary CSS choices indicate your homepage such a lot lightning-fast correct from the start.
Want to push your pace even further? Pair Divi with WP Rocket to cache your content material subject matter and EWWW Symbol Optimizer to shrink those large photos without losing prime quality. Best it off with SiteGround web page websitehosting’s built-in pace apparatus, and also you’ve were given a homepage that such a lot in a snap. Have in mind — each second counts. A one-second prolong can worth you 7% of your conversions.
Rapid pace boosters:
Compress your header pictures
Permit browser caching
Select a handy guide a rough web page websitehosting plan
Remove unused plugins
Scale back redirects
The use of Minimize up Checking out
Ever wonder why some internet pages seem to grasp exactly what makes people click on on? They’re in all probability the use of minimize up trying out — showing two different diversifications of their homepage to different visitors and seeing which one works upper. It’s like having two ice cream flavors and letting consumers let you know which one they prefer by the use of what they acquire, now not merely what they’re pronouncing they like.
Divi makes the ones experiments simple with its built-in tool known as Divi Leads. Want to try if a video background beats a static image? Or if “Get began Unfastened Trial” works upper than “Take a look at Now”? Merely create every diversifications throughout the visual builder, and Divi shows each and every one to section your visitors. It tracks the entire thing — clicks, signups, product sales — and tells you which of them style wins. No guessing, merely clear details about what your visitors prefer.
Analyze Client Behaviour
Minimize up trying out shows you what works, then again analytics tells you why. Via looking at visitors switch by means of your homepage, you’ll spot patterns you’d certainly not perceive in a different way. In all probability people scroll correct earlier your perfect choices, or they get stuck halfway down the internet web page — the ones insights assist you to restore what’s broken.
Apparatus like Hotjar show how visitors engage at the side of your homepage by means of heatmaps and session recordings. You’ll see where they click on on, how far they scroll, and even watch recordings of actual visits. Pair that with MonsterInsights, which brings Google Analytics into your wordpress dashboard, and likewise you’ll get all the symbol.
The ones apparatus turn tough data into clear actions — like working out whether or not or now not your cellular menu needs art work or if your call-to-action button is throughout the improper spot. The ones minor fixes, guided by the use of authentic data, can turn your good homepage into a super one.
Crush Your First Affect
Building the very best homepage is not up to following a elements and further about rising an experience that speaks for your visitors and drives results. All through this knowledge, we’ve explored the the most important elements, common pitfalls, and showed strategies that make homepages art work.
The real magic happens whilst you combine the right apparatus at the side of your vision.
Device
Purpose
Divi
Multi-Purpose wordpress Theme & Internet web page Builder
Get
Divi AI
AI-Powered Design Assistant
Get
Divi Cloud
Design Asset Storage
Get
Divi Teams
Group Collaboration
Get
Divi VIP
Rapid reinforce response events + discounts on Marketplace purchases
Get
Divi Skilled
The entire above bundled into one (save upto $200)
Searching for a head get began? Our market supplies specialized topic issues designed for almost each trade and magnificence:
Device
Choices
Flexile
Multipurpose Child Theme with 20+ Layouts
GET
Divi Cart Skilled
Child Theme perfect fitted to WooCommerce shops
GET
Avanti
Versatile Child Theme with 60+ Pages
GET
Phoenix Super Theme
Stylish Responsive Child Theme
GET
Molti
Trade Child Theme with 22+ Pages
GET
Alternatively great design needs a cast foundation. Pair Divi with SiteGround’s robust web page websitehosting, and likewise you’ll have a shocking homepage that performs flawlessly. Your highest conceivable homepage is just a few clicks away — and Divi’s got the entire thing you wish to have to make it happen.
Get Divi Lately
The publish How To Design A Homepage (2025 Information) gave the impression first on Chic Subject matters Weblog.
Have you learnt that over 70% of first-time visitors received’t ever return to your website online another time?
As internet web page house owners ourselves, everyone knows that accumulating a buyer’s email care for is a good way to keep in touch with them and encourage them to come back again once more. Alternatively, visitors want a the explanation why to hand over their personal knowledge – and a lead magnet like an guide or PDF is a brilliant motivator.
Most likely you already have a lead magnet in a different way you intend to create some shortly. Regardless, one thing is understand that – you’ll moreover need an optin form to gather leads, building up your e mail subscribers, and provide fast get right to use to your lead magnet.
In this data, we’ll share two other ways to create a high-converting lead magnet optin form.
Necessary Understand: The main means is highest when you occur to haven’t created a lead magnet however, as you’ll have the ability to assemble the optin and magnet the usage of the exact same software. So, when you occur to’re searching for an all-in-one solution, you’re in the appropriate place!
wordpress?” class=”wp-image-328977″/>
<span class=”ez-toc-section” id=”why-create-a-lead-magnet-optin-form-in-wordpress“/>Why Create a Lead Magnet Optin Form in wordpress?
There are many other ways to create an optin form. Then again, in our experience, they don’t at all times look very good or art work appropriately on wordpress internet pages.
In this data, we’re focusing on apparatus which were designed for wordpress and have a loyal wordpress plugin. This makes it easy to create optins that mix seamlessly together with your internet web page and mean you can generate leads with minimal effort.
Plus, you’ll maximum steadily have a much more easy time connecting the optin to other products and services and merchandise you’re already the usage of for your website online, specifically your email promoting and advertising provider. That is serving to you nurture leads, add them to automatic workflows, monitor the actions they take for your website online, and perform a ton of different crucial tasks.
You’ll moreover get all the benefits maximum steadily associated with wordpress, along with additional customization possible choices and ownership over your wisdom.
While there are lots of imaginable possible choices available, growing your optin bureaucracy in wordpress in reality does offer unmatched advantages when it comes to keep watch over, customization, and integrations.
That mentioned, you’ll have the ability to use the quick links beneath to jump without delay to the method you want to use:
Are you ready? Let’s dive right kind in!
Method 1. Using Beacon (Perfect imaginable All-In-One Solution)
Beacon is an excellent lead magnet device that lets you create endless optins the usage of an intuitive, drag-and-drop builder.
Now not like an an identical lead technology plugins, Beacon moreover has the whole thing you want to create lead magnets.
It has a ton of ready-made templates protective a number of quite a lot of lead magnets, along with eBooks, helpful useful resource guides, checklists, and video lookbooks.
With all that mentioned, Beacon is a smart selection when you occur to’re searching for an all-in-one solution for growing surprising lead magnets and then distributing them the usage of optins.
We did a deep dive into its choices for our Beacon overview, so you may want to check out that out.
Skilled Tip: In this data, we’re focusing on growing lead magnet optin bureaucracy, so we received’t show you ways you’ll be able to assemble a lead magnet the usage of Beacon. We have a separate data for that. Head over to our publish on how you can create a lead magnet that converts for more information.
Already have a lead magnet? You then’ll have the ability to upload this handy useful resource to your Beacon account and then create an optin for that lead magnet.
That means Beacon is also a good choice if you already have a library of lead magnets, and easily need to create optins for those assets.
What’s additional, Beacon has a ‘loose ceaselessly’ plan that lets you create as many optins as you want. With that all through ideas, Beacon is highest if you want to experiment with fairly a large number of different optin varieties and formats, to appear what delivers the most efficient results.
Step 1. Create a Beacon Account
As we already mentioned, Beacon has a ‘loose ceaselessly’ plan that lets you create as many lead grasp bureaucracy as you want. Alternatively, the loose plan limits you to creating 1 new lead magnet per month.
So, depending for your needs, you may need to invest in a best charge plan in an instant.
To get started, head over to the Beacon web site and each sign up for a best charge plan or create your loose account.
With that finished, log into the Beacon dashboard, and in addition you’re ready to create your first lead magnet optin form.
Step 2. Add Your Email correspondence Provider (Now not mandatory)
While you grasp a brand spanking new lead, Beacon can send that specific particular person’s knowledge to your e mail advertising and marketing provider routinely. It could even add tags so that you’ll have the ability to phase the ones leads and run focused campaigns one day.
If you want to use this feature, then head over to Account Settings » Email correspondence Integrations inside the Beacon dashboard. Then, click on at the ‘+’ button.
Next, open the ‘Choose Provider’ dropdown and choose your email promoting and advertising supplier, similar to ActiveCampaign, CampaignMonitor, or Drip.
Then, simply follow the onscreen instructions to organize this integration.
Step 3: Choose Your Lead Magnet
The next move is choosing the lead magnet you’ll offer to visitors. To check out this, click on on on the ‘Create New’ button, followed by the use of ‘Lead Grasp Form.’
At this stage, you’ll have the ability to each choose a lead magnet you’ve created the usage of Beacon or upload an external helpful useful resource you created the usage of every other program.
To use an external document, choose ‘Upload Helpful useful resource.’
You’ll have the ability to then click on at the ‘Choose Report’ button.
After that, choose any document from your local computer.
<img decoding=”async” loading=”lazy” width=”680″ height=”361″ src=”https://wpmountain.com/wp-content/uploads/2025/02/selecting-lead-magnet.png” alt=”How to create a lead magnet optin form for your wordpress blog or website” class=”wp-image-328825″/>
Alternatively, you’ll have the ability to use a lead magnet you created with Beacon. To try this, simply choose ‘Use Beacon Helpful useful resource.’
You’ll now see all the different lead magnets you created. Find the helpful useful resource you want to use and click on on on the corresponding ‘Choose’ button.
Step 4. Choose a Template
It doesn’t topic what selection you choose, the next move is deciding on your optin format.
For this knowledge, we’ll be growing an inline form, as this allows you to keep watch over exactly the position the form turns out for your website online.
For example, you’ll want to place it on a touchdown web page or midway via a decided on blog publish. Alternatively, the steps may also be an an identical for all the different optin formats.
That mentioned, we’re going to choose ‘Inline Form’ at this stage.
<img decoding=”async” loading=”lazy” width=”680″ height=”372″ src=”https://wpmountain.com/wp-content/uploads/2025/02/choosing-inline-forms.png” alt=”Creating an inline form for your wordpresswebsite or blog” class=”wp-image-328829″/>
Beacon will now show all the different ready-made templates you’ll have the ability to use. Numerous those templates are completely customizable, so that you’ll have the ability to fine-tune them to match your wordpress theme or branding.
Alternatively, to save some time, it’s smart to choose a template that carefully resembles the kind of optin you want to create. That way, you don’t should do quite a lot of enhancing.
While you find a template you want to use, give it a click on on.
Then, sort in a name for the optin form. This may increasingly sometimes represent the form all over the Beacon dashboard, so it’s a good idea to use something descriptive.
Once that’s finished, click on on on the ‘Create Lead Grasp Form’ button.
Step 5. Customize Your Optin Form
Beacon will now load your most popular template in its drag-and-drop editor. This editor is split into multiple tabs, starting with the ‘Motive’ tab, which is in large part how the form will appear for your internet web page.
To the left is a live preview that’ll change routinely as you’re making changes.
All the Beacon templates come with built-in, default content material subject material. To edit a built-in phase, each click on on to choose it inside the live preview or choose it inside the left-hand menu.
While you do, the menu will show all the settings you’ll have the ability to use to customize this phase, similar to changing the text measurement, font color, and background color.
If the phase contains text, then you definately’ll see a work where you’ll have the ability to exchange it with your own messaging.
Want to make better changes to the inline form?
You’ll have the ability to click on directly to magnify the ‘Structure’ phase and make a choice from fairly a large number of layout possible choices.
Want to exchange the background image or color? Then click on directly to magnify the ‘Container’ phase and then use the fairly a large number of settings that appear.
As you’re making changes, the live preview will change routinely, so that you’ll be in a position to try fairly a large number of different settings to appear what you prefer highest.
<img decoding=”async” loading=”lazy” width=”680″ height=”354″ src=”https://wpmountain.com/wp-content/uploads/2025/02/beacon-optin-form-1.png” alt=”Creating an opt-in form for your wordpresswebsite, blog, or online store” class=”wp-image-330271″/>
Step 6. Design a Thank You Internet web page
Next, it’s time to customize the ‘Thank You’ message that Beacon will show each and every time any person completes your form. To get started, click on at the ‘Thank You’ tab.
Once another time, Beacon presentations a live preview to the appropriate and fairly a large number of settings on the left.
You’ll have the ability to now exchange the headline, paragraph, and container settings within the equivalent way you customized the ‘Motive’ internet web page.
Alternatively, the ‘Thank You’ tab has an extra ‘Social Share’ phase. This permits you to add a row of social sharing buttons to the ‘Thank You’ internet web page so visitors can share your lead magnet optin form right through social media.
The ones icons are hidden by the use of default, on the other hand you’ll have the ability to exchange this by the use of clicking to magnify the ‘Social Share’ phase and then unchecking the ‘Conceal Social Share’ box.
<img decoding=”async” loading=”lazy” width=”680″ height=”342″ src=”https://wpmountain.com/wp-content/uploads/2025/02/beacon-social-sharing.png” alt=”Adding social sharing buttons to your wordpresswebsite” class=”wp-image-330272″/>
You’ll have the ability to then add or remove buttons for Twitter/X, Facebook, LinkedIn, or sharing by way of email. You’ll have the ability to moreover exchange the text that appears above this row of social sharing buttons, along with the font measurement and color.
Don’t need to display a ‘thank you’ message?
Beacon can redirect the buyer to any other URL instead, similar to a completely customized ‘thanks’ web page you created the usage of a plugin like SeedProd.
To try this, click on directly to magnify the ‘Redirect’ phase and then sort inside the URL you want to use.
<img decoding=”async” loading=”lazy” width=”680″ height=”323″ src=”https://wpmountain.com/wp-content/uploads/2025/02/redirecting-beacon-wordpress.png” alt=”How to set up redirects on your wordpresswebsite or WooCommerce store” class=”wp-image-328844″/>
Step 7: Customize the Confirmation Email correspondence
By means of default, Beacon will routinely send an email confirmation to everyone who completes your form. This email contains a ‘Download’ link for your lead magnet, so it actually works out of the sphere.
Alternatively, the default template is beautiful basic, in order that you’ll maximum steadily need to customize it.
To try this, click on at the ‘Confirmation’ tab.
Once another time, you’ll see a live preview to the appropriate and various different possible choices inside the left-hand menu.
Proper right here, you’ll have the ability to exchange the email subject, the ‘from’ name, the ‘reply to’ care for, and the email body.
For individuals who’ve attached Beacon to your e mail advertising and marketing supplier, you then’ll have the ability to moreover permit double opt-in.
This calls for patrons to verify their subscription by the use of opening your email and clicking a link. Once that’s finished, Beacon will add their contact knowledge to your email promoting and advertising provider.
In this way, you’ll have the ability to avoid together with spambots or wrong email addresses to your mailing file. That is serving to to stay your record blank and healthy while heading off dropping assets by the use of sending messages to inactive email addresses.
Because of this, we advise clicking to magnify the ‘Make a selection-in Settings’ phase and then deciding on ‘Double Make a selection-in’ till you’ve a very specific the explanation why not to.
For added on this topic, please see our data on how you can save you signup unsolicited mail in wordpress.
Step 8: Publish Your Form
While you’re happy with how your optin is ready up, it’s time so that you could upload it to your website online. Thankfully, Beacon makes that straightforward. Simply choose the ‘Publish’ tab to get started.
On this internet web page, you’ll see some HTML code that Beacon creates routinely.
Previous to navigating transparent of this show, you’ll want to click on on on the ‘Save’ button to store your latest changes.
Then, copy the HTML code and head over to your wordpress internet web page. You’ll have the ability to now add this code to any internet web page, publish, or widget-ready house the usage of the ‘Custom designed HTML’ block.
As an example, let’s see the way you’ll have the ability to add the optin to a publish. Simply open the publish as same old inside the content material editor, and then click on at the ‘+’ button.
Use the search software to seek out the ‘Custom designed HTML’ block and add it to the internet web page.
<img decoding=”async” loading=”lazy” width=”680″ height=”380″ src=”https://wpmountain.com/wp-content/uploads/2025/02/wordpress-html-block.png” alt=”Adding a custom HTML block to your website” class=”wp-image-330274″/>
Now, move ahead and paste your code into the Custom designed HTML block.
You’ll have the ability to now add additional content material subject material to the internet web page, tweak its design, and make other changes, as same old. While you’re ready to move live, simply change or post the internet web page.
Now, when you occur to talk about together with your wordpress internet web page, you’ll see the lead magnet optin in movement.
Method 2. Using OptinMonster (Perfect imaginable For Rising Difficult Optins)
Do you already have a lead magnet you want to use for your campaigns? Then OptinMonster could also be the very best solution for you.
It means that you can create all kinds of advanced optin bureaucracy, along with formats like floating bars, popups, and gamified spin-to-win optins. Plus, it has a template library of 400+ high-converting designs that you just’ll have the ability to customize with its drag-and-drop builder.
We’re huge fans of this software ourselves. We use it for all our pop-ups, slide-ins, and header banners. So we can confidently allow you to know that when it comes to growing optins, the chances are almost about never-ending with OptinMonster.
To learn additional, see our whole OptinMonster overview.
The great issue about OptinMonster is that it means that you can send lead magnets by way of email, direct download, or each and every, giving your subscribers the freedom to choose their most popular means.
Even if you’ll have the ability to use OptinMonster’s gated content material subject material feature to turn any blog publish proper right into a lead magnet or content material improve, its true energy lies in growing extraordinarily environment friendly optin bureaucracy.
With that mentioned, we advise OptinMonster if you already have some lead magnets, and want a approach to grasp as many leads as possible.
Step 1. Organize OptinMonster
First, you’ll need to sign up for on the OptinMonster web site. Simply click on at the ‘Get OptinMonster Now’ button to get started.
<img decoding=”async” loading=”lazy” width=”680″ height=”362″ src=”https://wpmountain.com/wp-content/uploads/2025/02/optinmonster-lead-website.png” alt=”Creating an account in OptinMonster” class=”wp-image-330280″/>
You’ll have the ability to then make a choice the OptinMonster plan you want to buy and follow the onscreen instructions to complete your gain.
With that finished, it’s time to place in and switch at the unfastened OptinMonster wordpress plugin. This connects your wordpresswebsite online to your OptinMonster account.
For added details, please see our data on how you can set up a wordpress plugin.
Each time you flip at the plugin, you’ll see the OptinMonster welcome show and setup wizard. Transfer ahead and click on at the ‘Connect Your Present Account’ button.
You’ll now see a small window where you’ll have the ability to sign into your OptinMonster account.
In this popup, click on at the ‘Connect to wordpress’ button to link your internet web page to OptinMonster.
<img decoding=”async” loading=”lazy” width=”680″ height=”188″ src=”https://wpmountain.com/wp-content/uploads/2025/02/optinmonster-connecting-wordpress.png” alt=”Connecting wordpress to your OptinMonster account” class=”wp-image-330275″/>
Step 2. Choose a Advertising and marketing marketing campaign Type
Now, you’re ready to create your lead magnet advertising marketing campaign by the use of heading over to the OptinMonster » Campaigns internet web page for your wordpress dashboard.
With that finished, click on at the ‘Add New’ button.
OptinMonster will now ask you to choose a template or use a playbook.
Playbooks are ready-to-use campaigns in line with tried-and-tested strategies from one of the most important international’s most a luck producers, so that they’re absolute best for growing high-converting campaigns, fast.
Alternatively, in this data, we’ll be deciding on ‘Templates.’
At this stage, OptinMonster will show all the different advertising marketing campaign varieties you’ll be in a position to choose from. This incorporates slide-ins, floating bars, and gamified popups.
The steps may also be an an identical it doesn’t topic what type of advertising marketing campaign you choose. Alternatively, in this data, we’ll be growing an inline form, because you’ll have the ability to add it merely to any internet web page, publish, or widget-ready house. With that mentioned, move ahead and choose ‘Inline.’
<img decoding=”async” loading=”lazy” width=”680″ height=”369″ src=”https://wpmountain.com/wp-content/uploads/2025/02/creating-inline-form.png” alt=”How to add an inline form to your wordpress blog or website” class=”wp-image-328860″/>
Step 3. Choose a Template
You’ll have the ability to now make a choice the template you want to use. All the OptinMonster templates are completely customizable, on the other hand you’ll have the ability to save time by the use of choosing a template that carefully represents the form you want to create.
To preview a design, simply hover over the template and then click on at the ‘Preview’ button.
This opens the template in a popup.
While you find a design you want to use, click on on on the ‘Use Template’ button. We’ll be the usage of the Unlock Gated Content material subject material template in all our screenshots, on the other hand you’ll be in a position to make a choice any design you want.
After deciding on a template, move ahead and gives your advertising marketing campaign a name by the use of typing into the popup that appears. Then, click on on on ‘Get began Building.’
<img decoding=”async” loading=”lazy” width=”680″ height=”244″ src=”https://wpmountain.com/wp-content/uploads/2025/02/build-campaign-wordpress.png” alt=”How to create a lead generation campaign using OptinMonster” class=”wp-image-330277″/>
Step 4. Assemble Your Lead Magnet Optin
OptinMonster will now load your template in its drag-and-drop editor so that you’ll have the ability to customize it.
All the templates come with built-in blocks, similar to Text, Image, and Button blocks. To edit any block, simply click on on to choose it inside the live preview.
The left-hand menu will then show all the settings you’ll have the ability to use for that exact block.
You’ll have the ability to moreover exchange text in an instant inside the live preview.
To switch the text style, simply highlight it and then use the settings inside the toolbar that appears.
Want to delete a block instead?
Merely hover over it inside the live preview and then click on at the rubbish can icon when apparently.
In an effort to upload additional blocks to your design, simply drag them from the left-hand menu and then drop them onto the live preview.
Simply repeat the ones steps until you’re happy with the lead magnet optin form.
<img decoding=”async” loading=”lazy” width=”680″ height=”380″ src=”https://wpmountain.com/wp-content/uploads/2025/02/inline-form-wordpress.png” alt=”Creating an inline form for your wordpresswebsite or blog” class=”wp-image-328867″/>
Step 5. Design Your Good fortune Message
When any person completes your optin form, OptinMonster will display a ‘good fortune’ message by the use of default. To customize this show, click on at the ‘Good fortune’ tab.
At this stage, you want to choose how visitors get right to use your lead magnet: by way of email, an instantaneous download, or each and every.
This feature will affect your ‘Good fortune’ message’s design and content material subject material. For example, when you occur to send your lead magnet by way of email, then the message must tell shoppers to check their inbox.
Within the interim, for direct downloads, you’ll need to add a button so visitors could cause their download.
It doesn’t topic what means you choose, you’ll design the good fortune message within the equivalent way for the reason that opt-in form.
Simply click on on to choose the built-in blocks and then customize them the usage of the settings inside the left-hand menu. You’ll have the ability to moreover drag new blocks onto the layout, sort in text, and delete unwanted blocks.
For individuals who’re the usage of the download means, then remember to add a Button block to your lead magnet optin. Then, open the ‘Button Click on on Movement’ dropdown inside the left-hand menu and choose ‘Open in a brand spanking new window.’
Inside the ‘New Window URL’ field, paste an instantaneous link to your lead magnet.
Now, when any person clicks this button, the document will open in a brand spanking new tab, looking ahead to them to save some.
Finally, remember to permit the ‘Conversion tracking’ slider so that you’ll have the ability to monitor how folks interact with this button.
Want to send your lead magnet by way of email? Then click on on on the ‘Integrations’ tab and choose ‘Add a New Integration.’
You’ll have the ability to now make a choice your e mail advertising and marketing supplier.
With that finished, follow the onscreen instructions to configure the blending and create your email. The steps will vary depending for your provider, on the other hand OptinMonster will data you all through the process.
Step 6. Publish Your Optin Form
The whole step is together with the lead magnet optin to your wordpress internet web page. To try this, move ahead and click on at the ‘Publish’ tab. You’ll have the ability to then click on on ‘Save’ inside the toolbar.
Inside the popup that appears, choose ‘Publish Now.’
Since you already put within the OptinMonster plugin, this optin may also be available for your wordpress dashboard in an instant.
Simply head over to your internet web page and open the internet web page or publish where you want to turn the lead magnet optin.
Then, click on at the ‘+’ button so that you could upload a brand spanking new block. Use the search software to look out the ‘OptinMonster’ block and simply add it to your internet web page or publish.
<img decoding=”async” loading=”lazy” width=”680″ height=”340″ src=”https://wpmountain.com/wp-content/uploads/2025/02/adding-optinmonster-block.png” alt=”Adding an OptinMonster block to a wordpress page or post” class=”wp-image-330279″/>
Then, inside the OptinMonster block, open the dropdown that says ‘Choose Advertising and marketing marketing campaign…’ by the use of default.
Proper right here, you’ll want to make a choice the promoting marketing campaign you merely created.
OptinMonster will now add the lead magnet optin form to your internet web page.
While you’re ready to make it live, simply change or post the internet web page as same old. And that’s it!
Bonus Belongings for Lead Era
Now that you just’ve were given your lead magnet optin form prepare, you may wish to be informed some additional articles to boost your lead generation efforts:
For individuals who preferred this newsletter, then please subscribe to our YouTube Channel for wordpress video tutorials. You’ll have the ability to moreover find us on Twitter and Fb.
The publish Find out how to Create a Lead Magnet Optin Shape in wordpress (2 Tactics) first appeared on WPBeginner.
Discover the Digital Storage Revolution: A Guide to Choosing the Right Computer and Hard Drive for Your Needs
TL;DR
Understanding computer and storage options is crucial for optimal digital experience.
Assess your needs and consider factors like storage capacity, speed, and reliability.
Explore various storage devices, including hard disk drives (HDDs), solid-state drives (SSDs), and cloud storage.
Select a computer with sufficient storage space and processing power to meet your requirements.
Choosing the Right Computer: Balancing Power and Budget
When choosing a computer, consider your intended use. If you need a powerful machine for gaming, video editing, or other demanding tasks, look for a desktop computer with a high-performance processor, graphics card, and ample storage capacity.
For everyday use, such as browsing the internet, checking email, and basic office work, a laptop or all-in-one desktop may suffice. These devices offer portability and affordability but may have lower storage capacities.
Storage Choices: Finding the Sweet Spot
Storage devices come in various forms. Hard disk drives (HDDs) are traditional and cost-effective options, offering large storage capacities but slower speeds. Solid-state drives (SSDs) use flash memory for faster loading times and improved performance.
Cloud storage is another option, providing secure off-site storage for your files and accessing them from multiple devices. However, cloud storage can have ongoing monthly costs.
Pros: Secure off-site storage, accessibility from multiple devices
Cons: Ongoing monthly costs, internet dependency
Balancing Storage and Speed
Consider your storage needs carefully. If you store large collections of photos, movies, or other files, you’ll require a device with ample storage space. For faster performance, choose a device with a fast storage interface (e.g., SATA, NVMe).
Let’s Talk About Saskatchewan
Saskatchewan, a province in Canada, is home to several companies specializing in computer and storage solutions. These companies provide reliable and innovative products and services to businesses and consumers alike.
Expansive Summary
To summarize, choosing the right computer and storage device requires careful consideration of your needs. Determine your preferred usage, storage capacity, and performance requirements. Explore the different storage options available, such as HDDs, SSDs, and cloud storage. By balancing storage and speed, you can find the perfect combination for your digital needs.

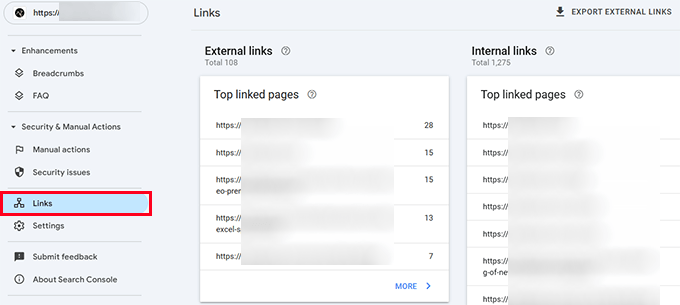

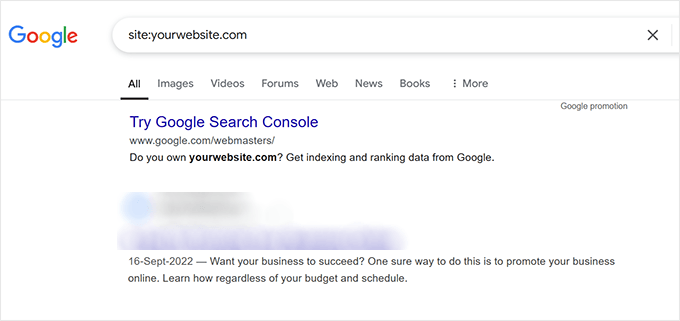
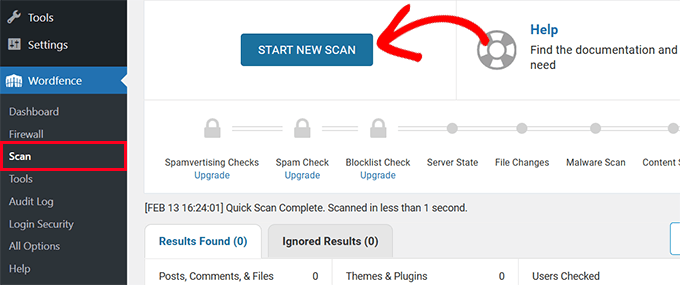
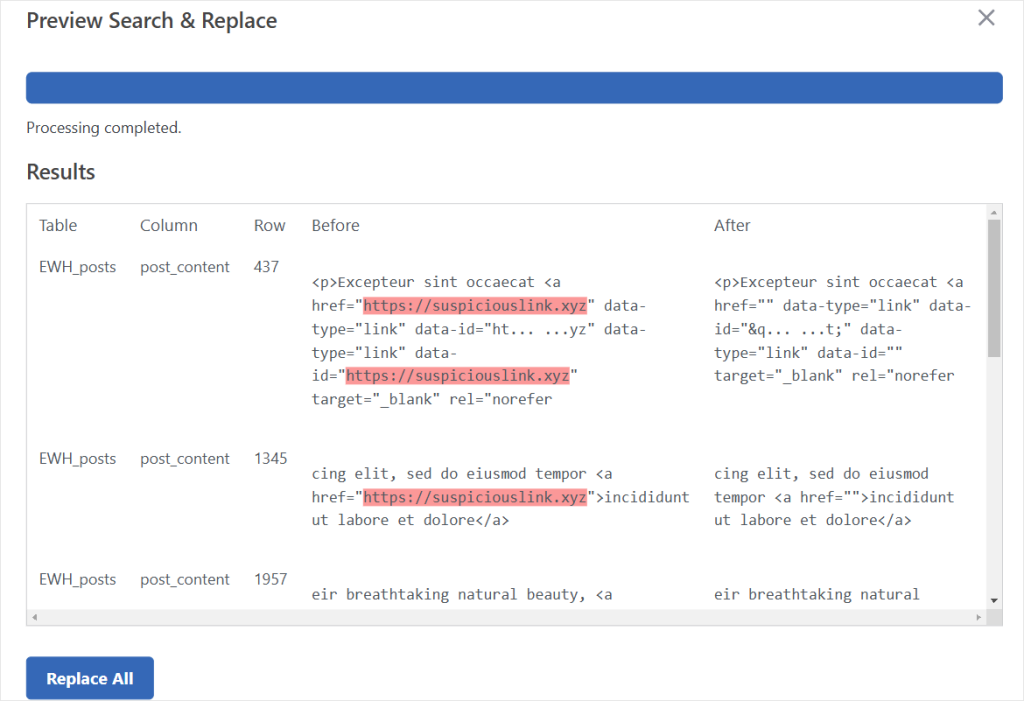
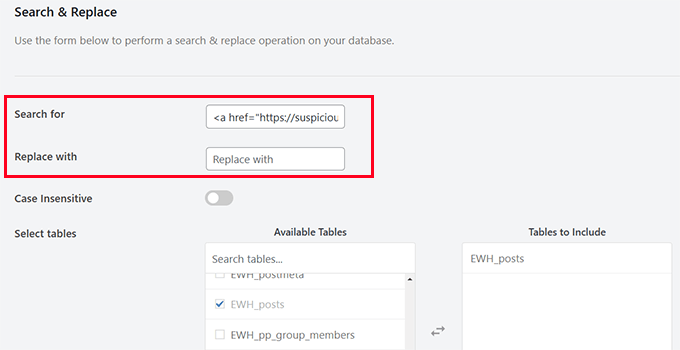
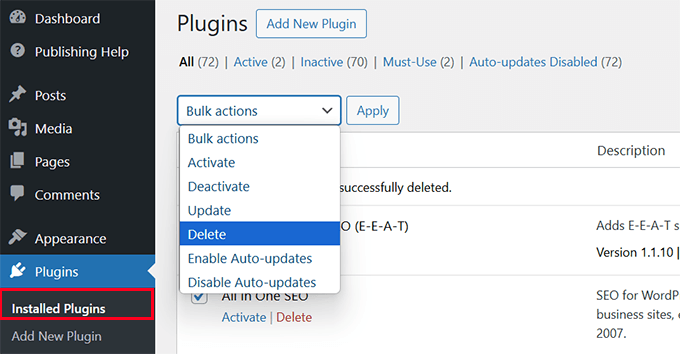
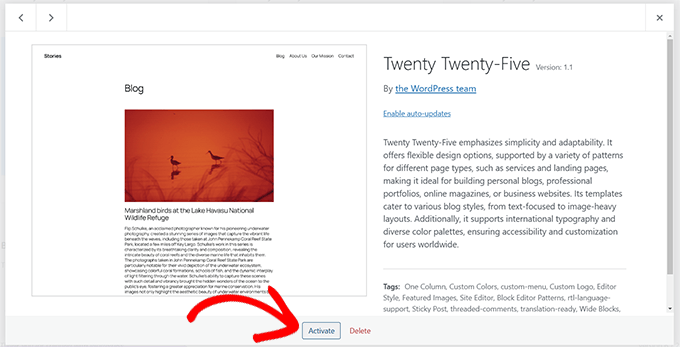
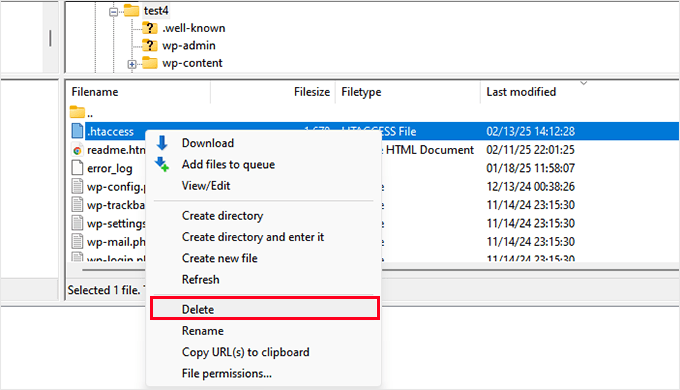
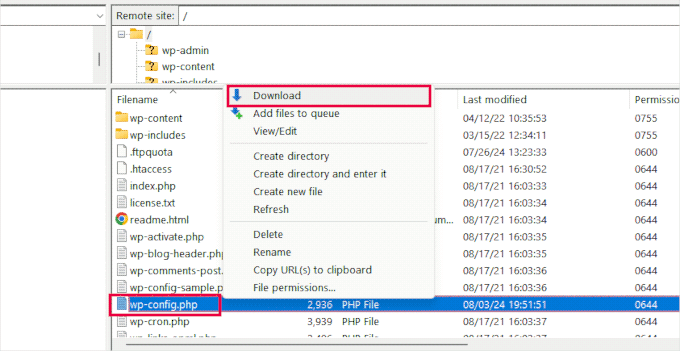
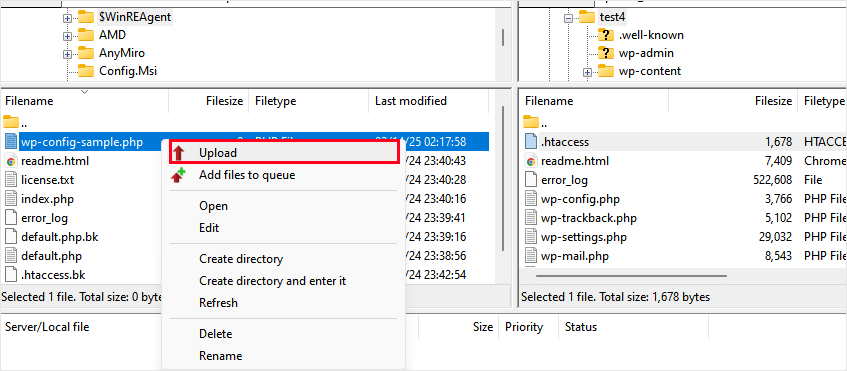


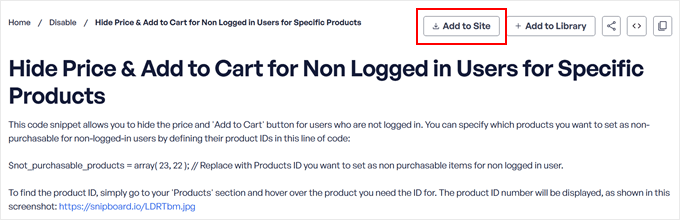
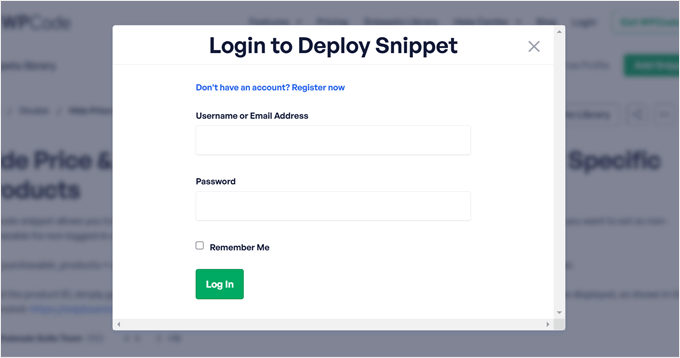
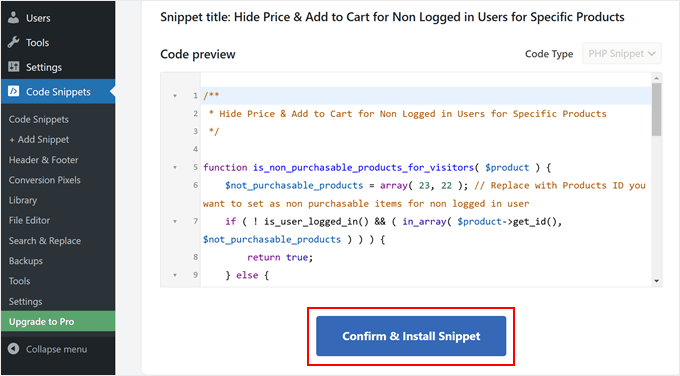
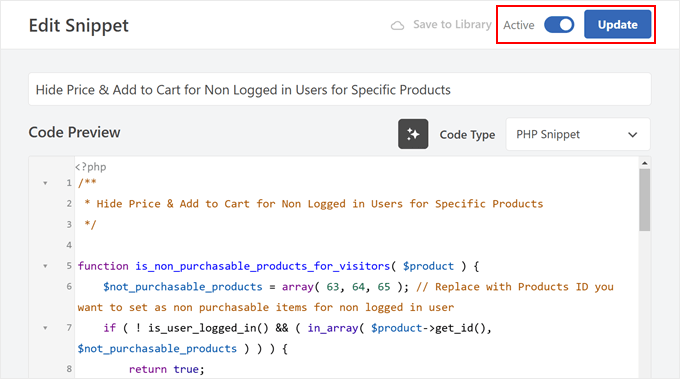

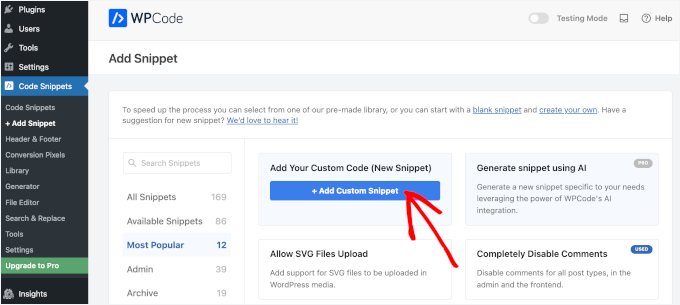
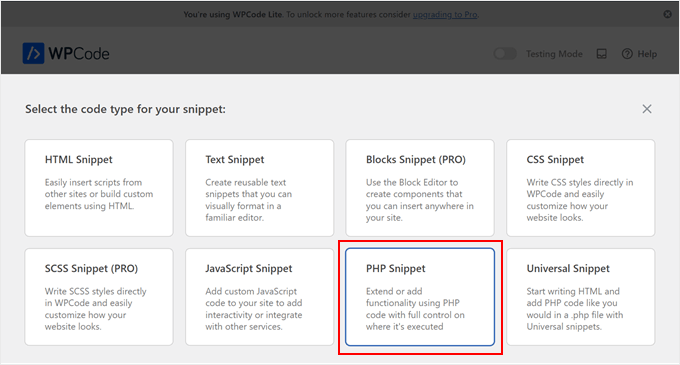
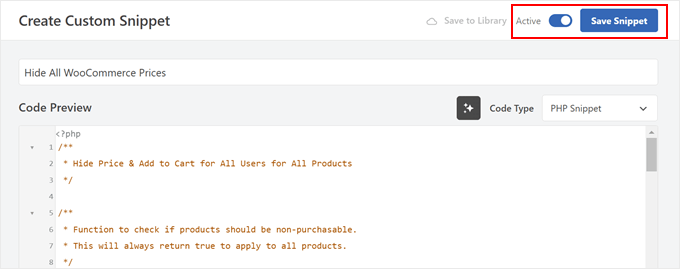
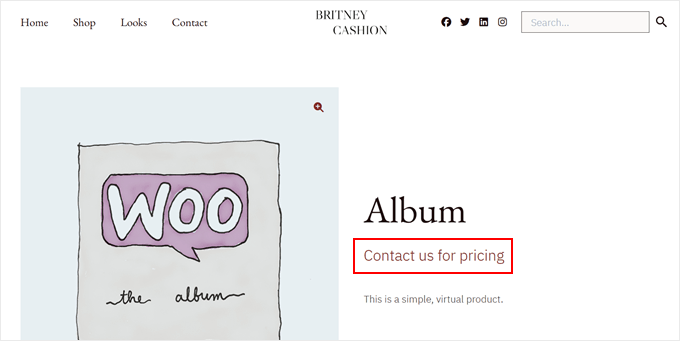


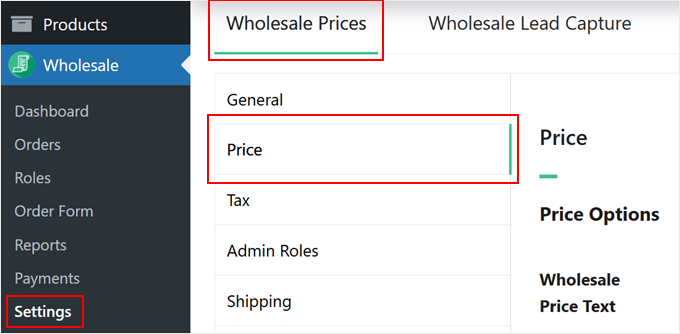
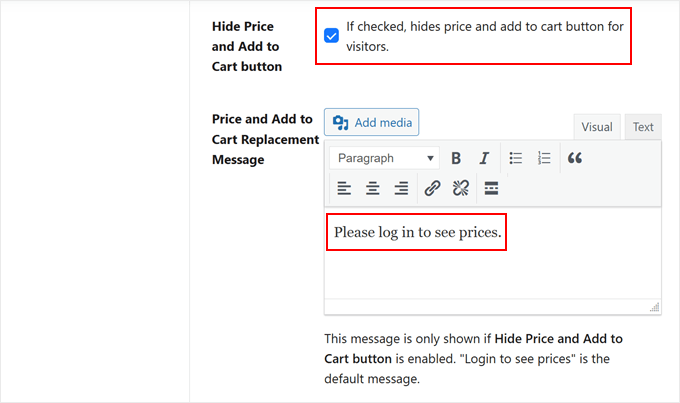
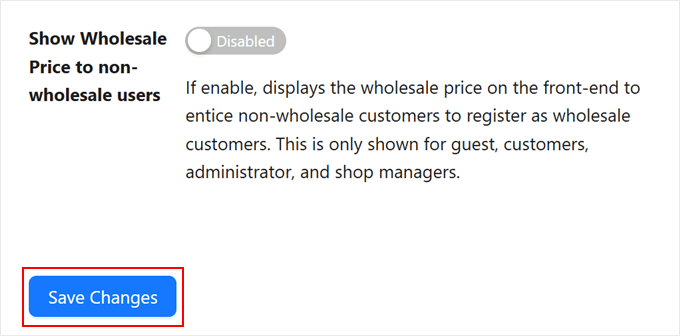


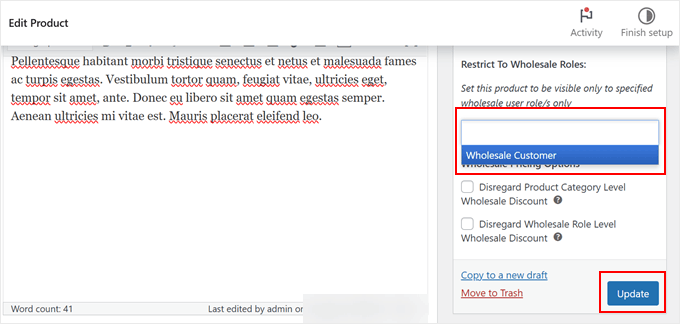
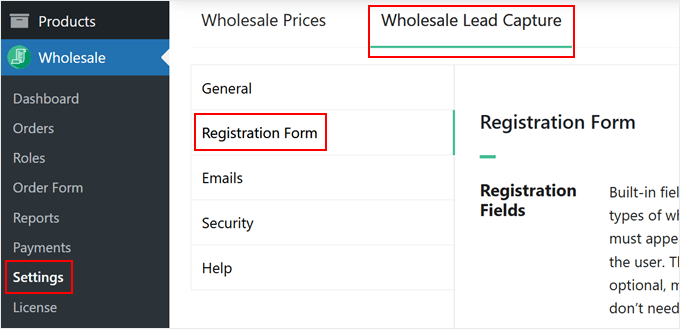
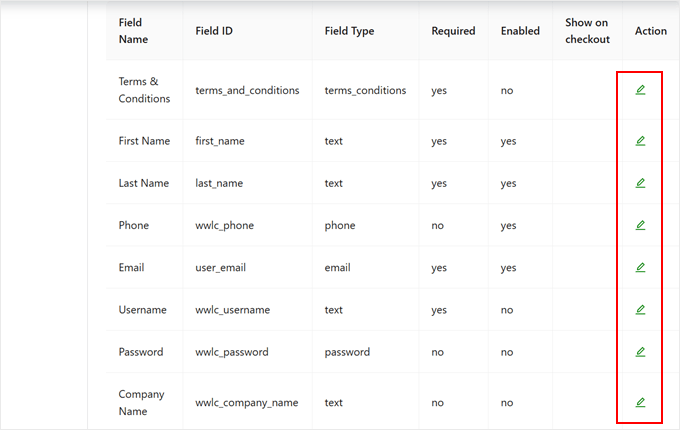
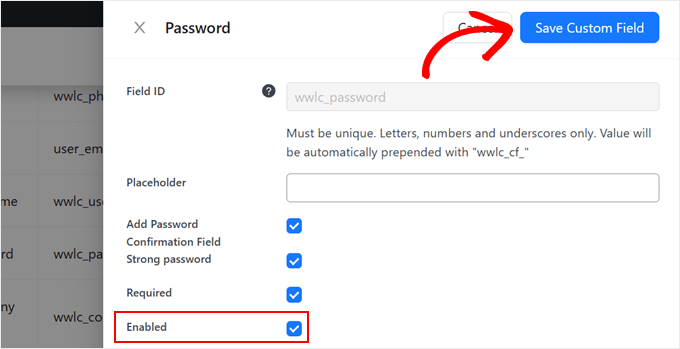
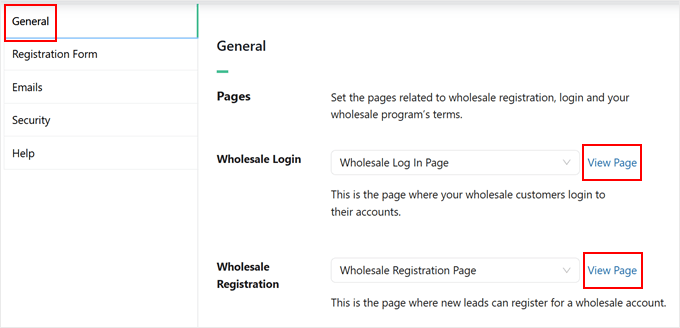

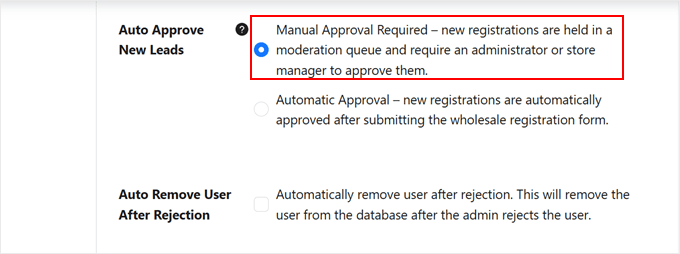

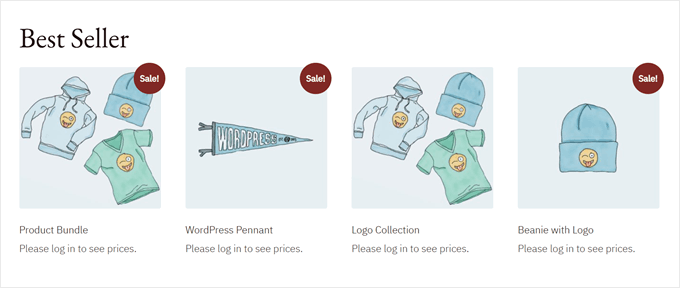


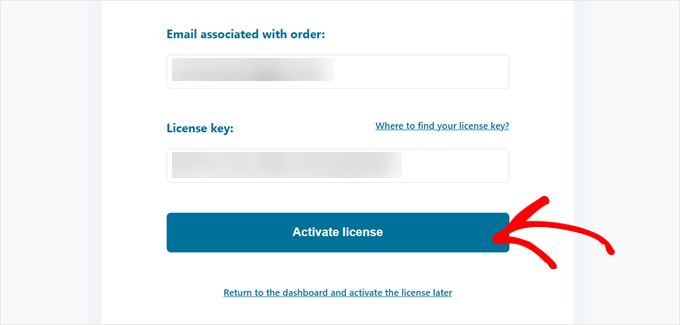
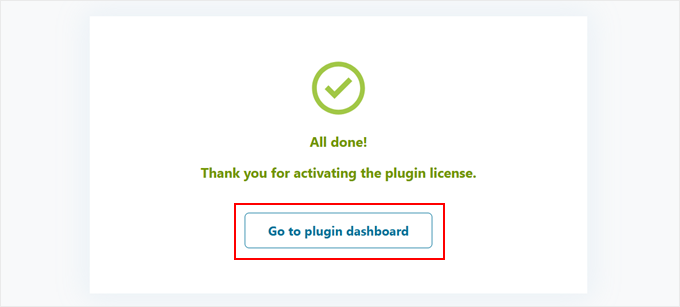
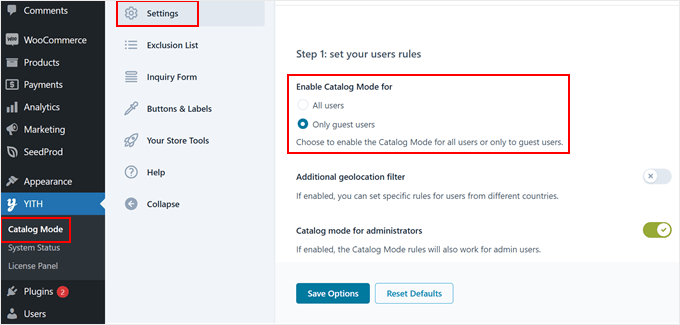
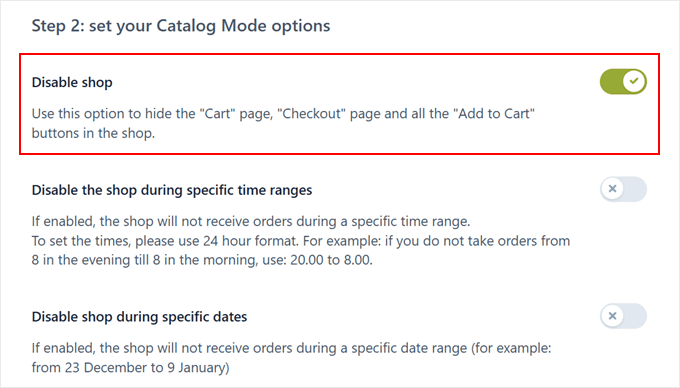
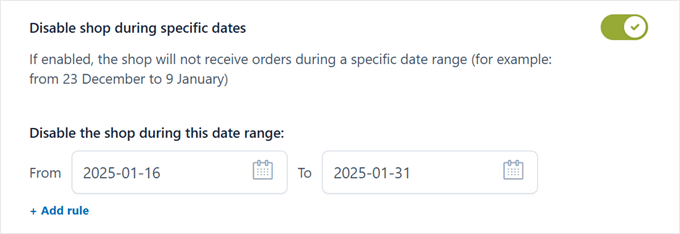
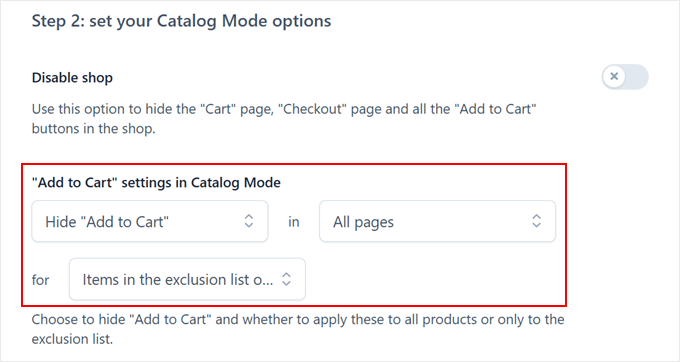
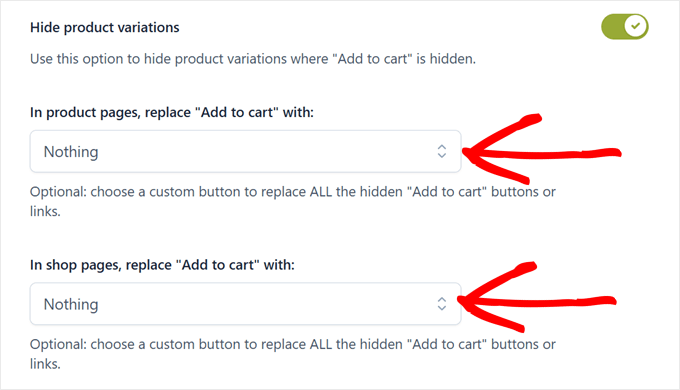
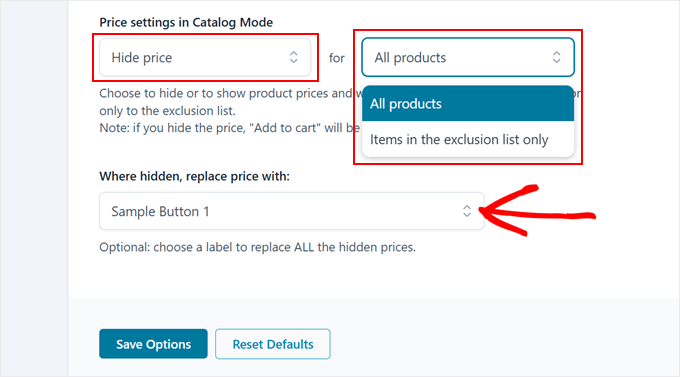
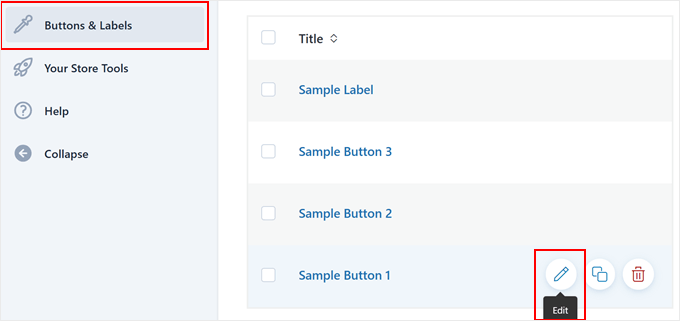
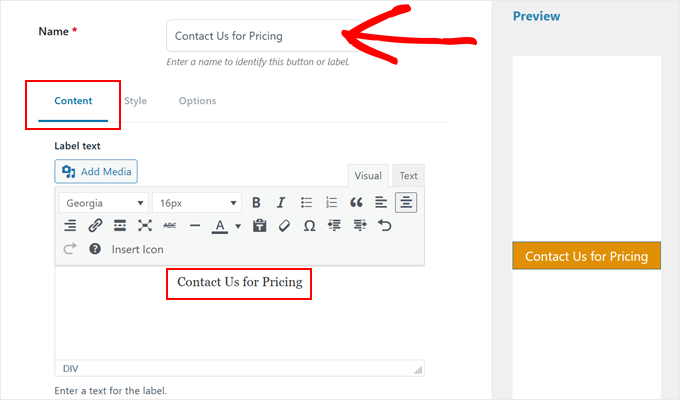
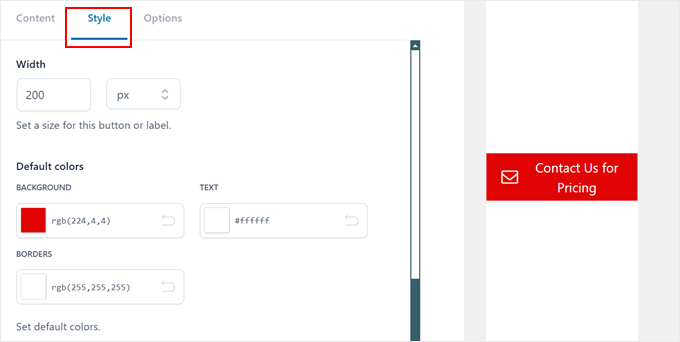
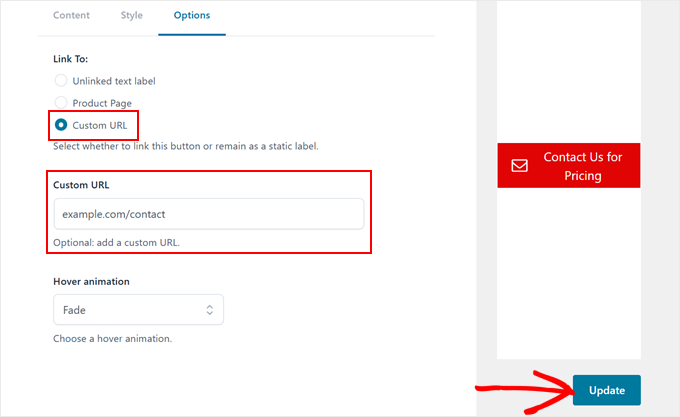
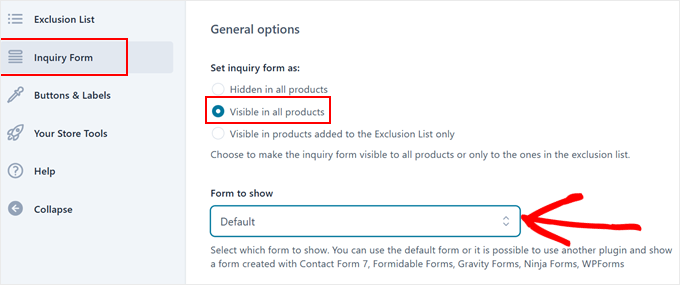
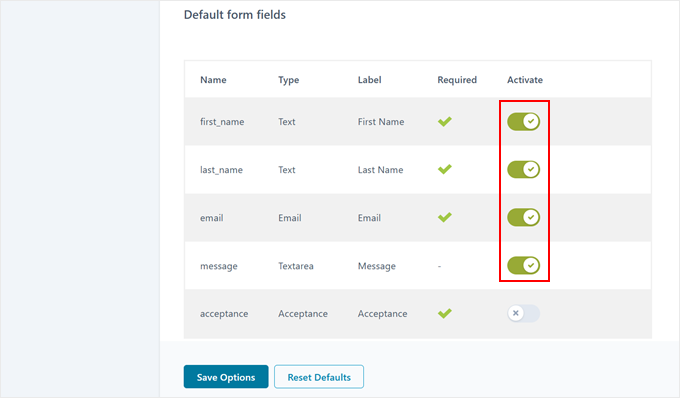
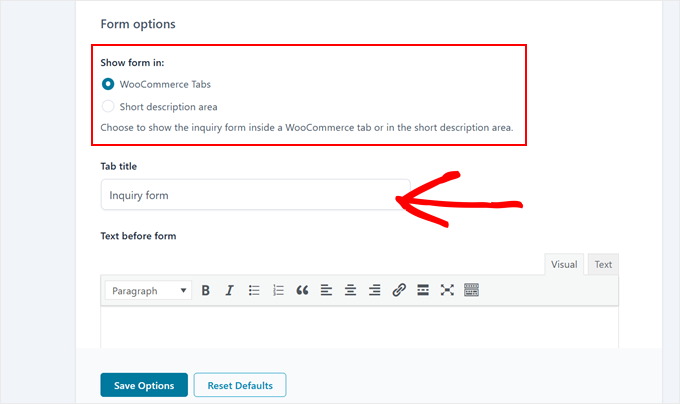


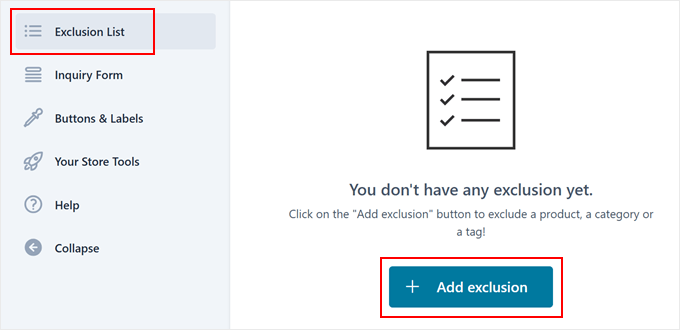
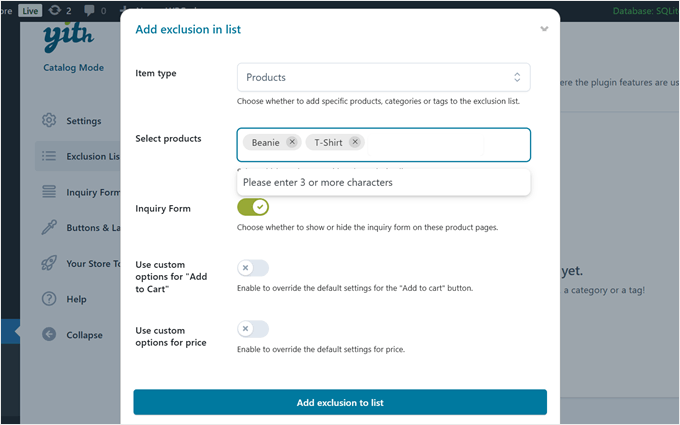
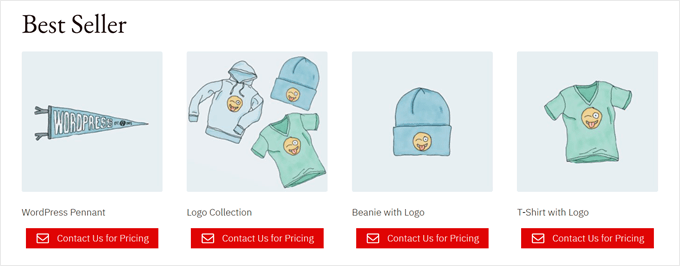


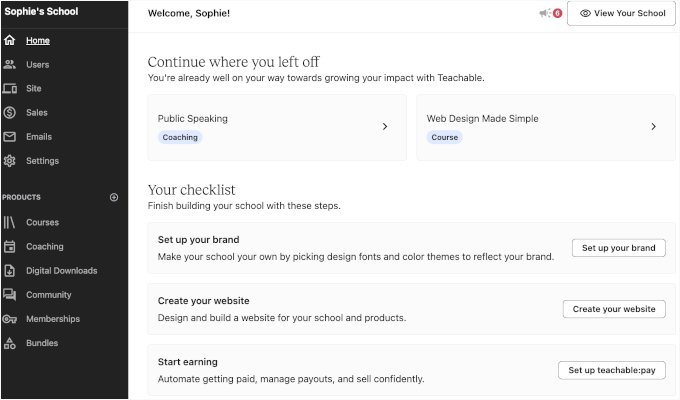
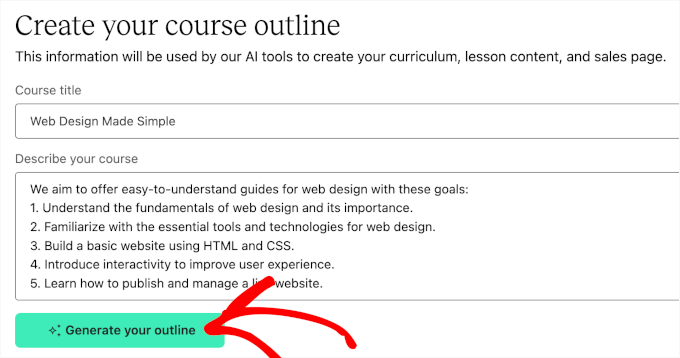
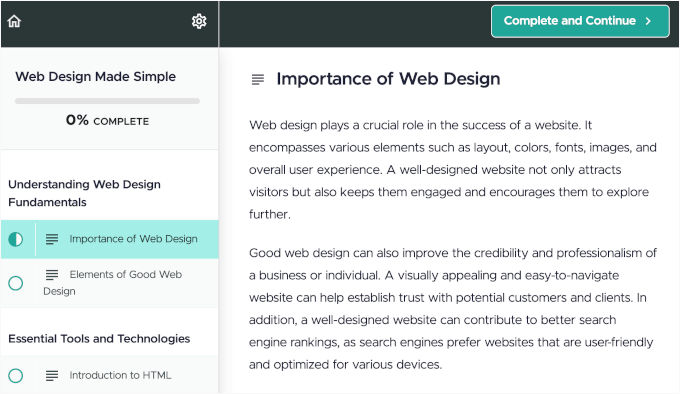

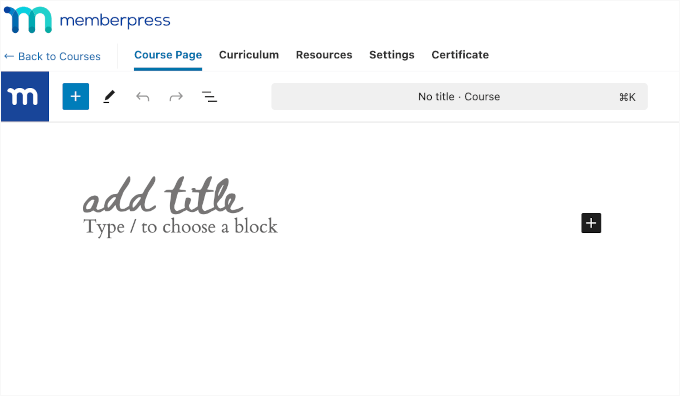
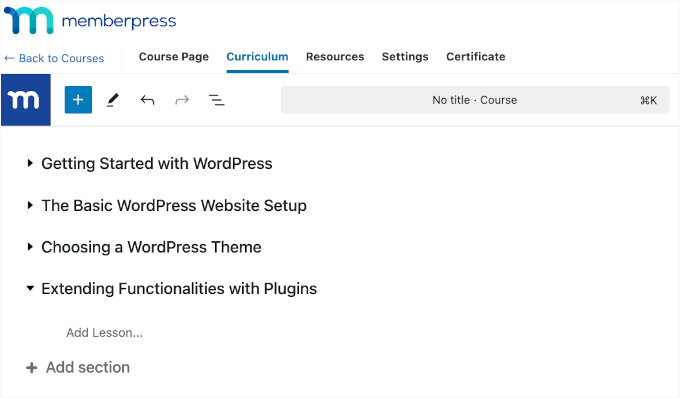
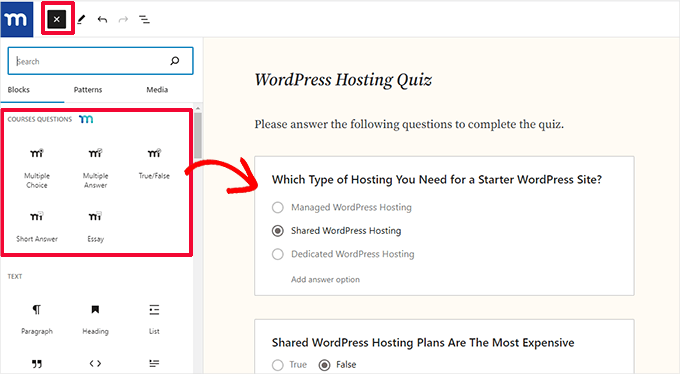
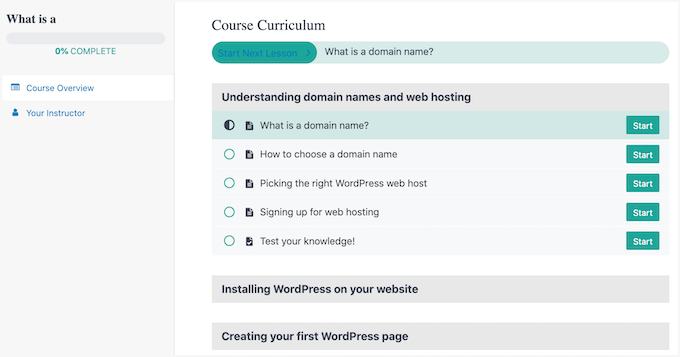
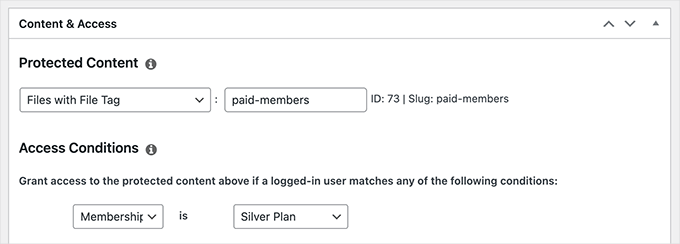
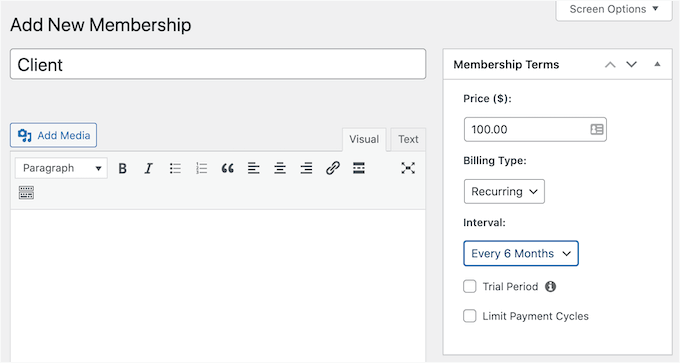
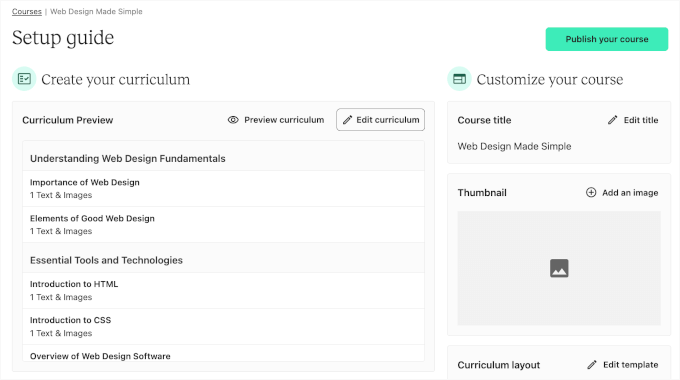
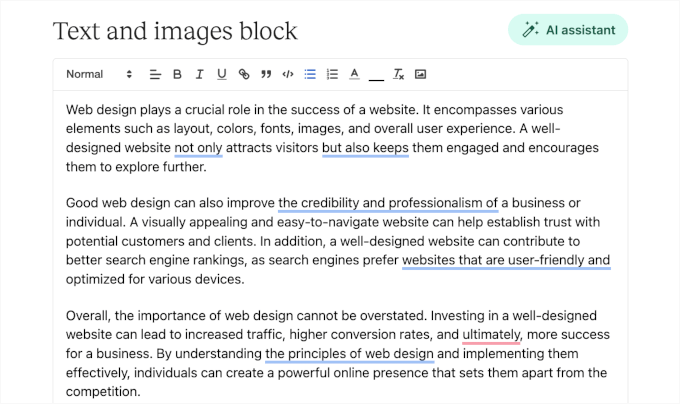
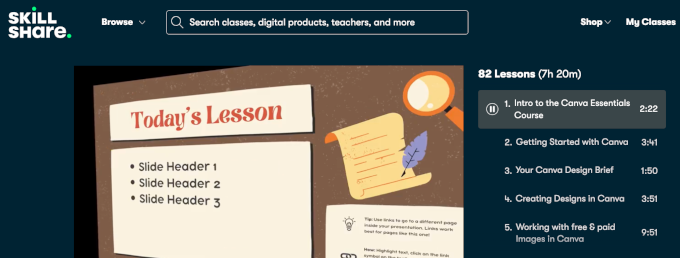
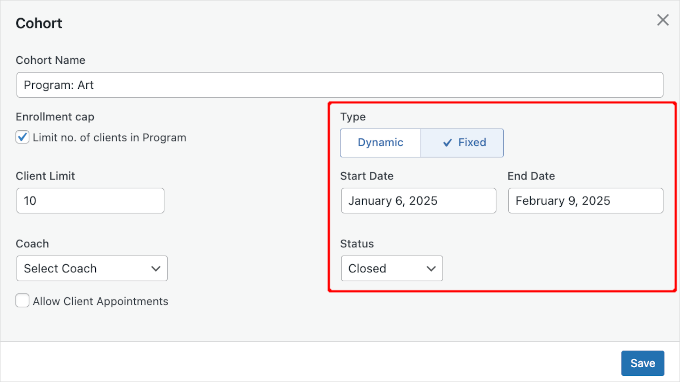
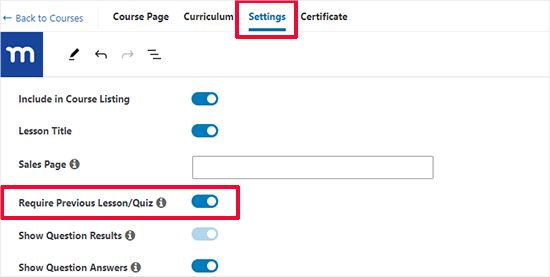
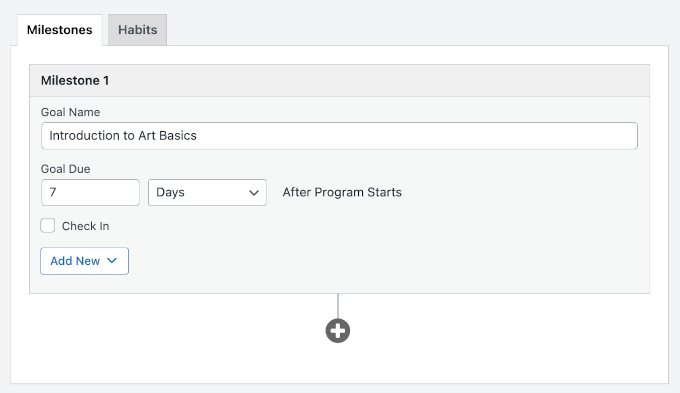
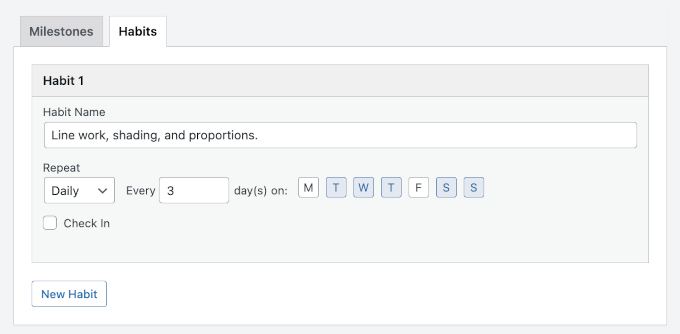
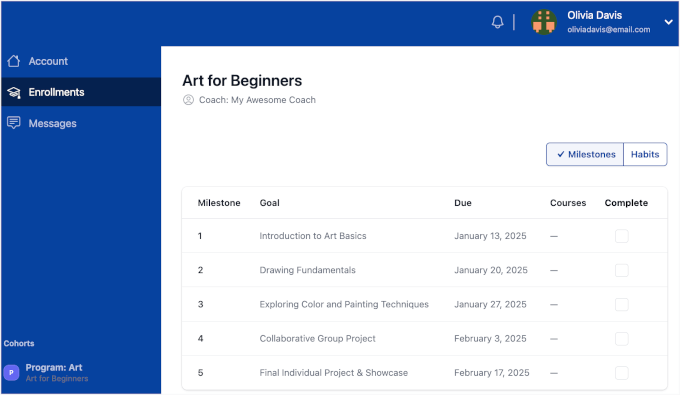
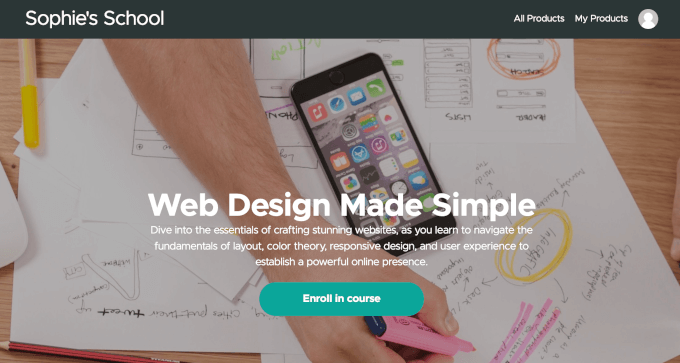


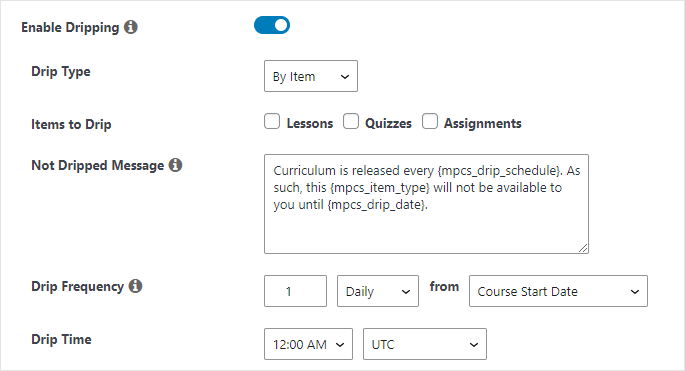
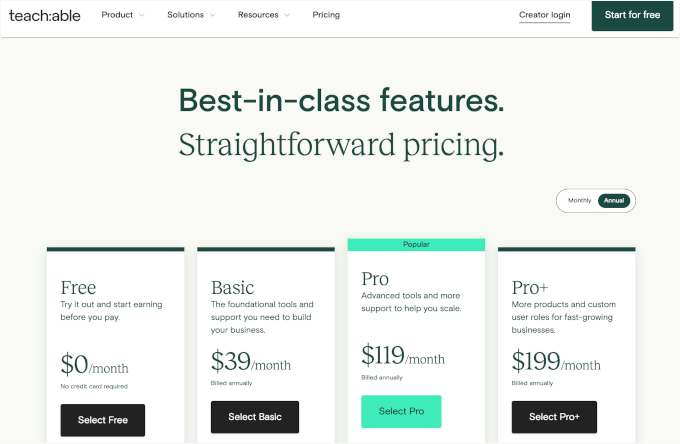


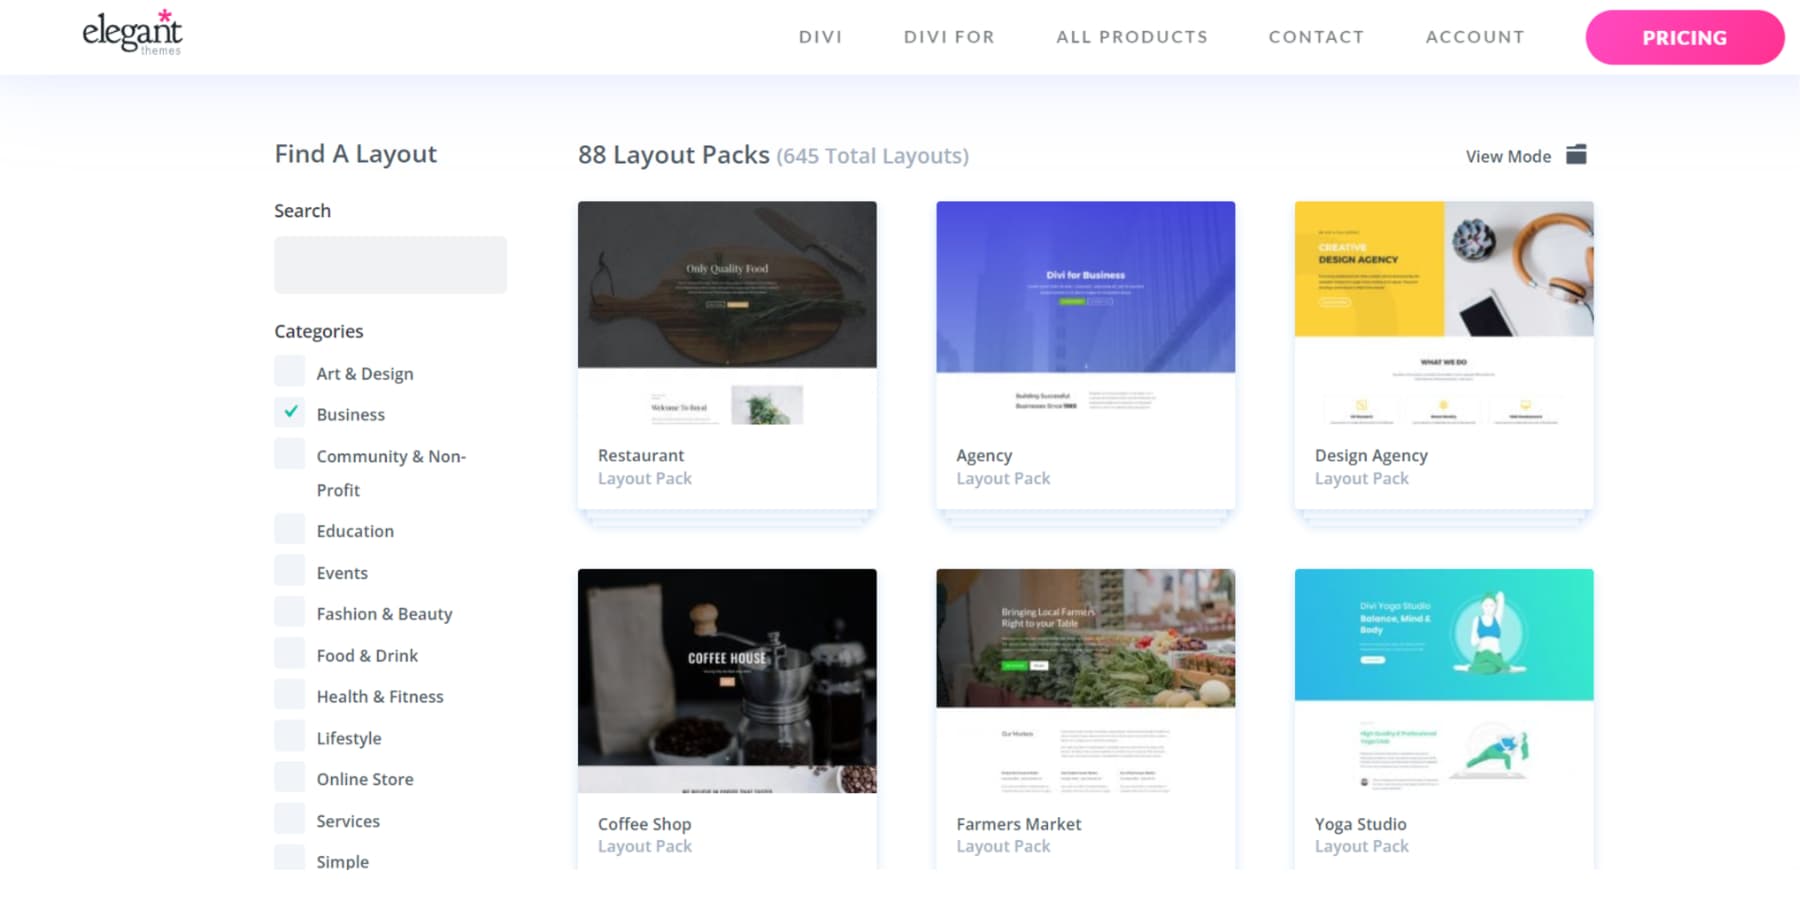
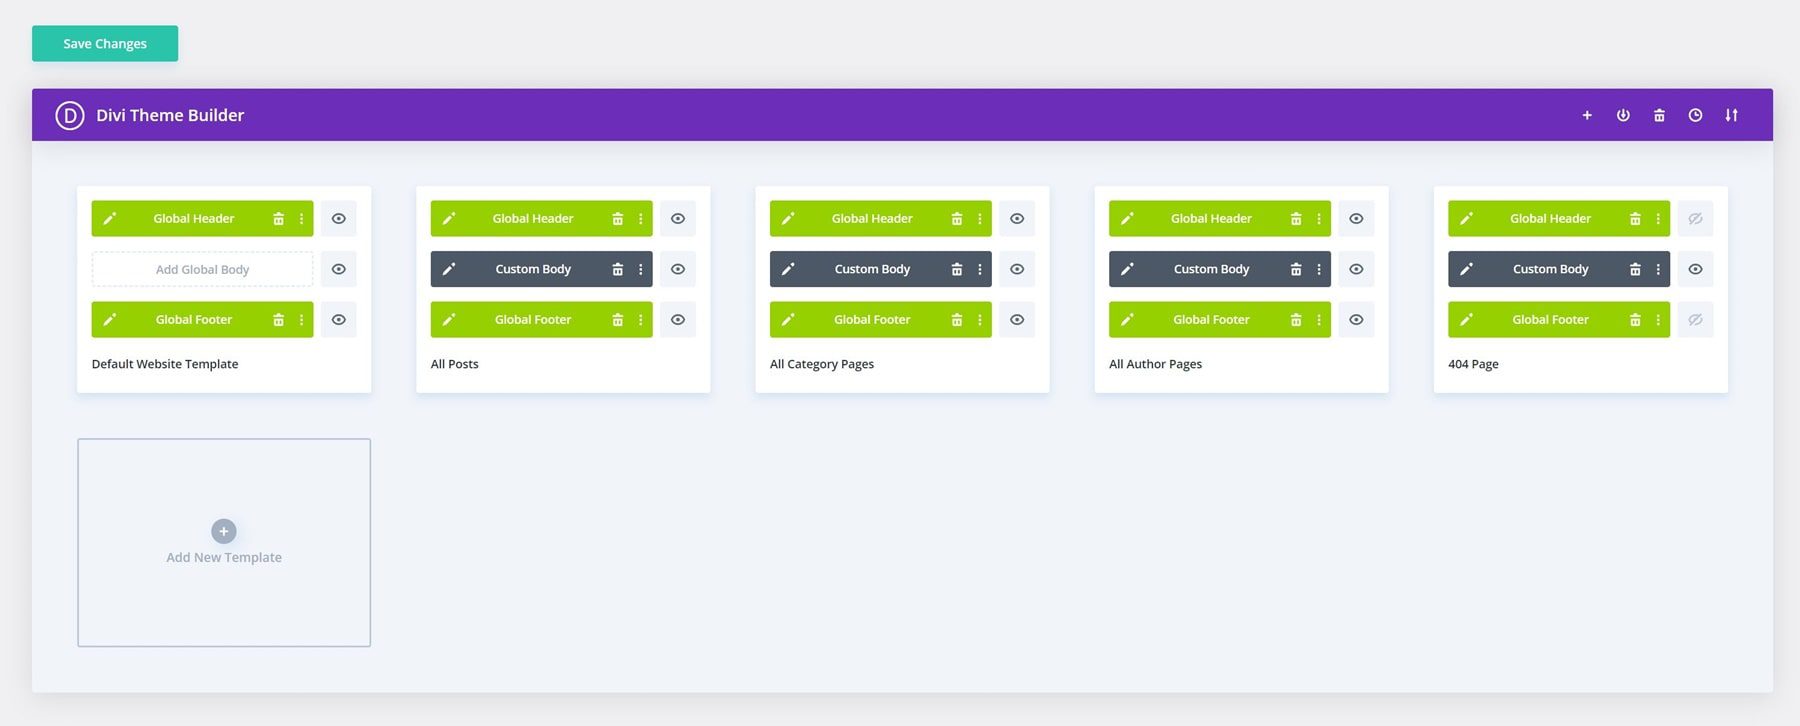
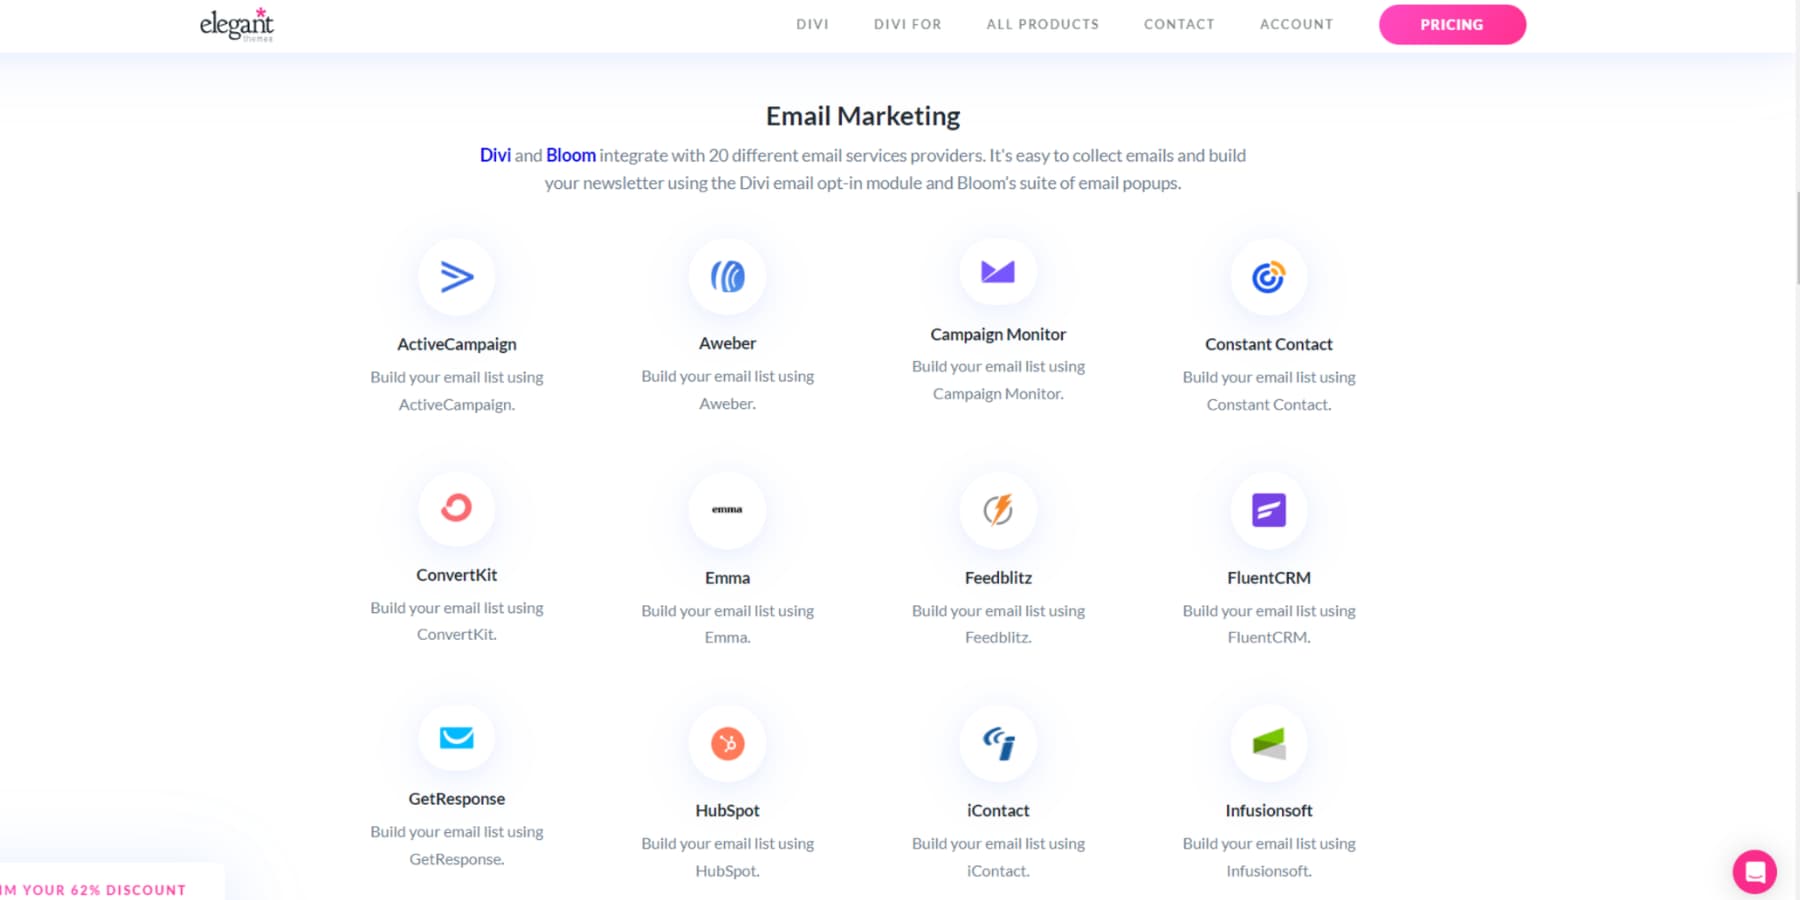
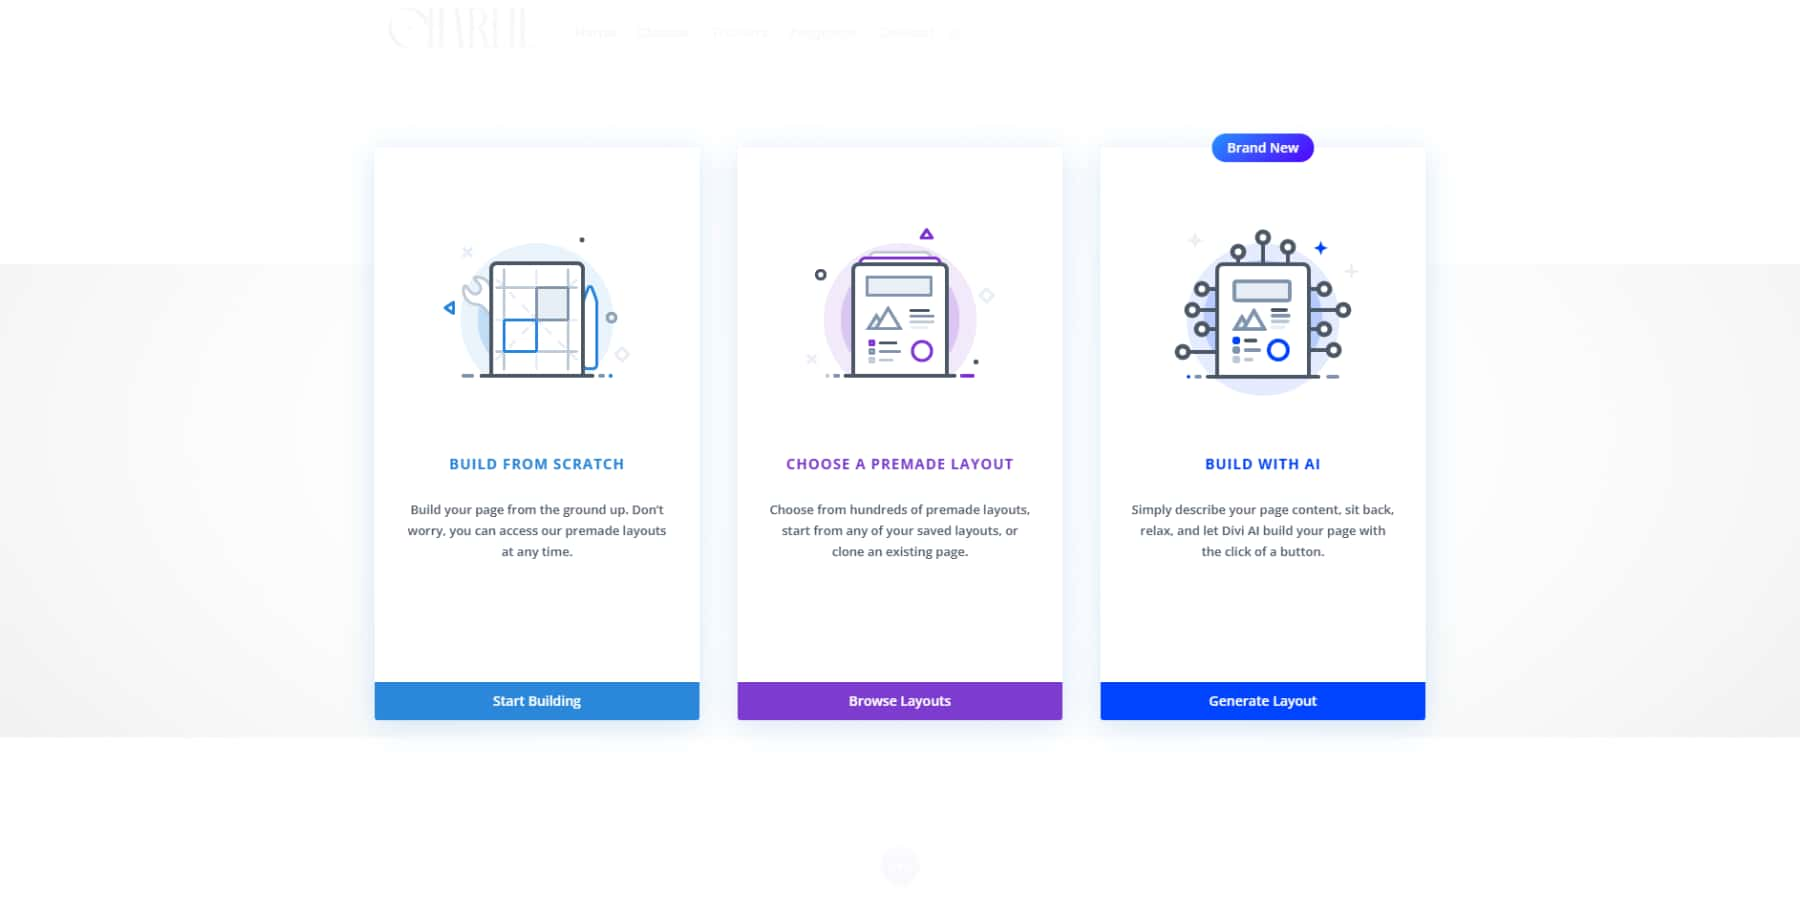

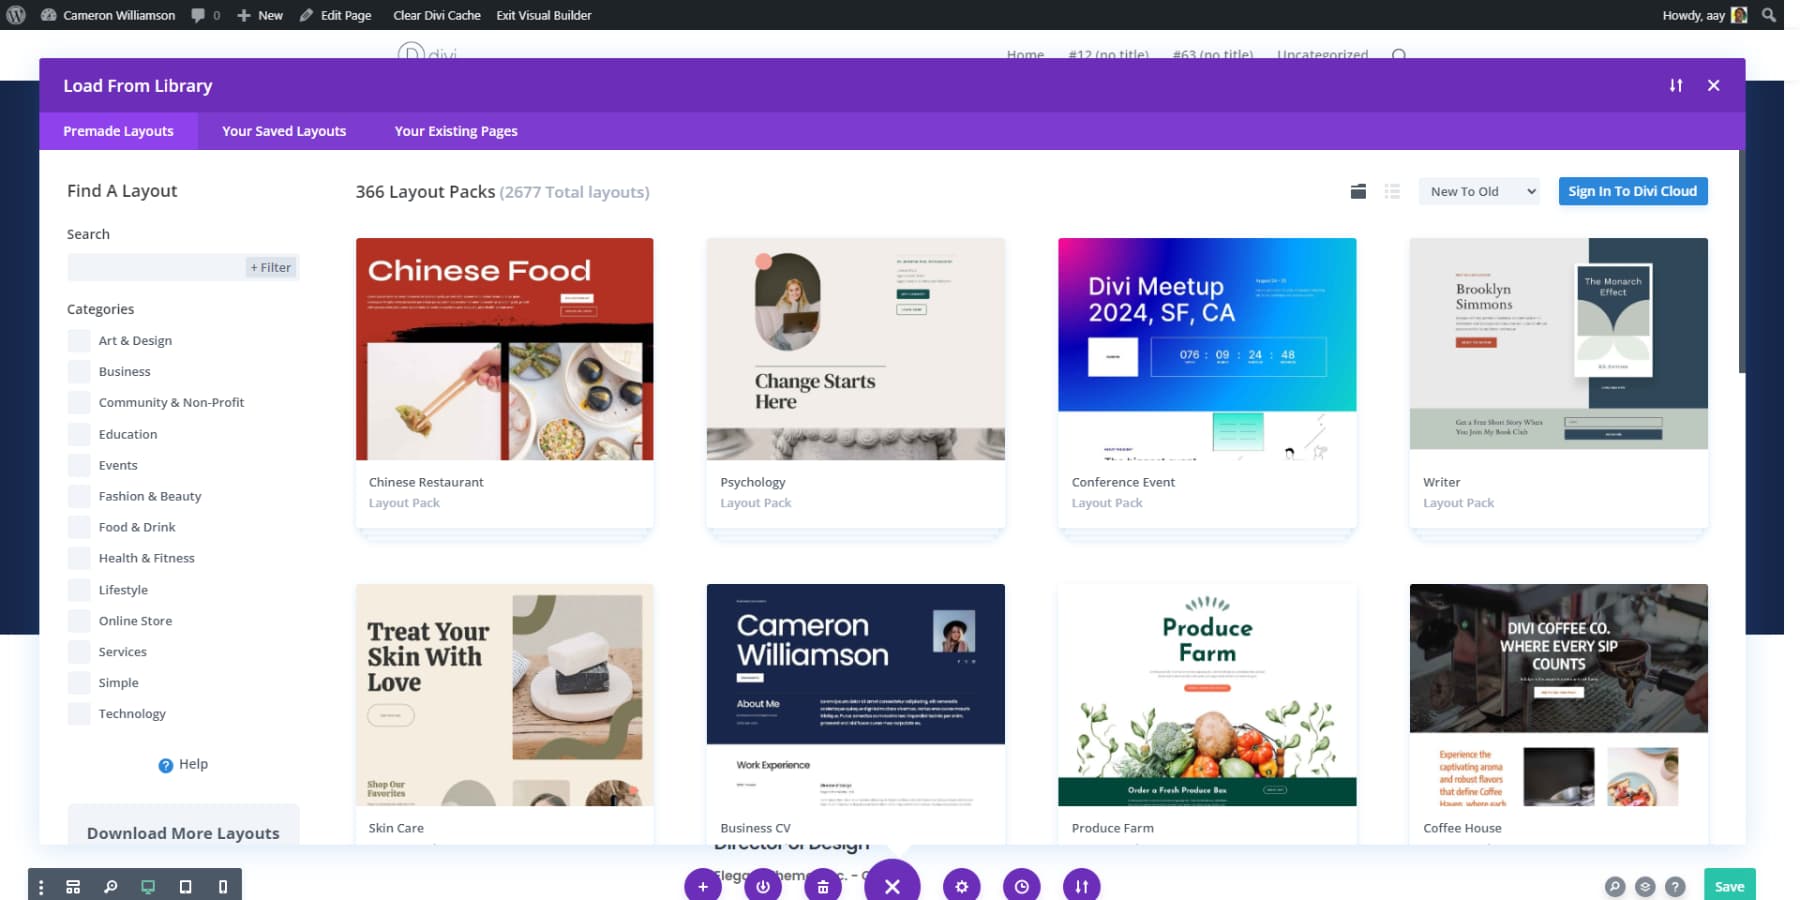
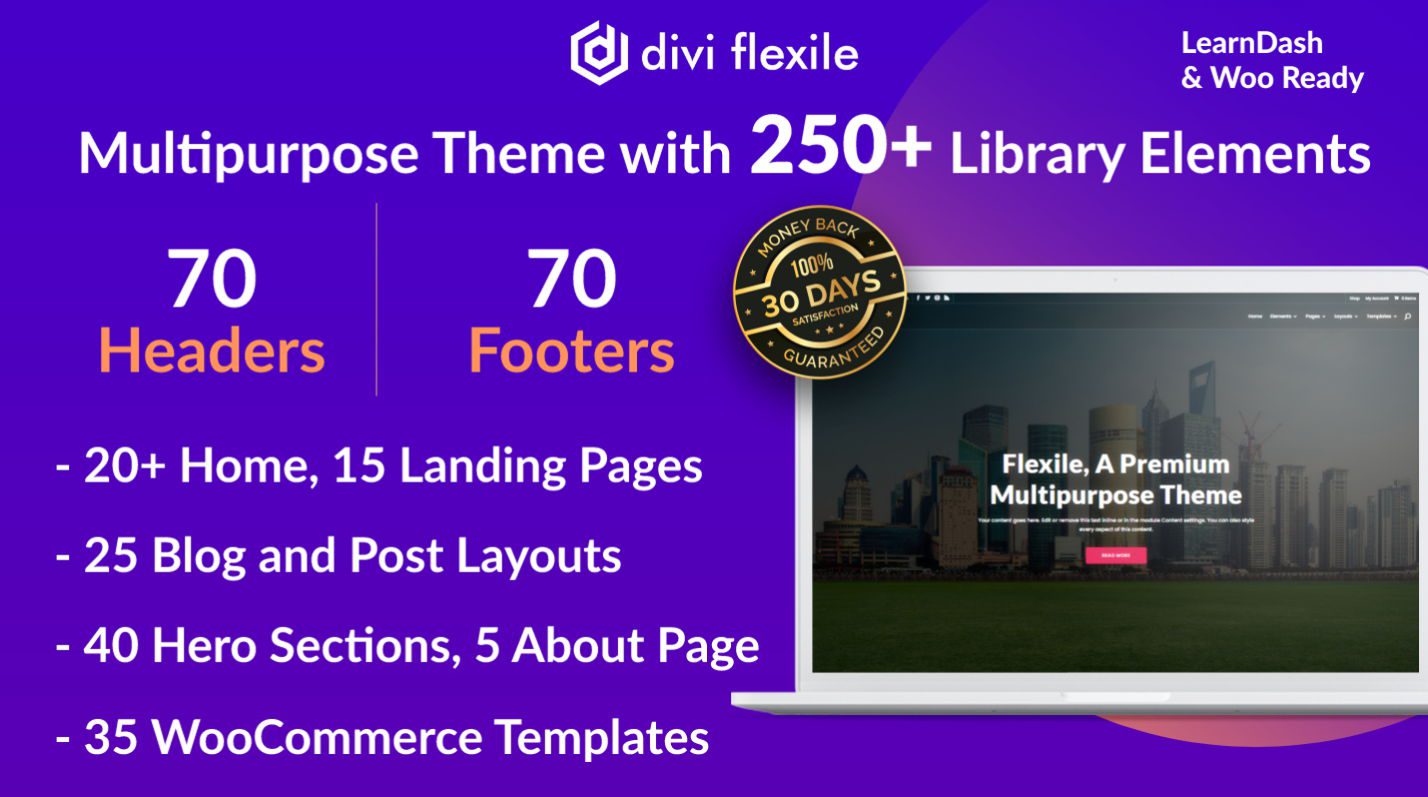

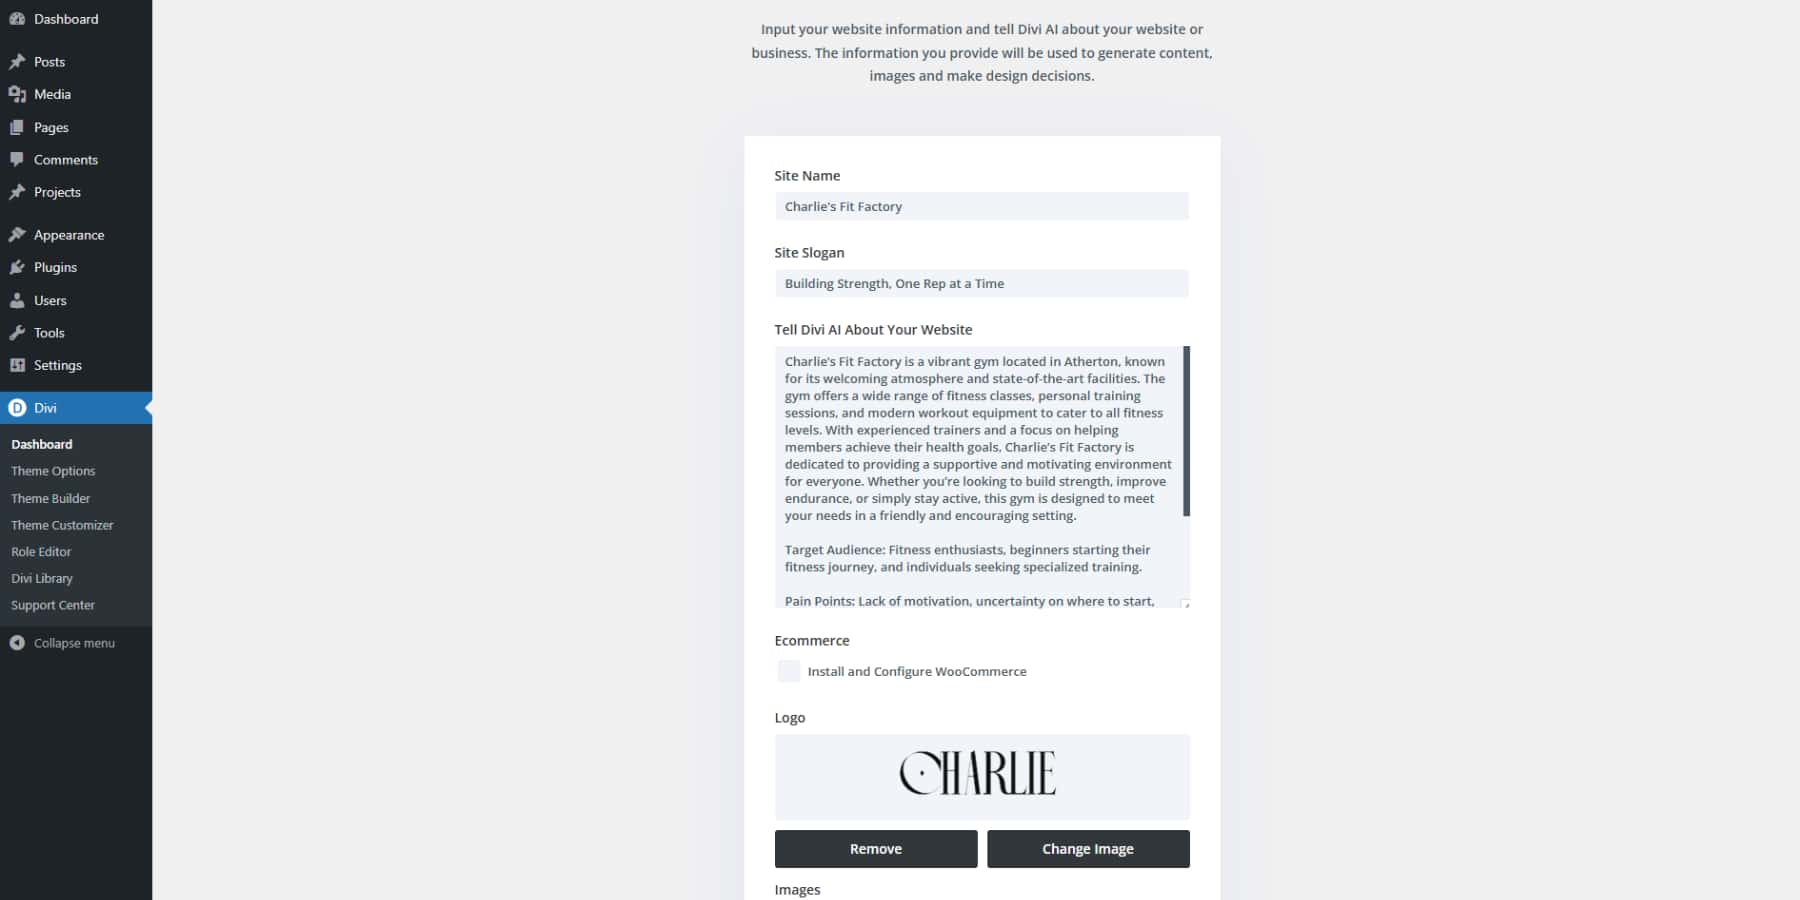


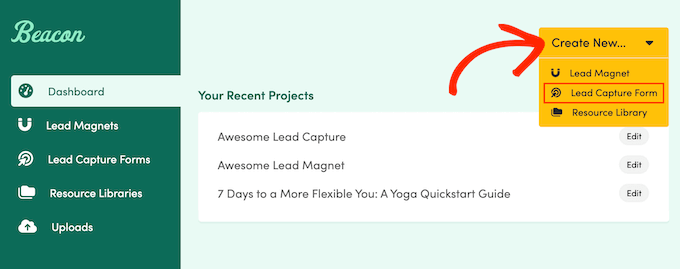
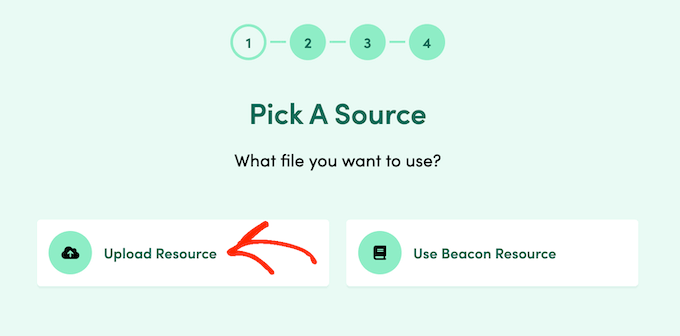
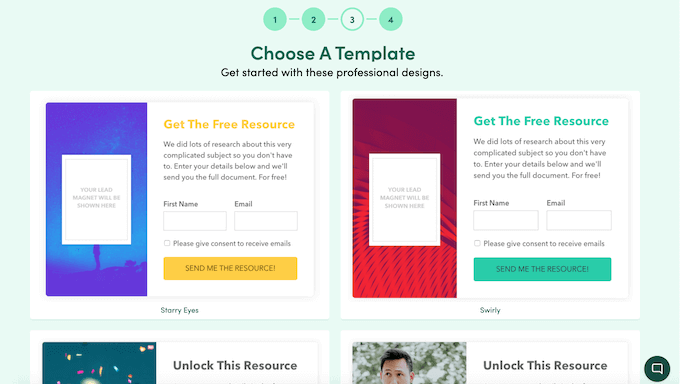
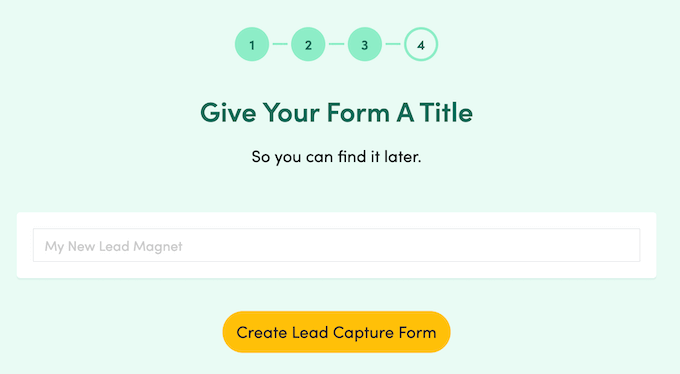
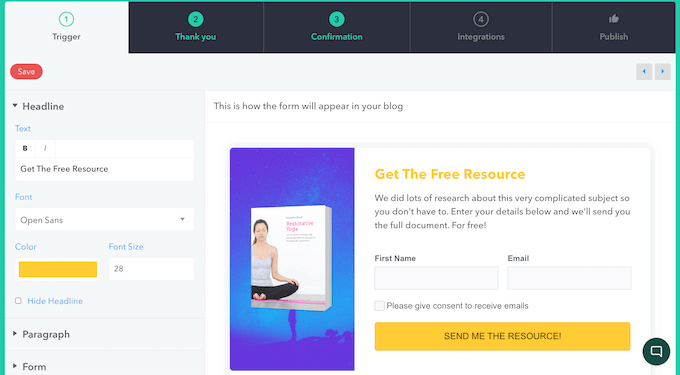
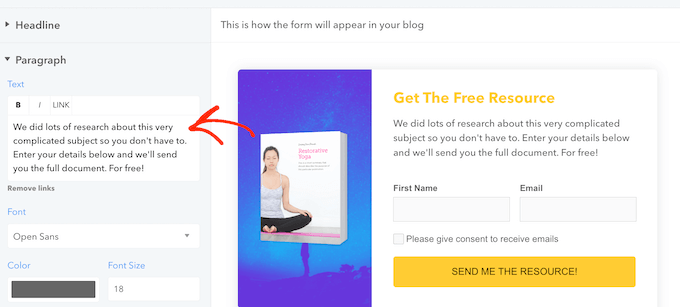
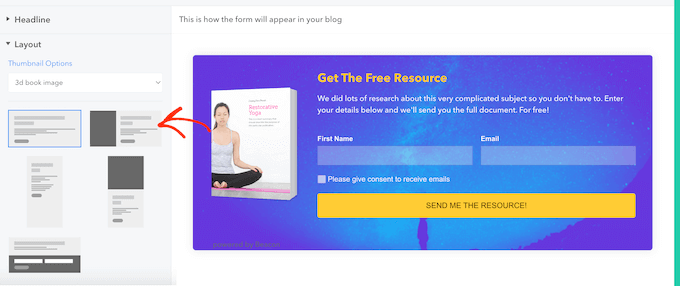
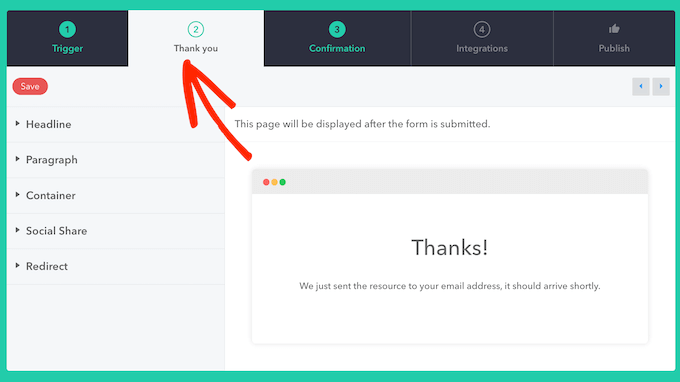
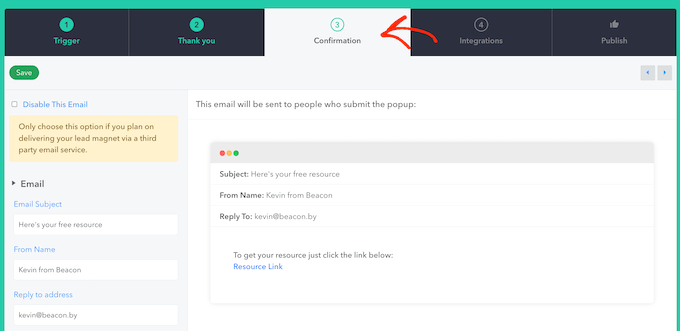
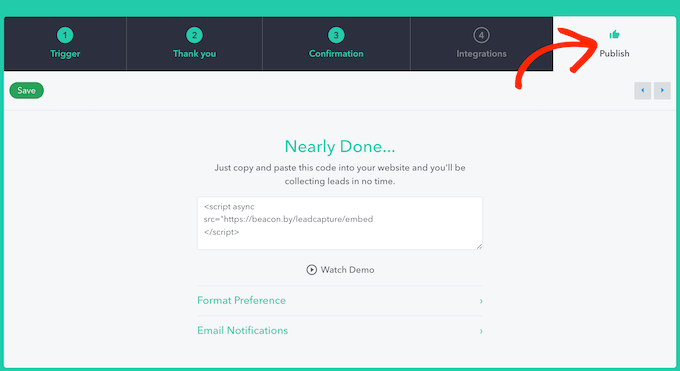
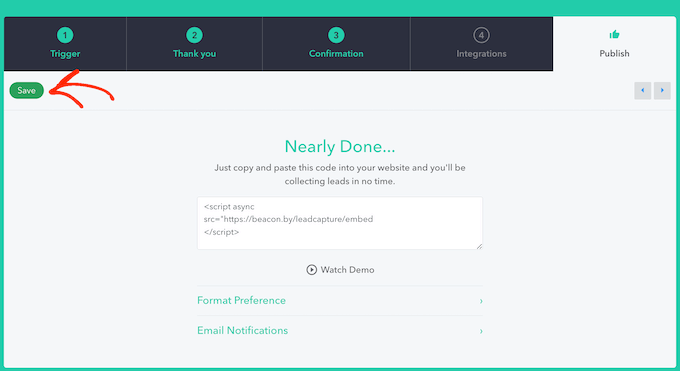

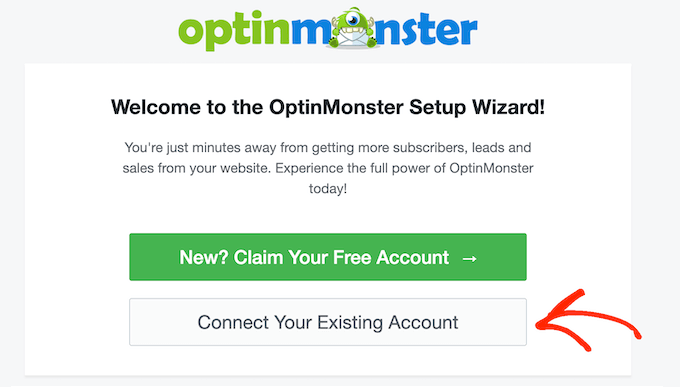
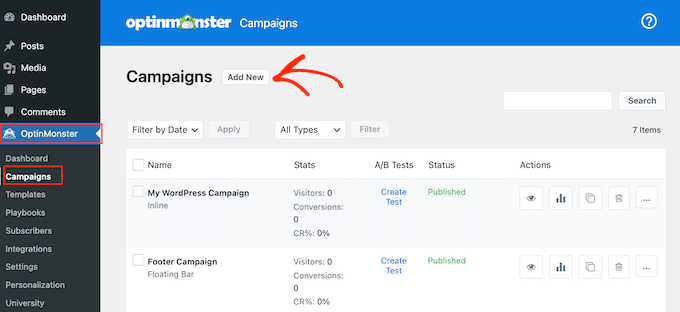

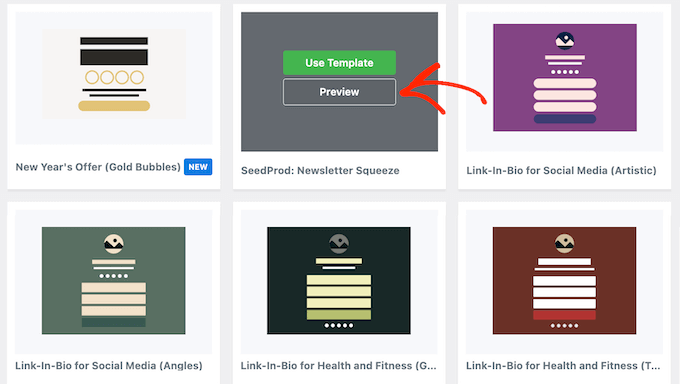
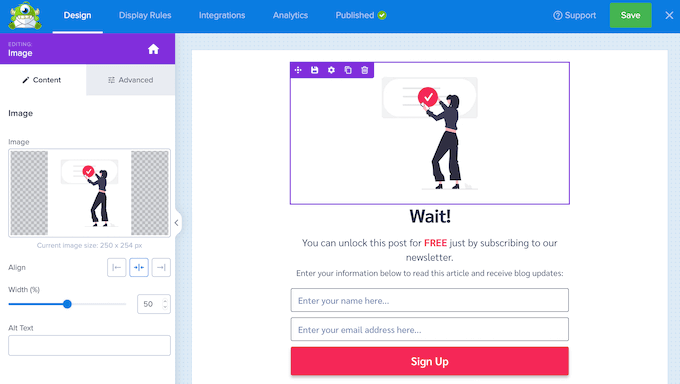
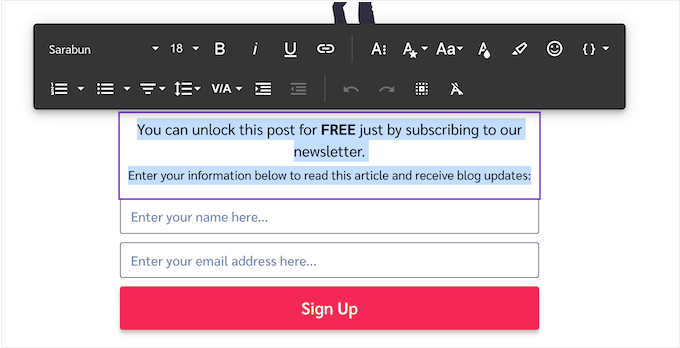

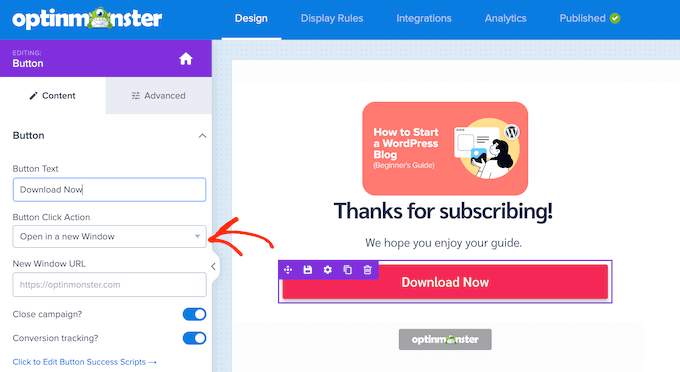
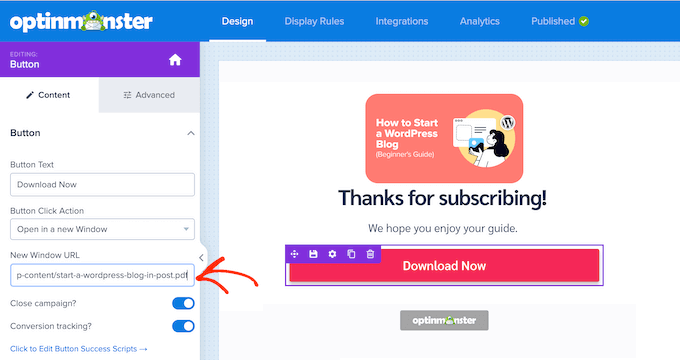
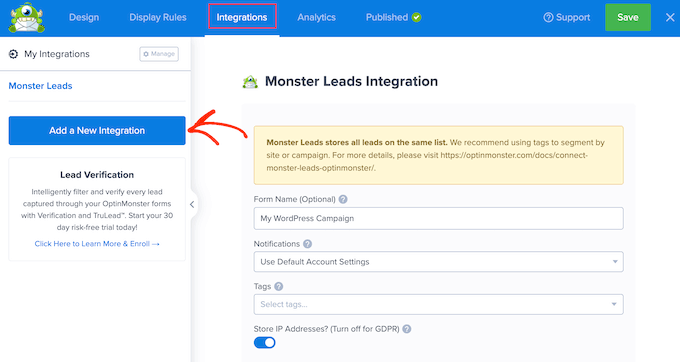
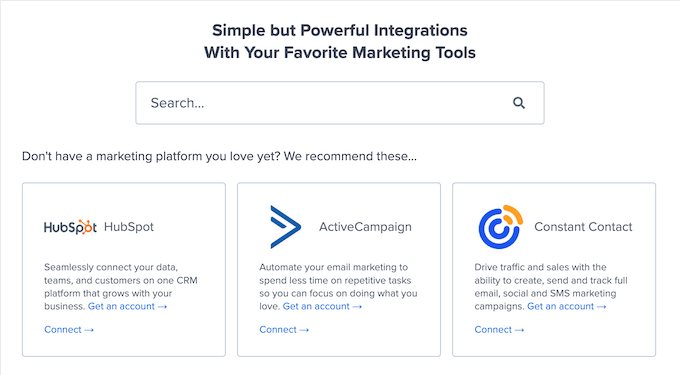
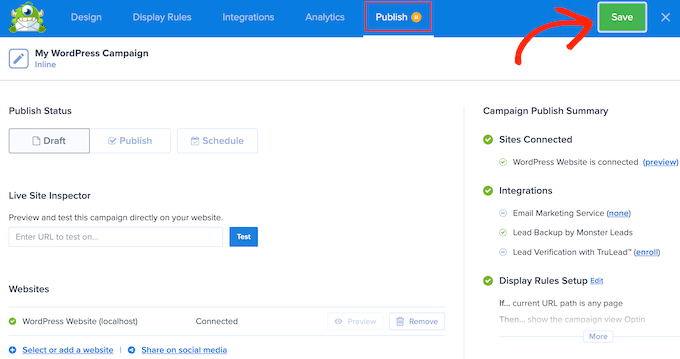


![Download Now: Free Marketing Plan Template [Get Your Copy]](https://worldproductreview.com/wp-content/uploads/2024/08/Come-puoi-usare-i-omaggi-per-ottimizzare-la-tua-era-150x59-1.png)