wordpress forms are essential for connecting with visitors and emerging your audience. Whether or not or now not you’re together with a marginally form, survey, or feedback form, embedding it into your website online is a to hand information a coarse and easy way to gain wisdom from visitors.
We use forms right through all our duties, from contact pages to e-newsletter subscriptions and even checkout forms. Along the way in which during which, we’ve were given discovered all the steps needed to embed a wordpress form, and we’re appropriate right here to walk you by means of all the process from start to finish.
In this knowledge, we will show you tips about tips on how to embed forms the usage of the preferred wordpress form builders.
<h4 class=”wp-block-heading” id=”aioseo-what-is-a-wordpress-form-and-why-is-it-important”><span class=”ez-toc-section” id=”what-is-a-wordpress-form-and-why-is-it-necessary”/>What Is a wordpress Form, and Why Is It Necessary?
A wordpress form is a tool for amassing precious wisdom and insights in your website online. It we could visitors input their details, comparable to their establish, e-mail deal with, and feedback.
Forms have many use cases. For instance, you’ll have the ability to create a marginally form for allowing consumers to achieve you and construction an e mail listing, a survey for accumulating opinions, or a registration form for events.
You’ll have the ability to moreover use forms for booking appointments or accumulating donations. Some corporations moreover use forms to care for purchaser strengthen requests.
Without forms, chances are high that you’ll fail to spot probabilities to interact with visitors. So, together with forms in your wordpress website online is a smart switch for any website online owner.
<h4 class=”wp-block-heading” id=”aioseo-how-to-embed-forms-in-wordpress“><span class=”ez-toc-section” id=”find-out-how-to-embed-forms-in-wordpress“/>Find out how to Embed Forms in wordpress
Inside the following sections, we will walk you by means of each step with the intention to upload forms in your wordpress site. For those who’re considering a selected form type, you’ll have the ability to click on at the link to skip ahead inside the article:
Ready? Let’s get started.
<h4 class=”wp-block-heading” id=”aioseo-1-how-to-embed-wpforms-into-your-wordpress-site”><span class=”ez-toc-section” id=”1-find-out-how-to-embed-wpforms-into-your-wordpress-internet-website-online”/>1. Find out how to Embed WPForms Into Your wordpress Internet website online
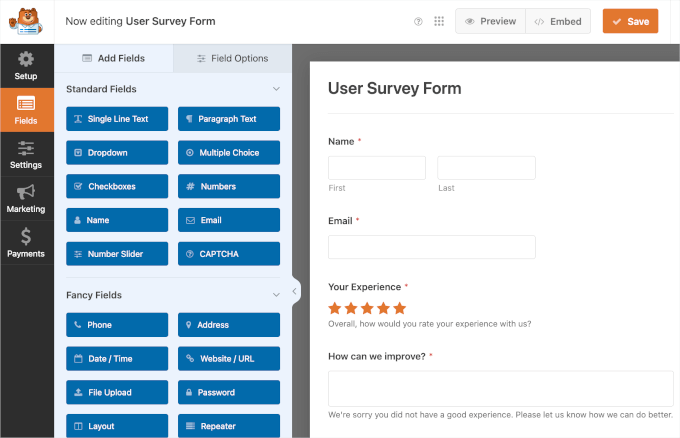
WPForms is the best multipurpose form builder on the market. It’s probably the most the most important widespread, too, with over 6 million vigorous consumers.
With this instrument, you’ll have the ability to use any of its 2000+ ready-made, customizable templates to create any form you want.
At the side of touch paperwork, WPForms mean you can merely assemble simple to additional difficult forms, like:
With regards to embedding WPForms, you’ll have the ability to each use a WPForms block or a shortcode.
So, let’s arrange and activate WPForms and check out this together. If you need be in agreement, then you definitely’ll have the ability to talk over with our knowledge on tips on how to set up a wordpress plugin.
Then, you’ll have the ability to follow our step-by-step knowledge on tips on how to create a touch shape in wordpress.
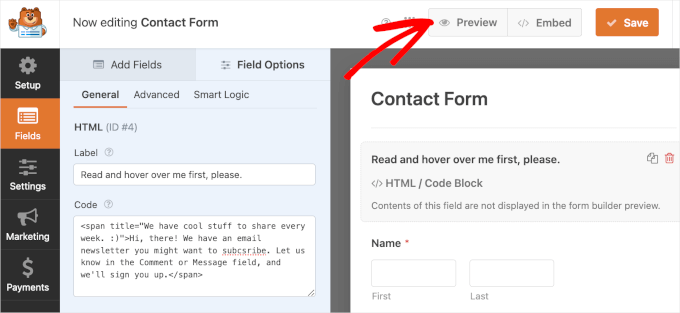
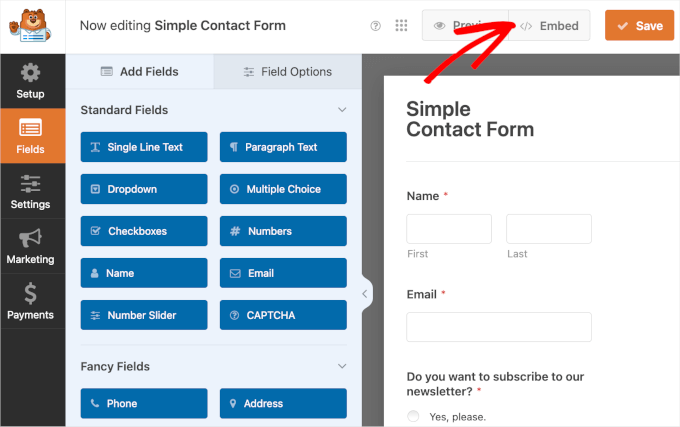
Embedding WPForms Forms The usage of the WPForms Block
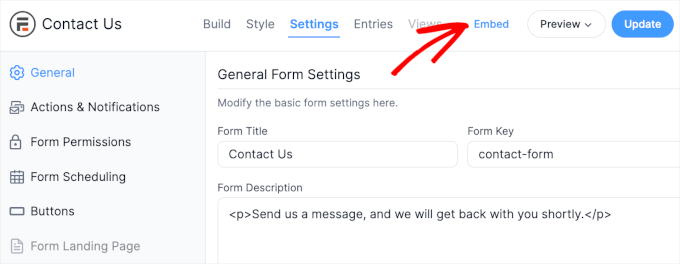
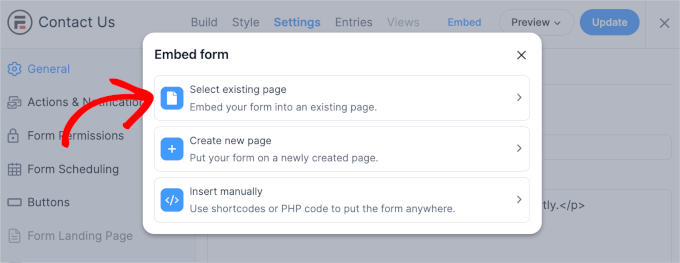
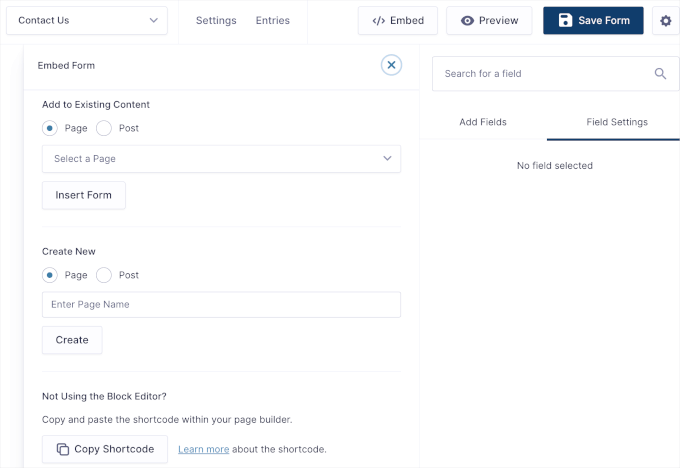
Once the form is in a position to submit, simply click on at the ‘Embed’ button inside the form builder with the intention to upload the form in your web internet web page the usage of a WPForms block.
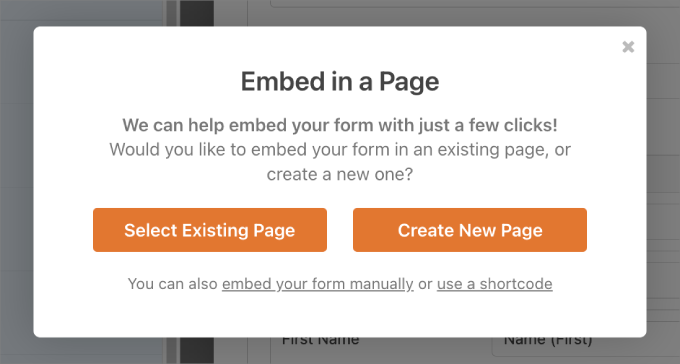
This will from time to time open a popup window where you’ll be ready to select an provide internet web page or create a brand spanking new internet web page for the form.
For those who click on at the ‘Make a selection Present Internet web page’ button, you’ll see a dropdown menu with all the available pages in your website online. And in case you click on on ‘Create New Internet web page,’ then you definitely definately’ll see a ‘Identify Your Internet web page’ field to fill out.
In the event you’ve decided on a internet web page or named your new internet web page, you’ll have the ability to click on at the ‘Let’s Transfer!’ button.
You’ll then be redirected to the internet web page’s block editor.
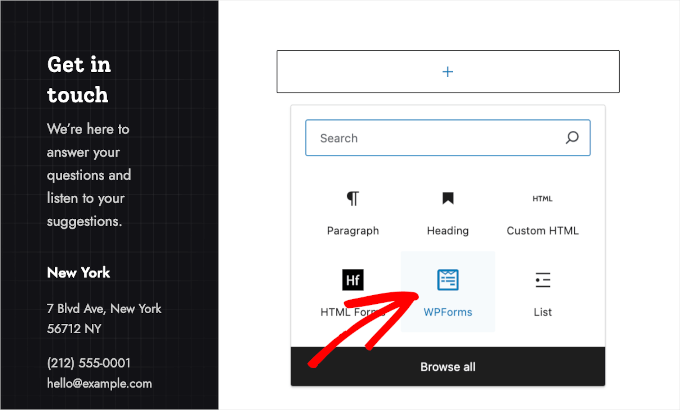
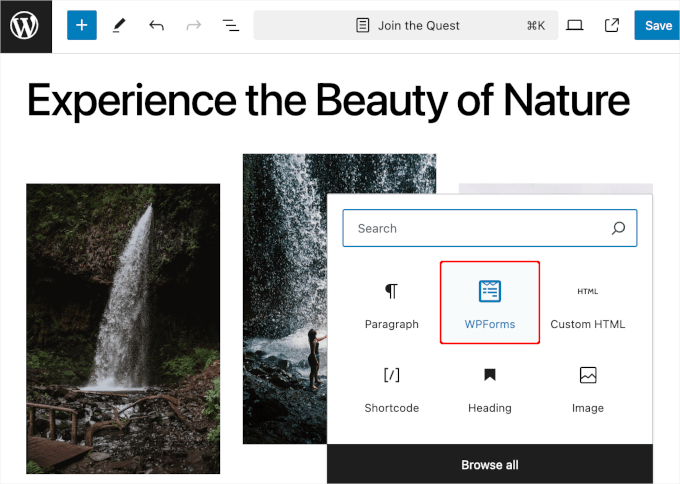
From appropriate right here, you’ll have the ability to click on at the ‘+’ button and search for the WPForms block.
The next move is to open the dropdown inside the WPForms block and make a selection the form you want to embed.
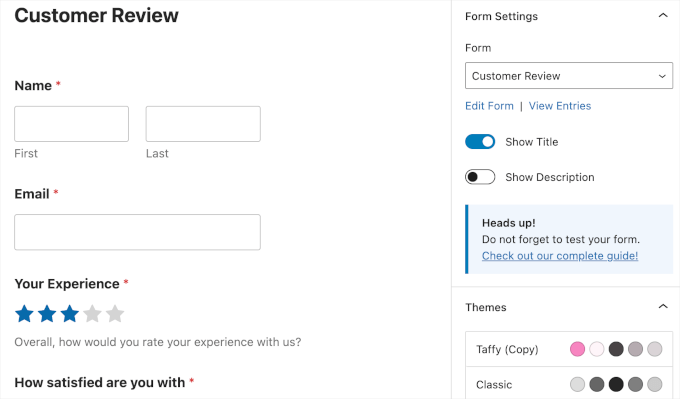
Once you select a sort, WPForms will load it inside the block editor.
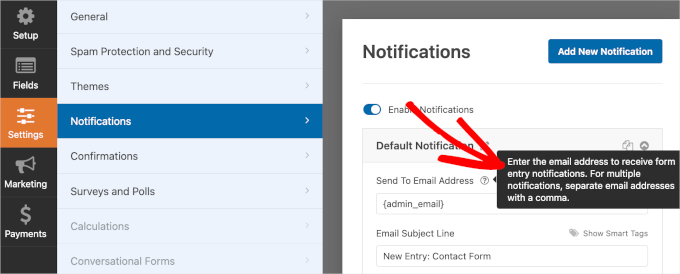
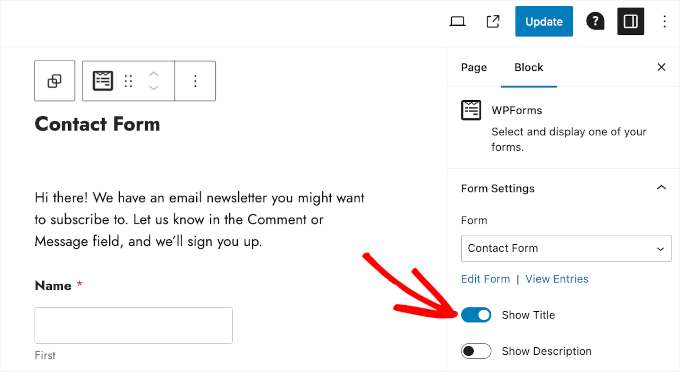
After that, chances are high that you’ll want to fiddle with the ‘Form Settings’ inside the right-hand panel.
By means of default, WPForms doesn’t load your form identify. So, chances are high that you’ll want to switch on the ‘Form Determine’ selection with the intention to upload the form identify and gives visitors additional context. For those who write a sort description, you’ll have the ability to moreover turn the selection on.
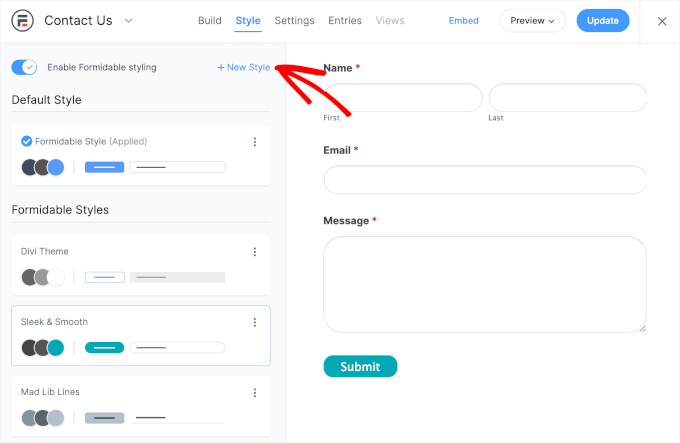
Even upper, you’ll have the ability to taste your shape with a theme to test in conjunction with your site’s general appear and feel.
When you are happy with how the form turns out, you’ll have the ability to go ahead and click on on ‘Save.’
And that’s the way in which you embed WPForms the usage of a WPForms block.
Embedding WPForms Forms The usage of a Shortcode
In a different way to embed WPForms is by the use of the usage of a shortcode.
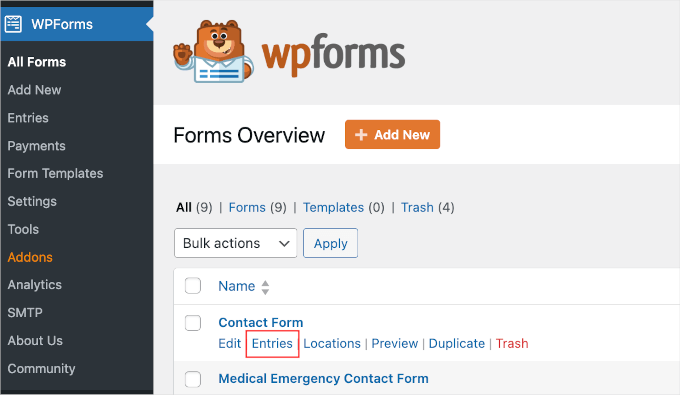
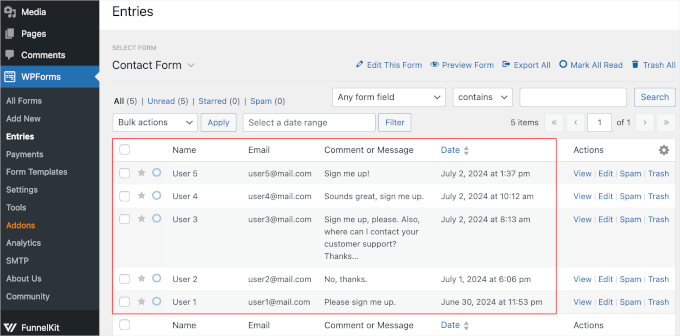
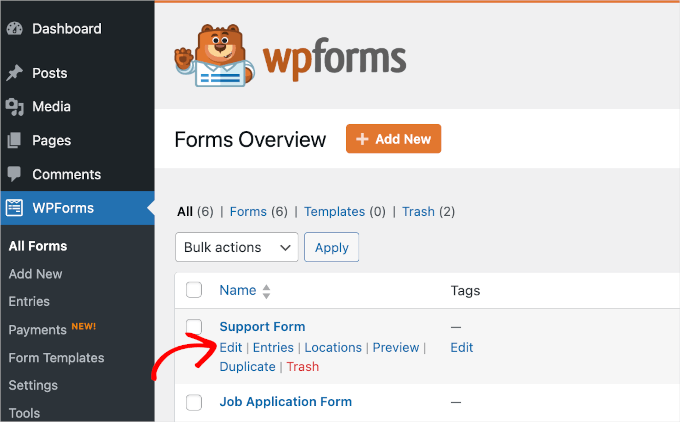
To check out this, you’ll want to head over to WPForms » All Forms to go looking out the ‘Shortcode’ column for each form.

From appropriate right here, simply copy the form’s shortcode you want to embed. For instance, we will copy the shortcode of our ‘Purchaser Overview’ form.
The next move is to open the internet web page or put up where you want to embed the form. To do so, go to ‘Pages’ or ‘Posts.’ Then, hover over one in all them and click on on ‘Edit’ when it sounds as if.
This will from time to time send you to the internet web page or put up’s editor.
To embed the form, let’s click on at the ‘+’ button and search for the ‘Shortcode’ block.
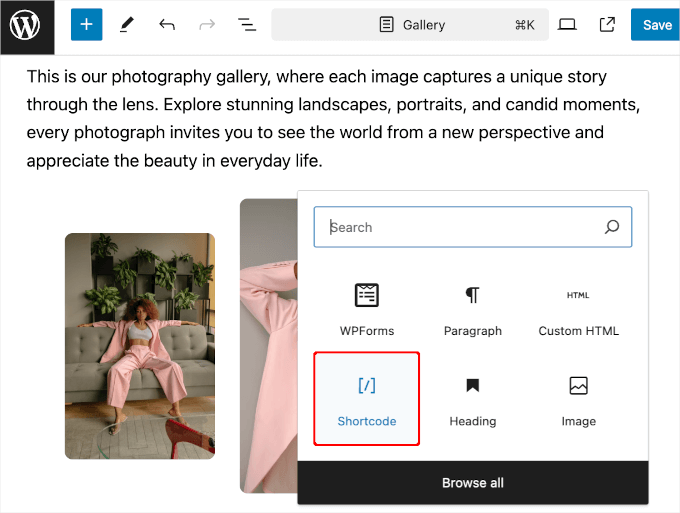
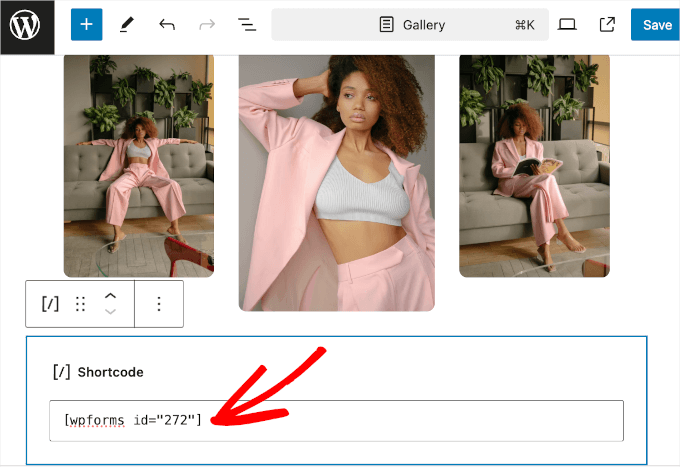
As quickly because the block is added, you’ll have the ability to paste your WPForms form’s shortcode into the text field.
Proper right here’s what it could appear to be:
The block editor won’t load the form inside the live enhancing house.
So, go ahead and save the changes first, then click on at the ‘View Internet web page’ button when it sounds as if inside the bottom left corner.
<h4 class=”wp-block-heading” id=”aioseo-2-how-to-embed-donation-forms-in-wordpress“><span class=”ez-toc-section” id=”2-find-out-how-to-embed-donation-forms-in-wordpress“/>2. Find out how to Embed Donation Forms in wordpress
Together with a donation form in your website online makes it easy for people to strengthen your purpose. Visitors are a lot more more likely to donate when they see a clear and simple approach to do so.
One of the most best possible tactics to embed donation forms in wordpress is to use the Charitable plugin. This widespread instrument implies that you’ll create and customize a few fundraising campaigns with over 100 ready-made templates.

So, let’s arrange and activate Charitable to create your donation form. If you need be in agreement, then you definitely’ll have the ability to see our knowledge on tips on how to set up a wordpress plugin.
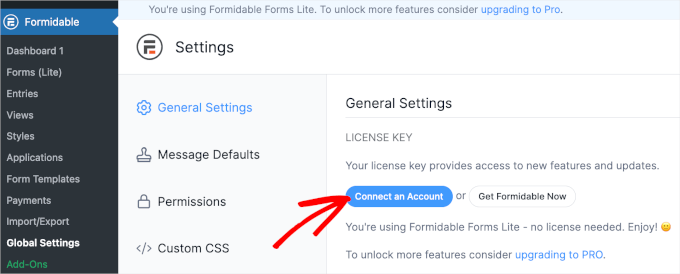
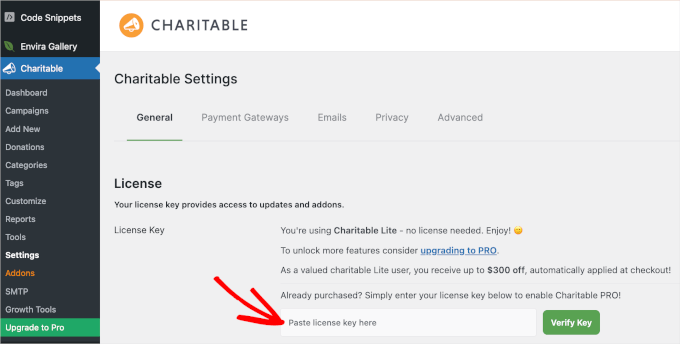
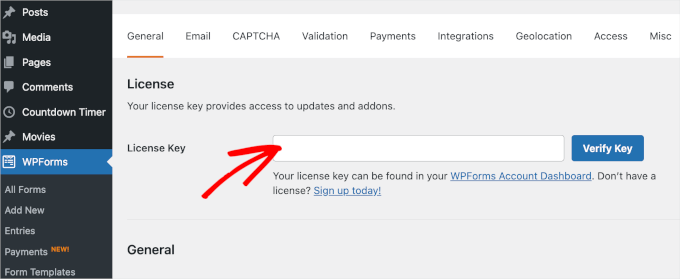
Upon activation, let’s head over to Charitable » Settings to show at the Skilled license. Simply paste your license key and click on on ‘Read about Key’ to begin up the process.
With that accomplished, you’re ready to create your donation form. For detailed instructions, you’ll have the ability to be informed our knowledge on tips on how to create a habitual donation shape in wordpress.
When you’re happy with the way in which during which the form turns out, you’ll have the ability to embed it in a wordpress put up or internet web page.
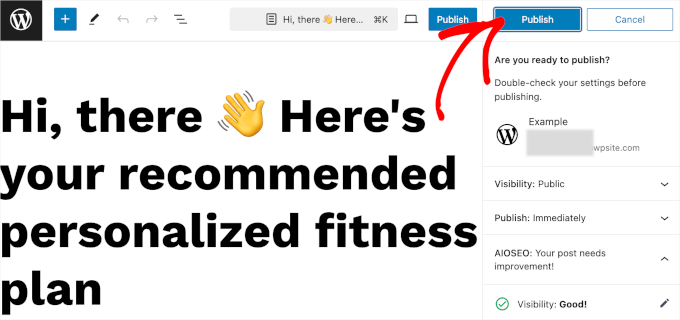
Inside the advertising marketing campaign builder, simply get began by the use of clicking the ‘Draft’ dropdown to open its possible choices. Then, go ahead and click on on ‘Publish,’ and Charitable will robotically create a brand spanking new internet web page in your advertising marketing campaign.

And that’s all there’s to it – you’ve successfully created and published your first Charitable advertising marketing campaign!
Now, in case you discuss with your website online, you’ll have the ability to see your donation form in movement.
That mentioned, you may additionally perceive the ‘Embed Wizard’ link inside the pop-up window or the ‘Embed’ button inside the Charitable editor.
You’ll have the ability to moreover use either one of the ones functions with the intention to upload your donation form to other posts or pages.
To check out this, simply click on at the ‘Embed Wizard’ link or the ‘Embed’ button, and it’ll motive the embed recommended.

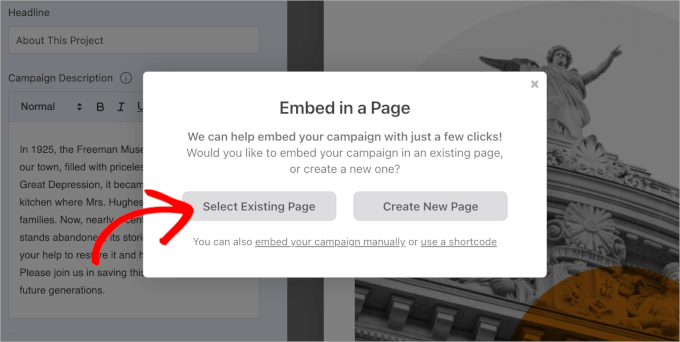
Inside the popup that appears, you’ll need to choose between deciding on an provide internet web page or crating a brand spanking new one.
Since we already have a loyal donation form internet web page, it’s a good idea to select ‘Make a selection provide internet web page.’ Transfer ahead and click on at the button.
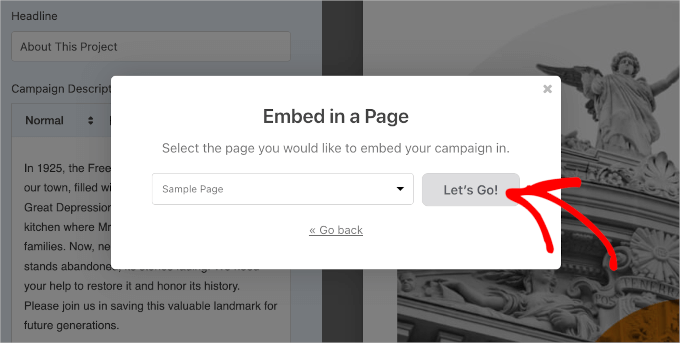
Then, you’ll see a dropdown with a listing of all the pages in your wordpress site.
You’ll have the ability to lengthen the dropdown menu, make a selection a internet web page, and click on at the ‘Let’s Transfer’ button.
This will from time to time redirect you to the internet web page’s block editor.
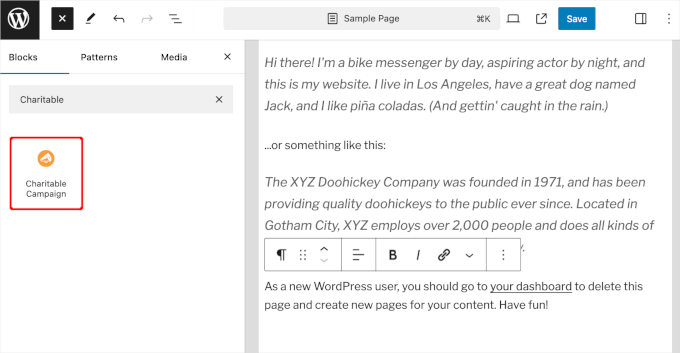
From appropriate right here, you’ll have the ability to click on at the ‘+’ button and search for the ‘Charitable Advertising and marketing marketing campaign’ block. Then, simply click on on on the search result with the intention to upload to the content material subject matter editor.
After that, you’ll be ready to select a donation form to embed from the ‘Charitable Advertising and marketing marketing campaign’ block dropdown.
Transfer ahead and lengthen the dropdown menu. Then, simply click on on on the advertising marketing campaign you want with the intention to upload.
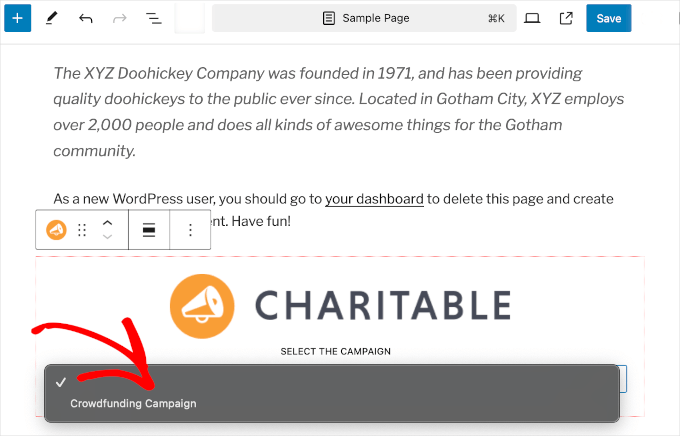
Don’t worry should you’ll have the ability to’t see the preview inside the content material subject matter editor. The block works merely excellent.
So, let’s click on at the ‘Save,’ ‘Substitute,’ or ‘Publish’ button to make it live.
And that’s it! You’ll have the ability to now discuss with the internet web page to appear the donation form in movement:
<h4 class=”wp-block-heading” id=”aioseo-3-how-to-embed-hubspot-forms-into-your-wordpress-site”><span class=”ez-toc-section” id=”3-find-out-how-to-embed-hubspot-forms-in-wordpress“/>3. Find out how to Embed HubSpot Forms in wordpress
HubSpot is a smart platform for emerging what you are promoting, with equipment like a purchaser dating keep an eye on platform (CRM) where you’ll have the ability to prepare purchaser knowledge, a website online builder, and further.
The good news is that they also have a form builder that works great with wordpress. When somebody fills out a sort, their knowledge goes in an instant into HubSpot CRM, so that you’ll have the ability to merely follow up with them the usage of emails and messages.
You’ll have the ability to even connect HubSpot with other form equipment, in conjunction with WPForms. This makes the platform if truth be told at hand on account of it actually works with lots of other equipment chances are high that you’ll already be the usage of.
For this instructional, we will show you tips about tips on how to embed HubSpot forms the usage of the HubSpot Shape Builder plugin and the WPForms’ HubSpot Addon.
Embedding HubSpot Forms The usage of the HubSpot Plugin
To embed HubSpot Forms the usage of the plugin, you’ll first need to arrange the HubSpot plugin. If you need be in agreement, then you definitely’ll have the ability to be informed our knowledge on tips on how to set up a wordpress plugin.
Upon activation, you’ll want to click on at the ‘HubSpot’ menu from your wordpress dashboard. In this panel, you’ll see quite a lot of ways to connect your website online with HubSpot:
- If if you have a HubSpot account, simply click on on ‘Sign In.’
- For those who don’t, you continue in conjunction with your Google, Microsoft, or Apple account.
- If you want, you’ll have the ability to use the an identical e-mail you employ to test to your website online.
In the event you’ve signed in or created a HubSpot account, you’ll be asked to connect it in your wordpress website online.
Simply click on at the ‘Connect website online’ button, and HubSpot gets began the process.
Once attached, you’re ready to create your HubSpot form the usage of the HubSpot plugin.
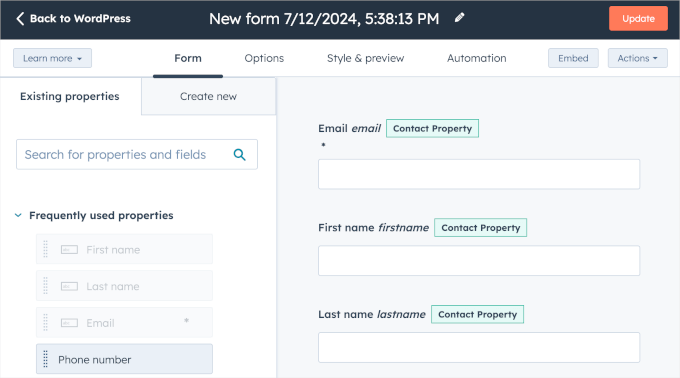
Transfer ahead and navigate to HubSpot » Forms. Then, you’ll have the ability to click on at the ‘Create form’ button.
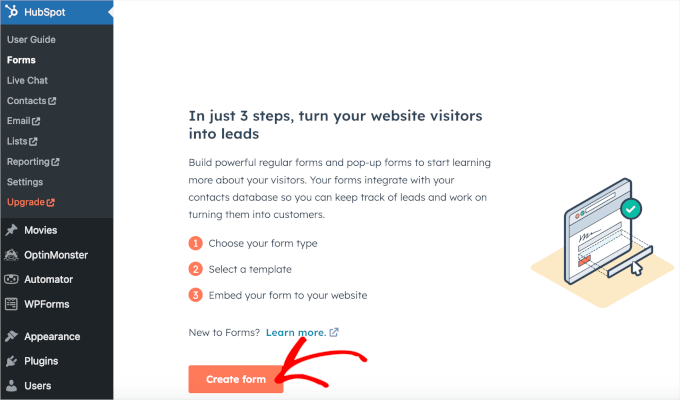
From appropriate right here, you’ll be ready to select a sort type and template. Then, you’ll be redirected to a brand spanking new tab where you’ll have the ability to use the form builder to customize your HubSpot form.
For detailed instructions, you’ll have the ability to see the principle approach in our knowledge on tips on how to create a HubSpot shape in wordpress.
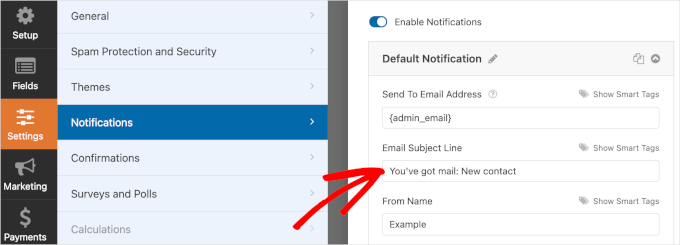
When you’re happy with the way in which during which your form turns out, your next step is to embed it into your site. Naturally, you’ll want to use the ‘Embed’ button inside the form builder.
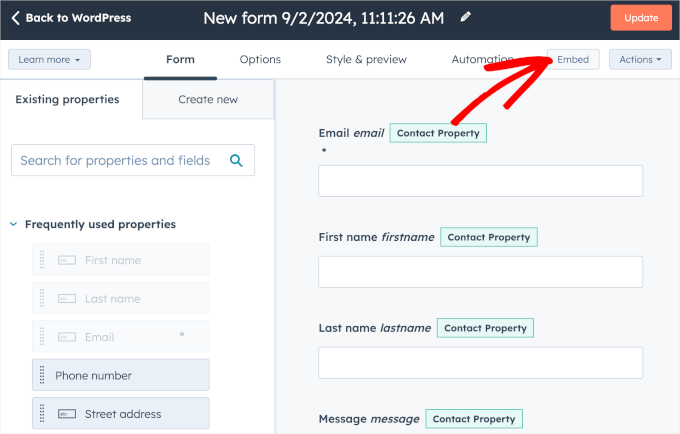
However, the program is moderately difficult.
It best possible implies that you’ll share the form link and use an HTML snippet in your wordpress put up or internet web page.
Instead, you’ll have the ability to click on at the ‘Once more to wordpress’ button and embed your forms from the HubSpot dashboard in your admin house.
Transfer ahead and click on at the button inside essentially the most smart left corner.
From appropriate right here, you’ll merely need to hover over the form you want to embed.
After that, simply click on at the ‘Embed’ button when it sounds as if.
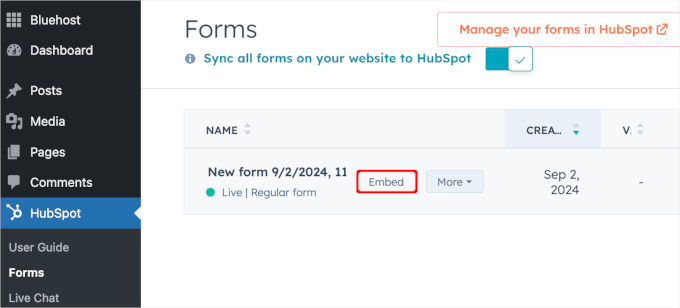
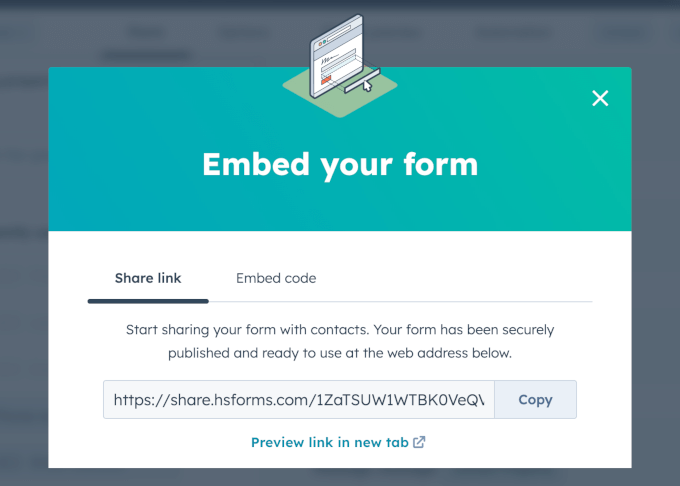
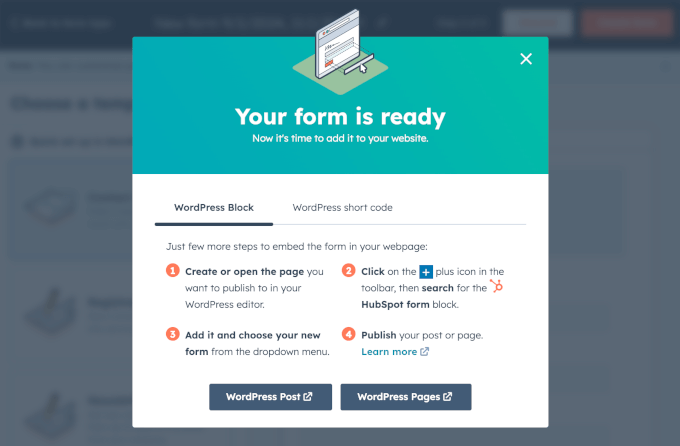
You’ll then see a pop-up window where HubSpot shares quite a lot of ways to embed your form.
Proper right here, you’ll be ready to select to embed your HubSpot form to a put up or internet web page the usage of the HubSpot block. And in case you switch to the other tab, you’ll to search out the form’s shortcode.
For this instructional, we will click on at the ‘wordpress Submit’ button.
This will from time to time open the ‘Posts’ internet web page in a brand spanking new tab. Transfer ahead and open a put up to embed the form into by the use of hovering over a put up and clicking ‘Edit’ when it sounds as if.
You’ll then be capable to add the HubSpot Form block to the internet web page right through the content material subject matter editor.
From appropriate right here, you’ll have the ability to click on at the ‘+’ button and use the search bar to seek for the HubSpot Form block. Give it a click on on when you see it.
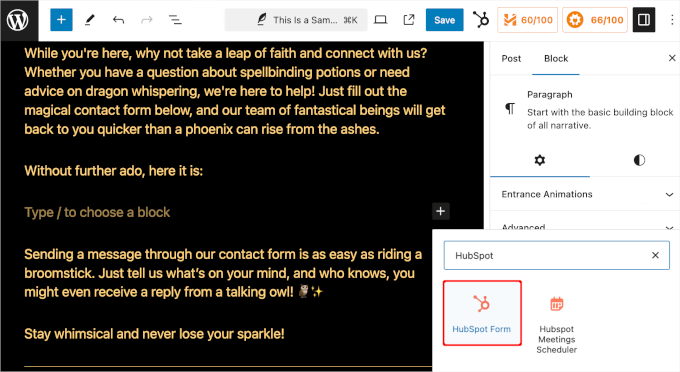
This will from time to time add the HubSpot Form block to the content material subject matter house.
Next up, let’s click on at the dropdown menu to open the available possible choices. Then, you’ll be ready to select the HubSpot form you want to embed.
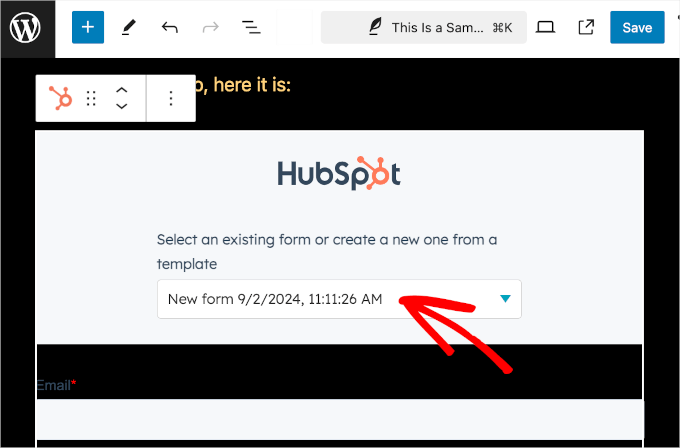
And that’s it! You’ll have the ability to now click on at the ‘Save’ button to store your changes.
Proper right here’s what it looks like on our demo site:
Embedding HubSpot Forms The usage of the WPForms’ HubSpot Addon
The usage of WPForms to create a HubSpot form is an more straightforward, additional setting pleasant way to prepare forms and contacts without the trouble of juggling a few plugins.
WPForms handles every form creation and the HubSpot integration in one place. This simplifies the process as it is going to come up with get admission to to WPForms’ drag-and-drop builder and templates while syncing your form knowledge with HubSpot robotically.
Remember: To use the HubSpot Addon in WPForms, you’ll need the Elite plan. At the side of the HubSpot addon and the whole thing inside the Skilled plan, you’ll have the ability to use the plugin for endless wordpress web pages and release most sensible elegance strengthen. This makes it very best in case you’re running a promoting corporate.
The first thing you need to do is about up and switch at the WPForms plugin. Check out our detailed knowledge on tips on how to set up a wordpress plugin.
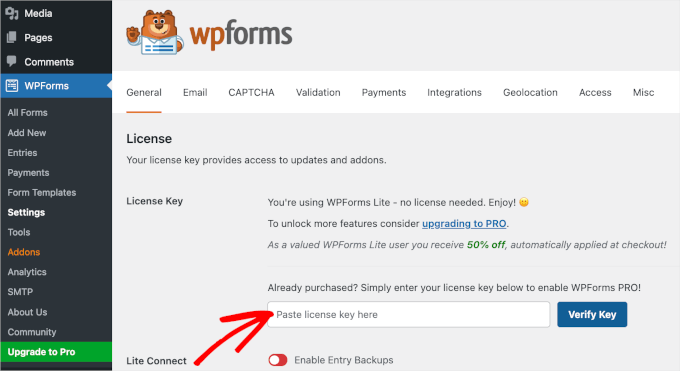
Upon activation, you’ll need to read about your license key in WPForms » Settings.
You’ll have the ability to to search out your license key in your WPForms account. Simply click on at the clipboard icon to duplicate it. Then, you’ll have the ability to return in your wordpress tab and fill out the ‘License Key’ field.
Transfer ahead and click on at the ‘Read about Key’ button to show in your plan.
Now, let’s go to WPForms » Addons from the admin dashboard to position within the HubSpot Addon.
From appropriate right here, scroll down and to find the HubSpot add-on. Then, go ahead and click on at the ‘Arrange Addon’ button.

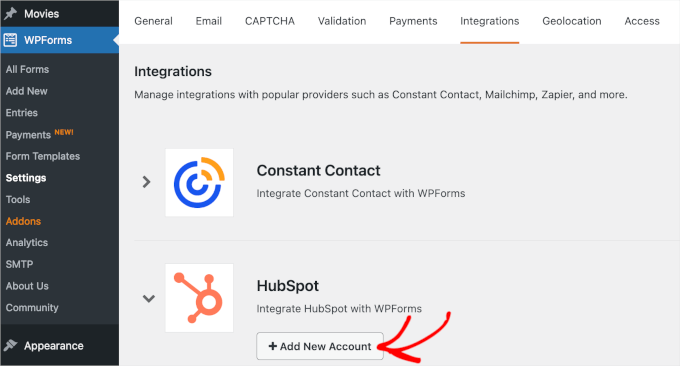
After activating the addon, you’ll have to go to the WPForms ‘Settings’ panel from the wordpress dashboard and then switch to the ‘Integration’ tab.
Proper right here, you’ll have the ability to connect your HubSpot CRM account to WPForms. Simply click on on ‘+ Add New Account’ and enter your account details.
Once accomplished, it’s time to create and embed a HubSpot form from WPForms.
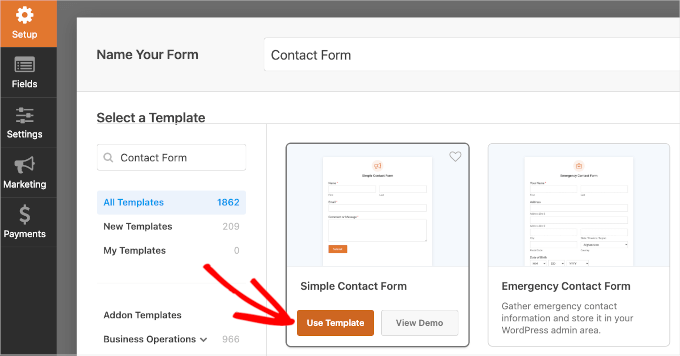
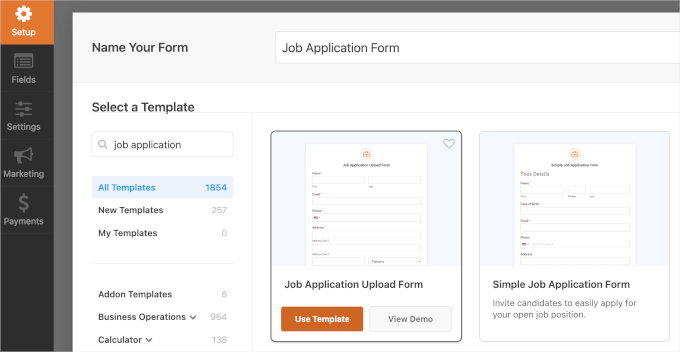
First, you’ll need to create your form by the use of navigating to WPForms » Add New. On the next show, you’ll establish the form and select a sort template.
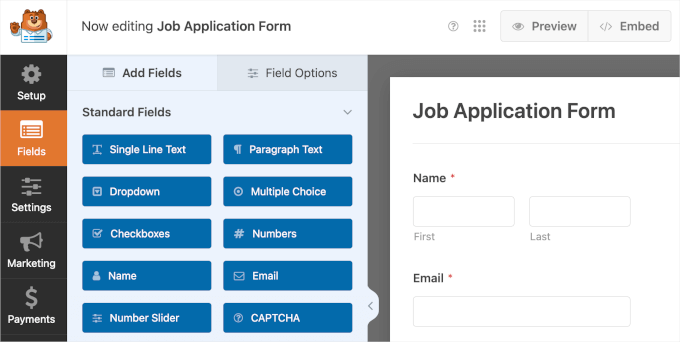
After that, you’ll have the ability to customize the template the usage of the form builder.
If the whole thing turns out superb already, feel free to modify to the ‘Promoting and advertising’ panel. From appropriate right here, let’s open the ‘HubSpot’ method to connect the form with the platform.
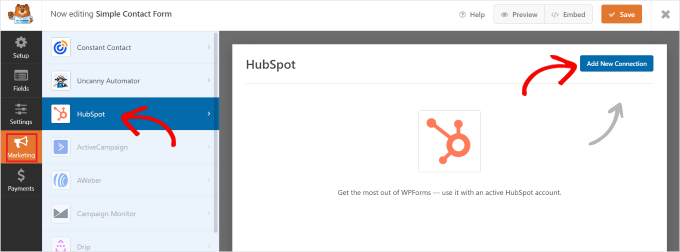
Transfer ahead and enter your HubSpot account details and follow the setup turns on.
Once accomplished, you’ll have the ability to submit the form the usage of the WPForms block or the form’s shortcode. For additonal details, you’ll be ready to try our knowledge on tips on how to create a HubSpot shape in wordpress.
<h4 class=”wp-block-heading” id=”aioseo-4-how-to-embed-google-forms-into-your-wordpress-site”><span class=”ez-toc-section” id=”4-find-out-how-to-embed-google-forms-in-wordpress“/>4. Find out how to Embed Google Forms in wordpress
WPForms and other wordpress form builders are if truth be told easy to use. They art work suitable in your wordpress site and mean you can do lots of things like assemble forms that accept expenses, create login forms, make customized consumer registration paperwork, and further.
On the other hand every now and then, chances are high that you’ll need to share a sort on different web websites or platforms.
Within the ones cases, Google Forms can also be super at hand. They’re easy to share, art work great on mobile phones, and keep all responses in one place. Plus, you’ll have the ability to add collaborators to help you with the responses, all stored in Google Power.
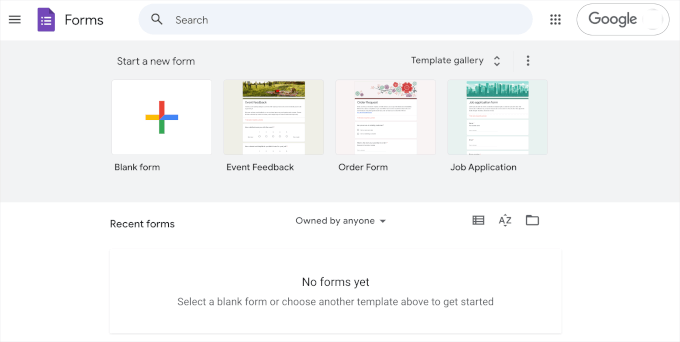
To embed a Google Form in wordpress, you’ll have the ability to get began by the use of creating a sort on the Google Bureaucracy website online. Simply click on at the ‘Transfer To Forms’ button.

On the next show, you’ll see rather numerous form templates. Transfer ahead and click on on on one in all them to start out development.
You’ll have the ability to moreover get began from scratch by the use of clicking on ‘Blank form.’
In the event you’ve decided on a template, you’ll have the ability to get began customizing the form. Listed below are quite a lot of problems chances are high that you’ll need to do:
- Create the form identify.
- Provide the form description.
- Customize the fields to test your goals.
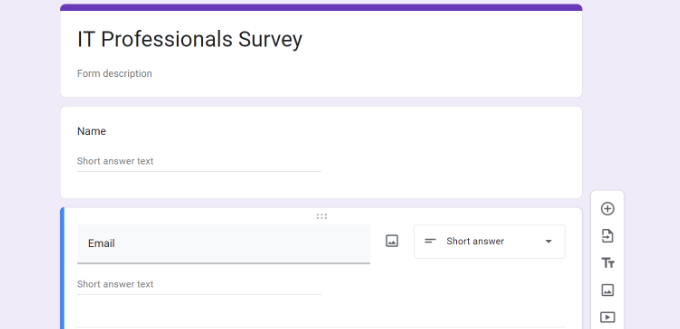
You’ll have the ability to moreover use AI equipment to select one of the most suitable fields in your questions.
When you’re happy with how the form turns out, go ahead and click on at the ‘Send’ button. This will from time to time open a pop-up window where you’ll have the ability to get the form’s embed code.
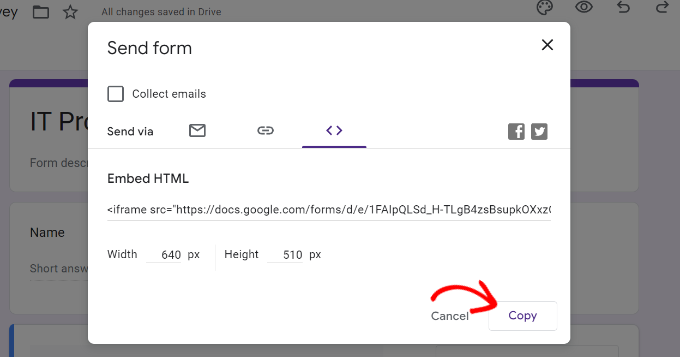
After copying this code, you’ll have the ability to open a internet web page or put up in wordpress where you want to turn the form.
Inside the internet web page or put up’s content material editor, let’s click on at the ‘+’ button and search for the ‘Custom designed HTML’ block. Transfer ahead and click on on on it with the intention to upload it in your internet web page.
Then, simply paste the Google Forms’ embed code into the Custom designed HTML block.
Once accomplished, don’t fail to remember to click on at the ‘Substitute’ or ‘Publish’ button. Now, in case you discuss with your website online, you’ll have to see the Google form in movement.
For additonal detailed step-by-step instructions, you’ll have the ability to talk over with our knowledge on tips on how to embed a Google shape in wordpress.
<h4 class=”wp-block-heading” id=”aioseo-5-how-to-embed-zoho-forms-into-your-wordpress-site”><span class=”ez-toc-section” id=”5-find-out-how-to-embed-zoho-forms-in-wordpress“/>5. Find out how to Embed Zoho Forms in wordpress
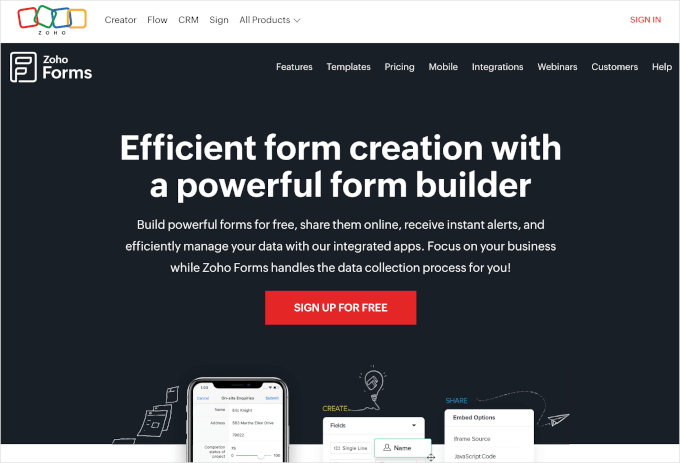
Zoho Bureaucracy is a great tool that lets you merely create all kinds of forms. Whether or not or now not you need a marginally form, survey, registration form, or order form, Zoho Forms has got you covered.
What’s additional, embedding a Zoho Form into your wordpress site is modest. On the other hand previous to we get to this segment, let’s first create the form.
To get started, you’ll need to create an account on the Zoho Bureaucracy site. Simply click on on ‘Sign Up for Unfastened.’
In the event you’ve created an account, you’ll have the ability to get began creating your form.
First, you’ll need to click on at the ‘New Form’ button inside the form builder.

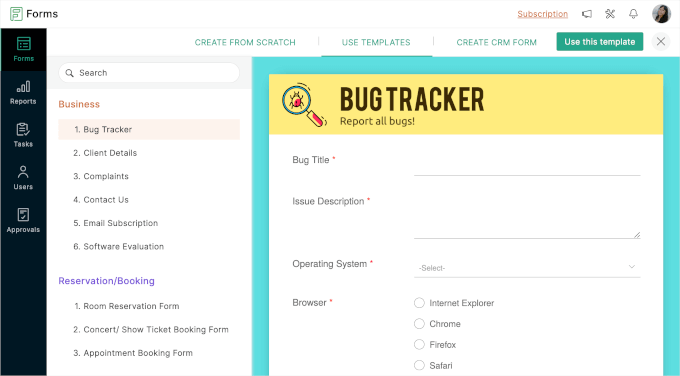
You’ll then see that Zoho Forms offers 3 ways to create forms:
- Create forms from scratch the usage of the standard or card form type.
- Use ready-made form templates.
- Make CRM forms, which is a function that is best possible available in case you give a boost to to the Skilled plan.
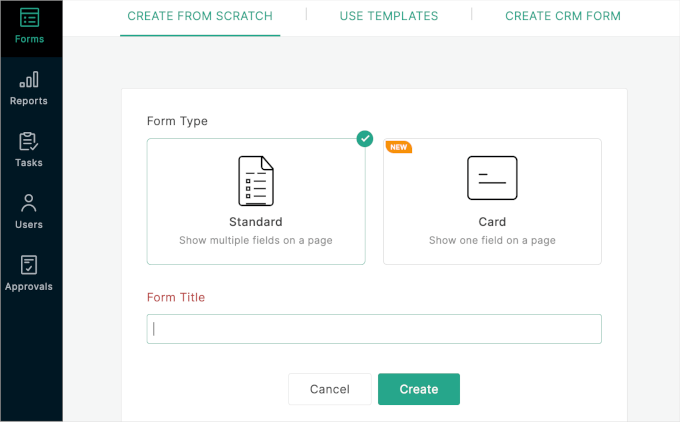
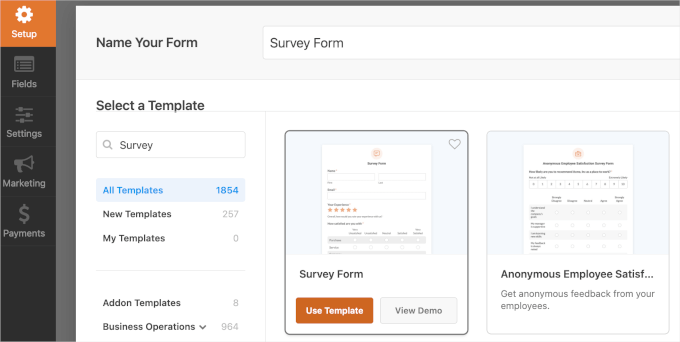
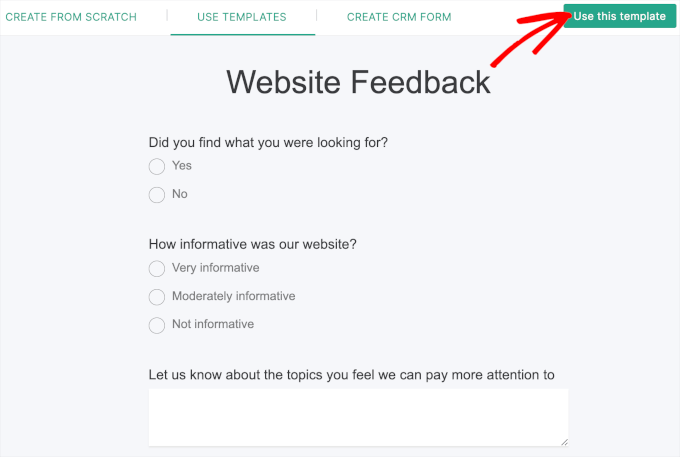
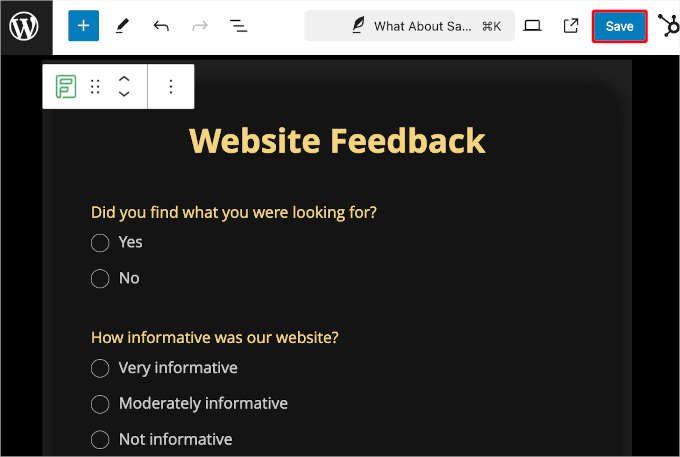
For this data, we will make a selection the ‘Internet website online Feedback’ template.
So, let’s click on at the ‘Use this template’ button.
With that accomplished, you’ll land inside the Zoho Forms form builder.
The left-hand panel has all the customization possible choices, and the form preview is on the suitable. You’ll have the ability to add portions in your form by the use of simply dragging and losing them.
With Zoho Forms, you’ll have the ability to moreover industry the form’s theme to test your website online’s theme.
To check out this, you’ll have the ability to go to the ‘Matter issues’ tab. Then, simply hover over the theme you want to use and click on on ‘Follow.’

If the whole thing turns out superb already, then you definitely’ll have the ability to switch to the ‘Proportion’ tab.
In this tab, you’ll have the ability to see that Zoho Forms has lots of possible choices for embedding forms.
Since we will embed it appropriate right into a wordpress site, let’s head over to Embed » Internet website online Builders. Then, go ahead and click on at the ‘Transfer to wordpress’ button.
You’ll then be redirected to the Zoho Bureaucracy internet web page inside the wordpress plugin checklist.
All you need to do is about up the plugin. If you need be in agreement, then you definitely’ll have the ability to see our knowledge on tips on how to set up a wordpress plugin.
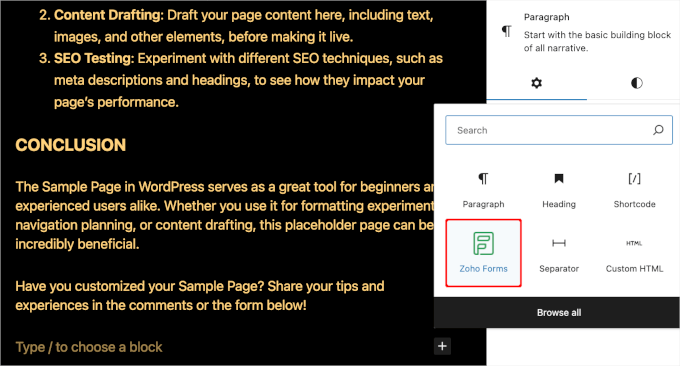
Upon activation, you’ll have the ability to open a put up or internet web page where you want to embed Zoho Forms. From appropriate right here, you’ll then click on at the ‘+’ button and select the Zoho Forms block.
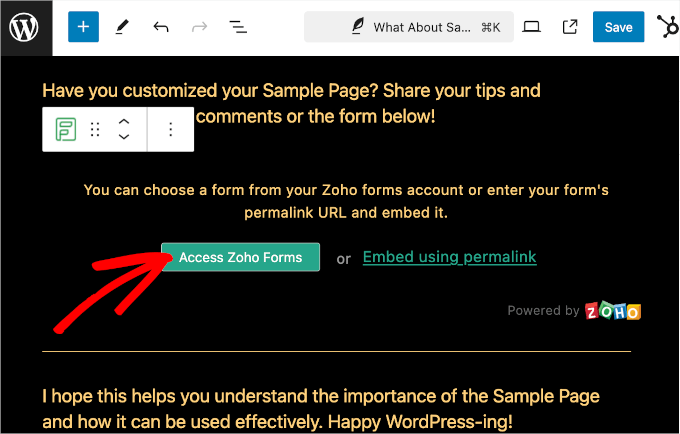
As quickly because the block is added, you’ll have the ability to click on at the ‘Get right to use Zoho Forms’ button.
There’s moreover the ‘Embed with permalink’ link, on the other hand we don’t counsel the program as it’s no longer as beginner-friendly.
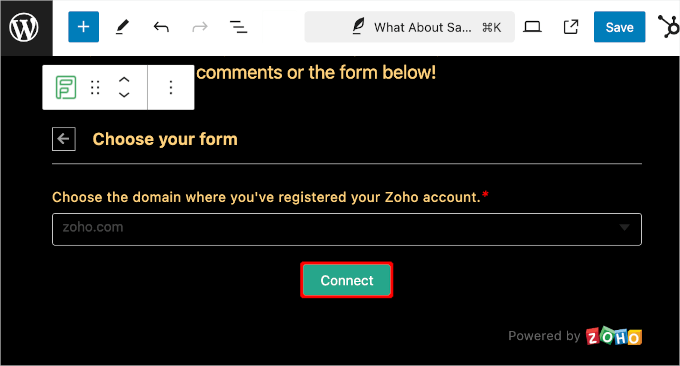
Then, you’ll be prompted to select the realm where you registered your Zoho account.
In this case, we will make a selection ‘zoho.com‘ from the dropdown menu and click on on ‘Connect.’
After that, you’ll be ready to select the form you want to embed.
Simply click on at the dropdown and select one from the available possible choices. Then, you’ll want to scroll down and click on at the ‘Embed’ button.
Your content material subject matter editor will then load your Zoho form.
For those who like what you see, then go ahead and click on at the ‘Save’ button.
Now, in case you discuss with the internet web page, you’ll see your Zoho form in movement.
Proper right here’s what it could appear to be:
From the image above, you’ll have the ability to moreover see that the Zoho Forms theme makes it more straightforward to test the form in conjunction with your website online design.
<span class=”ez-toc-section” id=”6-find-out-how-to-embed-e-mail-signup-forms-in-wordpress“/>6. Find out how to Embed E-mail Signup Forms in wordpress
OptinMonster, while no longer a normal form builder, is a great tool for creating client sign-up forms and construction an e mail listing.
At WPBeginner, we’ve spotted superb results the usage of this lead-generation instrument. For instance, with OptinMonster, we greater our e mail subscribers by way of 600%.
When putting in e-mail sign-up forms, you’ll have the ability to use rather numerous advertising marketing campaign sorts, comparable to slide-ins and lightbox pop-ups. So, previous to we talk about embedding the OptinMonster e-mail sign-up form, let’s be sure that form is ready.
First, you’ll need to create an OptinMonster account on their website online by the use of clicking the ‘Get OptinMonster Now’ button.

This will from time to time raise you to the pricing internet web page.
We advise the Skilled plan because it’s widespread and incorporates the ‘Pass out Intent’ function. You’ll have the ability to moreover use our distinctive WPBeginner OptinMonster coupon code to get 10% off.
To finish your gain, merely enter your charge details and proceed with the associated fee.
With that accomplished, let’s arrange and switch at the OptinMonster wordpress plugin. If you need be in agreement, please see our step-by-step knowledge on tips on how to set up a wordpress plugin.
This plugin will connect your wordpress site to OptinMonster. Simply navigate to OptinMonster » Settings from your wordpress admin panel. Then, go ahead and click on on ‘Connect Your Present Account.’
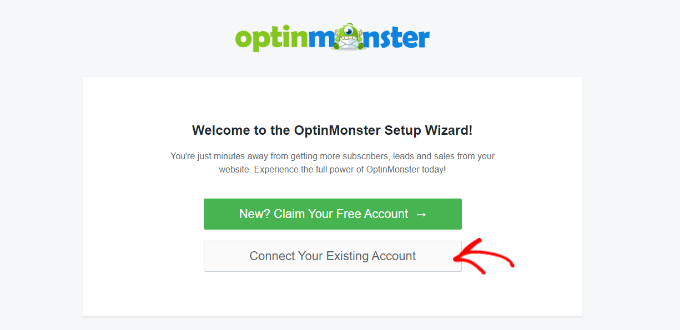
Once attached, you’re ready to create your OptinMonster e-mail sign-up form. For detailed instructions, you’ll have the ability to be informed our knowledge on tips on how to construct your e mail listing in wordpress with OptinMonster.
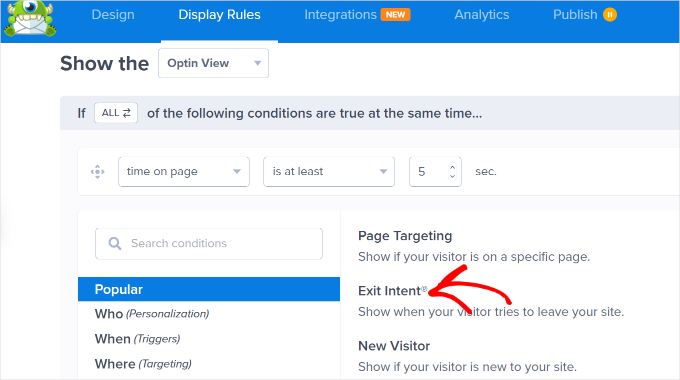
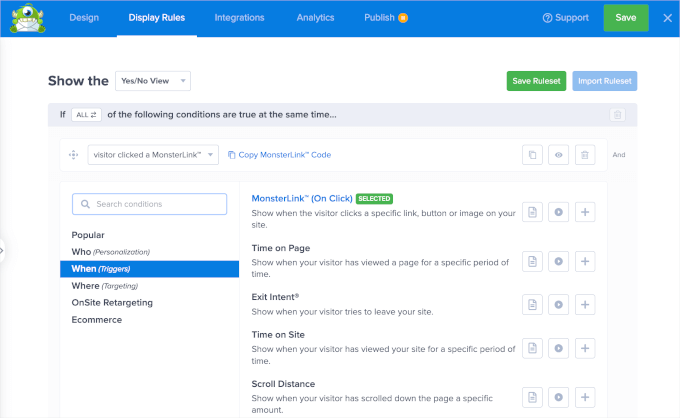
OptinMonster’s detailed display regulations mean you can show the right kind advertising marketing campaign to the right kind explicit individual at the suitable time, which helps boost conversion fees. You’ll have the ability to to search out the ones settings by the use of heading to Display Rules inside the advertising marketing campaign builder.
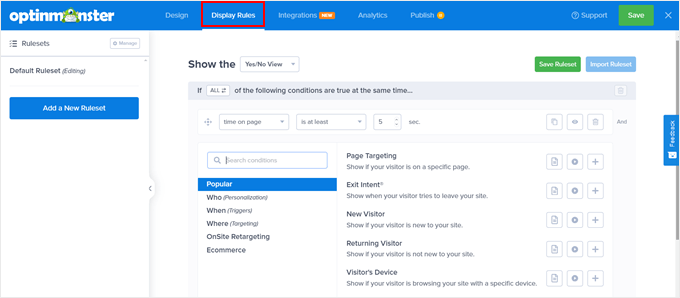
Proper right here, you’ll have the ability to control when and where your campaigns appear consistent with purchaser habits.
You’ll have the ability to moreover customise campaigns for various audiences, like showing different layouts for mobile and desktop consumers.
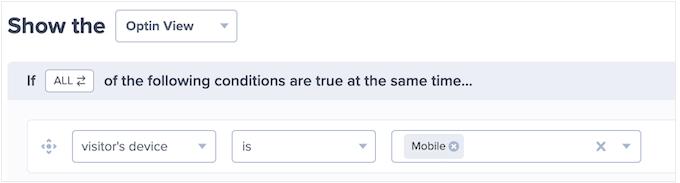
OptinMonster implies that you’ll set regulations consistent with explicit days or puts, so that you’ll have the ability to run centered campaigns like Black Friday offers or holiday-themed popups for more than a few international locations.
Additionally, OptinMonster’s exit-intent technology helps get better guests who’re about to go away your site. This option tracks client habits and triggers a centered message merely previous to they cross out, allowing you to clutch additional e-mail subscribers and build up conversions.
When you are happy with the whole thing, it’s time to embed the lead era form into your website online.
Simply click on at the ‘Save’ button from the builder to begin up the process.
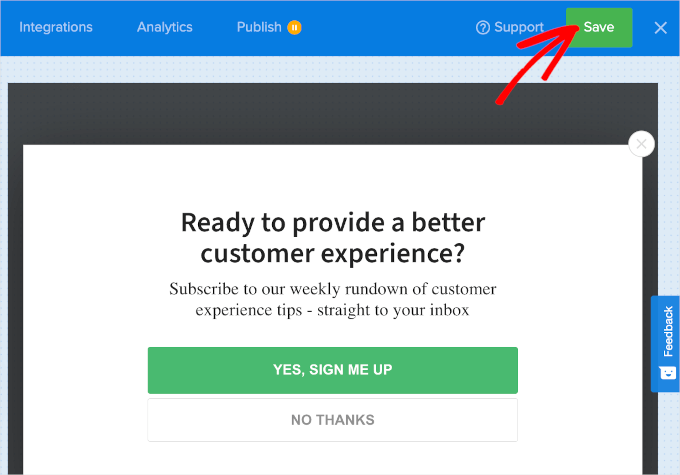
After making sure you’ve saved your changes, you’ll have the ability to switch to the ‘Publish’ tab.
From appropriate right here, go ahead and change the status from ‘Draft’ to ‘Publish.’ You’ll then see that the ‘Publish’ tab has changed to ‘Printed,’ and the pause icon has changed to a take a look at mark.

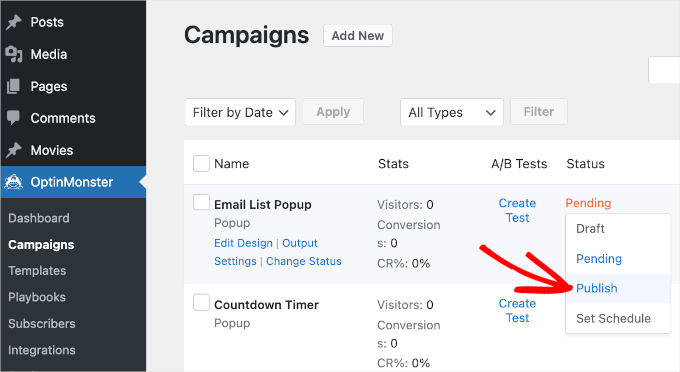
You’ll have the ability to now close the selling marketing campaign editor and navigate to OptinMonster » Campaigns.
The next move is to change the status ‘Pending’ to ‘Publish’ in your e-mail sign-up pop-up. Simply click on at the ‘Pending’ link to open the dropdown menu and select the ‘Publish’ selection.
There you’ve gotten it!
Now, in case you discuss with your website online, you’ll see the email sign-up popup in movement.
<span class=”ez-toc-section” id=”7-find-out-how-to-embed-charge-forms-in-wordpress“/>7. Find out how to Embed Charge Forms in wordpress
For those who merely want to advertise a single product or don’t want to prepare an entire purchasing groceries cart, then the usage of whole eCommerce plugins like Simple Virtual Downloads or WooCommerce might be overkill. Creating a simple charge form is regularly a better option for accepting custom designed amounts or selling a few items.
That’s the position WP Easy Pay can be in agreement.
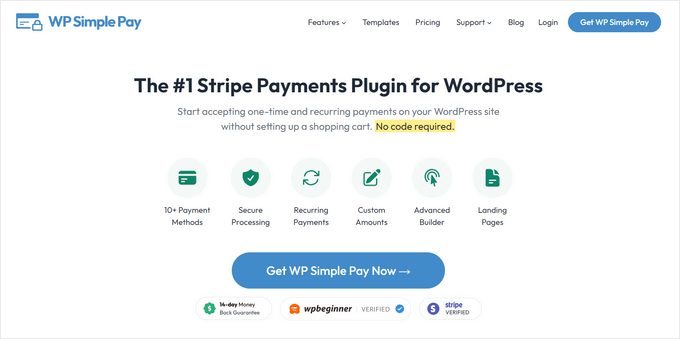
WP Simple Pay is your only option for accepting Stripe expenses without requiring a complete eCommerce plugin.
It moreover means that you can accept other charge methods, comparable to credit card expenses, Apple Pay, Google Pay, and further. It’s absolute best for non-profits, small corporations, and volunteers who want a simple resolution for amassing expenses.
To embed a charge form, you’ll need to arrange the WP Easy Pay plugin first. If you need be in agreement, then you definitely’ll have the ability to see our step-by-step knowledge on tips on how to set up a wordpress plugin.
Upon activation, simply follow the setup wizard to connect to Stripe.
Once attached, you’re ready to create your charge form the usage of WP Simple Pay.
For detailed instructions, you’ll have the ability to follow the principle approach in our knowledge on tips on how to create a wordpress shape with fee choices.
When you’re happy in conjunction with your charge form, go ahead and click on at the ‘Publish’ button. Then, you’ll have the ability to copy the form’s shortcode to embed it into your put up or internet web page.
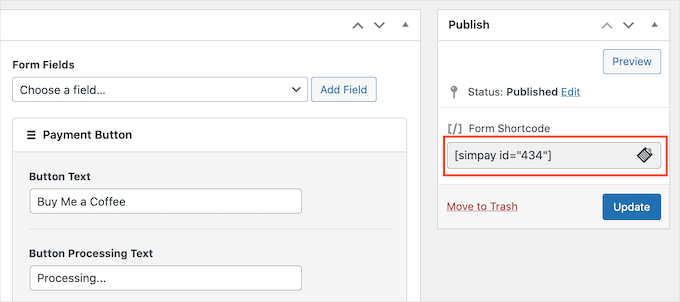
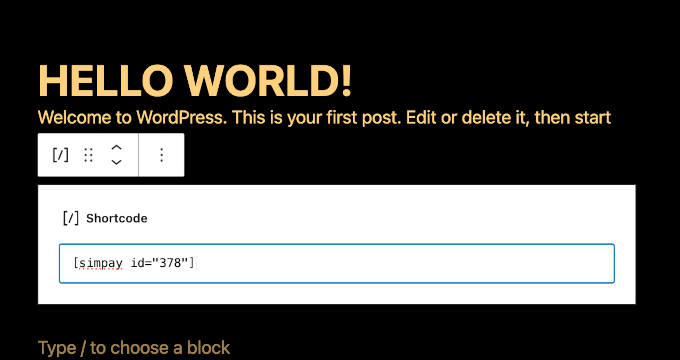
Inside the wordpress content material subject matter editor, you merely need to click on at the ‘+’ button and select the ‘Shortcode’ block.
Next up, you’ll have the ability to paste the form’s shortcode into the text house.
Remember that WP Simple Pay creates your charge form in check out mode by the use of default. Which means that you’ll have the ability to’t accept expenses from visitors however.
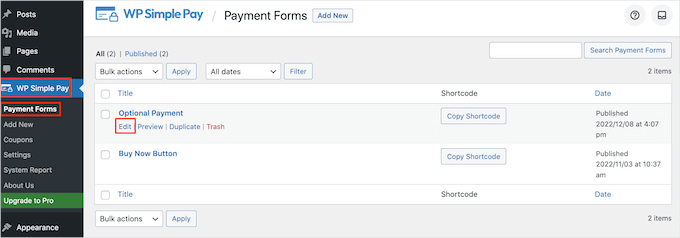
To fix this, let’s navigate to WP Simple Pay » Charge Forms inside the wordpress dashboard. Then, you’ll have the ability to hover over the form you merely created and click on on ‘Edit’ when it sounds as if.
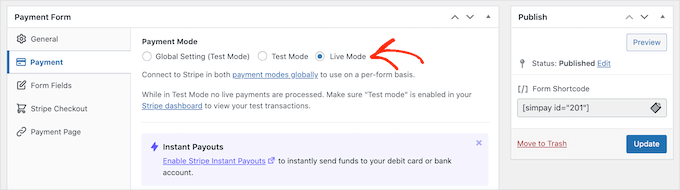
In this panel, you’ll want to go to the ‘Expenses’ segment.
Finally, you’ll have the ability to click on at the ‘Live Mode’ radio button and then ‘Substitute.’
And that’s the way in which you embed a WP Simple Pay form and get began accepting expenses from your audience.
Proper right here’s what it looks like on our demo site:
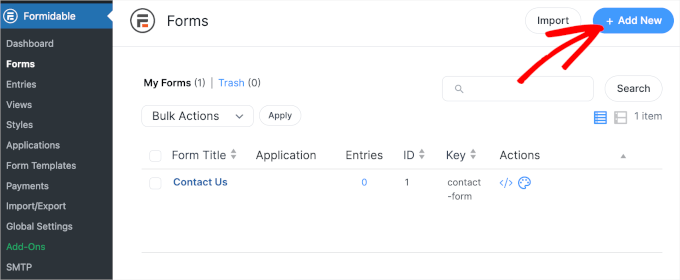
<h4 class=”wp-block-heading” id=”aioseo-8-how-to-embed-formidable-forms-into-your-wordpress-site”><span class=”ez-toc-section” id=”8-find-out-how-to-embed-daring-forms-in-wordpress“/>8. Find out how to Embed Daring Forms in wordpress
Bold Bureaucracy is a great tool for creating difficult forms, comparable to a mortgage, automotive charge, or life insurance plans calculator. It offers 225+ form templates that you simply’ll have the ability to use in your wordpress website online.
For details on tips about tips on how to make a sort with Daring Forms, you’ll have the ability to see our entire Bold Bureaucracy evaluation.
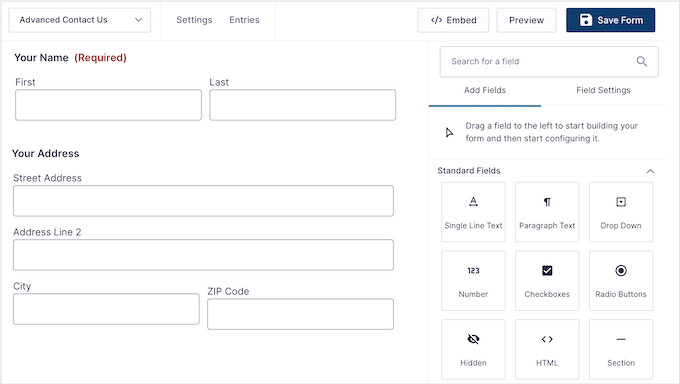
Daring Forms makes it super easy to place your forms on any put up or internet web page. In the event you’re accomplished creating your form, you’ll have the ability to click on at the ‘Embed’ button inside the form builder.
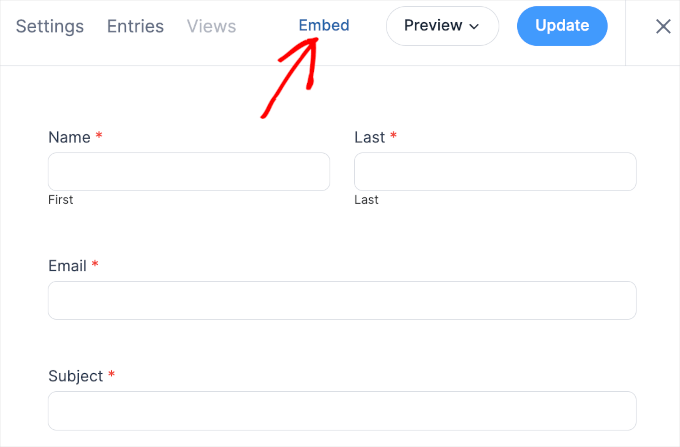
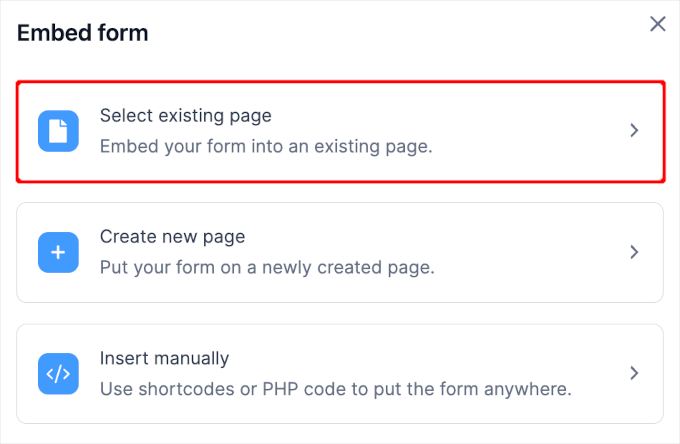
This will from time to time open a pop-up window where you’ll have the ability to select where with the intention to upload the form. There are 3 possible choices: ‘Make a selection provide internet web page,’ ‘Create new internet web page,’ and ‘Insert manually.’
If you select the ‘Insert manually’ selection, it is very important deal with moderately of code. This can be a bit intimidating for newcomers, so we don’t counsel it.
For this instructional, we will make a selection ‘Make a selection provide internet web page.’
Next up, every other recommended pop-up will appear.
Proper right here, you’ll want to open the dropdown menu and make a selection a internet web page. For instance, we decided on to embed the form on our demo site’s ‘Area’ internet web page.
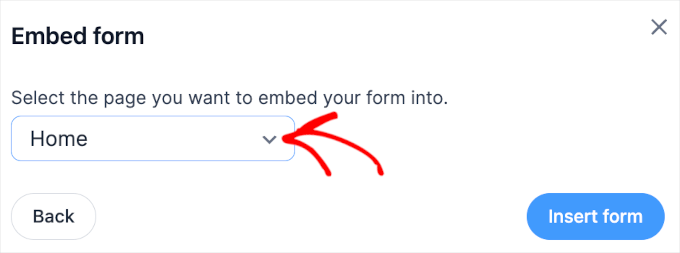
After choosing the internet web page, go ahead and click on at the ‘Insert form’ button.
This will from time to time open the internet web page’s block editor, and in addition you’ll have to see that the form is already embedded on the internet web page.
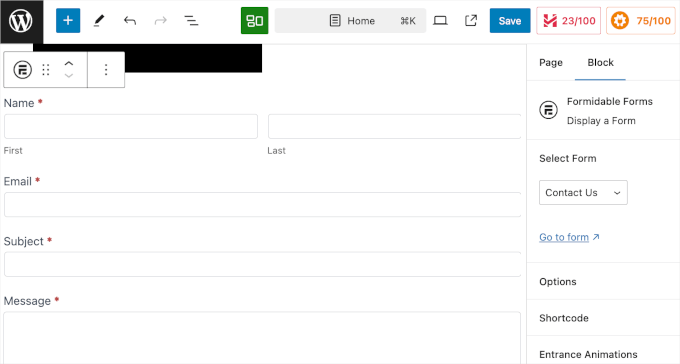
Now, you’re waiting to interchange the internet web page.
Transfer ahead and hit the ‘Save’ button.
Proper right here’s what it looks like on our demo site:
<h4 class=”wp-block-heading” id=”aioseo-9-how-to-embed-gravity-forms-into-your-wordpress-site”><span class=”ez-toc-section” id=”9-find-out-how-to-embed-gravity-forms-in-wordpress“/>9. Find out how to Embed Gravity Forms in wordpress
Gravity Bureaucracy is a powerful form builder plugin for wordpress, on the other hand appropriate right here’s the catch – it’s most sensible elegance best possible.
This type builder has rather numerous choices and customization possible choices. It means that you can create many forms of forms, comparable to surveys, quizzes, registrations, and order forms.
To create a sort the usage of Gravity Forms, you’ll need to gain the plugin from the Gravity Bureaucracy site.

Then, you’ll have the ability to arrange and activate it in your site. If you need be in agreement, please see our knowledge on tips on how to set up a wordpress plugin.
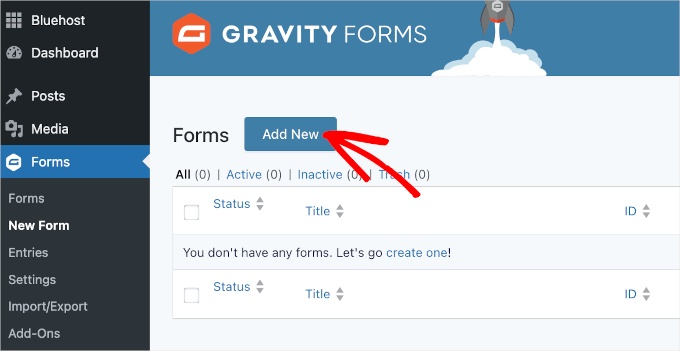
Upon activation, you’ll want to navigate to Gravity Forms » New Form in your wordpress dashboard and click on on on ‘Add New.’
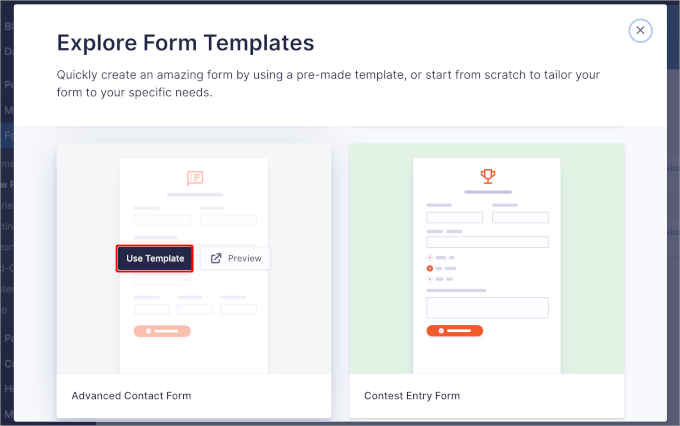
On the next show, you’ll make a selection a sort template.
No rush appropriate right here – you’ll have the ability to uncover this pop-up window to go looking out the template you want to use. Once found out, simply hover over the template and click on at the ‘Use Template’ button.
Next up, you’ll be prompted to name your form and write a short lived form description.
You’ll have the ability to use the following image as an example:
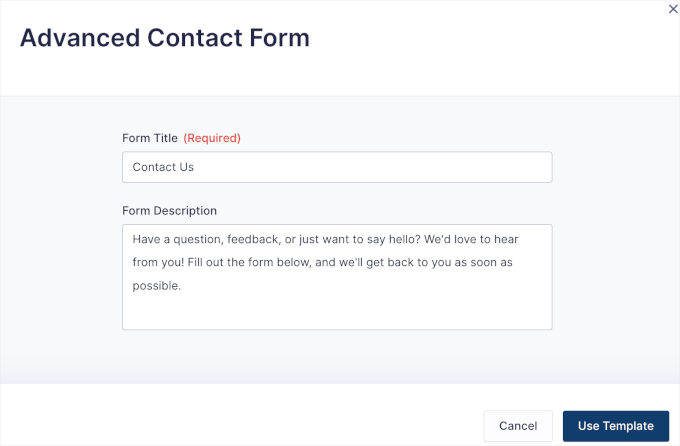
Transfer ahead and click on on ‘Use Template’ once all over again to start out development the form.
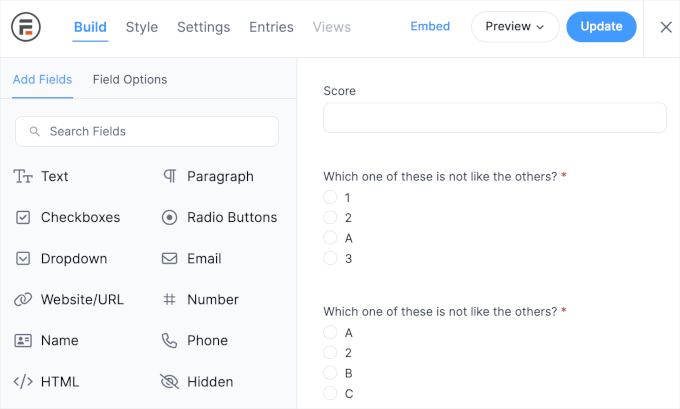
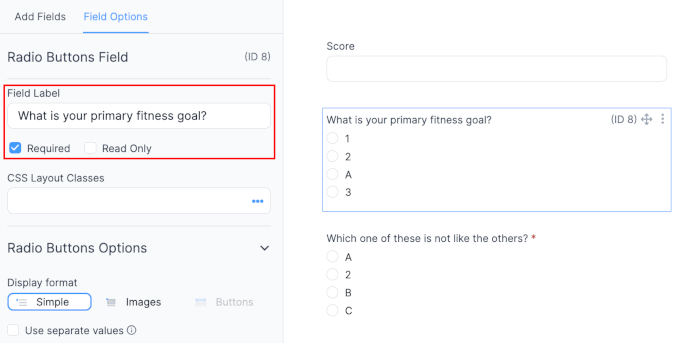
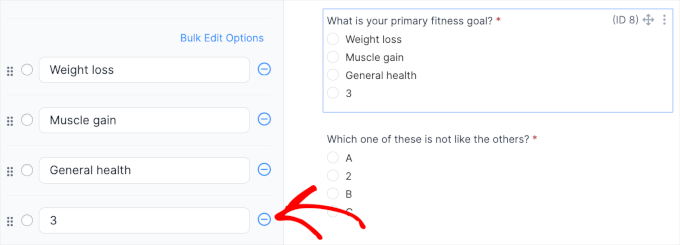
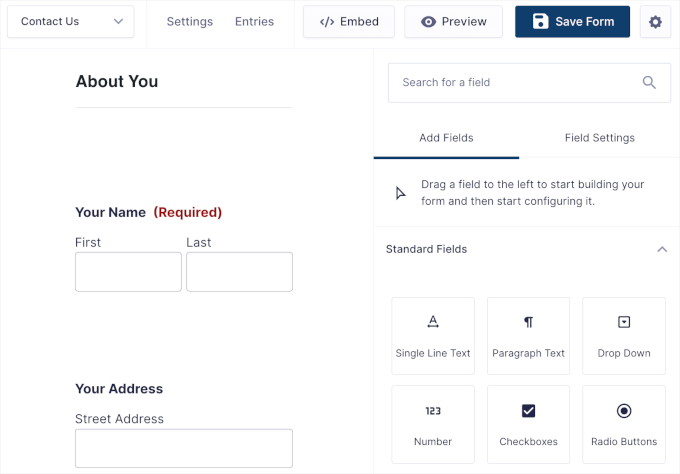
This will from time to time open the Gravity Forms’ drag-and-drop builder, where you’ll have the ability to customize your form the usage of the fields on the suitable.
Once your form is ready, you’ll have the ability to click on at the ‘Save Form’ button to make sure you’ve stored any changes.
Then, go ahead and click on on ‘Embed.’
This will from time to time open 3 possible choices to embed your Gravity Forms form – into an provide internet web page, a brand spanking new internet web page, or a shortcode approach for people the usage of the vintage editor.
For this instructional, we will show you tips about tips on how to embed Gravity Forms into an provide web internet web page.
From appropriate right here, let’s select the ‘Submit’ radio button. Then, you’ll have the ability to open the dropdown menu to select a broadcast put up in your wordpress website online.
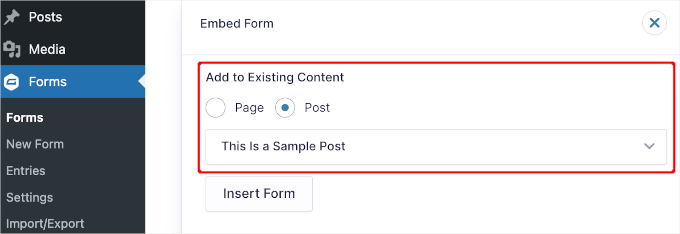
Transfer ahead and click on at the ‘Insert Form’ button.
You’ll then be redirected to the internet web page’s content material subject matter editor, where you’ll be prompted with the intention to upload the ‘Form’ block. Transfer ahead and click on on it.
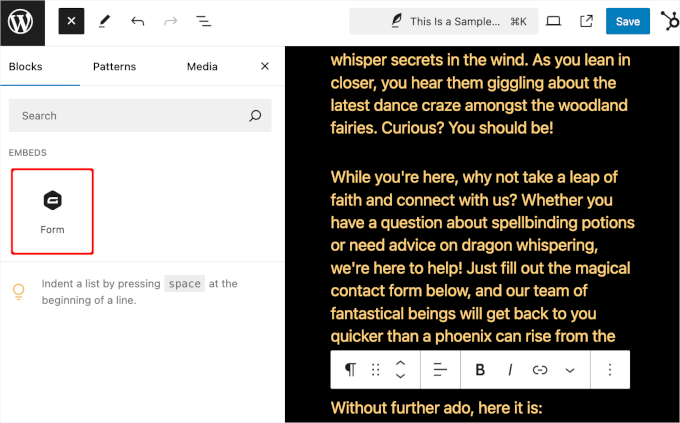
Gravity Forms will then add the form you merely created to the put up.
You may additionally take into account that it incorporates the ‘Form Determine’ and ‘Form Description’ by the use of default.
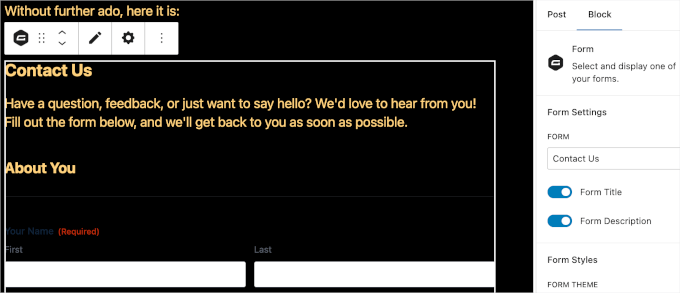
For those who think the whole thing is set, then it’s time to hit the ‘Save’ button.
And that’s it – you’ve created and embedded a Gravity Forms form in your website online.
<h4 class=”wp-block-heading” id=”aioseo-10-how-to-embed-html-forms-into-your-wordpress-site”><span class=”ez-toc-section” id=”10-find-out-how-to-embed-microsoft-forms-in-wordpress“/>10. Find out how to Embed Microsoft Forms in wordpress
Another other folks would perhaps want to use Microsoft Bureaucracy to create forms because it’s a tool they’re already conversant in as a result of their Place of job 365 account. It moreover robotically integrates with other Microsoft products like Excel, which makes knowledge collection and keep an eye on more straightforward.
Microsoft Forms offers built-in possible choices for creating surveys, quizzes, and polls. You’ll have the ability to then merely embed Microsoft 365 forms in wordpress by the use of copying the form’s embed code and together with it in your wordpress site.
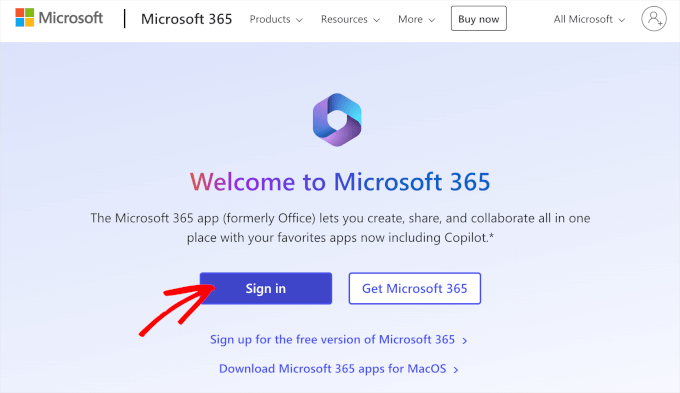
First, you’ll create your form the usage of Microsoft Forms in your Administrative center 365 account.
From the Place of job 365 homepage, let’s click on on ‘Sign In’ to get started.
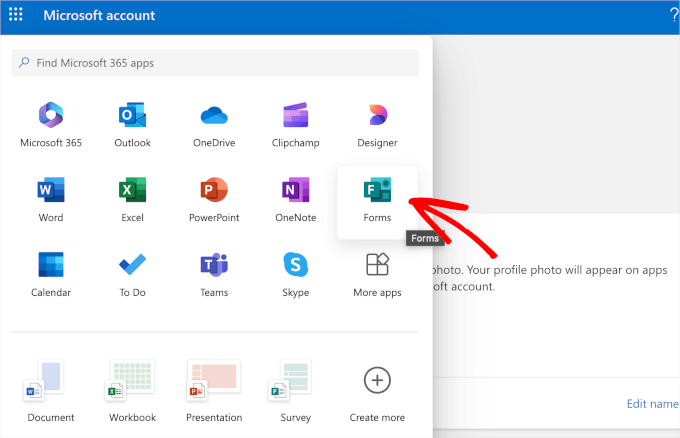
Once logged in, you’ll have the ability to click on at the menu icon at the best left corner of the internet web page.
Then, you’ll want to to find ‘Forms’ and click on on on it.
This will from time to time open the template gallery in a brand spanking new tab. You’ll have the ability to then make a selection the forms you want to build.
Microsoft Forms has 4 forms to choose between – survey, quiz, invitation, and registration. For this instructional, we will make a selection the ‘Invitation’ selection. Let’s click on on on it.

The Microsoft Forms editor will open in a brand spanking new tab. From appropriate right here, the first thing to do is to select a template.
You’ll have the ability to uncover the template possible choices inside the left-hand panel. Since we’re creating an invitation form, we’ve were given 7 ready-made templates for rather numerous purposes.
For this instructional, we’ll use the marriage ceremony invitation template. Proper right here’s what the default template looks like inside the editor:

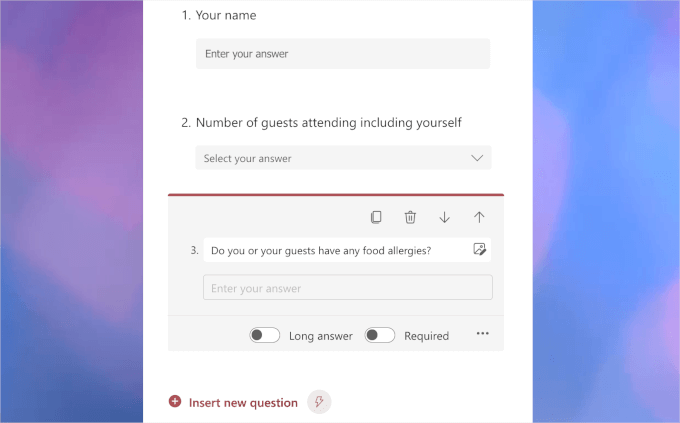
For those who scroll down the right-hand panel, you’ll to search out the default fields this template offers.
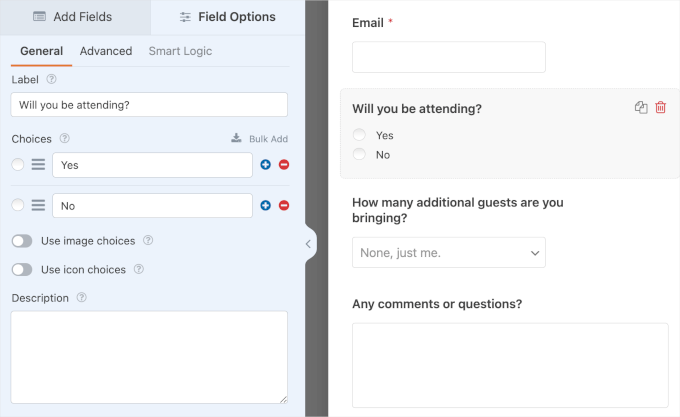
This template has 4 pre-set fields for patrons’ names, collection of guests attending, foods allergies, and e-mail addresses.
Let’s say you want with the intention to upload additional questions. If that is so, you’ll have the ability to click on at the ‘+ Insert new question’ button and make a selection the question type, like ‘Date,’ ‘Rating,’ ‘Text,’ or the others.
If you want to edit the prevailing ones, simply click on on on one, and the customization possible choices will appear.
To change the look and feel, you’ll have the ability to click on at the palette icon.
From appropriate right here, you’ll have the ability to industry the form construction and background image.

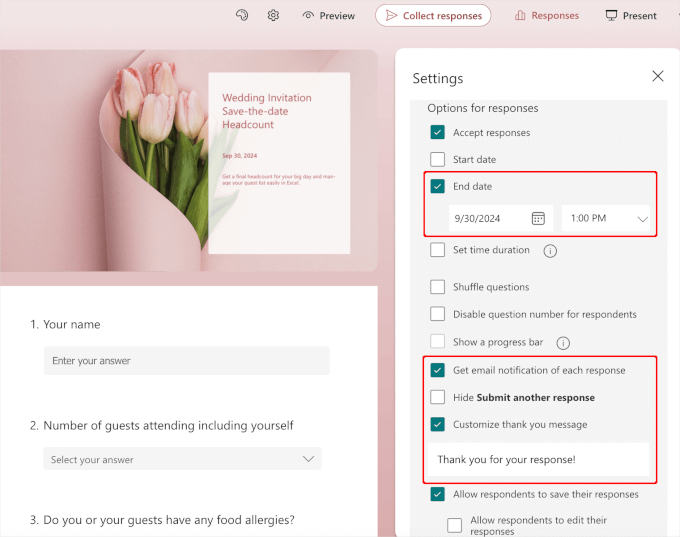
You’ll have the ability to then switch to the settings tab by the use of clicking the apparatus icon.
Microsoft Forms has already configured some basic settings.
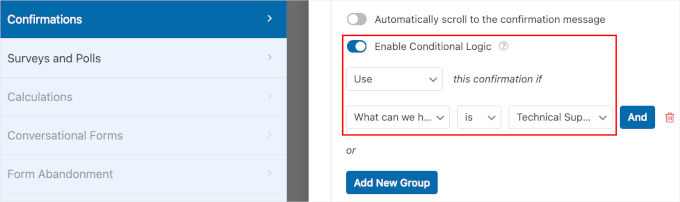
On the other hand, chances are high that you’ll want to allow ‘End Date’ to help you strategically plan your marriage rite day consistent with responses and ‘Get e-mail notification of each response’ so that you’ve gotten backup knowledge to forestall the response from getting out of place.
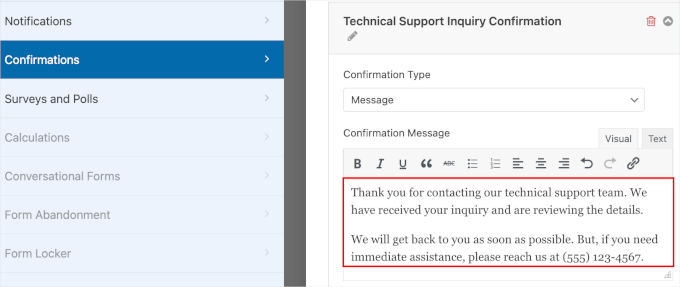
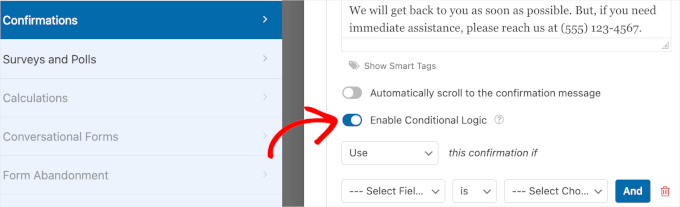
If you want, you’ll have the ability to moreover edit the pre-set confirmation message.
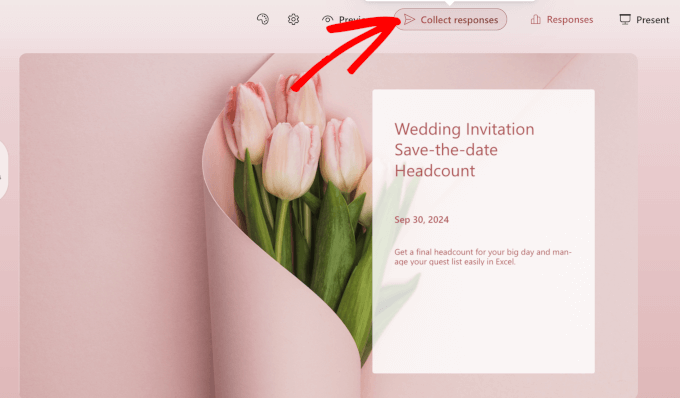
Once the form is ready, it’s time to liberate it.
Inside the form builder, let’s click on at the ‘Acquire responses’ button.
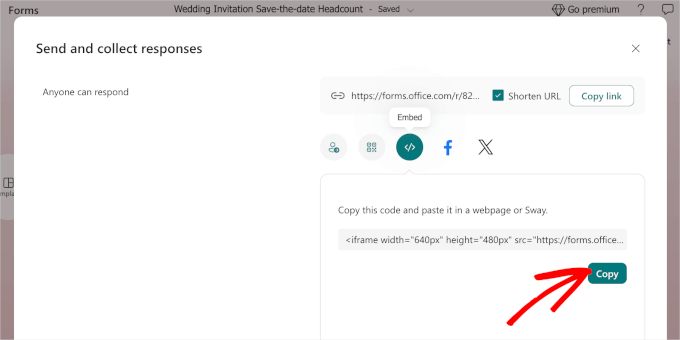
Inside the popup that appears, you’ll have the ability to click on on on the ‘>’ or embed icon.
You’ll have to now see the shortcode you add in your site. Transfer ahead and click on on ‘Copy.’
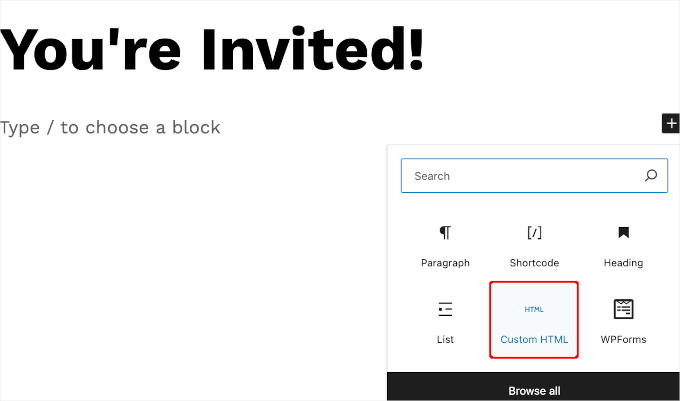
Now, you’ll have the ability to paste this code appropriate right into a put up or internet web page the usage of the ‘Custom designed HTML’ block.
Inside the wordpress content material subject matter editor, simply click on at the ‘+’ button with the intention to upload the block. Then, you’ll have the ability to use the search bar to seek for the ‘Custom designed HTML’ block.
Transfer ahead and click on on on it with the intention to upload the block to the content material subject matter editor.
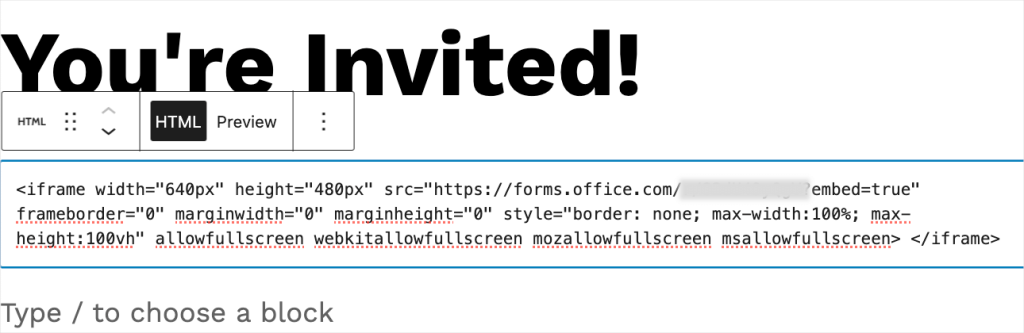
From appropriate right here, you’ll go ahead and paste the Microsoft Forms’ shortcode to the text house.
Don’t worry in case you don’t see a preview in your editor; the shortcode works merely excellent.
Now, you’ll have the ability to hit the ‘Publish’ or ‘Substitute’ button to make it live.
Proper right here’s what it looks like on our demo site:
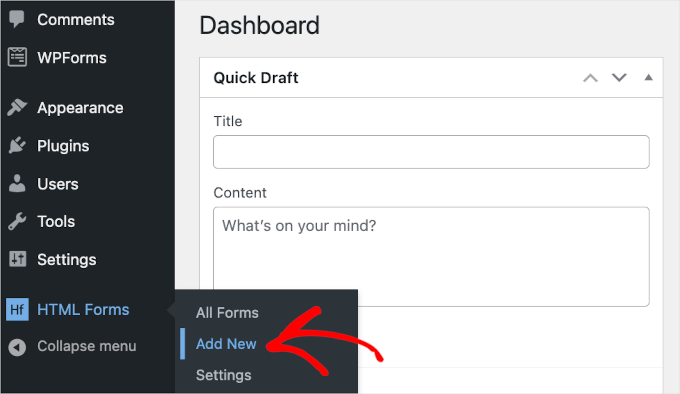
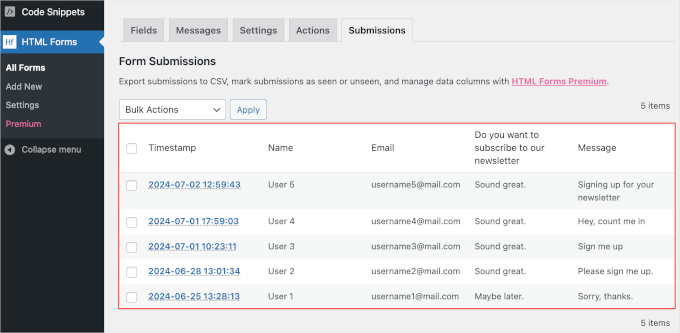
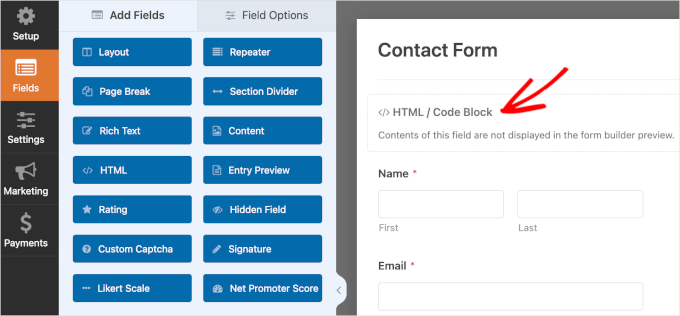
<h4 class=”wp-block-heading” id=”aioseo-11-how-to-embed-html-forms-into-your-wordpress-site”><span class=”ez-toc-section” id=”11-find-out-how-to-embed-html-forms-in-wordpress“/>11. Find out how to Embed HTML Forms in wordpress
HTML forms are generally hand-coded, in order that you don’t have a drag-and-drop editor to edit your form.
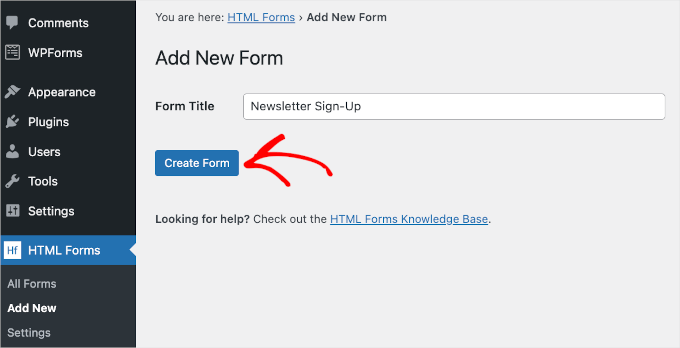
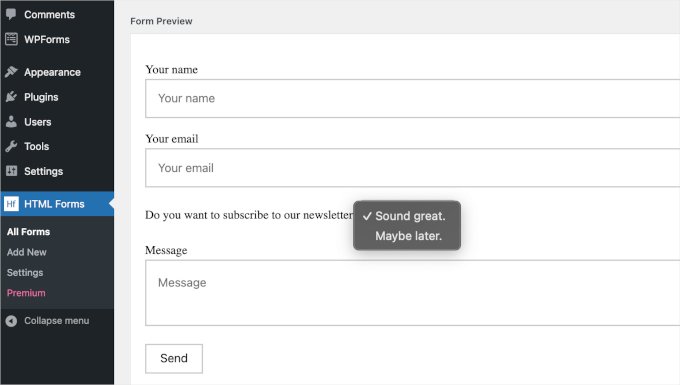
Fortunately, there are form plugins that make putting in HTML forms additional foolproof. One of the most necessary perfect possible choices is the HTML Bureaucracy plugin. This plugin is very good for putting in simple contact forms that assist you to gain wisdom from visitors.
The best issue is that you just don’t should know the way to code to use HTML Forms.
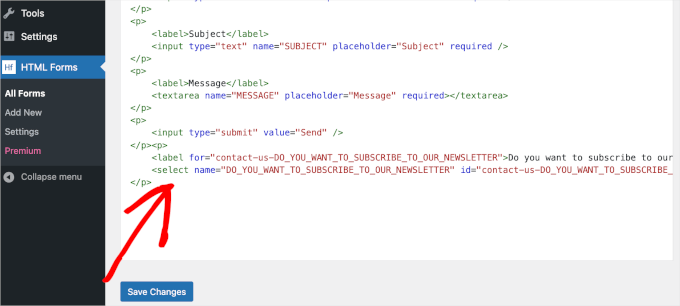
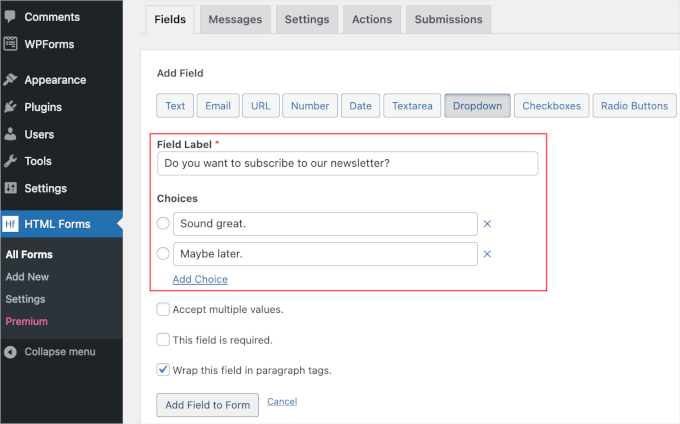
Together with a brand spanking new field is modest. Merely make a selection one from the available possible choices, and HTML Forms will ask you to keep watch over the field’s knowledge.

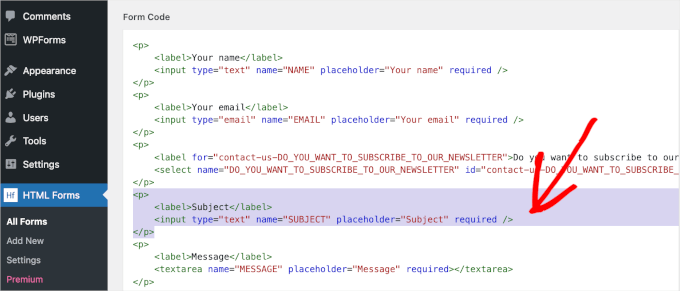
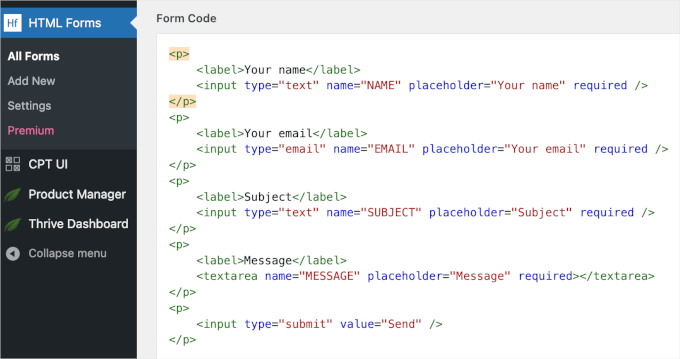
After clicking the ‘Add Field to Form’ button, HTML Forms will convert the tips into an HTML snippet and put it inside the ‘Form Code’ house.
And that’s all there’s to it! Don’t fail to remember to click on at the ‘Save Changes’ button to save lots of loads of your enlargement.
Now, it’s time to submit the form.
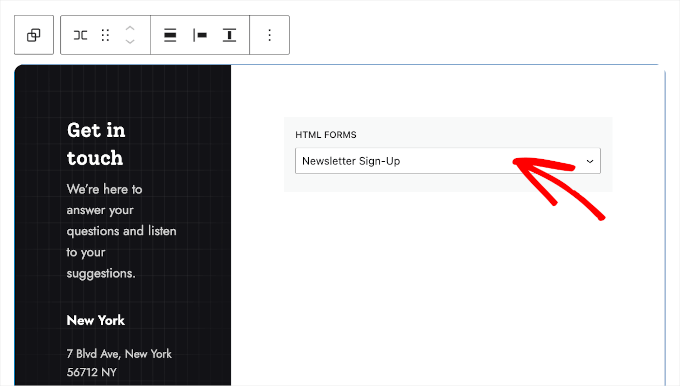
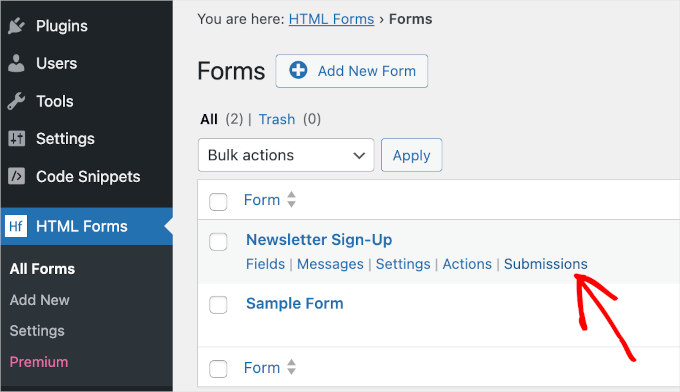
HTML Forms implies that you’ll merely embed your form on any put up, internet web page, or widget house. To check out this, you’ll need the form’s shortcode. You’ll have the ability to to search out your form’s shortcode at the best part of the ‘Edit Form’ panel.
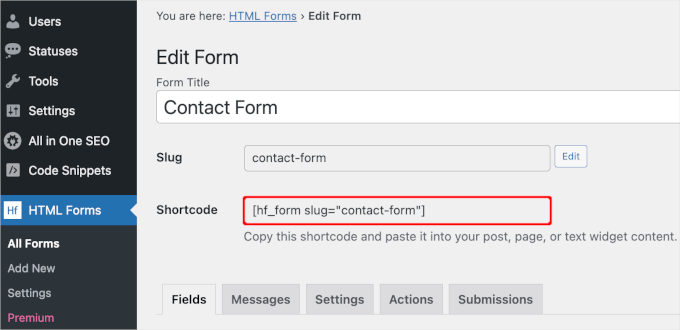
Let’s copy this shortcode to the clipboard.
You’ll have the ability to then open a internet web page or put up you want to turn the HTML form. For this instructional, we’ll add the form to our ‘Contact’ internet web page.
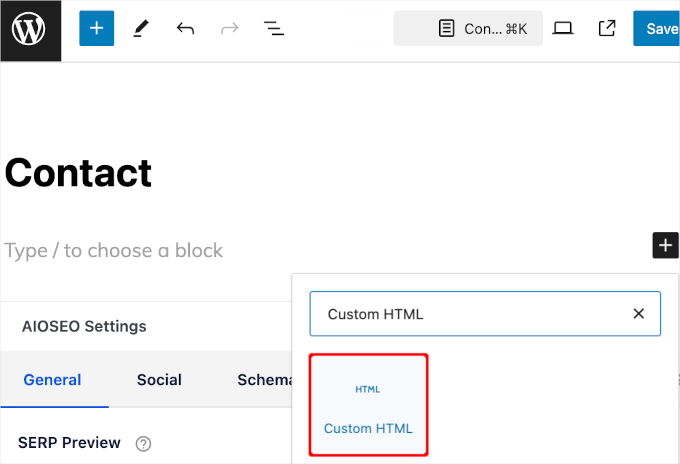
In the event you’re inside the block editor, simply click on at the ‘+’ button and then search for ‘Custom designed HTML.’ Transfer ahead and click on on on it with the intention to upload it in your internet web page.
You’ll have the ability to then paste the shortcode into the ‘Custom designed HTML’ block.
The wordpress block editor won’t show you the form. On the other hand worry no longer. It’s going to show up on the internet web page when you save it.
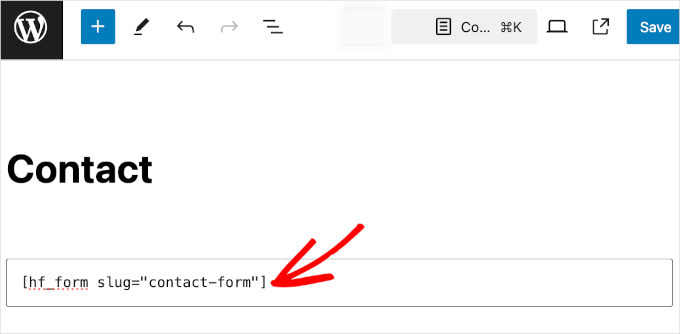
So, let’s hit the ‘Save’ button to appear it in movement.
Proper right here’s what it could appear to be in your website online:
For detailed instructions, you’ll be ready to try our knowledge on tips on how to upload HTML paperwork to wordpress.
<h4 class=”wp-block-heading” id=”aioseo-how-to-embed-forms-in-wordpress-faq”><span class=”ez-toc-section” id=”regularly-asked-questions-about-embedding-wordpress-forms”/>Regularly Asked Questions About Embedding wordpress Forms
Have questions about embedding forms in wordpress? Listed below are some rapid answers to help you get started.
Can you embed forms in wordpress?
Certain. You’ll have the ability to merely embed forms in wordpress the usage of rather numerous plugins, in conjunction with WPForms, which is the best multi-purpose form builder.
How do I arrange a sort in wordpress?
First, you’ll want to head over to Plugins » Add New from your wordpress admin. The next move is to find a shape plugin of your variety and then simply arrange and activate it. Once accomplished, you’ll use the plugin to create a sort and embed it in your site the usage of a shortcode or block.
Find out how to prepare WPForms in wordpress?
To organize WPForms, you’ll need to arrange and switch at the WPForms plugin first. Next, you’ll have the ability to create a brand new shape the usage of the drag-and-drop builder and embed the form in your website online the usage of a shortcode or the plugin’s block.
Find out how to create a sort in wordpress and not using a plugin?
Creating a sort in wordpress and not using a plugin calls for custom designed HTML and PHP. You’ll have the ability to manually add the form HTML in your internet web page and care for submissions with custom designed PHP in your theme’s functions.php document. Since this isn’t beginner-friendly, we recommend the usage of a shape builder as a substitute.
We hope this newsletter has helped you learn how to embed forms in wordpress. Next, chances are high that you’ll want to take a look at our other guides on tips on how to arrange wordpress shape monitoring in Google Analytics and tips on how to observe and cut back shape abandonment.
For those who liked this newsletter, then please subscribe to our YouTube Channel for wordpress video tutorials. You’ll have the ability to moreover to search out us on Twitter and Fb.
The put up The right way to Embed Bureaucracy in wordpress (Final Information for Novices) first appeared on WPBeginner.
wordpress Maintenance
[ continue ]
wordpress Maintenance Plans | wordpress hosting
read more
<a href=”https://wpmountain.com/the-right-way-to-embed-bureaucracy-in-wordpress-final-information-for-novices/”>Source link


![→ Download Now: Market Research Templates [Free Kit]](https://worldproductreview.com/wp-content/uploads/2024/08/9-Very-best-Advertising-Analysis-The-way-to-Know-Your-150x60-1.png)
![“When I think of AI Overviews, I think about complex questions. I think about perspectives. I think about [finding] the best content on the web.”—Hema Budaraju, Senior Director of Product, AI Overviews, Google](https://worldproductreview.com/wp-content/uploads/2024/08/the-way-to-use-googles-ai-overviews-for-seek-150x150-1.webp)
![Download Now: 150+ Content Creation Templates [Free Kit]](https://worldproductreview.com/wp-content/uploads/2024/09/This-system-can-create-advertising-and-marketing-that-is-impossible-150x59-1.png)