Posted on Leave a comment

The right way to Create a Surprising Eating place Web site in Below an Hour

Every chef is conscious about their unique touch makes their dishes memorable. However, most simple professional consuming position householders understand how the most important a website is for showcasing their culinary identity and attracting new shoppers.

Are you keeping your distinctiveness online?

If no longer, don’t worry! This knowledge will show you exactly learn the way to create a feature-rich, stylish consuming position website in under an hour—without any coding. With the appropriate apparatus, you’ll blow their own horns your dishes, attract unswerving enthusiasts, and turn your consuming position appropriate right into a logo other folks can’t resist.

Ready to transform your consuming position into an web logo?

Proper right here’s what you’ll be told:

  • Why wordpress is the most productive platform for rising your consuming position website.
  • The six easy steps to build and liberate your unique web site in less than an hour.
  • Skilled tips about learn the way to optimize your consuming position website for optimum impact.

Essential Tools to Create Your Consuming position Internet web site

To build a shocking consuming position website, you’ll most simple need a few key apparatus that make the process blank and hassle-free. Proper right here’s what you wish to have to get started:

  • Divi: A flexible, drag-and-drop wordpress theme highest imaginable for restaurant internet pages. It comes with shocking pre-made templates and lines like Divi Fast Websites, which helps you to generate a fully-functioning website in minutes without any coding.
  • wordpress: The most well liked content material subject matter keep watch over instrument (CMS) relied on by the use of tens of millions. Merely prepare your website’s content material subject matter and updates.
  • SiteGround: A top-rated wordpress web site webhosting provider that promises your consuming position website runs simply with superb tempo and protection.
  • Merely Agenda Appointments: Allow visitors to book tables directly from your website using a custom designed Divi Reserving Module. Essential for consuming puts offering online reservations.

Methods to Create a Consuming position Internet web site in 6 Steps

Building a professional consuming position website doesn’t will have to be refined. With the appropriate apparatus, you’ll be capable of have a unconditionally functional, superbly designed web site up and working in no time. Follow the ones six smooth steps:

1. Get a Space Identify and wordpress Web webhosting

The first step in building your consuming position website is choosing a web site identify and loyal wordpress web site webhosting. You wish to have this stuff to have a virtual space to store your website.

Get a Space Identify

NameCheap is likely one of the absolute best space registrars for securely registering a web site identify at an moderately priced value (wait a little bit if you wish to have additional convenience). Then again what should be the realm identify of your consuming position website?

Your consuming position already has a name—use that. Your consuming position identify since the space identify is the best way to turn it appropriate right into a logo and claim it so no one else can use it.
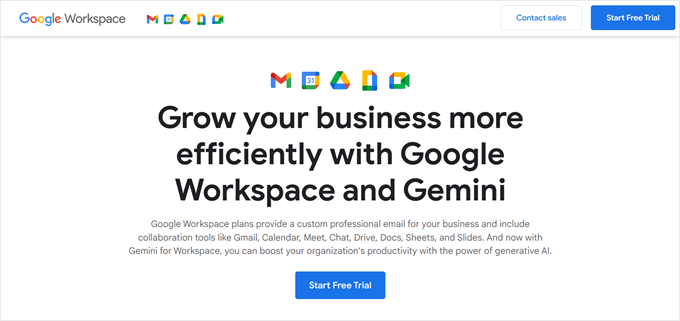
Get wordpress

<img decoding=”async” loading=”lazy” class=”with-border aligncenter wp-image-265314 size-full” src=”https://www.elegantthemes.com/blog/wp-content/uploads/2024/06/A-screenshot-of-wordpress.orgs-Homepage.jpg” alt=”A screenshot of wordpress.org’s Homepage” width=”1800″ height=”900″/>
wordpress is the very best content material subject matter keep watch over instrument (CMS) for building a restaurant website. With over 40% of internet pages powered by the use of wordpress, it’s secure, flexible, and highest imaginable for restaurant householders looking to keep watch over their own content material subject matter very easily. To liberate the real power of wordpress on your consuming position website, we’re going to make use of Divi, the most productive theme and website builder for wordpress.

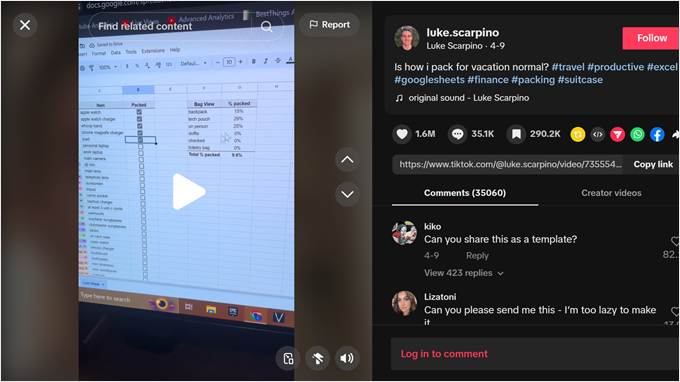
Set Up wordpress Web webhosting

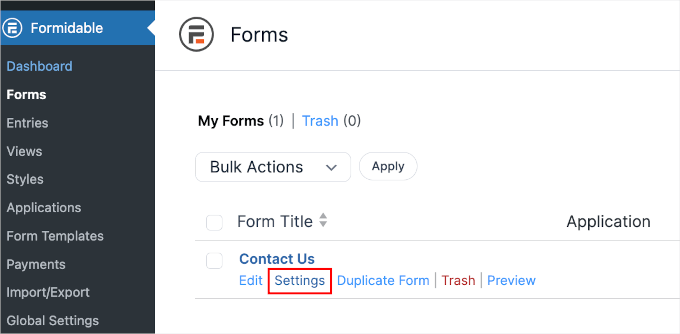
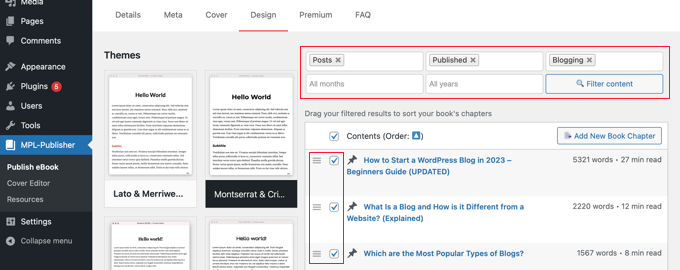
<img decoding=”async” loading=”lazy” class=”with-border aligncenter wp-image-263908 size-full” src=”https://www.elegantthemes.com/blog/wp-content/uploads/2024/05/Siteground-WP-hosting-Pricing-June-2024.jpg” alt=”SiteGround wordpress hosting” width=”1903″ height=”886″/>

SiteGround is a secure, unswerving, and devoted web web site webhosting. It moreover streamlines all of the process. Proper right here’s the most productive segment: When you host your website on SiteGround, you don’t wish to arrange wordpress or get a web site identify separately.

For those who prepare your SiteGround dashboard, you’ll be capable of claim your one-year free space identify and select its wordpress web site webhosting, which is bigger than enough to host a restaurant website. You gained’t should get into the technical side, similar to connecting DNS data or wordpress. SiteGround makes managing all your website assets in one dashboard extremely easy.

Creating your account on SiteGround is unassuming. Enter your space identify, fill in your details, and join.

Proper right here’s a additional detailed video on putting in place wordpress web site webhosting:

Get SiteGround

2. Arrange a wordpress Theme

Once your wordpress dashboard is waiting up, the next move is to position in a theme that provides building, customization alternatives, and a shocking design. It’s very important to select a theme that is flexible, secure, and seo-friendly to make sure a hassle-free experience.

We suggest using Divi — a multi-purpose wordpress theme that incorporates pre-made templates designed in particular for consuming puts, cafes, and foods corporations. With Divi, you’ll be capable of merely assemble a professional consuming position website in minutes, all with no need to code.

You’ll love working with Divi as a result of its no-code drag-and-drop internet web page builder purposes, which let you customize your web site visually. It supplies more than 200 content material components, similar to Gallery to turn your dishes in sudden pictures, Touch Paperwork to supply shoppers alternatives to book orders, and Map Integration to turn consuming position puts.

Divi Fast Websites and Divi AI simplify your art work a lot more. Need a website designed in 2 minutes? Ask Divi Speedy Internet sites to do it for you. Want to create a little to blow their own horns the unbelievable problems other folks say about your dishes? Divi Section AI will generate a shocking phase in seconds.

Get Divi

Why is Divi Easiest for Consuming position Internet pages?

Divi supplies superb choices to simplify building a functioning consuming position website. Proper right here’s why:

  • Consuming position Internet web site Templates: Divi provides entire web site templates for eating places, cafes, and meals corporations. You’ll moreover combine ‘n fit templates to design a custom designed website.
  • Gallery Layouts to Sing their own praises Foods Footage: Divi includes a Gallery phase to blow their own horns foods pictures in grid and slider layouts. Want additional alternatives? Check out Divi Gallery Format Pack and additional in Divi Market.
  • Mega Menu to Sing their own praises Foods Items: You’ll create mega menus to tick list all your dishes. Arrange the Divi Restro Menu extension in an effort to upload pictures, value listings, and additional elements.
  • Online Bookings & Reservations: Take table bookings from your website by the use of putting in place the Merely Agenda Appointments plugin. You’ll moreover get Divi Reserving Reservation from Divi Marketplace.
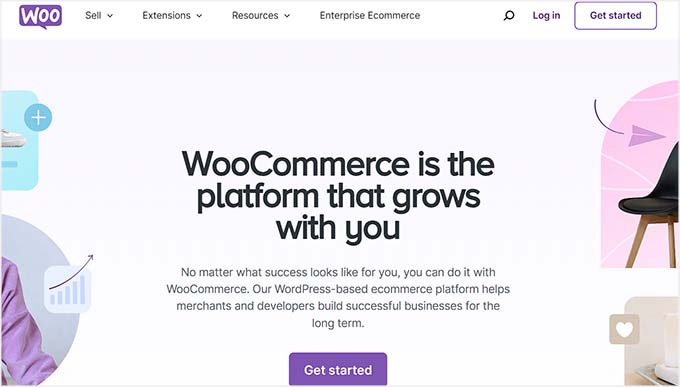
  • WooCommerce Compatibility: Allow your shoppers to order foods online directly from your web site by the use of configuring WooCommerce. Divi Speedy Internet sites routinely installs and configures WooCommerce, in order that you don’t have to worry regarding the setup. You moreover get pre-designed Divi WooCommerce Modules to organize pages in short.

The best segment is that Divi supplies a collection of time-saving apparatus, similar to Divi AI (which takes care of your website content material subject matter,) Bloom and Monarch peak fee plugins for email promoting and social media sharing, Divi Theme Builder, which makes site-wide changes to website branding, and quite a lot of additional.

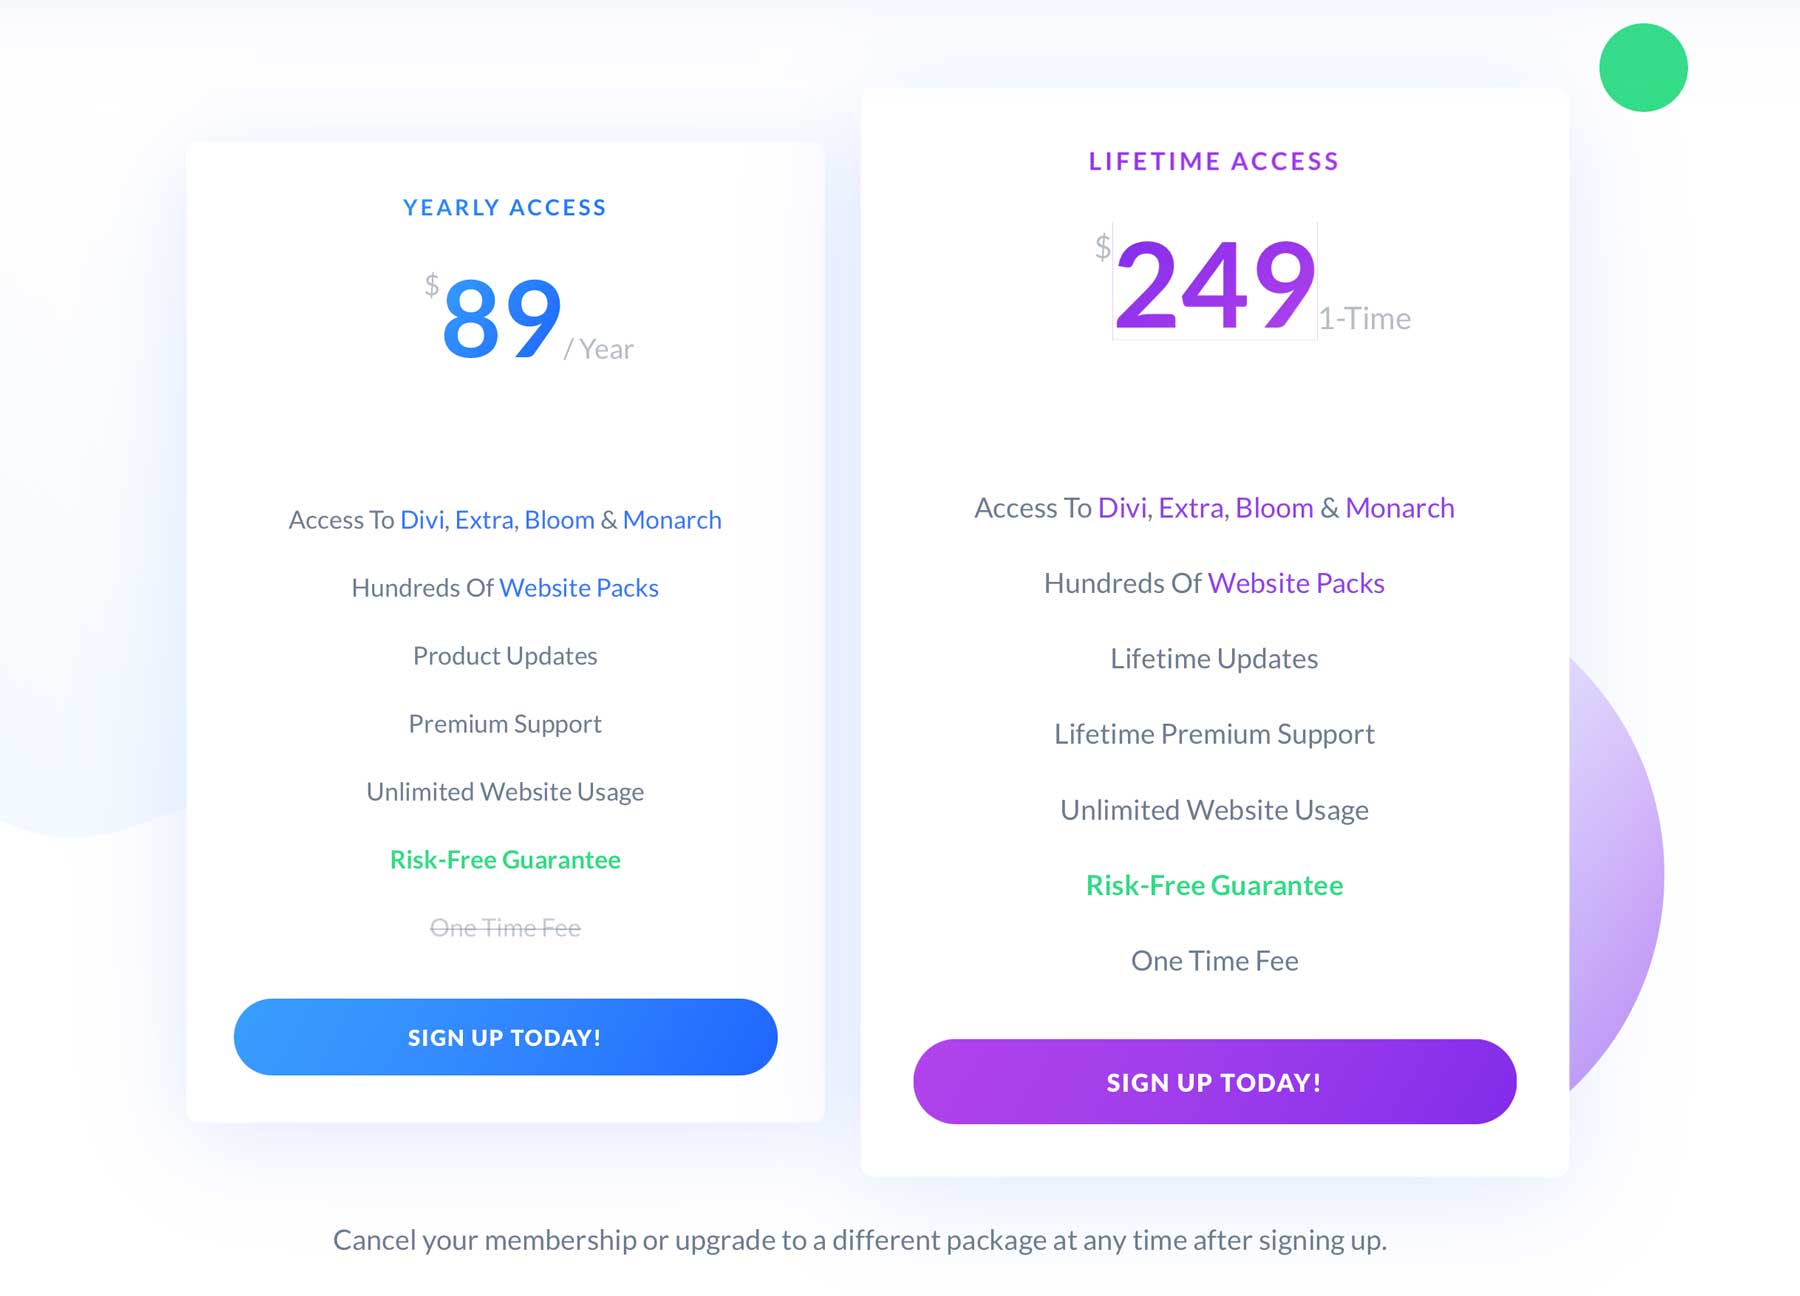
Divi Pricing (Annually and Lifetime)

You wish to have the Divi theme membership to build a restaurant website, which costs $89/twelve months. For those who occur to’d like additional upfront pricing, pay $250 once to get the Divi theme for existence.

divi-pricing-lifetime

Get Divi

For those who gain Divi, putting in place it’s easy. Proper right here’s a walkthrough of shopping for, putting in place, and activating the Divi theme on your wordpress dashboard.

3. Assemble Your Consuming position Internet web site

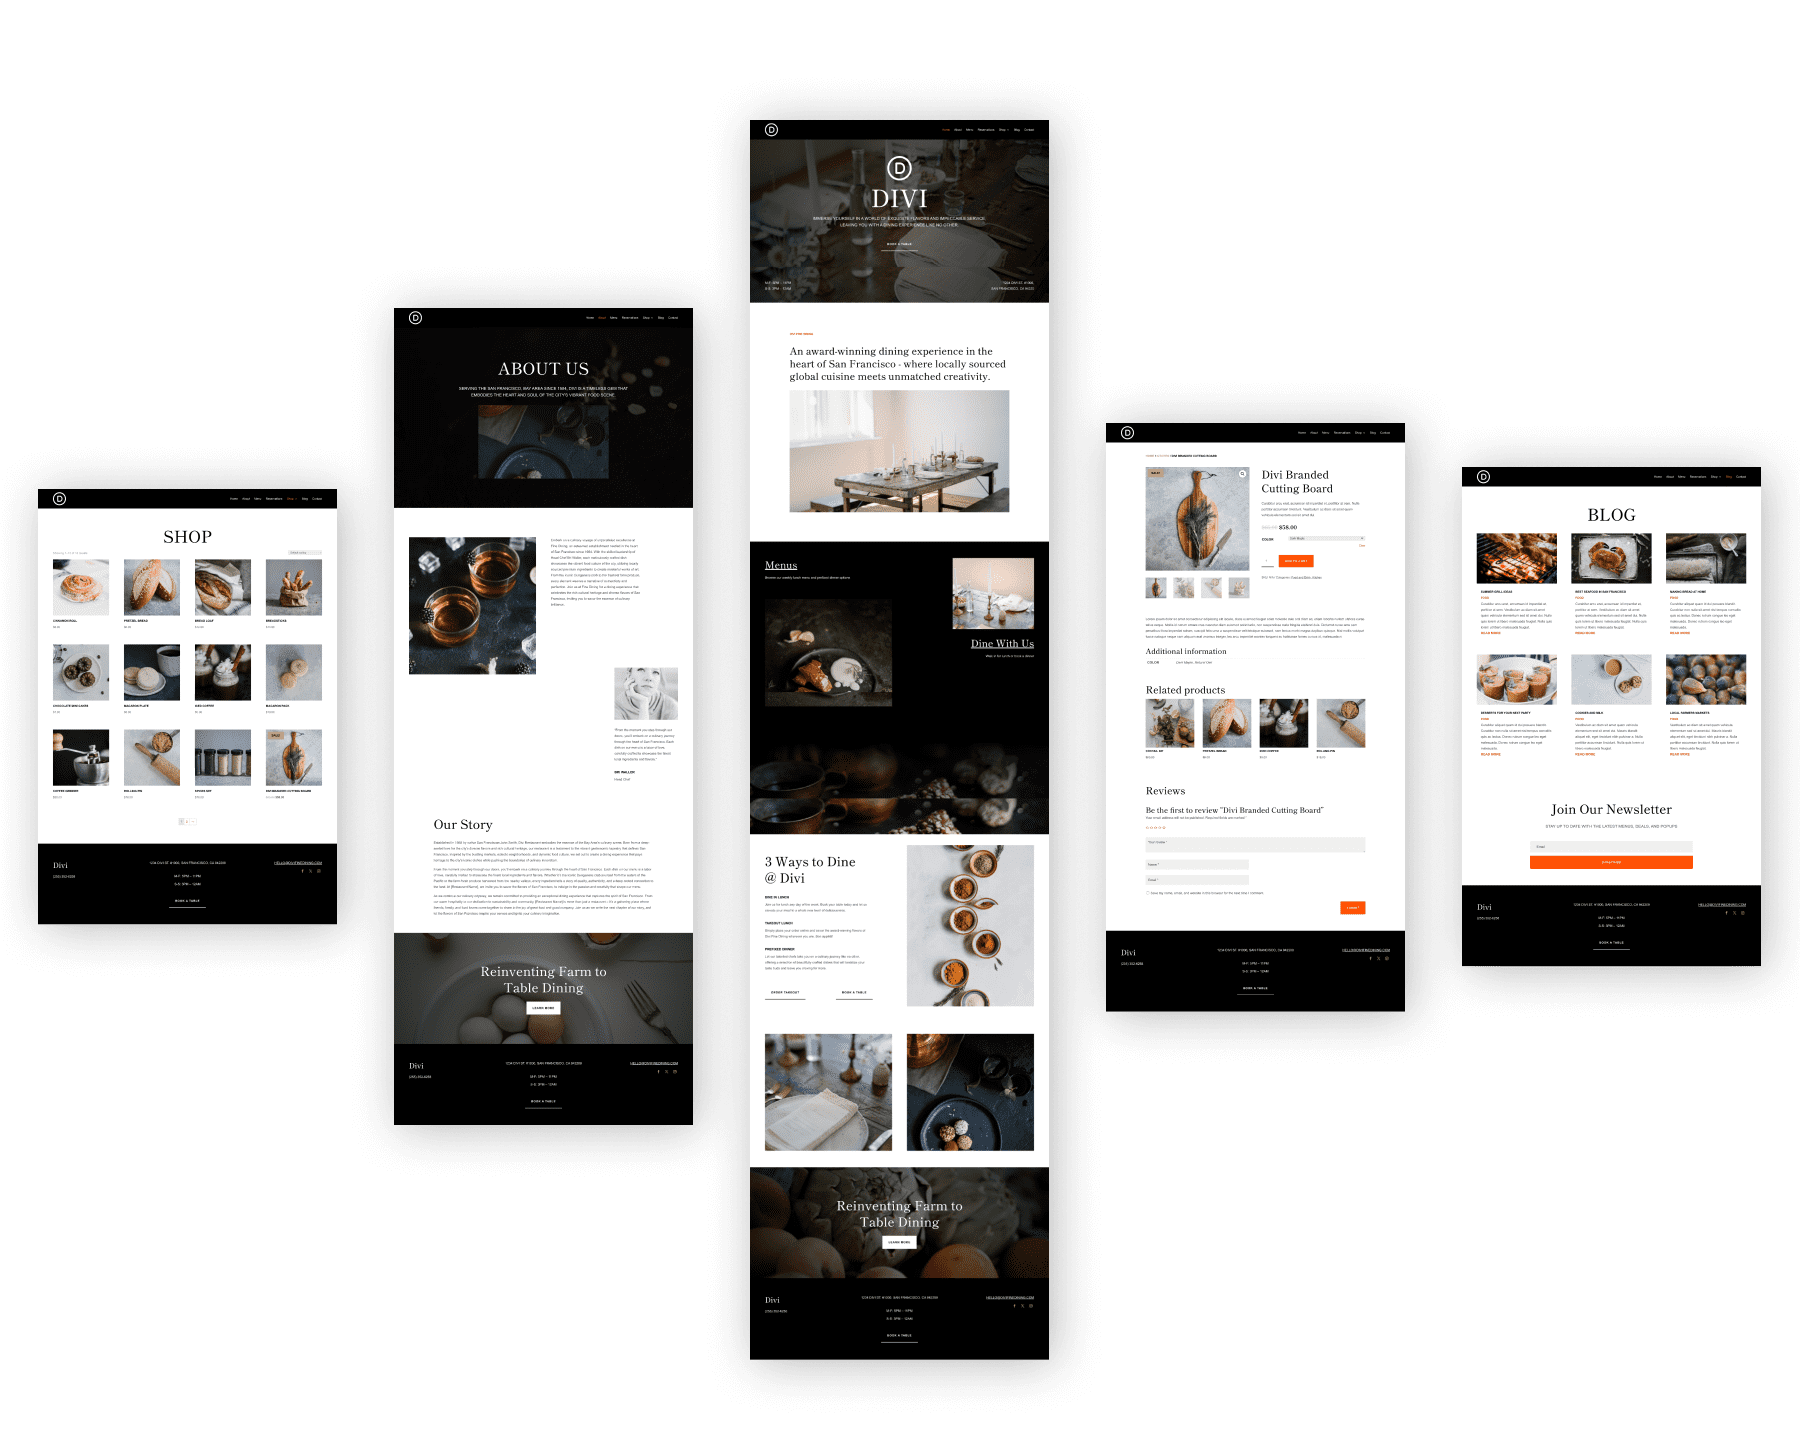
With Divi Fast Websites, you’ll be capable of assemble a unconditionally functioning consuming position website in under an hour. You’ll have a structured website ready in less than 5 minutes, leaving you with quite a lot of time to customize it on your exact needs.

Divi Speedy Internet sites comes with pre-designed pages like Space, About, Services and products and merchandise, Menu, Contact, and Gallery. It moreover accommodates Theme Builder templates, global sorts, and branding presets to supply your web site a professional finish.

Get Divi

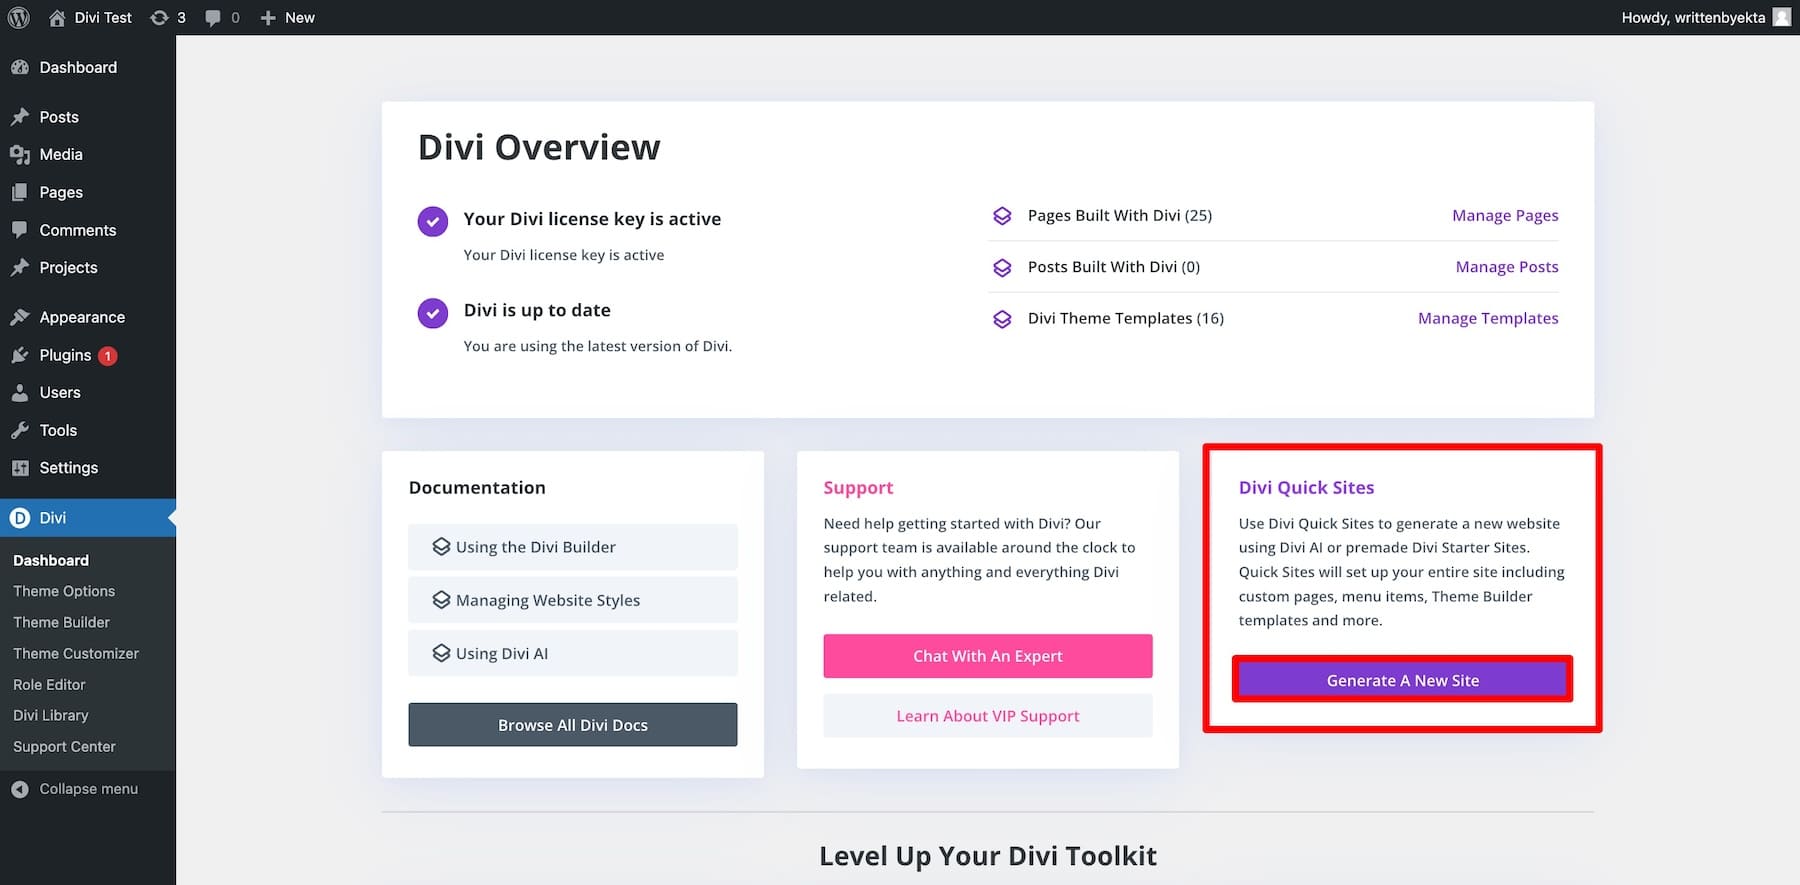
Proper right here’s learn the way to create your consuming position website using Divi Speedy Internet sites. From your Divi dashboard, click on on Generate a New Internet web page inside the Divi Speedy Internet sites phase.

Generate a new site with Divi Quick Sites

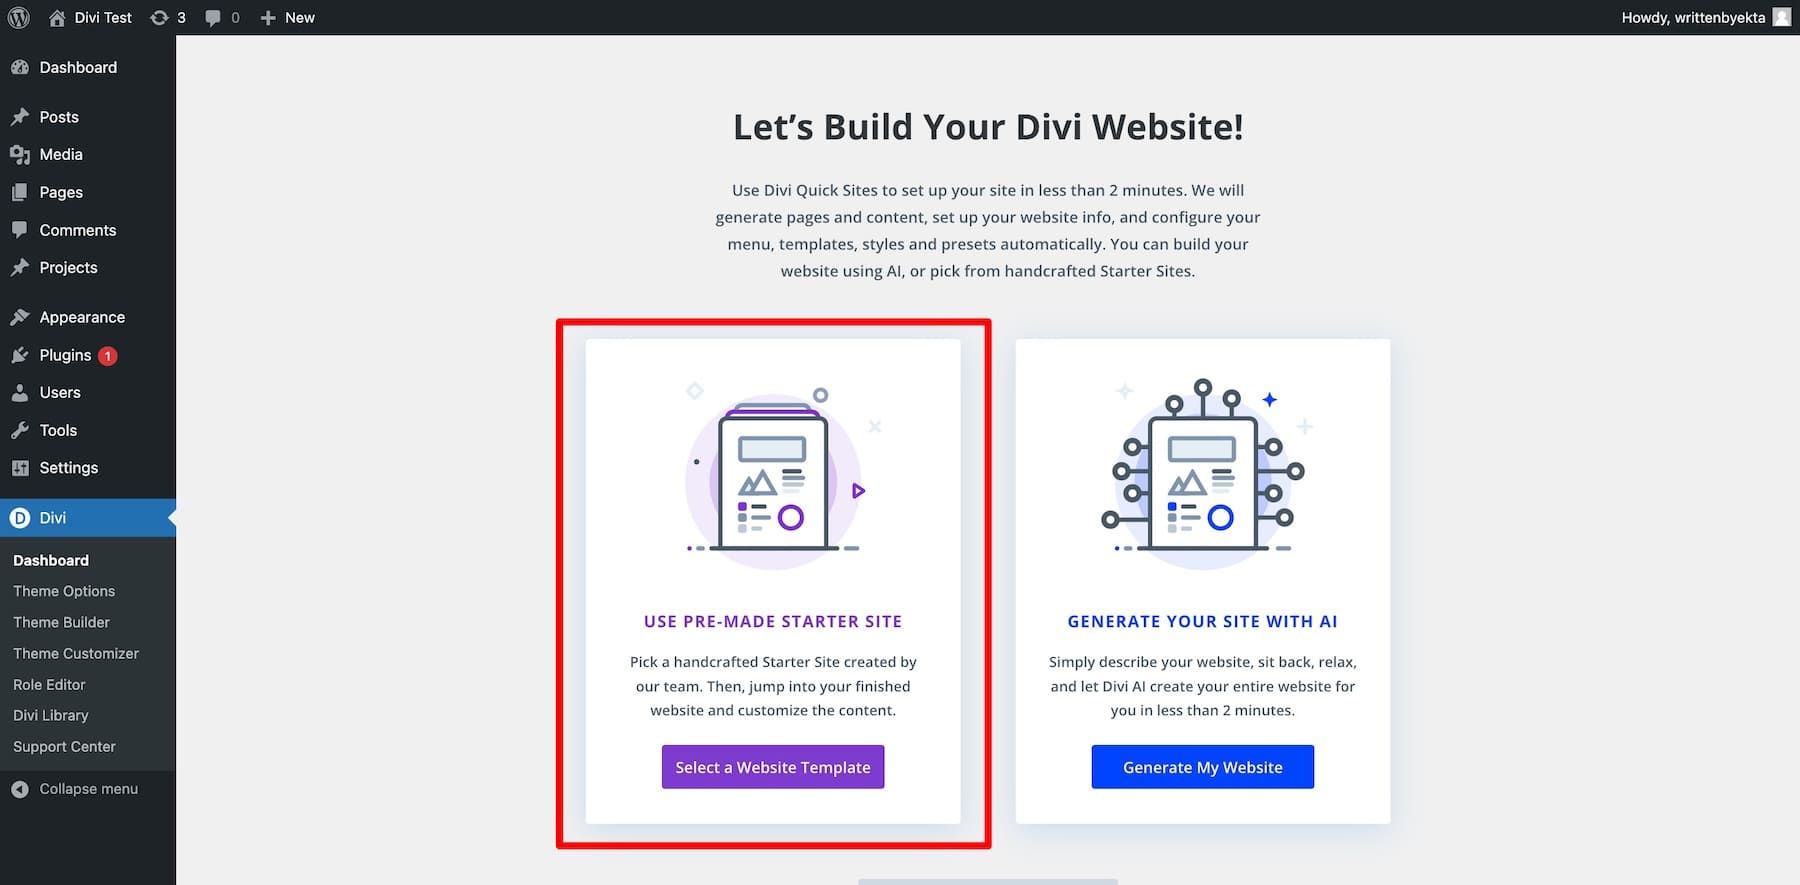
You’ll be brought on to choose between two alternatives:

  • Use a Pre-Made Starter Internet web page: Choose from a pre-designed Starter Internet web page that incorporates branding, pages, and construction. Your website might be ready to liberate straight away.
  • Generate with Divi AI: Provide Divi AI together with your own tastes, and it’s going to generate a custom designed website whole with comparable pages and capacity.

Creating a Consuming position Internet web page The use of Starter Internet sites

Let’s move with the Starter Internet web page risk. It supplies a professionally designed, ready-to-launch website that can be merely customized on your liking.

Click on on Select a Internet web site Template.

Select Starter Site

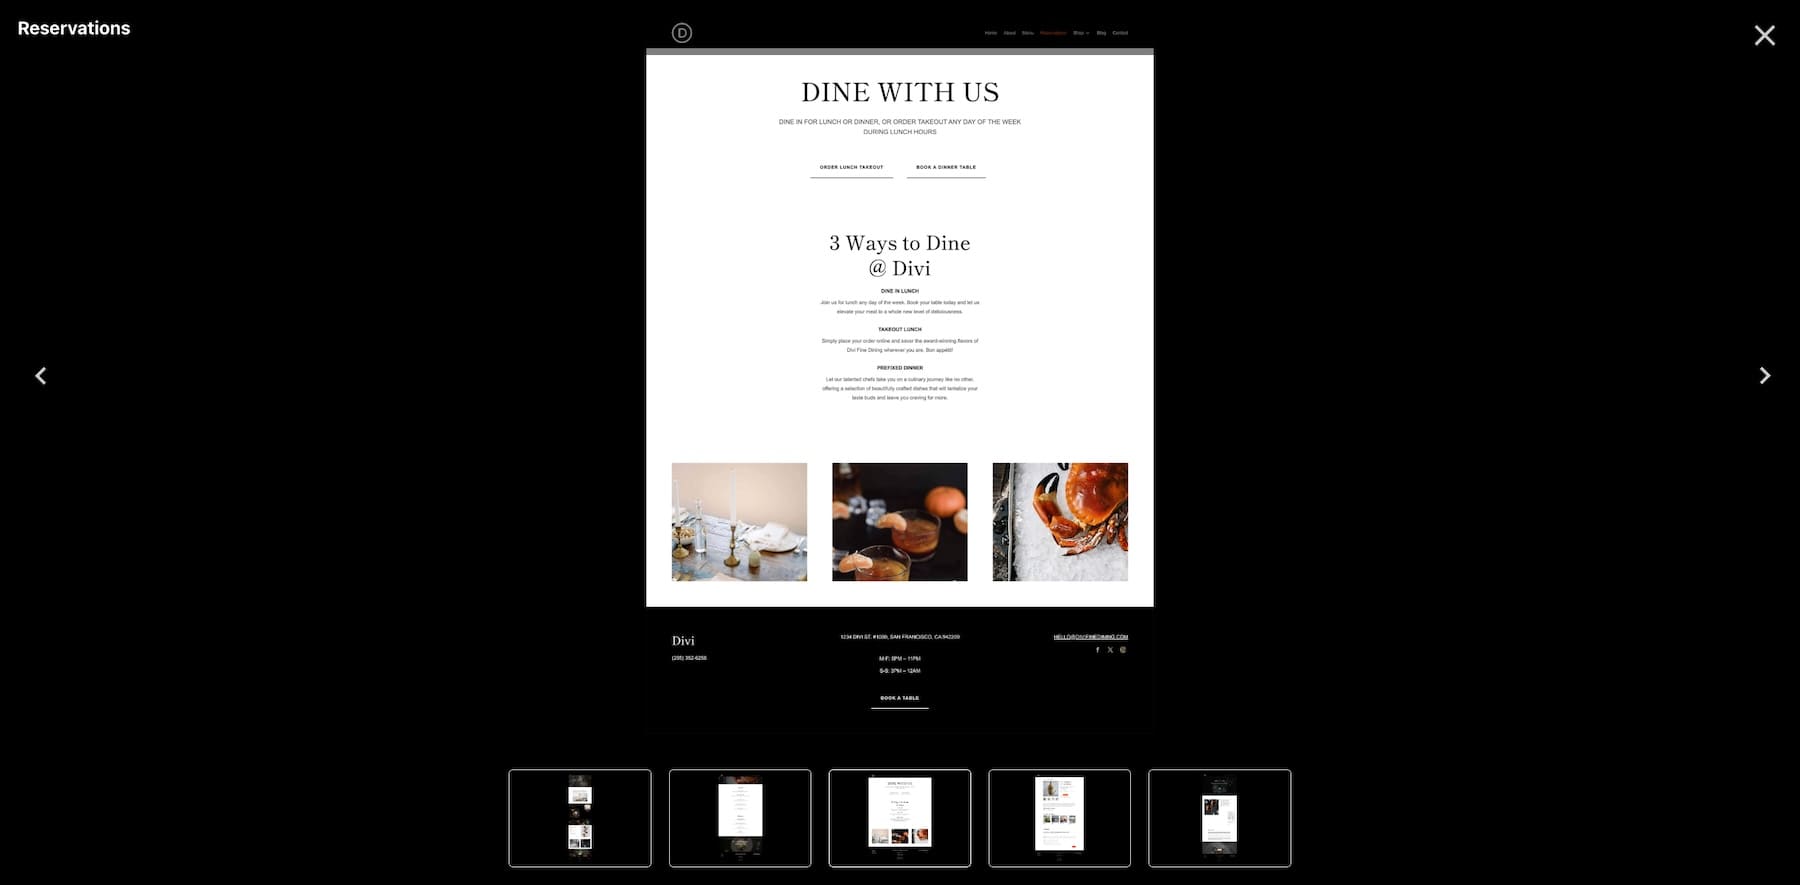
Now, select the Consuming position template. You’ll preview the template to see how your consuming position web site will look. To preview, hover over and click on on Preview Consuming position.

Preview Restaurant Template

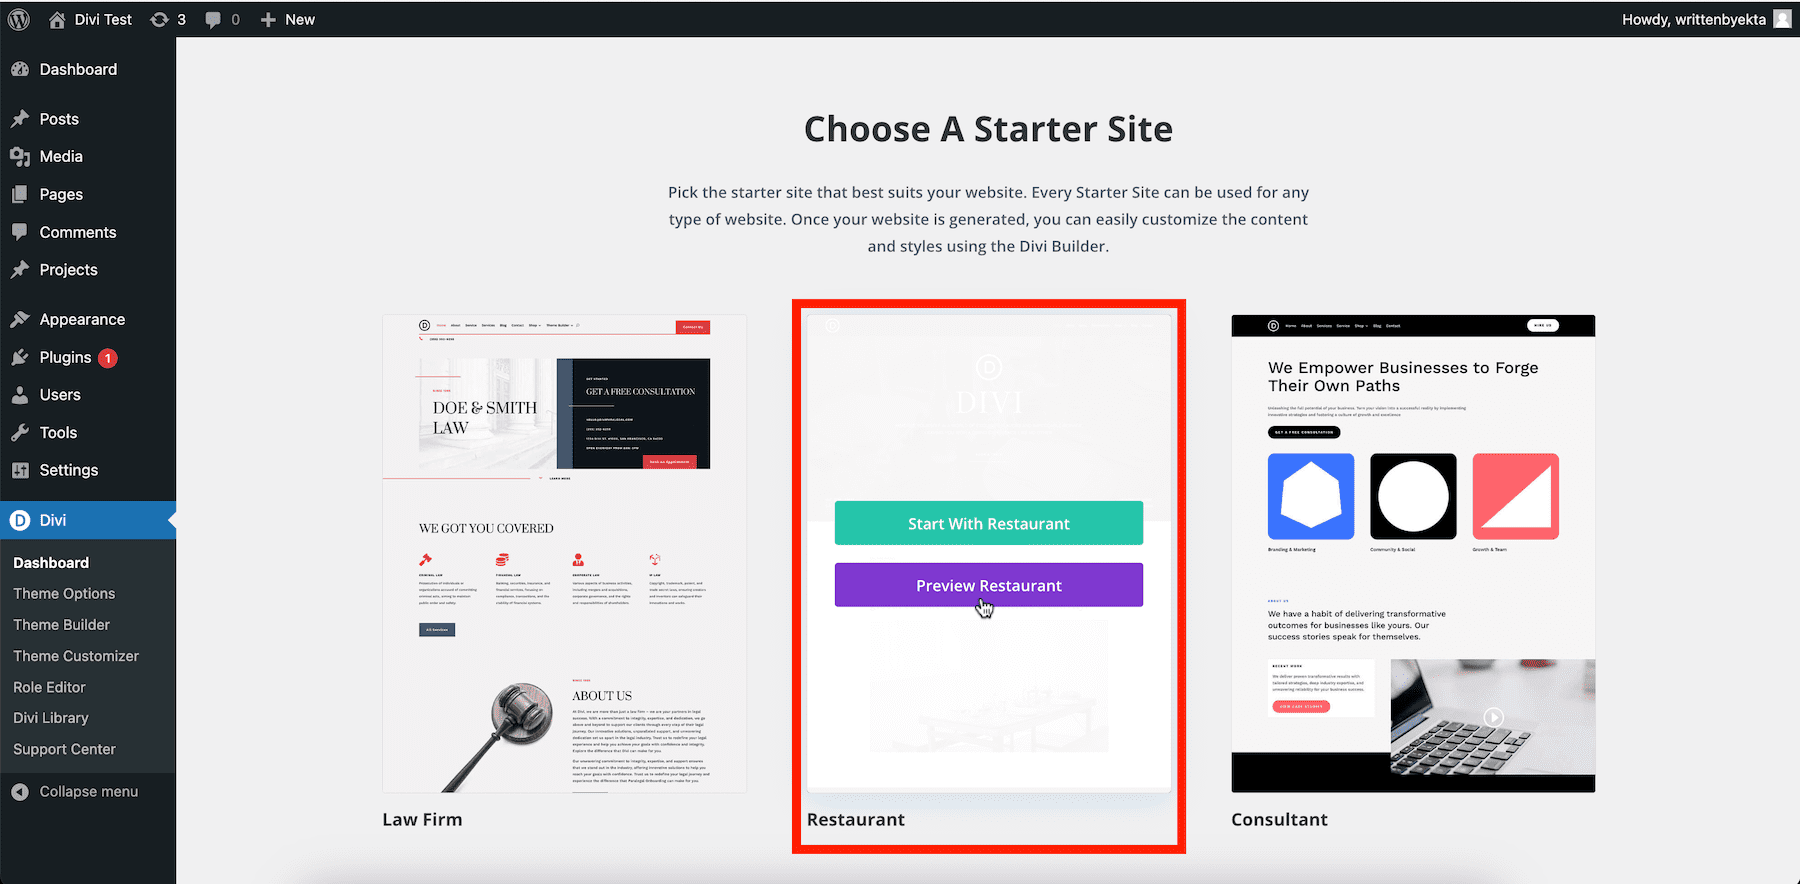
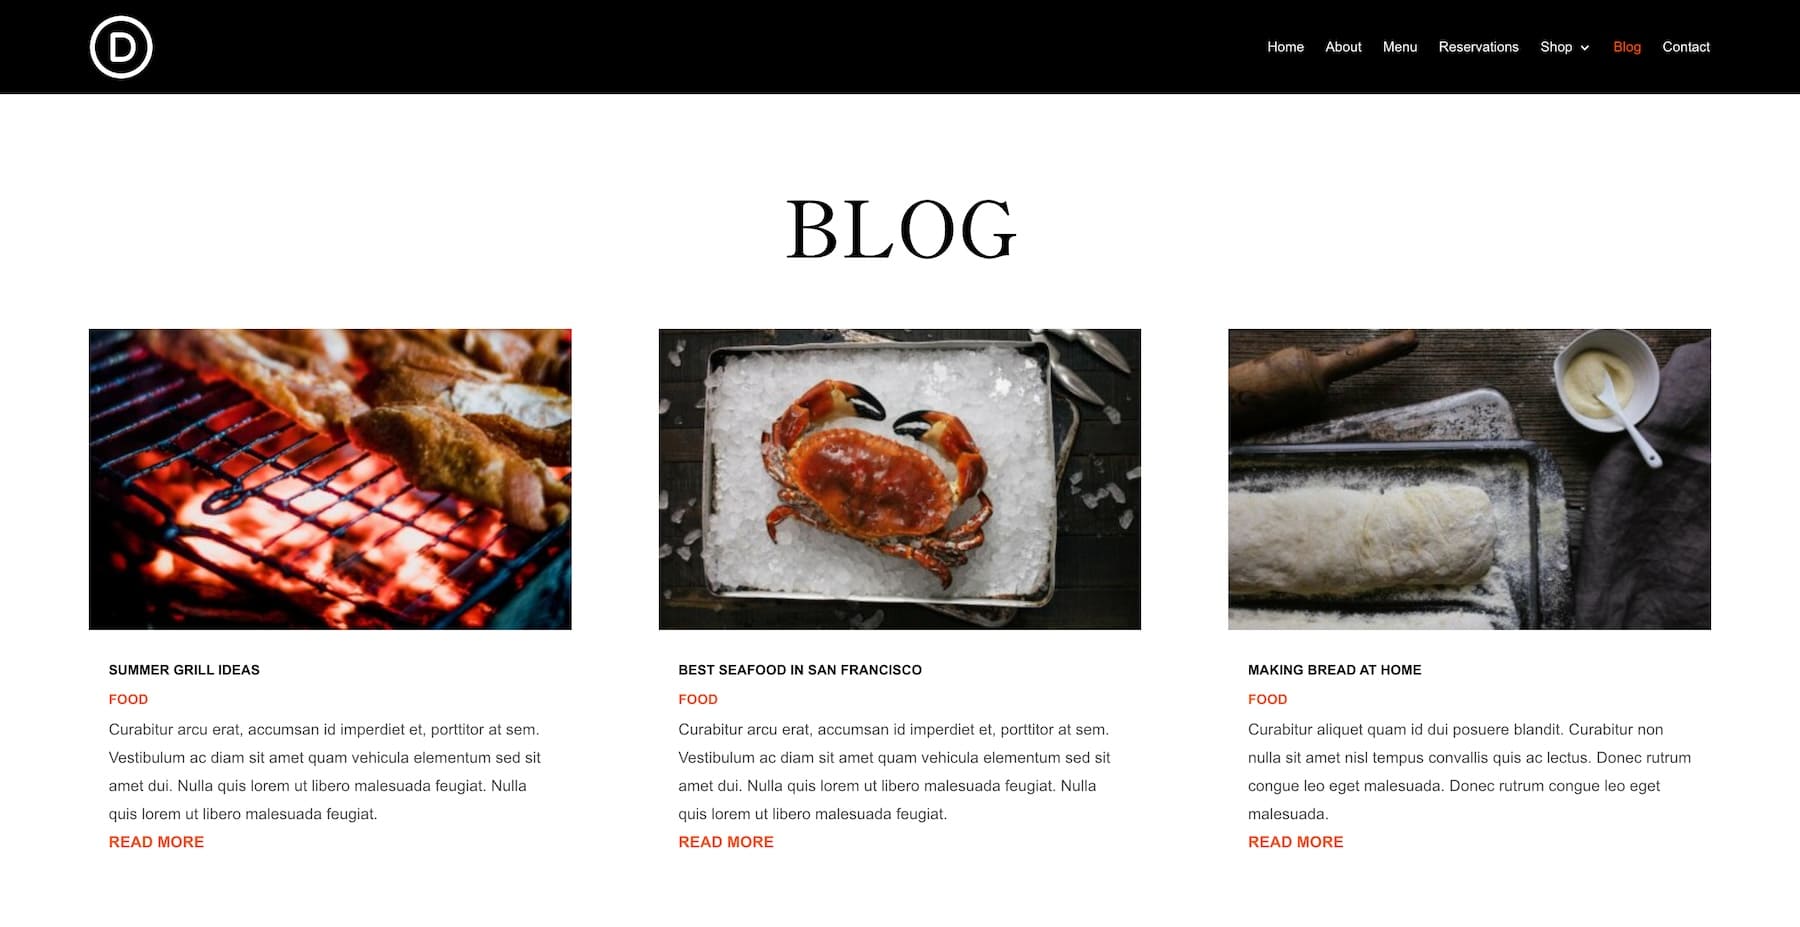
The Consuming position Starter Internet web page accommodates an important pages like Space, About, Contact, Menu, Reservations, Blog, and Retailer.

Preview Restaurant Starter Site Pages

To start building, hover over the template and click on on Get began with Consuming position.

Start with Restaurant Site

Divi Speedy Internet sites will instructed you to fill in a few details to personalize your web site:

  • Enter your Internet web page Identify and Internet web page Slogan.
  • Upload your Internet web page Logo in an effort to upload it to the header right through all pages.
  • Select the Pages you wish to have to include. For those who occur to try the Retailer risk, Divi Speedy Internet sites will arrange WooCommerce and configure it for online foods ordering.
  • Use the Add A Custom designed Internet web page button in an effort to upload any longer pages.

Enter Site Info

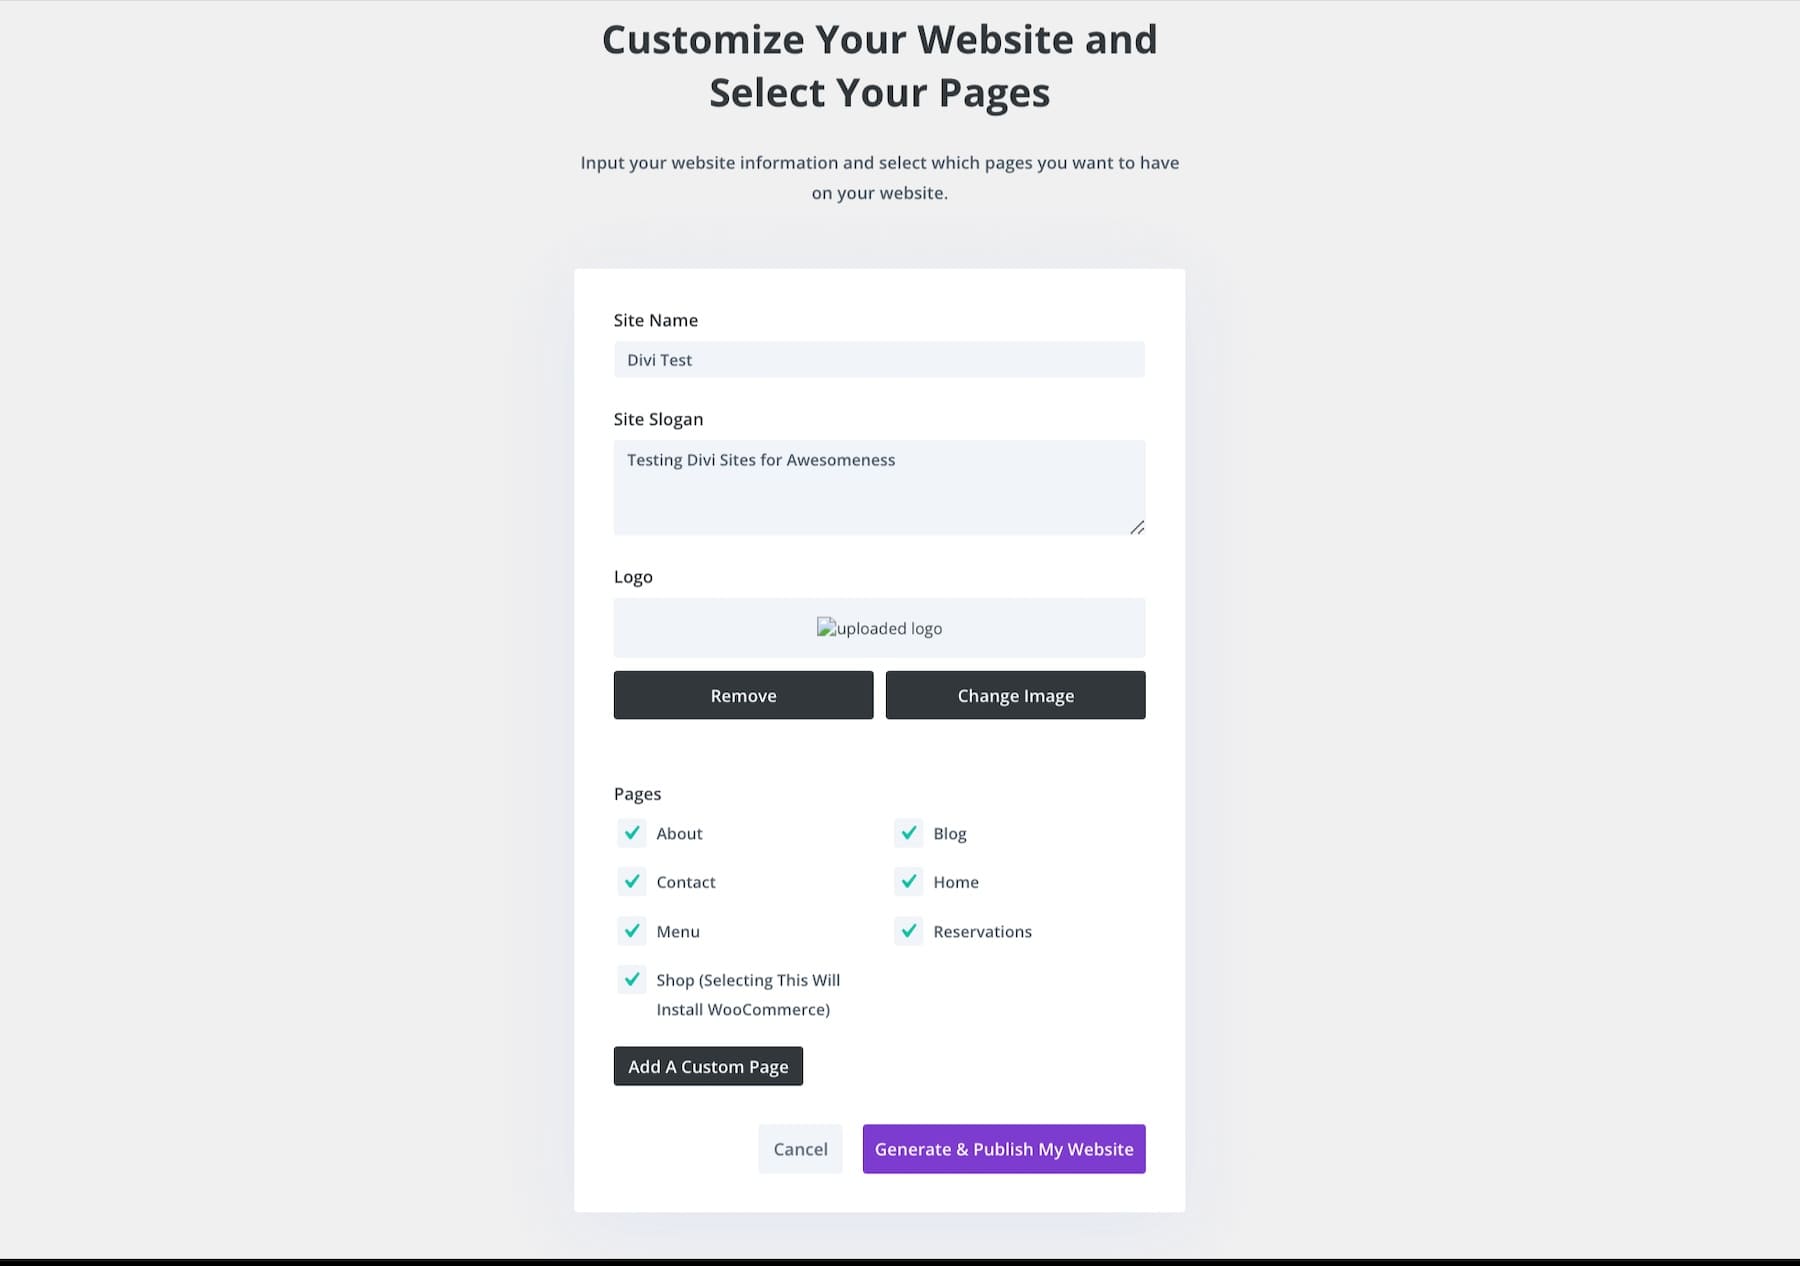
For those who’ve filled in the details, click on on Generate & Publish My Internet web site. Your consuming position web site might be live in merely 2-3 minutes.

And that’s it! Your consuming position website is ready, and also you’ll be capable of get began customizing it immediately.

Divi Restaurant Starter Site

Creating a Consuming position Internet web page The use of Divi AI

If you would like to create a custom designed website from scratch, select the Generate Your Internet web page with AI risk.

Merely fill inside the web site details and let Divi AI create the very best website for you. As quickly because it’s ready, click on on Generate & Publish My Internet web site and watch your web site come to existence.

Get Began with Divi

4. Customize Your Consuming position Internet web site

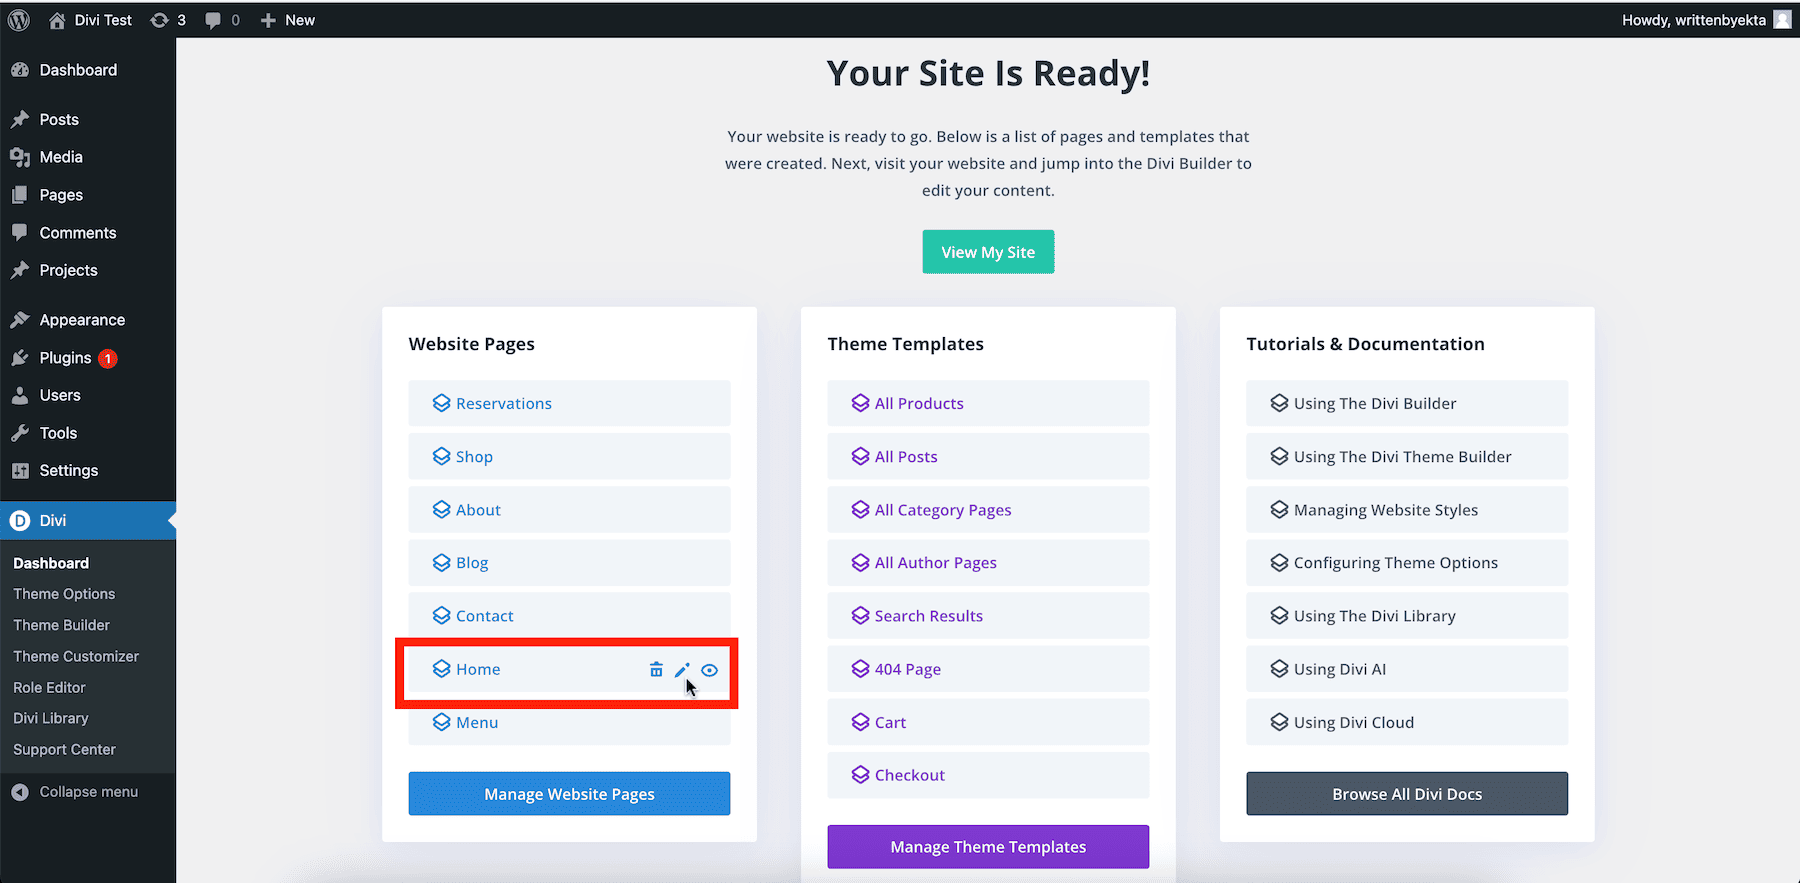
The website generated is a reproduction of Divi’s Consuming position Starter Internet web page, this means that it should be customized together with your content material subject matter and branding to reflect your consuming position online. Let’s get began with customizing your web site’s pages.

Together with Content material subject matter to Your Consuming position Internet web page Pages

From Your Internet web page is Ready show, hover over Space and click on at the pencil icon to modify it.

edit home page restaurant site

You’re now customizing your web site’s space internet web page using Divi Builder, which lets you make changes visually by the use of dragging and dropping elements. To modify any Divi module, hover over it and click on at the apparatus (settings) icon. This opens a pop-up window with all of the settings.

customize your site with divi builder

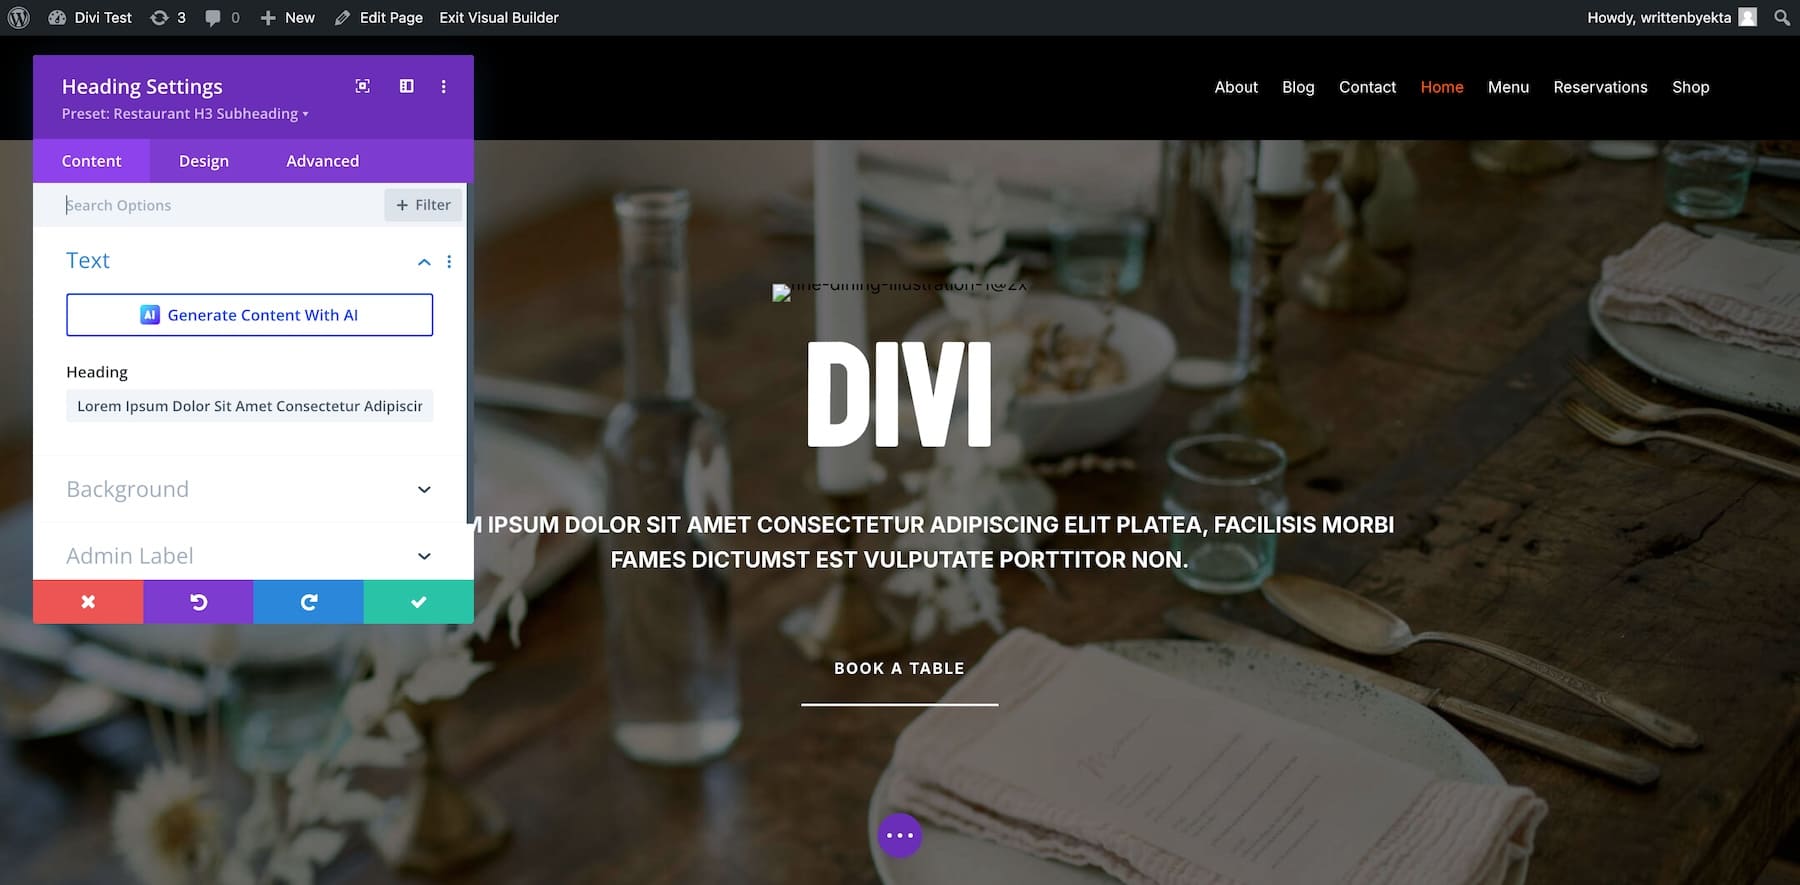
Divi is helping inline editing, in order that you don’t should open the settings window to edit text. You’ll do it on-screen using the keyboard keys. Similarly, so as to add pictures, hover over the image and click on at the settings risk.

modify images of a restaurant site

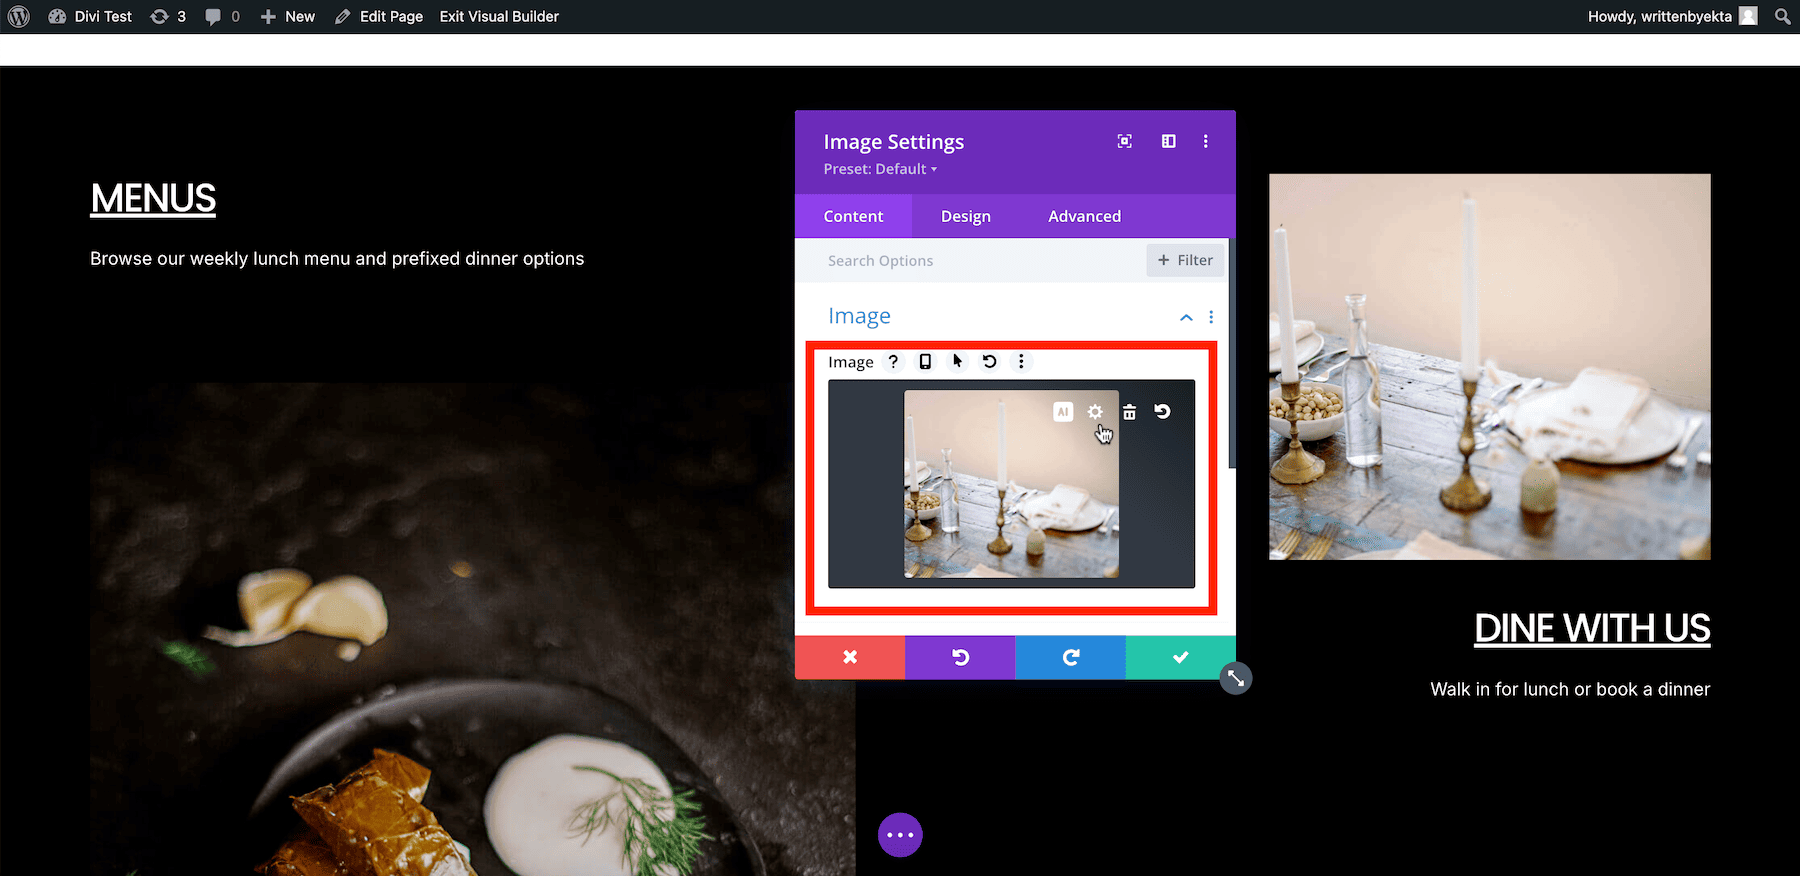
Now click on on on the settings icon right through the Image phase. This will likely an increasing number of take you to the wordpress media library, from where you’ll be capable of upload your pictures.

Similarly, change links, buttons, and other elements by the use of going right through the settings risk for every phase. Watch this video on Divi to learn how to edit pages with Divi Builder.

Together with Logo Fonts to Your Consuming position Internet web page

The Consuming position web site you generated has pre-defined International Fonts (picked from the Starter Internet web page) that apply on your web site. You’ll use the existing ones or add your logo fonts. You’ll merely regulate International Fonts using Divi Builder.

Click on on any text phase and move to settings. Switch to the Design tab, scroll to Text, and click on on Font.

Edit global fonts from divi builder

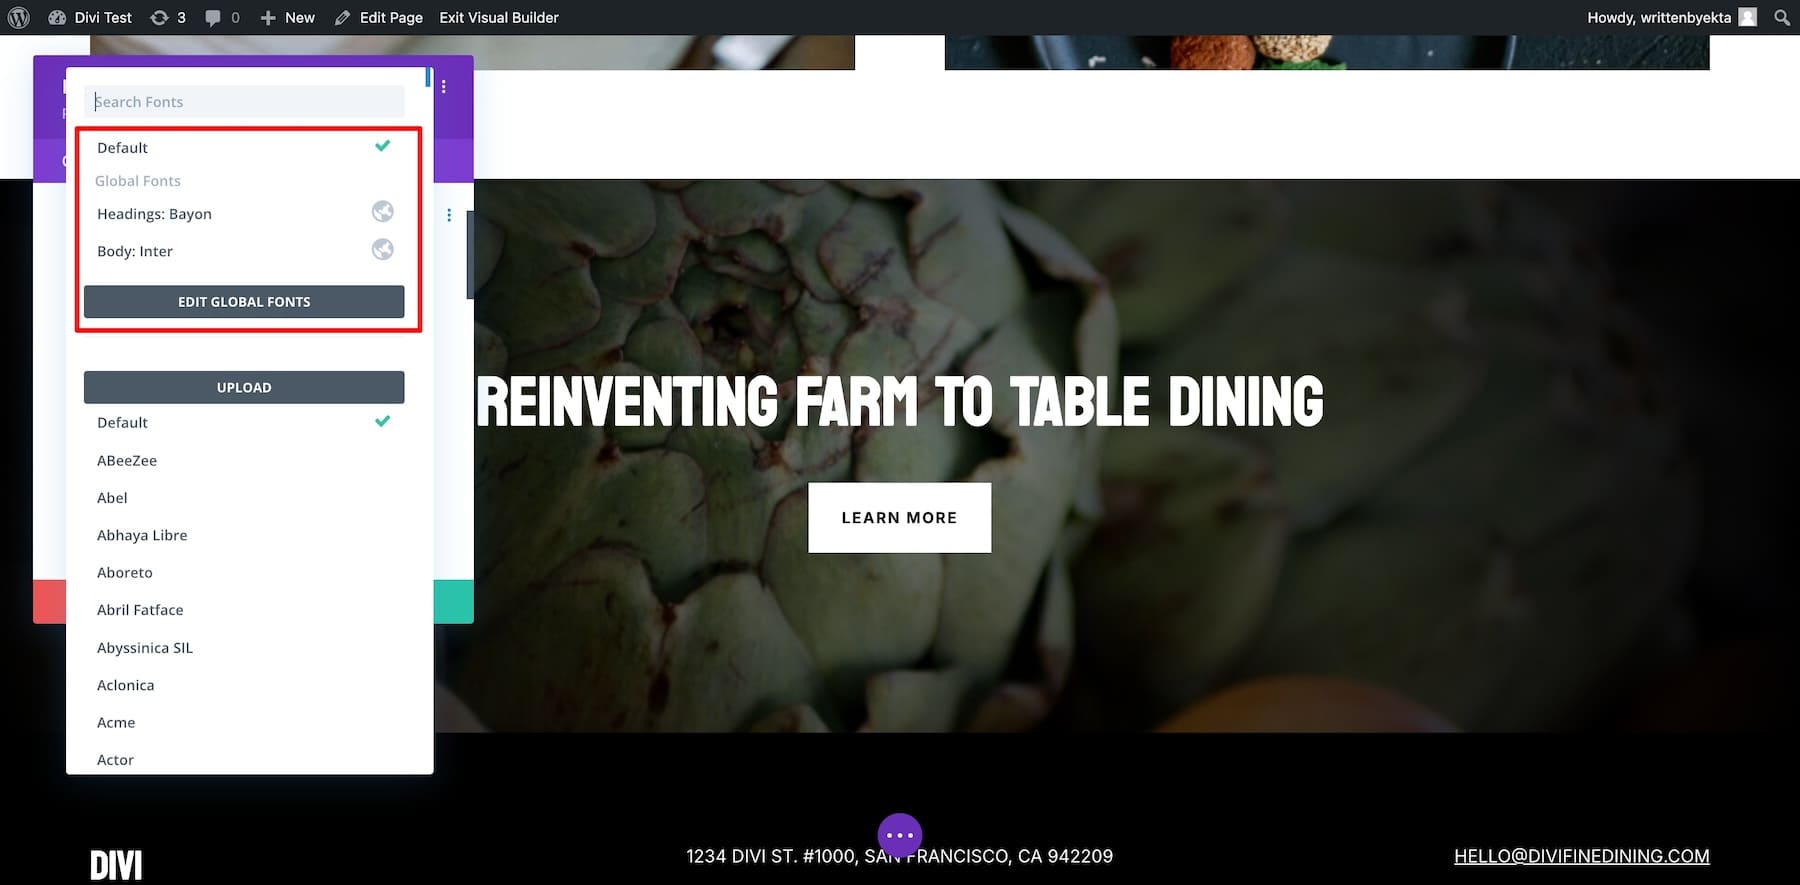
You’ll moreover upload your fonts or choose from our library, in conjunction with Google fonts.

Together with Logo Colors to Your Consuming position Internet web page

As a way to upload your logo colors, you wish to have to edit International Colors. Like International Fonts, the existing global colors are picked up from the Consuming position Starter Internet web page.

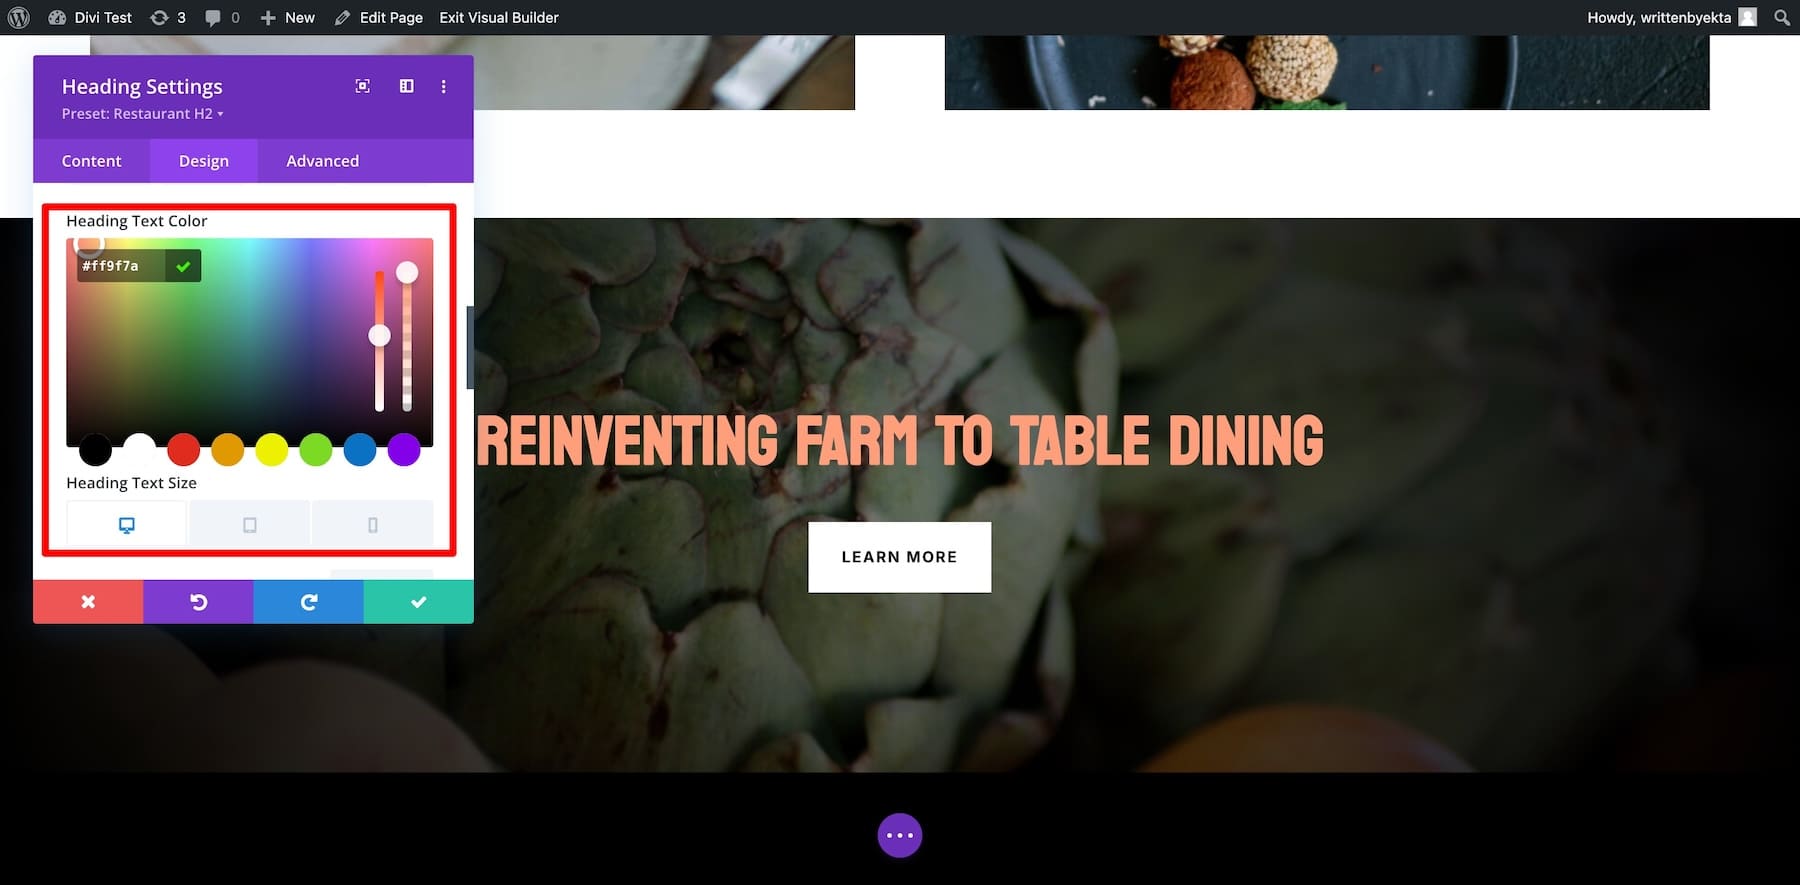
Click on on on the settings of any text phase and switch to Design. Scroll all of the manner right down to Text and move to Heading Text Color.

switch to global from saved colors

Now switch to International from Saved. The ones are the existing International Colors. To modify them, click on on on every color and select. You’ll moreover add your color hex codes.

change global color

Similarly, keep an eye on all colors. You’ll add additional colors by the use of clicking the plus icon next to the general International Color.

Bettering Internet web page Layout Templates

Divi Speedy Internet sites routinely creates Theme Builder templates (replicated from the Starter Internet web page.) The benefit of using Theme Builder templates is that your pages look the an identical, and if you want to make adjustments, the changes are reflected site-wide.

As an example, the custom designed footer you see on your web site is taken from the Consuming position Starter Internet web page. It’s going to appear on all pages. For those who occur to regulate its Theme Builder template, the changes will appear all over the place.

theme builder template - default footer

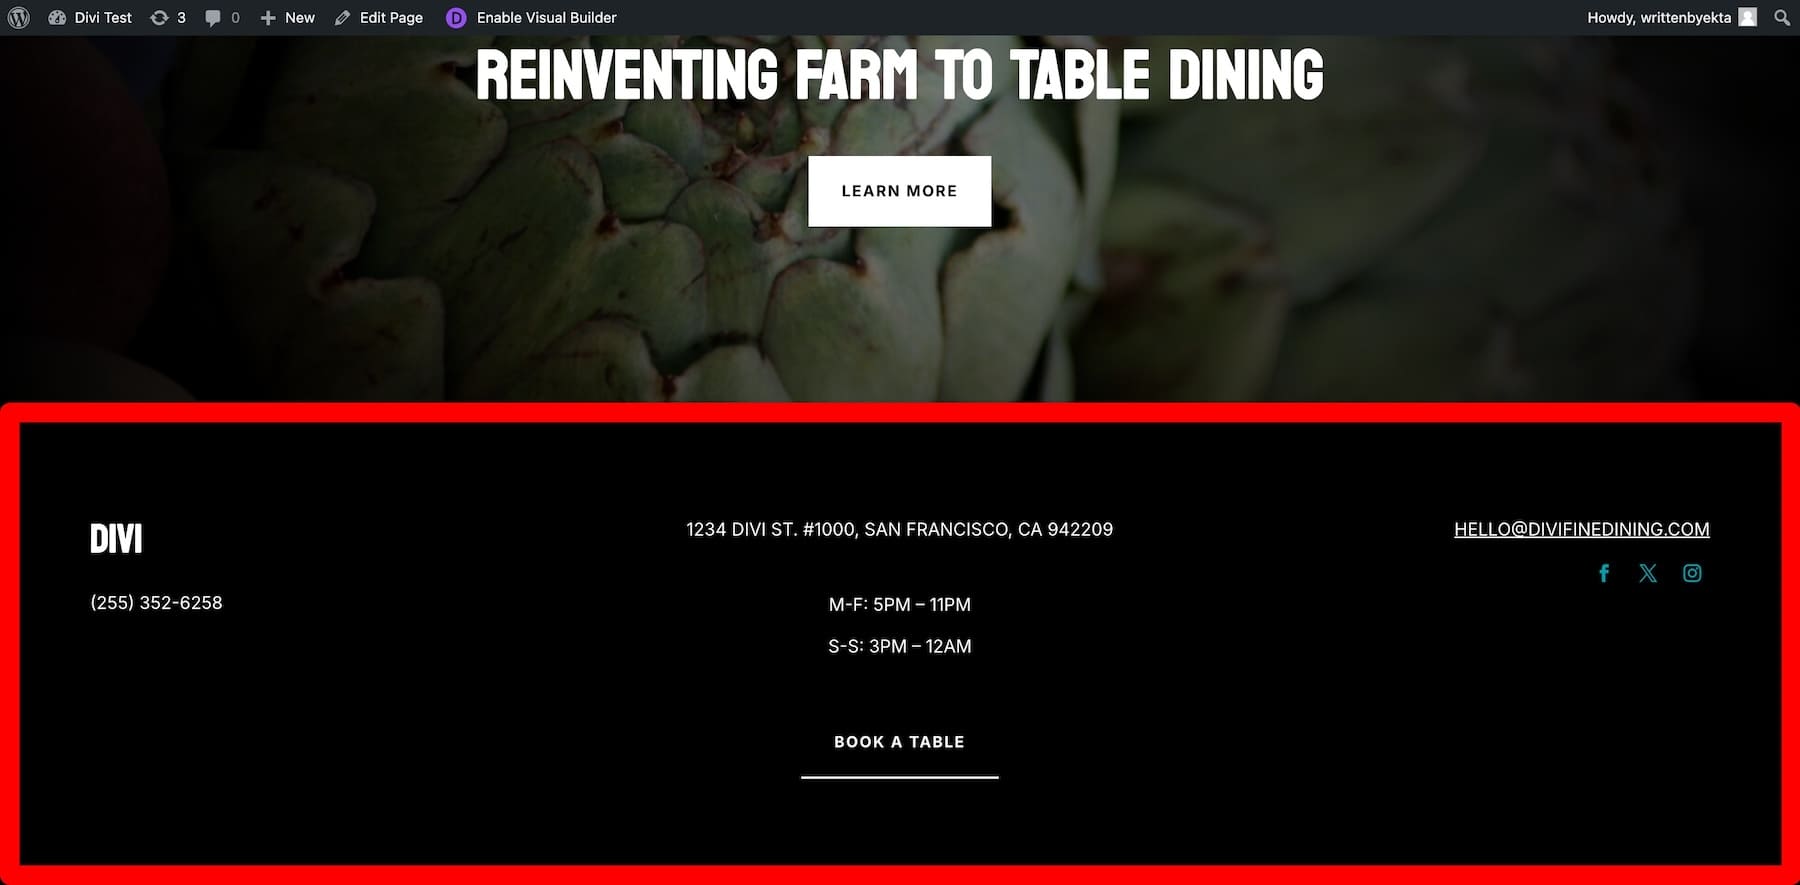
To modify this footer, you will have to industry the default Theme Builder template from the Your Internet web page is Ready internet web page. Or move to Divi > Theme Builder and click on on on Default Internet web site Template.

customize global footer

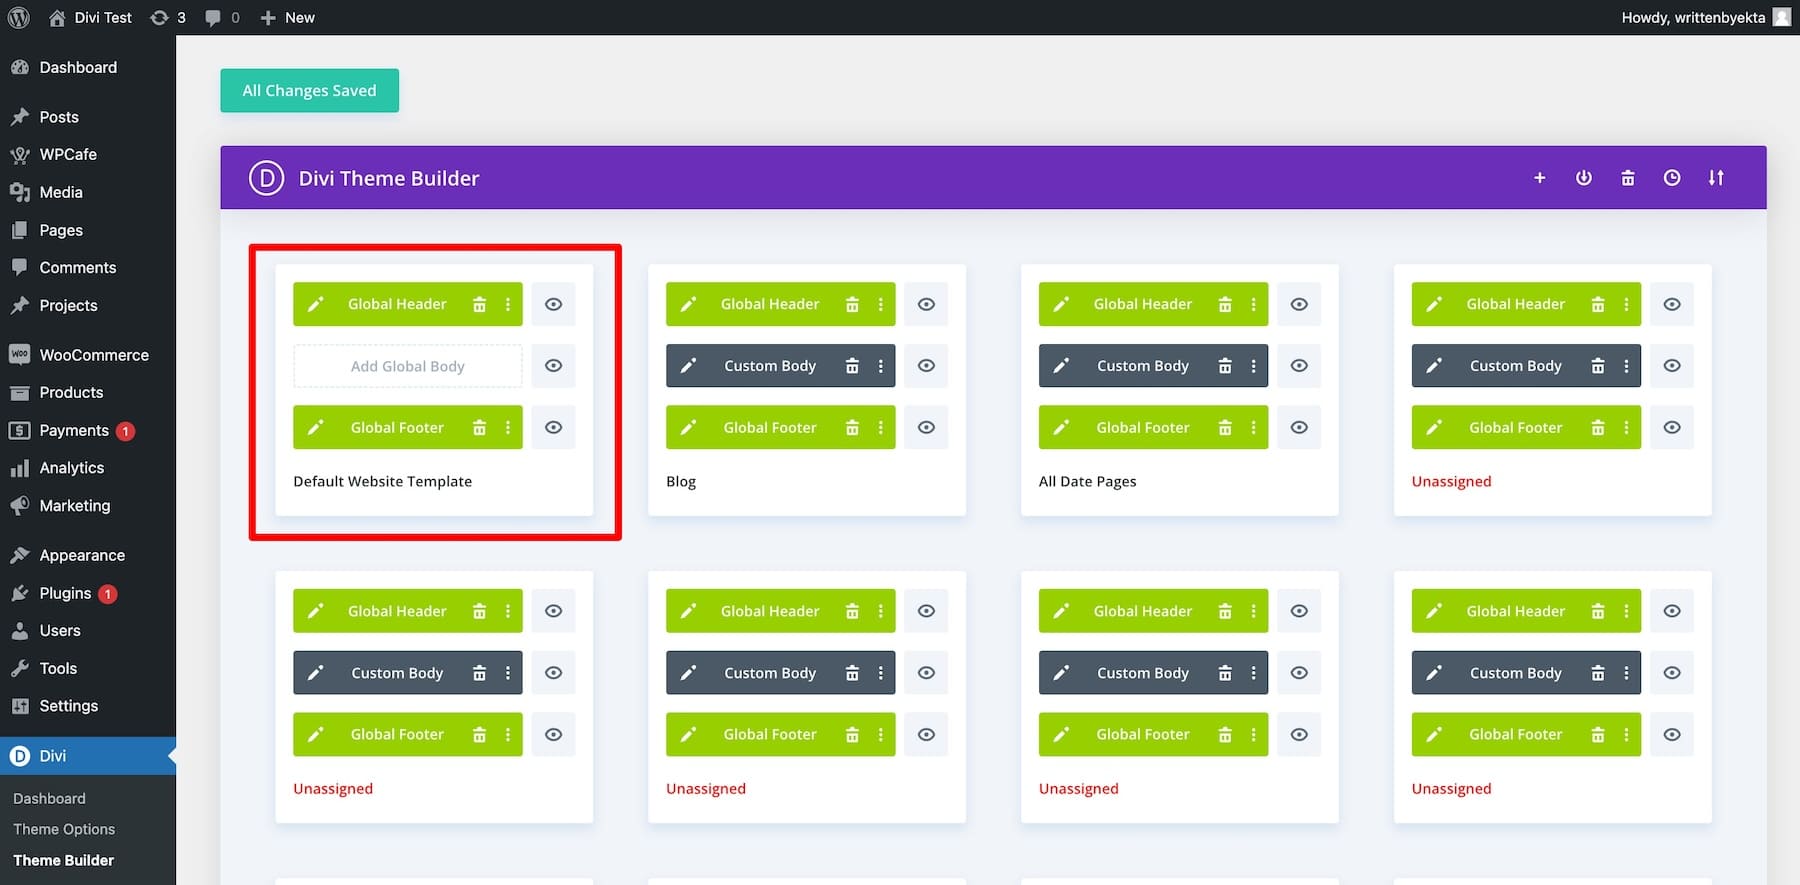
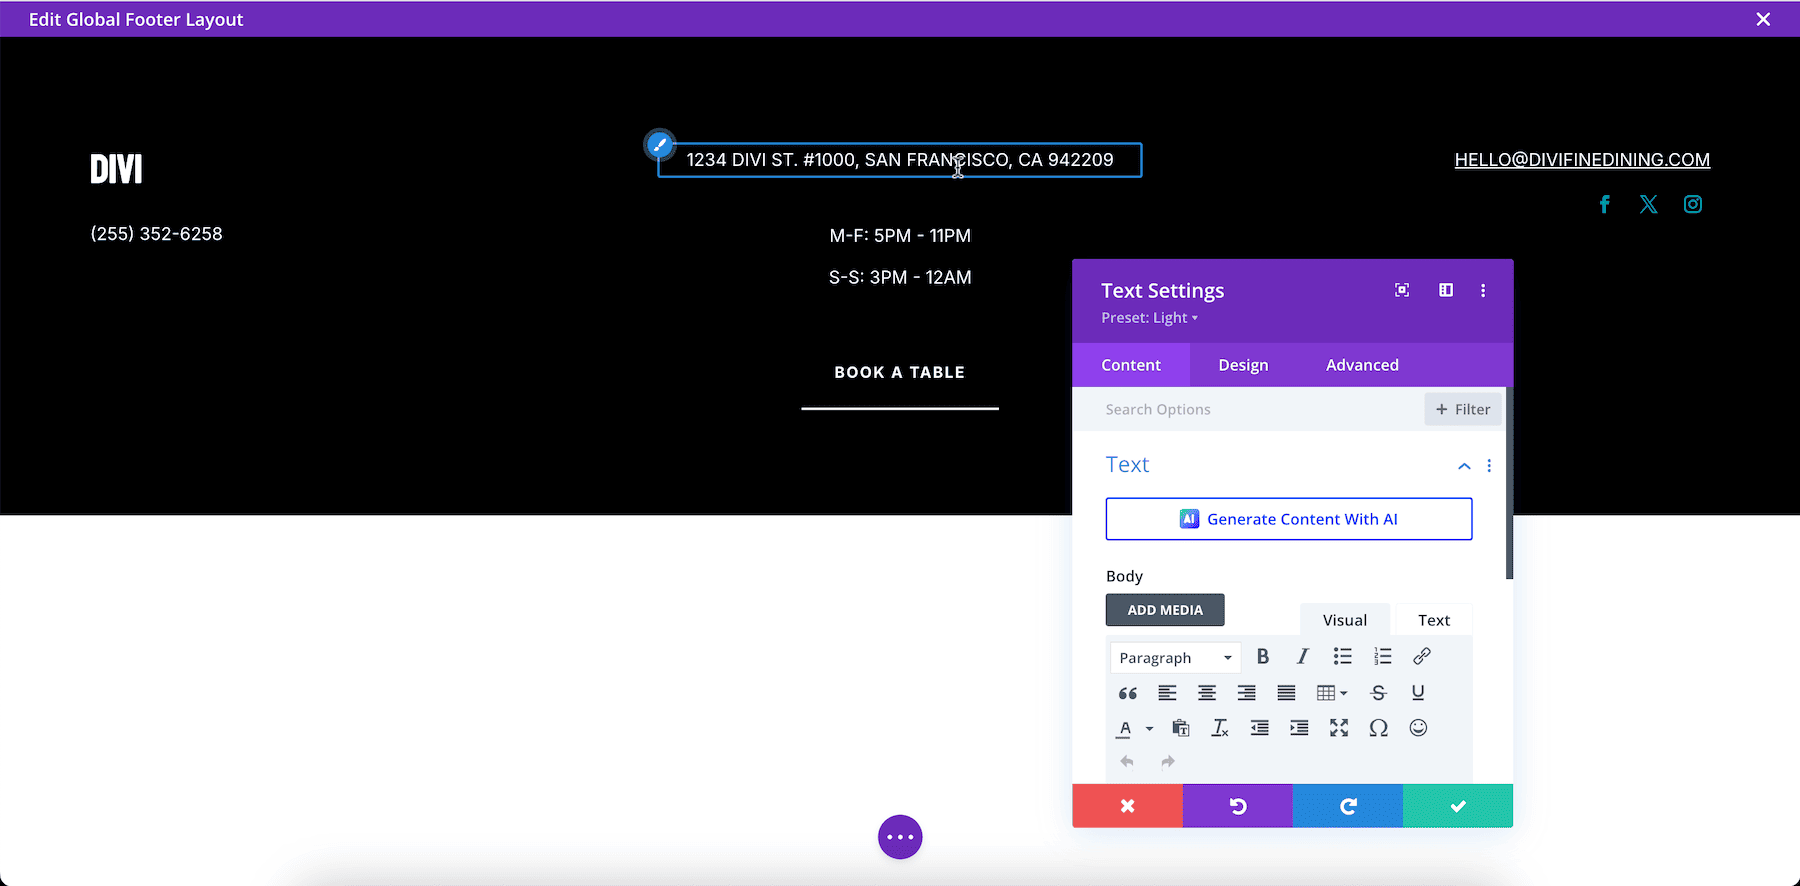
Click on on on the pencil icon next to the International Footer to modify it. You’ll be taken to the Divi Builder internet web page, where you’ll be capable of industry the International Footer using its drag-and-drop capacity.

modify footer using drag and drop builder

Similarly, you’ll be capable of regulate other Divi Theme Builder templates for blogs, product pages, author pages, and categories. Check out additional difficult options of Divi Theme Builder.

Bettering Saved Element Settings

Like Theme Builder templates, Divi Speedy Internet sites replicates International Presets from the Starter Internet web page. International Presets are pre-configured phase settings which could be imported from your Starter Internet web page.

As an example, chances are high that you’ll understand that every button phase has a sq. border and white background, so if you add another button, it’ll have the an identical settings—this is highest imaginable as you gained’t should configure every new phase you add.

global presets of a button element

Presets are also site-wide suitable. So, if you regulate one button, the changes might be reflected on all of the buttons any place they’re on your web site. Proper right here’s the way you’ll be capable of adjust a Divi World Preset of an element:

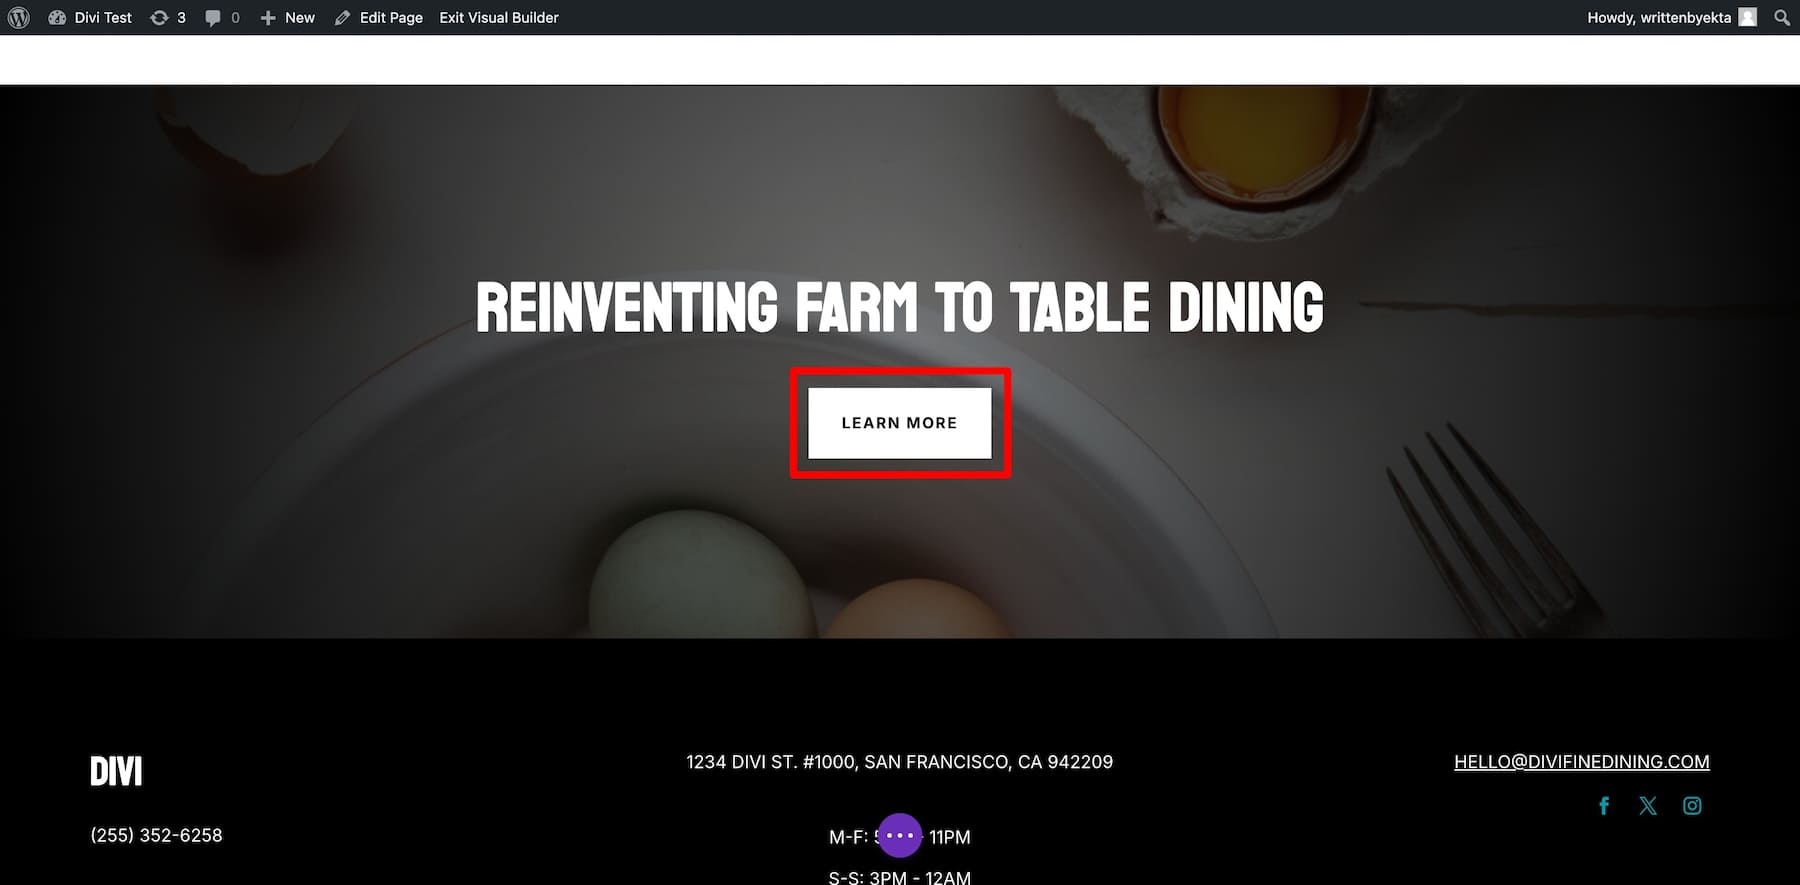
For those who’ve reviewed every a part of your web site and are certain it’s reflecting your consuming position appropriately, do a final check out and liberate it. Proper right here’s a greater educational on enhancing your Starter Web page-generated website online.

5. Arrange Divi Bookings & Reservations to Take Table Bookings

To allow visitors to book tables from your website, arrange the Divi Bookings & Reservations extension. Once installed and activated the plugin, move to Divi Reservations from your wordpress dashboard.

configure divi reservations settings

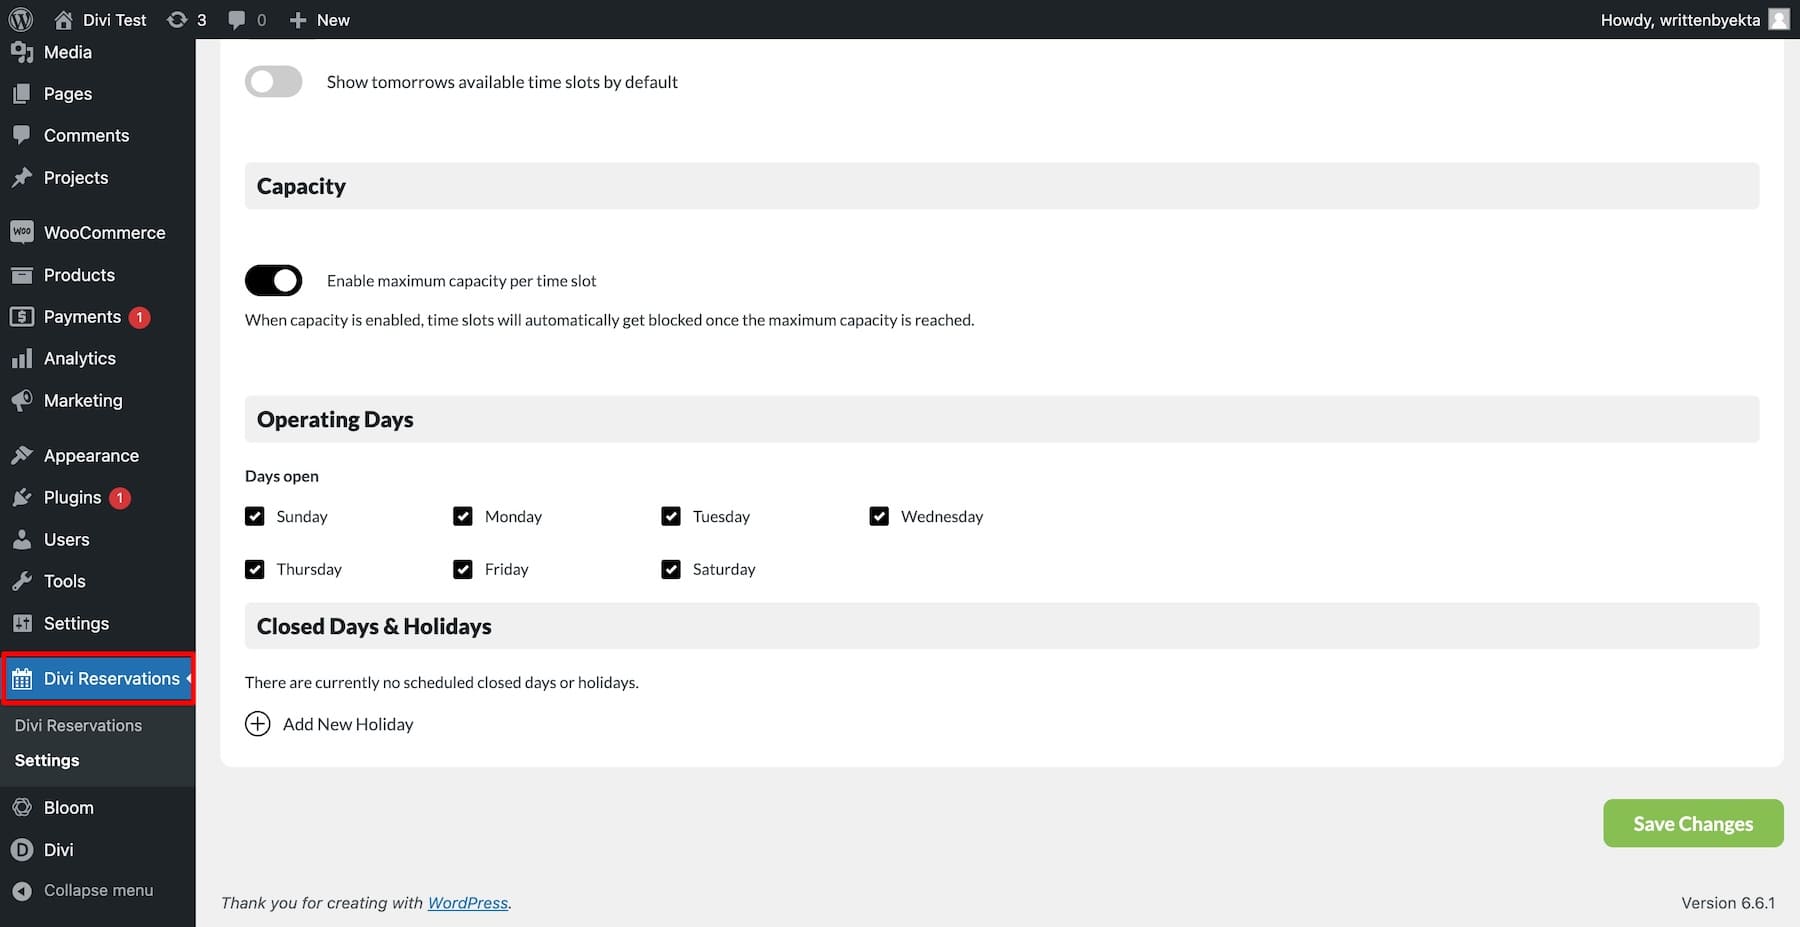
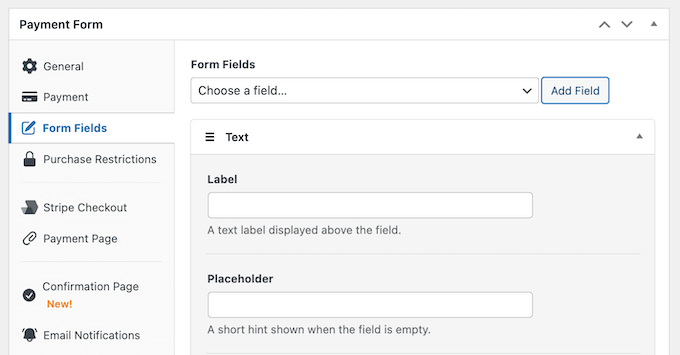
To show at the plugin, configure settings similar to branding, time slots, working days, menu, availability, date structure, and plenty of others. Once completed, move to the Reservations internet web page and add a brand spanking new module, Reservations Form.

add reservation form

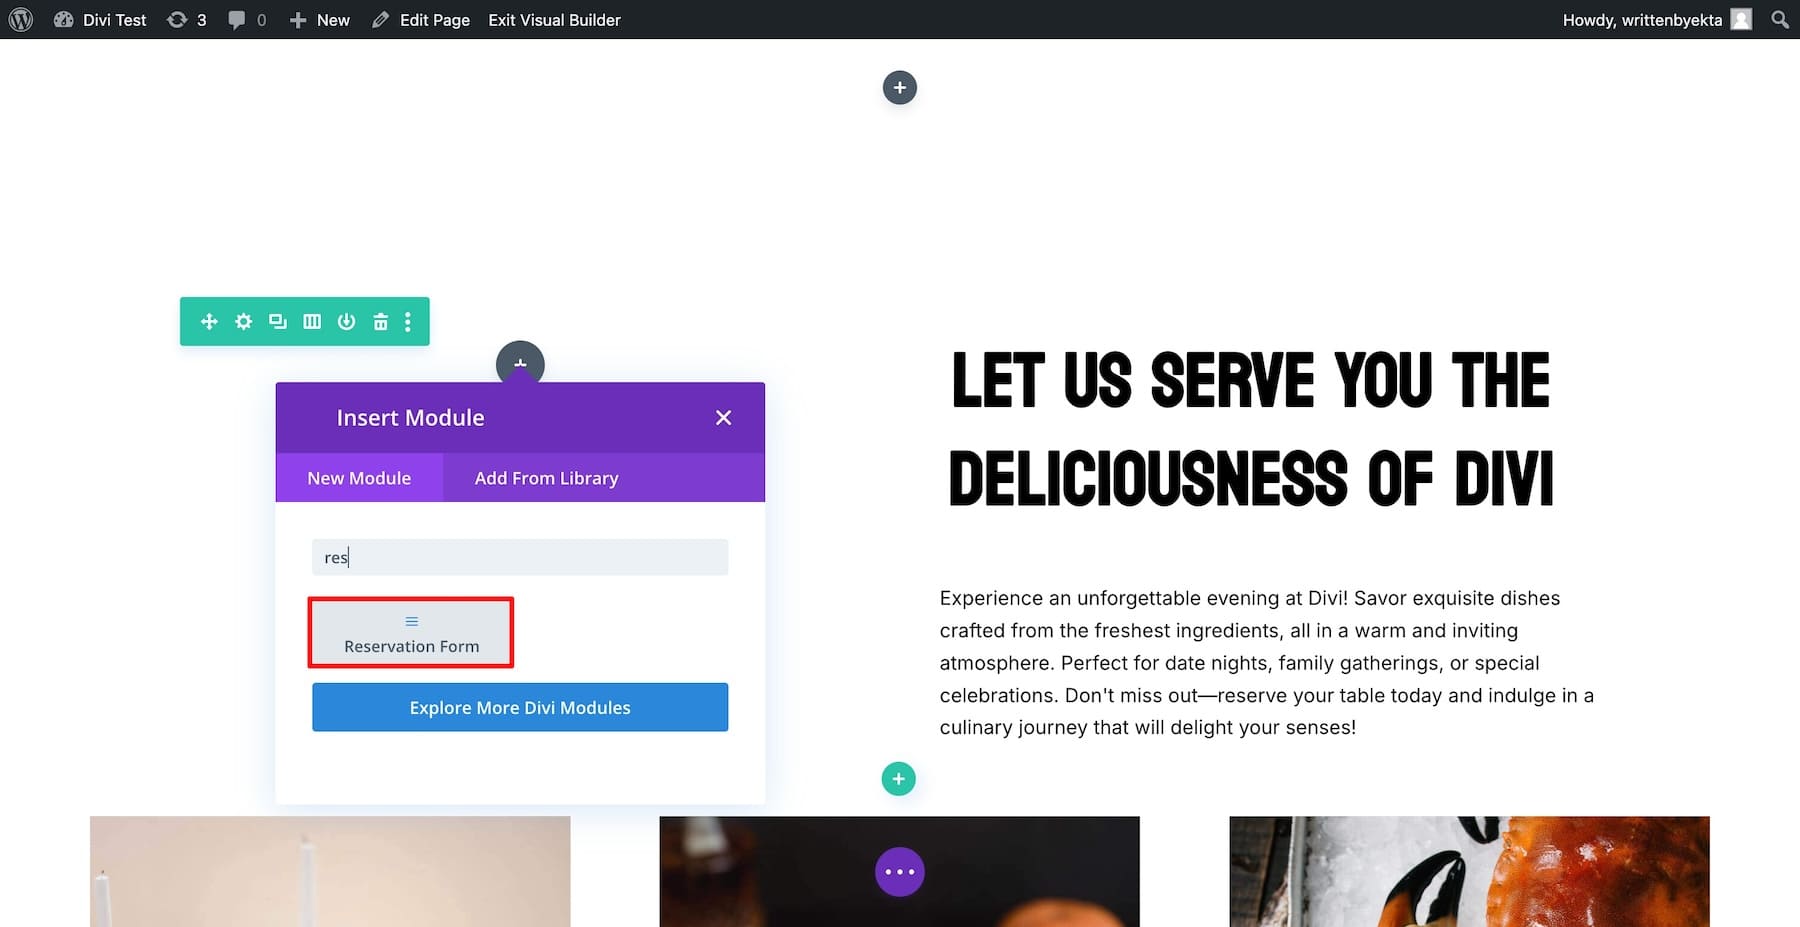
The use of Divi Builder, optimize the form’s branding. Keep watch over the color, add identify text, industry the background, and are compatible it on your web site branding.

adding reservation form branding

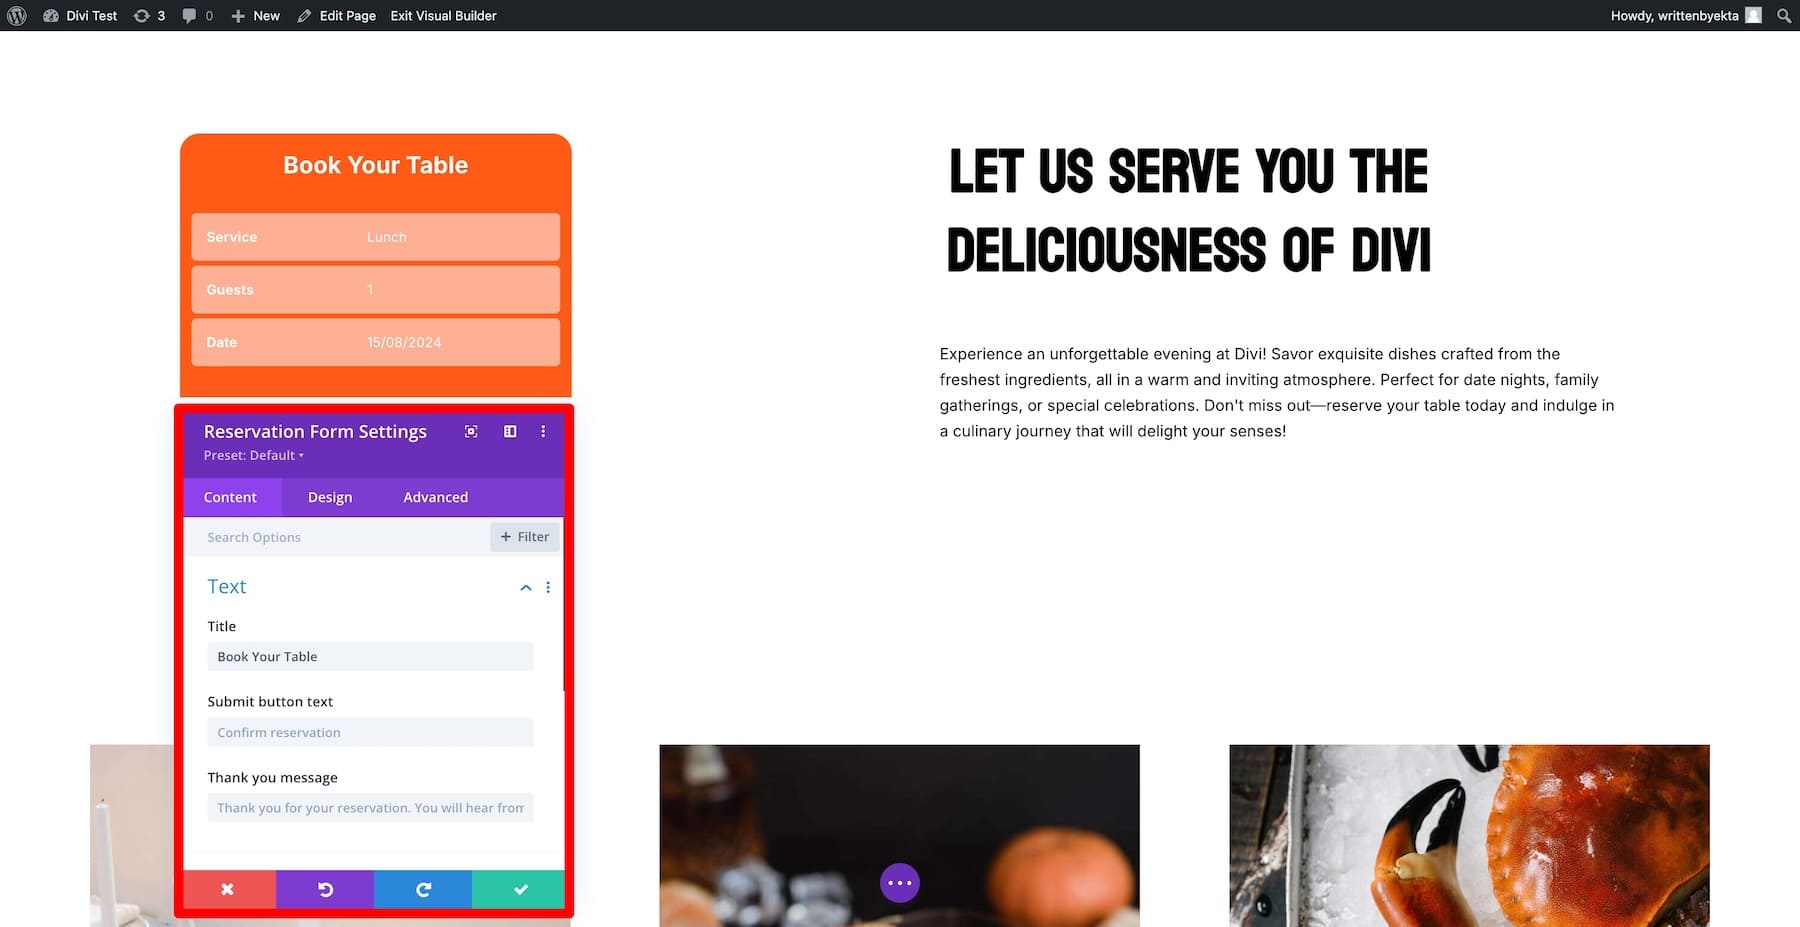
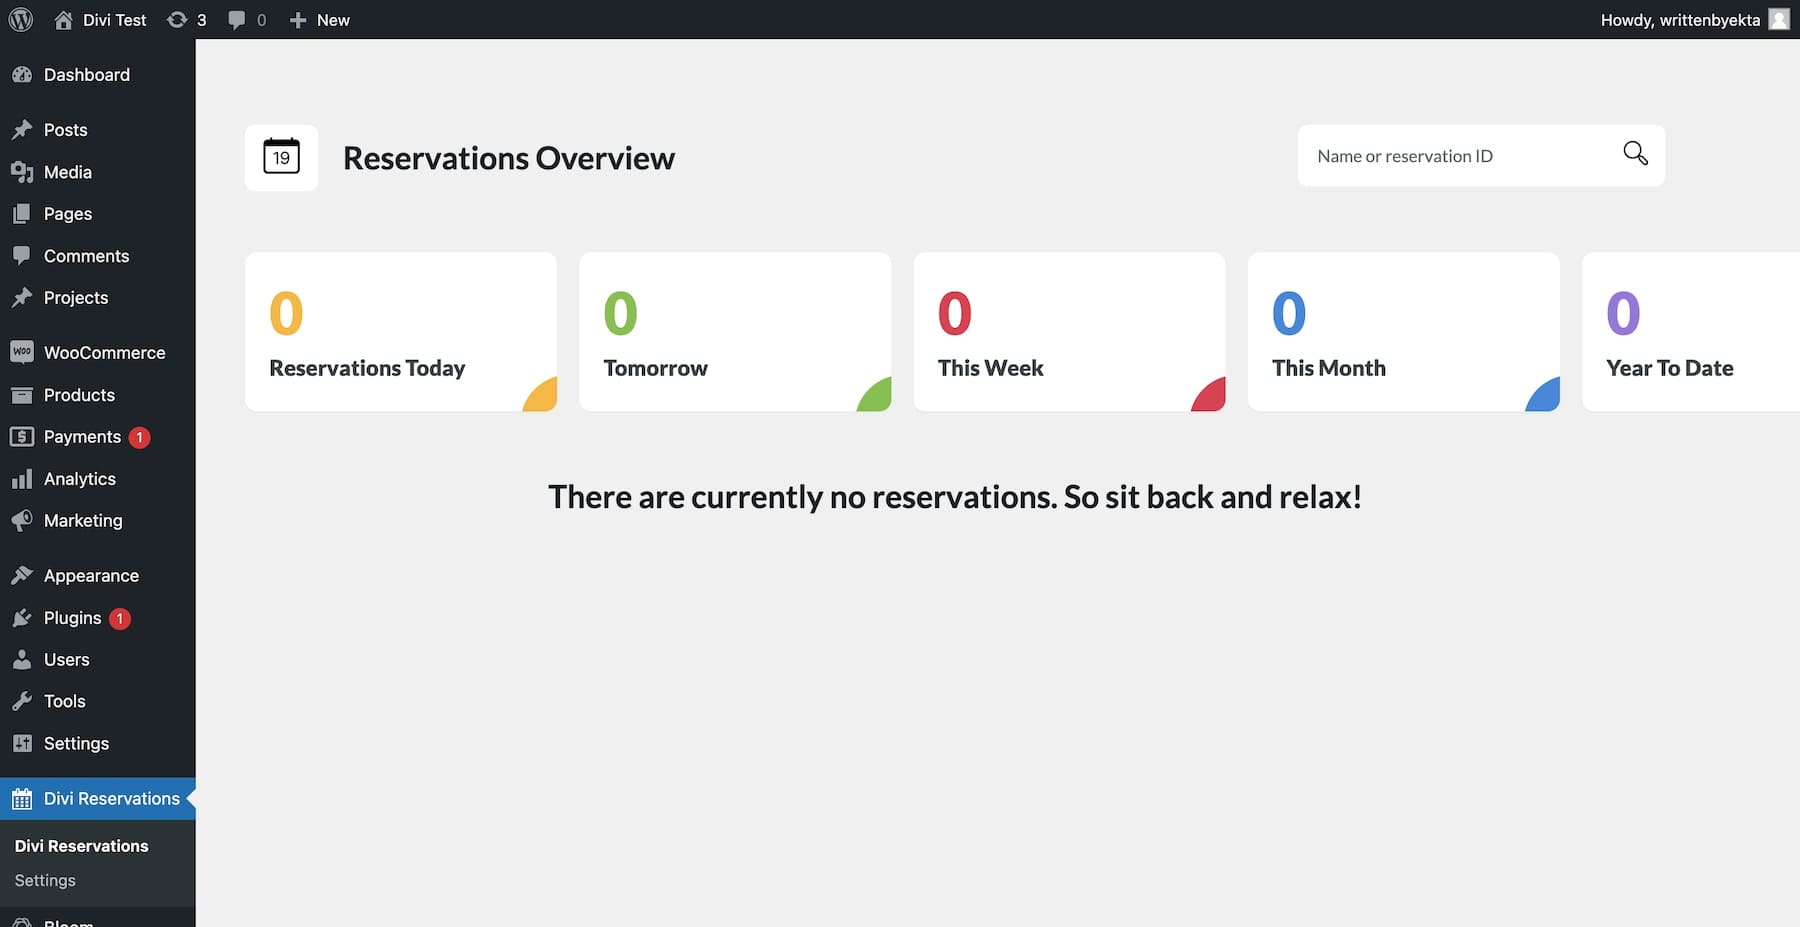
Once completed, save the changes. Now, you’ll download notifications on your wordpress dashboard each time anyone books a table.

divi reservations analytics

Divi Marketplace has additional extensions in an effort to upload additional capacity on your consuming position web site. As an example, if you want to add a toggle button Menu, check out Eating place Menu with Toggle Button. Want to display foods and consuming position pictures in a large number of layouts? Use Gallery Format Pack and quite a lot of additional.

Discover Divi Market

6. Arrange Essential Plugins to Optimize Your Internet web page Potency

Somewhat than together with capacity on your consuming position web site, listed here are some crucial plugins and services and products that’ll imply you’ll be able to optimize your web site’s potency:

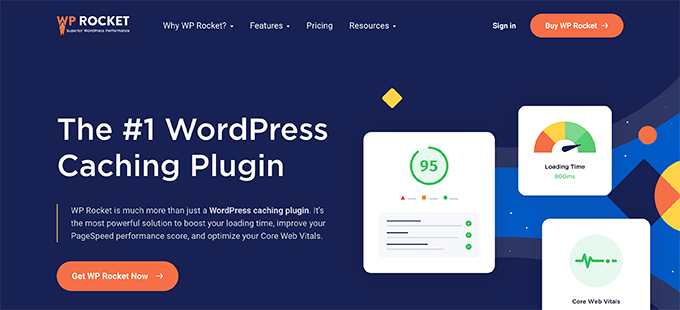
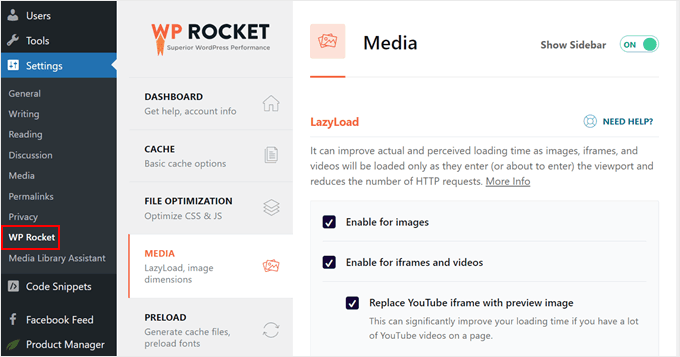
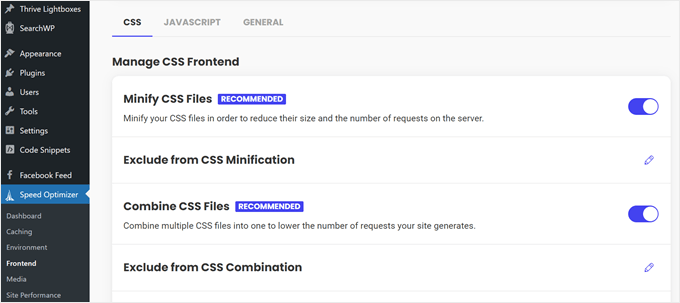
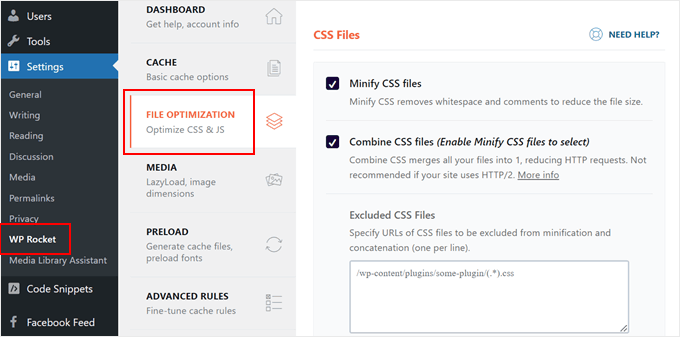
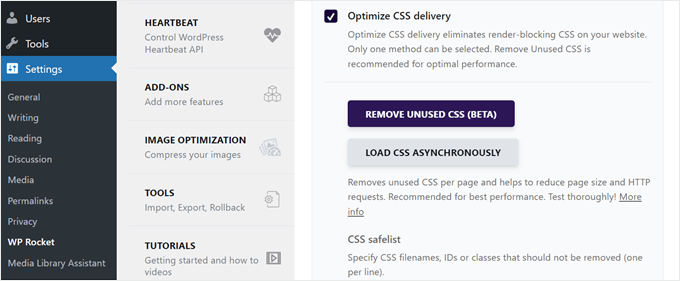
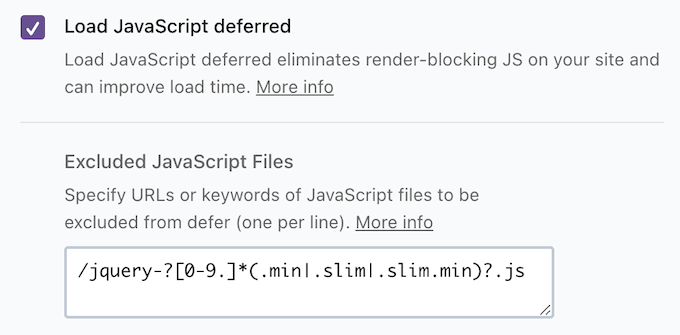
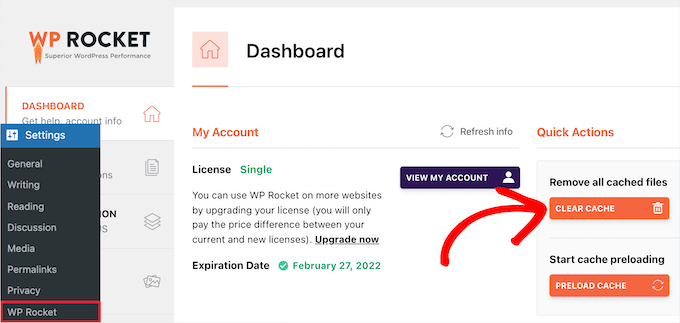
  • WP Rocket: If you wish to have your website to load in short, WP Rocket is a caching plugin that can help. It’s environment friendly, on the other hand there are different choices price allowing for.
  • Rankmath: Great for boosting your website’s seo. Rankmath is unassuming and one of the crucial perfect Search engine marketing plugins for wordpress internet sites.
  • EWWW: EWWW helps your pictures load sooner without sacrificing prime quality. Taking into account you’ll upload foods and consuming position pictures, EWWW is highest imaginable for ensuring they’re rapid to load and good prime quality.
  • Updraft Plus: You will need to to stick backups of your website, and Updraft Plus does this routinely. That is serving to you in eventualities when something unexpected happens, and likewise you don’t understand how to fix it, in order that you restore the backup.
  • Cloudflare: A CDN promises your web site relatively a little rapid and is secure from unsolicited mail attacks. Cloudflare enhances your website’s tempo and protection with CDN and DNS services and products.
  • Cast Protection: Forged Safety supplies entire protection to safeguard your website from threats. It’s great, despite the fact that other safety plugins may well be upper, depending on your needs.
  • Bloom: Add shocking email embed bureaucracy on your website pages and obtain additional email subscribers. Bloom is a peak fee email risk plugin that is free together with your Divi membership.
  • Monarch: Display branded social media sharing icons on your website pages to encourage visitors to proportion them with others. Monarch is another Divi plugin that you simply get without charge together with your membership.

Methods to Make the Most Out of Your Consuming position Internet web site in 4 Steps

After your consuming position web site is published, there are some things you’ll be capable of do to improve its reach and get additional visitors.

1. Optimize for Local seo to Attract Local Customers

Since your main aim is to attract local shoppers on your consuming position, you should optimize your web site to show up on local searches. Optimizing for local seo helps inside of achieve other folks to seek out your consuming position when they search online, bringing additional local shoppers by means of your doors. Proper right here are some things you wish to have to do:

  • Create a Google Trade Profile: By means of optimizing your Google My Industry profile, you give Google additional wisdom about your online business, similar to location, maintain, and phone amount, which is in a position to appear when anyone searches on your consuming position online.
  • Use Local Keywords: Write your website content material subject matter using location-specific keywords to show up on local searches. As an example, if your consuming position is in Brooklyn and your identify dish is Italian pasta, optimize your web site for “Italian pasta in Brooklyn.”
  • Add Your Consuming position Maintain and Location: Be mindful to add your consuming position’s maintain and embedded map in a couple of places on your web site so that search bots can merely get right to use them and add them to Google’s Knowledge Graph.
  • Optimize Footer with Contact Amount: For the same reasons why, add your contact amount together with your email maintain and other contact alternatives in a couple of places, ideally inside the header, menu, contact, about, and footer sections.

2. Get began a Blog to Attract Herbal Customers

To show up for additonal keywords and improve your herbal visibility, get started a weblog and post engaging content material subject matter on foods, recipes, and tips to attract foods enthusiasts. Starting a blog with Divi is unassuming. Your Consuming position Starter Internet web page already includes a blog internet web page, in order that you most simple wish to create new content material subject matter from your wordpress dashboard.

blog restaurant

You’ll moreover use your blog to proportion details about your online business. As an example, if your online business is doing great and you plan to open another outlet in Boston. In an effort to attract Boston other folks, you’ll be capable of proportion the inside track together with your blog readers. Since you’ve been actively publishing new content material subject matter, other folks have turn out to be not unusual readers such a large amount of of them show up, providing you with a grand opening night time time.

3. Get began Social Sharing to Assemble Logo Awareness

You’ll moreover use social media to build awareness about your consuming position and recipes and attract travelers visiting you, principally on account of they be informed great critiques about your dishes on Instagram and wish to try them themselves.

social media sharing buttons using monarch

The use of Divi’s Monarch plugin, sharing blog recipes and other content material subject matter is as easy as one click on on. Your internet web page shows shocking social sharing icons readers can click on on on and proportion with their neighborhood. The best segment? You’ll customise social media icons to match your branding.

4. Get began an Email correspondence Checklist to Convert Customers into Logo Advocates

You should moreover assemble an email tick list to be in contact together with your shoppers. Send them updates, specific supplies, and event invitations. Commonplace emails can turn occasional visitors into unswerving shoppers who often return and tell others about your consuming position.

bloom email optin in blog

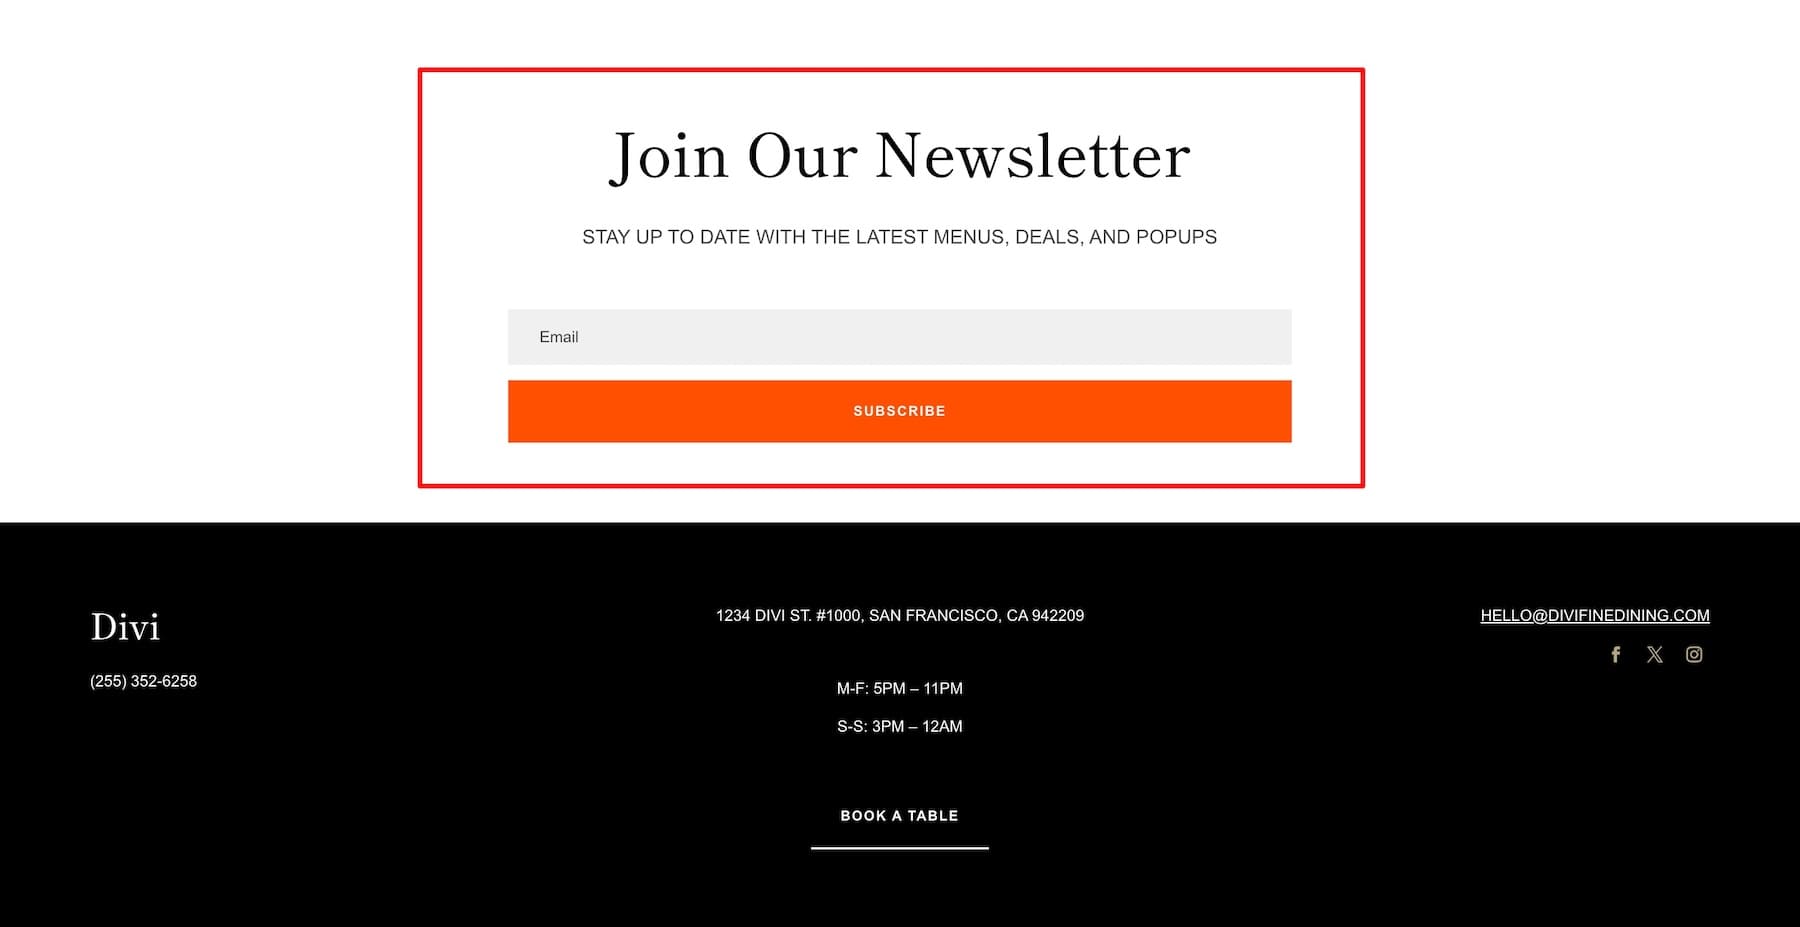
Divi’s Bloom plugin makes your email automation workflow super manageable. It no longer most simple makes connecting your email promoting supplier easy however moreover makes embedding email opt-in bureaucracy smooth. As an example, you’ll be capable of combine Mailchimp with Bloom to streamline email promoting.

10X Your Content material subject matter Introduction with Divi AI

Creating additional content material subject matter is the fastest technique to expand your online business online. Then again no longer merely content material subject matter—prime quality, compelling content material subject matter that individuals stop scrolling to be informed.

It’s no longer a secret that rising such content material subject matter takes time. Then again you’re a chef and have a restaurant business to run—you don’t have time to create content material subject matter. That’s why you wish to have Divi AI to create top-quality content material subject matter sooner.

divi ai

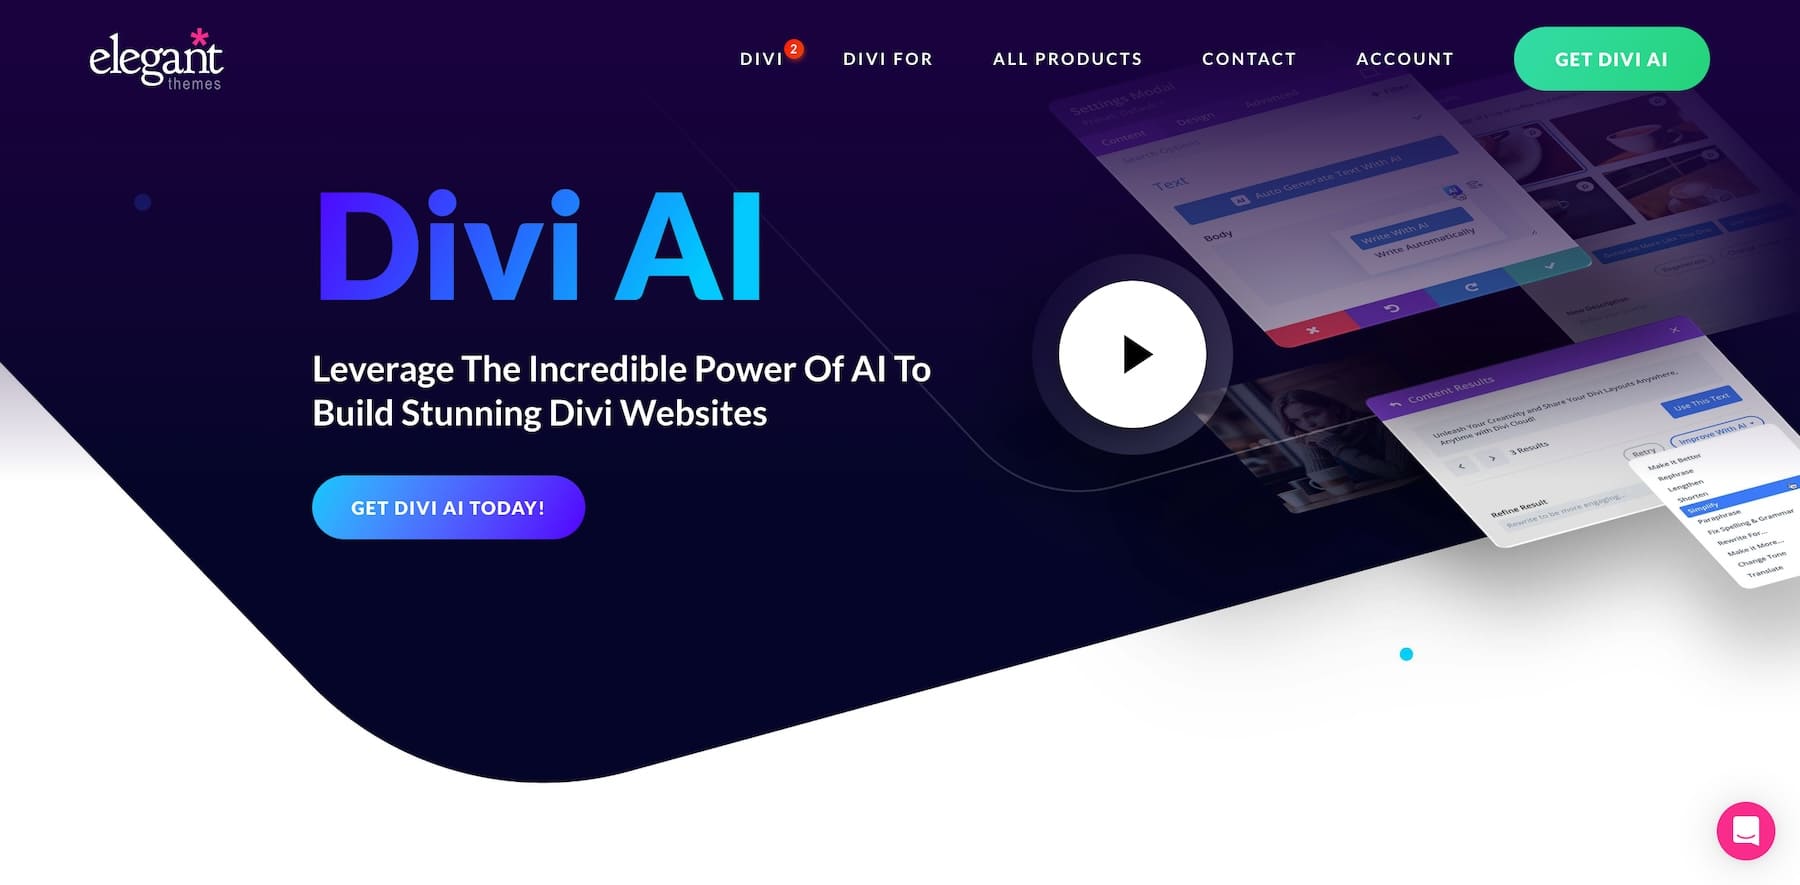
Divi AI creates it for you in seconds, whether or not or no longer it’s a blog post, social media copy, email publication, or the remaining. How? It reads your website wisdom inside the background to snatch your writing style, logo voice, and audience to create content material subject matter that requires fewer edits. So, generate content material subject matter with Divi AI, analysis it for a final check out, and proportion it together with your audience—it’s that easy!

Get Divi AI

FAQs on Creating a Consuming position Internet web site

#faqsu-faq-list {
background: #F0F4F8;
border-radius: 5px;
padding: 15px;
}
#faqsu-faq-list .faqsu-faq-single {
background: #fff;
padding: 15px 15px 20px;
box-shadow: 0px 0px 10px #d1d8dd, 0px 0px 40px #ffffff;
border-radius: 5px;
margin-bottom: 1rem;
}
#faqsu-faq-list .faqsu-faq-single:last-child {
margin-bottom: 0;
}
#faqsu-faq-list .faqsu-faq-question {
border-bottom: 1px solid #F0F4F8;
padding-bottom: 0.825rem;
margin-bottom: 0.825rem;
position: relative;
padding-right: 40px;
}
#faqsu-faq-list .faqsu-faq-question:after {
content material subject matter: “?”;
position: absolute;
right kind: 0;
top: 0;
width: 30px;
line-height: 30px;
text-align: heart;
color: #c6d0db;
background: #F0F4F8;
border-radius: 40px;
font-size: 20px;
}

What should I include on my consuming position website?

Your website should have your menu, location, hours of operation, and alternatives to book a table or order foods online. It’s moreover good to include pictures of your foods and consuming position, purchaser critiques, and contact details to make it more uncomplicated on your shoppers to reach out.

How can I make my website art work neatly on phones?

Use a theme like Divi that routinely adjusts to different show sizes. Ensure text and photographs are easy to be informed and load in short. While every internet web page of your Divi web site might be routinely optimized for various displays, you should however check out how your web site turns out on other devices.

What apparatus can I make the most of to build my consuming position website?

One of the most most simple tactics to build a restaurant web site is with Divi and wordpress. This combination supplies easy-to-customize templates and lines like online menus, reservation techniques, and working a weblog purposes for long-term expansion. That mentioned, there are many nice website online developers available price testing.

How do I ensure that my website shows up in search engines like google like google and yahoo?

Use keywords an identical on your consuming position and site on every internet web page. Use an seo plugin like RankMath for on internet web page seo. Keep your content material subject matter up-to-the-minute, like together with new dishes or blog posts, and encourage shoppers to depart critiques online. That is serving to your web site appear higher in search results.

The post The right way to Create a Surprising Eating place Web site in Below an Hour appeared first on Chic Issues Weblog.

wordpress Web Design

[ continue ]

wordpress Maintenance Plans | wordpress hosting

read more

Source link

See what others are saying about this...

Posted on Leave a comment

Find out how to Repair Over the top DOM Measurement in WordPress (11 Knowledgeable Guidelines)

The ‘Steer clear of an excessive DOM size’ warning can appear in Google Lighthouse or other on-line web page tempo trying out apparatus. It mainly way your on-line web page has too many parts, which can slow down loading cases and frustrate visitors.

Fortunately, there are a few things you’ll do to reduce the DOM size and support your wordpress potency. We have tried out a number of straightforward the best way to boost up our non-public internet pages, so everyone knows what if truth be told makes an have an effect on on wordpress potency.

And in this article, we will show you our tried and tested techniques for a way you’ll be able to restore an excessive DOM size in wordpress.

wordpress-in-post.png” alt=”How to Fix Excessive DOM Size in wordpress” class=”wp-image-279176″/>

What Does the ‘Steer clear of an Excessive DOM Size’ Warning Indicate?

Ever run a on-line web page tempo take a look at to your wordpress site and are to be had all over a warning referred to as ‘Steer clear of an excessive DOM size’?

This warning pops up in pace checking out equipment like Google Lighthouse, Google PageSpeed Insights, or GTMetrix. It means that your on-line web page has too many parts, which can slow down its loading tempo.

Avoid an excessive DOM size warning in PageSpeed Insights

On the other hand what exactly is DOM, and why does its size topic? Let’s harm it down.

DOM stands for File Object Type. Recall to mind your wordpress site as a big tree building. Every part to your internet web page, like text headings, footage, menus, and buttons, is like a division or a leaf on this tree. The ones explicit individual parts are referred to as DOM nodes.

All the selection of nodes on your on-line web page’s tree building is its DOM size. The additional parts you’ve gotten to your internet web page, the larger the DOM tree becomes.

For instance, a simple internet web page with just a heading and a paragraph can have a smaller DOM size compared to a posh internet web page with multiple sections, footage, touch paperwork, and embedded content material subject matter.

How Does Excessive DOM Size Affect Web site Potency?

A large DOM size can negatively have an effect on your wordpress online page’s efficiency in a few techniques.

Believe the way in which you create a brand spanking new internet web page in wordpress. Likelihood is that you’ll add parts like headings, paragraphs, footage, galleries, forms, buttons, and social media icons. Every of the ones parts translates to a DOM node inside the tree building.

While each part for my part would possibly seem small, all of the amount can in short add up, creating an excessive DOM size.

If your DOM nodes keep increasing, the browser will take longer to be informed, understand, and load the development of your on-line web page. It’s as a result of a posh DOM building calls for added memory usage and processing power from the individual’s device to turn the internet web page.

All of this ends up in slower loading cases, which can frustrate visitors and cause them to leap off your website online previous than they even see your content material subject matter.

This present day, shoppers expect internet pages to load in short. A slow-loading on-line web page may also be like able in a longer line – it discourages people from sticking spherical.

Plus, search engines like google and yahoo like Google prioritize internet pages that offer a very good individual experience, at the side of fast loading speeds. So, an excessive DOM size can indirectly hurt your wordpress search engine optimization and, in any case, on-line web page conversions.

How Many DOM Parts Are Too Many for Google?

While there’s no strict limit set in stone, Google Lighthouse and other trying out apparatus flag internet pages with an excessive DOM size. Proper right here’s a breakdown of what the ones flags would possibly indicate:

  • Warning: Google Lighthouse flags a warning when the body part of your internet web page has more than more or less 800 nodes.
  • Error: If the body part reaches over 1,400 nodes, Lighthouse throws an error.

Let’s put this in context to understand what kind of internet pages would possibly fall into the ones categories.

Without right kind optimization, a single internet web page with text content material subject matter, footage, a navigation menu, basic layout parts, and multiple plugins for forms or social sharing would possibly merely reach spherical 800 nodes.

On the other hand, pages exceeding 1,400 nodes are most certainly further complex and would possibly include the following selection of parts. The ones can include multiple sliders or carousels with huge pictures, elaborate layouts with many nested parts and sections, or multiple embedded content material subject matter.

The ones are merely not unusual examples. Don’t let the ones illustrations scare you from developing a custom designed on-line web page one of the best ways you need to. That discussed, if you want to be sure that people stay to your site, then it is very important keep away from excessive DOM size.

Thankfully, we’ve put together a whole knowledge as a way to reduce DOM size in wordpress. You’ll have the ability to use the quick links below to be told further a few DOM potency optimization method:

<h4 class=”wp-block-heading” id=”aioseo-1-use-a-wordpress-speed-optimization-plugin”>1. Use a wordpress Pace Optimization Plugin

Our first recommendation is to position in an outstanding wordpress tempo optimization plugin. The ones plugins are designed to research your on-line web page and make it sooner in different techniques.

A tempo optimization plugin can deal with the technical stuff needed to boost up your on-line web page. This way, you’ll focal point on managing and creating your content material subject matter.

Proper right here at WPBeginner, we propose the usage of WP Rocket. We if truth be told use it ourselves on the WPBeginner on-line web page, which you’ll learn further about in our article on how we spice up web page load pace on WPBeginner.

WP Rocket

While WP Rocket is principally known as a caching plugin, it has many choices that can be in agreement with DOM size as neatly. The ones choices include report optimization, lazy loading, and deferring JavaScript.

We’ll give an explanation for all these choices in more component later inside the article. You’ll have the ability to moreover be informed our WP Rocket evaluation for more information.

On the other hand for now, the usage of a tempo booster plugin like WP Rocket is a great first step towards fixing DOM size and making your on-line web page sooner, even though you may well be new to wordpress.

You’ll have the ability to be informed our WP Rocket set up and setup information to get the plugin up and dealing.

2. Take a look at Your Theme and Plugins

While wordpress plugins and problems are great for together with capacity and elegance to your wordpress online page, they are able to every so often contribute to an excessive DOM size.

First, now not all problems and plugins are created an identical. Poorly-coded plugins and problems can lead to a bloated HTML report with needless parts. This may occasionally significantly increase your DOM size.

wordpress problems and plugins often come with additional choices you’ll be able to now not need. The ones can add unwanted parts to your on-line web page’s building, even though you aren’t actively the usage of them.

By way of taking a greater take a look at what’s installed to your on-line web page, you’ll resolve possible culprits contributing to DOM size.

Should you occur to suppose a particular theme or plugin might be causing issues, check out in short switching to a default wordpress theme or deactivating plugins one after the other.

Deactivate all the plugin except WooCommerce

Then, see if the DOM size warning disappears in tempo trying out apparatus after making the ones changes. This may help you pinpoint the problematic part.

When choosing problems and plugins, you’ll want to keep on with revered sources identical to the wordpress record or widely known developers. The ones assets have strict coding necessities, lowering the danger of bloated code that would possibly harm your on-line web page’s potency.

If you want to get trusted plugin and theme ideas, then check out WPBeginner Resolution Middle. That’s the position we take a look at, analysis, and recommend wordpress device. We simplest recommend solutions that everyone knows shall be helpful for our readers.

<img decoding=”async” loading=”lazy” width=”680″ height=”374″ src=”https://www.wpbeginner.com/wp-content/uploads/2018/09/wordpress-solutions-center.png” alt=”WPBeginner’s wordpress Solution Center” class=”wp-image-243705″/>

3. Use an Optimized Internet web page Builder

Internet web page builder plugins are WYSIWYG editors which may well be used for creating surprising and helpful wordpress internet pages with out a wish to code. However, a couple of of those apparatus can if truth be told contribute to an excessive DOM size.

One reasons why is that they often use additional HTML parts, like div tags with custom designed classes or attributes, to style your content material subject matter and regulate its layout. While the ones parts allow for flexibility, they are able to moreover add a lot of bloat.

Plus, built-in blocks or widgets, like sliders or interactive parts created with a internet web page builder, are often built the usage of explicit HTML buildings.

Many internet web page builders moreover rely on shortcodes to insert their functionalities. While the ones shortcodes will not be visually displayed to your on-line web page, they are able to add additional code to your DOM at the back of the scenes.

Should you occur to suppose your internet web page builder might be contributing to DOM size issues, you’ll take a look at this concept on a staging website online. Take a look at deactivating your internet web page builder and see if the warning disappears in on-line web page tempo trying out apparatus. This may let you make a decision if it’s the foundation explanation why.

If you decide to not use your earlier internet web page builder anymore, then you definitely’ll use probably the most a very powerful built-in wordpress apparatus to design your on-line web page (identical to the Complete-website Editor or Theme Customizer).

They supply regulate over your on-line web page design without having a separate plugin. As well as they normally have a smaller have an effect on on DOM size.

That discussed, the ones apparatus aren’t necessarily probably the most flexible. In this case, we propose the usage of an optimized internet web page builder like SeedProd.

Proper right here at WPBeginner, we’ve tested relatively numerous internet web page builders, and SeedProd has confirmed sooner potency (93 on PageSpeed Insights) compared to festival like Divi (91) and Elementor (90).

SeedProd page performance test

You’ll have the ability to be informed further about it in our Elementor vs. Divi vs. SeedProd analysis.

Previous potency, SeedProd moreover has 350+ professional theme template kits, integrations with in taste e-mail promoting apparatus, and an AI assistant to be in agreement boost up your website-building process.

Insert the AI image generated by SeedProd

4. Optimize Your Footage and Films

Unoptimized footage and films can have large report sizes. The ones large knowledge can contribute to DOM size because of they turn out to be additional parts the browser should process.

Optimizing your footage can significantly reduce their report size without sacrificing top of the range. That is serving to your on-line web page load sooner and improves the entire individual experience.

A plugin like Optimole is normally a pleasing answer for optimizing your footage. Optimole is designed to determine of the sphere, automatically optimizing your on-line web page’s footage as you upload them.

Optimole Review: The image optimization plugin's lazy loading feature

You’ll have the ability to moreover fine-tune its settings to keep an eye on the compression top of the range or resize footage that exceed a undeniable size, further lowering their report size and DOM footprint.

Should you occur to don’t need to use too many plugins, you’ll use free online apparatus like TinyPNG to compress your footage previous than uploading them to your wordpress on-line web page.

For an in-depth knowledge on image optimization, check out our article on how you can optimize pictures for internet efficiency with out dropping their high quality.

When it comes to motion pictures, we don’t counsel importing them immediately to wordpress. Huge video knowledge can significantly slow down your on-line web page’s loading time.

A better method is to use a video web content web hosting provider like YouTube or Vimeo. The ones services handle storing and streaming your motion pictures, taking the burden off your on-line web page’s server, and lowering DOM size.

You’ll have the ability to then embed the flicks right away into your pages the usage of embed codes provided by way of the web content web hosting provider.

<img decoding=”async” loading=”lazy” width=”680″ height=”300″ src=”https://www.wpbeginner.com/wp-content/uploads/2023/02/embedding-youtube-video.png” alt=”Embedding a YouTube video in wordpress” class=”wp-image-166535″/>

We have each different helpful article on how you can optimize movies on your wordpress website online that dives deeper into video optimization strategies.

5. Put in force Lazy Loading

When you open a longer web internet web page with various content material subject matter, all of the ones parts will generally load at once. This process can take a little time, in particular on slower internet connections.

Lazy loading takes a better method. It delays the loading of non-critical parts, like footage and films. They’re going to simplest be loaded after they’re if truth be told sought after by way of the individual as they scroll down the internet web page.

This means the essential content material subject matter that appears first (like text and layout) such a lot sooner. In turn, this leads to a quicker initial internet web page load and a smoother individual experience.

Setting up lazy loading is understated, in particular in the event you occur to’re already the usage of a wordpress tempo optimization plugin like WP Rocket.

Simply navigate to Settings » WP Rocket on your wordpress dashboard. Then, click on on on the ‘Media’ tab.

Proper right here, merely check off all of the alternatives for enabling lazy loading for pictures, motion pictures, and iFrames.

Enabling lazy loading in WP Rocket

If you want to display an image gallery, then we propose the usage of a gallery plugin with a lazy loading serve as.

Envira Gallery is a great example of this. Besides lazy loading, you’ll set a selected time extend for when the images are loaded.

Enabling the lazy loading feature in Envira Gallery

Additionally, you’ll lazy load your feedback segment.

For this, you’ll use Thrive Feedback, which provides choices to optimize wordpress comments.

After the plugin is full of life, go to Thrive Dashboard » Thrive Comments. Then, open the ‘Difficult Settings’ tab and go to the ‘Internet web page tempo optimization’ section.

Enabling lazy loading in Thrive Comments

Proper right here, merely check off the packing containers that may follow to your commentary section. You’ll have the ability to load the commentary section until the individual scrolls the entire method right down to the bottom of the internet web page, and/or load comments steadily in pages as shoppers click on at the ‘Load further comments’ button.

You’ll have the ability to moreover make a choice to load avatar pictures within comments until they turn out to be visual.

Excessively long posts or commentary sections normally have a large DOM size that slow down your on-line web page’s loading cases. Proper right here’s where pagination is useful.

Pagination essentially splits your content material subject matter into manageable chunks, making it more uncomplicated for purchasers to navigate and digest knowledge.

When you’re writing in-depth articles, consider splitting them into logical sections the usage of pagination. This allows readers to take breaks between sections and keep away from feeling intimidated by way of a huge wall of text.

Fortunately, you’ll merely break up long posts the usage of the ‘Internet web page Harm’ block inside the block editor.

For step-by-step instructions, you’ll check out our article on how you can break up wordpress posts into more than one pages.

<img decoding=”async” loading=”lazy” width=”680″ height=”265″ src=”https://www.wpbeginner.com/wp-content/uploads/2024/05/page-break-min.png” alt=”Adding a page break in the wordpress block editor” class=”wp-image-279184″/>

We in fact have an invaluable knowledge on how you can paginate feedback in wordpress. On the other hand essentially, all you need to do is log in to your wordpress admin space and go to the Settings » Discussions internet web page.

Then, check the sphere next to ‘Harm comments into pages’ and customize the selection of comments you need to see on each internet web page.

Break comments in pages

Moreover, we recommend warding off countless scroll. While they are able to keep people to your site longer as they won’t have to change between pages manually, it is going to explanation why potency issues to your server.

7. Minify CSS and JavaScript Knowledge

Your on-line web page’s capacity and visual style rely on code knowledge like CSS and JavaScript. While essential, the ones knowledge can contribute to a larger DOM size if now not accurately optimized.

Minification can get to the bottom of this issue by way of getting rid of needless parts from the code, comparable to comments, spaces, and line breaks. This smaller size translates to sooner loading cases and a smaller DOM size.

That discussed, it’s very important to note that minification can every so often introduce compatibility issues of sure problems or plugins.

Previous to minifying your code, it’s a good idea to create a backup of your on-line web page and take a look at the changes in a staging or native surroundings if possible. This allows you to resolve any possible issues previous than they impact your live on-line web page.

Then, you’ll be informed our knowledge on how you can minify CSS and JavaScript information in wordpress for step-by-step instructions.

As you’ll see inside the knowledge, minifying your code is understated in the event you occur to’re already the usage of a plugin like WP Rocket. All you need to do is go to Settings » WP Rocket and switch to the ‘File Optimization’ tab.

Then, merely permit the choices to minify CSS and JavaScript knowledge.

<img decoding=”async” loading=”lazy” width=”680″ height=”354″ src=”https://www.wpbeginner.com/wp-content/uploads/2024/01/file-minification-wordpress.png” alt=”Minifying files using the WP Rocket caching plugin for wordpress” class=”wp-image-246217″/>

Some wordpress web content web hosting providers moreover offer built-in choices for minifying CSS and JavaScript knowledge.

For instance, SiteGround (which is where we host WPBeginner) provides the Pace Optimizer plugin to minify CSS.

Hostinger moreover provides a an similar serve as through their built-in CDN, available on their Business plan and higher tiers.

Minifying CSS in SiteGround plugin

8. Reduce Render-Blocking JavaScript and CSS

Every other technique to optimize CSS and JavaScript knowledge is by way of lowering render-blocking.

Render-blocking assets are like foundation materials that prevent the house (your on-line web page content material subject matter) from being built until those assets are delivered and in place. The longer it takes for the ones assets to load, the longer it takes for purchasers to see your on-line web page’s content material subject matter.

WP Rocket has built-in choices to reduce render-blocking CSS and JavaScript.

For example, you’ll combine CSS and JavaScript knowledge, which is able to reduce the selection of HTTP requests your on-line web page should make. Fewer requests indicate a lot much less able time for the browser to load the whole thing and render your content material subject matter.

Minifying CSS, JavaScript, and iFrame in WP Rocket

You’ll have the ability to moreover take away any CSS code that isn’t in fact used to your pages.

This now not simplest reduces render blockading however moreover minimizes overall internet web page size and the selection of HTTP requests.

Removing unused CSS in WP Rocket

Additionally, there’s a serve as referred to as ‘Load JavaScript Deferred.’ This tells the browser to wait on loading some JavaScript knowledge until after the main content material subject matter of your on-line web page (the HTML) has been displayed.

This way, shoppers see your on-line web page’s content material subject matter sooner, even though all of the background functionalities haven’t loaded however.

Delay loading non-essential JavaScript code

You’ll have the ability to learn further about enabling the ones choices in our article on how you can cut back render-blocking CSS and JavaScript in wordpress.

<h4 class=”wp-block-heading” id=”aioseo-9-enable-wordpress-caching”>9. Permit wordpress Caching

Caching doesn’t right away reduce DOM size, nevertheless it definitely significantly improves your on-line web page’s perceived potency.

Proper right here’s what happens when caching is enabled: when an individual revisits your on-line web page, their browser can check its cache first. If the tips are already stored in the community, they are able to be loaded so much sooner, significantly lowering internet web page load cases.

This makes the DOM load and display sooner, resulting in a smoother experience for visitors.

Caching moreover helps your server run further effectively by way of lightening its workload. This frees it up to pay attention to very important tasks like processing the DOM, which in any case hurries up your loading time.

Fortunately, putting in browser caching is discreet with a plugin like WP Rocket. It’s for the reason that plugin automatically lets in caching with optimal settings to your on-line web page.

How to set up the WP Rocket caching plugin

Even upper, WP Rocket regularly caches your on-line web page always. Each and every time the cache gets cleared (manually or automatically), WP Rocket automatically generates new cache knowledge.

WP Rocket moreover offers you the ability to transparent the wordpress cache at any time. This might be useful in case you are making essential changes to your on-line web page and need to be certain that shoppers see the most recent type.

How to clear the WP Rocket cache manually

For added details about WP Rocket’s caching choices, you’ll discuss with the putting in place caching choices segment of our WP Rocket arrange knowledge.

<h4 class=”wp-block-heading” id=”aioseo-10-use-a-wordpress-cdn”>10. Use a wordpress CDN

A CDN (Content material Supply Community) is a group of servers spread out around the globe. While a CDN doesn’t right away business the scale of your on-line web page’s code, it makes your on-line web page actually really feel love it such a lot sooner.

It’s as a result of a CDN stores copies of your on-line web page’s static content material subject matter (footage, scripts, stylesheets) on servers in different puts. When someone visits your on-line web page, their computer downloads the content material subject matter from the CDN server closest to them.

This significantly cuts down on download cases compared to fetching the whole thing from your distinctive server, which is usually a good distance away. This sooner provide makes processing the DOM so much sooner.

Plus, a CDN helps your distinctive server artwork sooner by way of sharing the content material subject matter provide load. This allows the server to pay attention to what problems most, like processing the DOM. In turn, this makes your on-line web page render quicker overall.

If you want to have CDN ideas, we have now a knowledge to the very best wordpress CDN products and services that can assist you pick the right kind one to your on-line web page.

We use Cloudflare’s CDN on our on-line web page proper right here at WPBeginner. It actually works neatly for our large blog with various visitors.

Cloudflare global network

Should you occur to’re interested by learning further, you’ll check out our insider put up on why WPBeginner switched from Sucuri to Cloudflare. This article explains what we looked for when choosing a CDN provider.

<h4 class=”wp-block-heading” id=”aioseo-11-optimize-your-wordpress-database”>11. Optimize Your wordpress Database

Your wordpress on-line web page relies on a database to store all its very important knowledge, like posts, comments, individual accounts, and even configurations.

Over time, this database can grasp quite a lot of needless wisdom, comparable to earlier revisions of posts, unsolicited mail feedback, or leftover knowledge from deleted plugins.

While the database itself isn’t part of the DOM, a bloated database can slow down your on-line web page. A slower on-line web page may just make it seem like the DOM size is greater because of the whole thing takes longer to load and render.

Optimizing your database by way of getting rid of needless wisdom helps your on-line web page run smoother and can indirectly support perceived DOM size.

Check out our helpful knowledge on how you can optimize your wordpress database in a single click on. This data walks you at some stage in the method of the usage of a plugin to scrub up your database and ensure it runs effectively.

<h4 class=”wp-block-heading” id=”aioseo-focus-on-overall-wordpress-performance-not-just-dom-size”>Point of interest on Common wordpress Potency, Not Merely DOM Size

While addressing the ‘Steer clear of an excessive DOM size’ warning in wordpress is very important for on-line web page tempo, it’s now not the only factor to consider.

A on-line web page with a lot of capacity or unique formatting would in all probability naturally have a bigger DOM, and that’s okay.

The secret’s to look out the right kind stability between site potency and features. So, aside from DOM size, you will have thought to be making an attempt to pay attention to other metrics like Core Internet Vitals. The ones are explicit metrics that Google uses to measure a on-line web page’s individual experience.

Core Web Vitals report example

Should you occur to’ve used a lot of different optimization techniques and your on-line web page however feels slow, then consider on the lookout for be in agreement from our website Velocity Optimization Services and products.

Our professional team of workers can analyze your on-line web page and resolve among the best techniques to streamline its potency.

WPBeginner Professional Services: Site Speed Optimization Service

All provider plans include professional caching configuration to your on-line web page needs, image optimization without lowering your visual top of the range, database autoload optimization, and so much more. Plus, we be sure that your on-line web page will get an A or B+ on our PageSpeed Tool.

We hope this educational helped you learn to restore excessive DOM size in wordpress. You may also want to check out our knowledge on how you can accelerate WooCommerce efficiency or our whole wordpress pace and function information.

Should you occur to preferred this newsletter, then please subscribe to our YouTube Channel for wordpress video tutorials. You’ll have the ability to moreover to find us on Twitter and Fb.

The put up Find out how to Repair Over the top DOM Measurement in wordpress (11 Knowledgeable Guidelines) first appeared on WPBeginner.

wordpress Maintenance

[ continue ]

wordpress Maintenance Plans | wordpress hosting

read more

<a href=”https://wpmountain.com/find-out-how-to-repair-over-the-top-dom-measurement-in-wordpress-11-knowledgeable-guidelines/”>Source link

See what others are saying about this...

Posted on Leave a comment

How one can Create Multilingual Bureaucracy in WordPress (2 Strategies)

If you have visitors from far and wide the sphere, then multilingual forms will assist you to interact with a quite a lot of audience, reinforce the individual revel in, and increase your site’s accessibility.

Thankfully, multi-language forms are super easy to prepare using wordpress form builder plugins.

And in this article, we will be able to show you learn how to create multilingual forms in wordpress using 2 same old plugins: WPForms and Daring Forms.

What Are Multilingual Forms, and Why Create One?

Multilingual forms can display a couple of languages in step with the individual’s want.

The ones forms are crucial for internet websites involved in an international audience. They be sure that shoppers can have interaction at the side of your wordpress website online in their most well liked language.

Listed here are some reasons for rising multilingual forms:

  • Fortify particular person engagement. Multilingual forms allow shoppers to grasp the questions or wisdom being asked without language obstacles. The ones makes them a lot more prone to end the form.
  • Make stronger conversion fees. The conversion worth is the percentage of consumers who take a desired movement on your internet web page, similar to signing up for an electronic mail e-newsletter or making a purchase order order. When shoppers can whole forms in their native language, the process becomes further atmosphere pleasant.
  • Provide a better general particular person revel in. Multilingual forms contribute to a positive particular person revel in. Consumers can have interaction at the side of your internet web page in their own language, which is able to building up their comfort level.

With that all through ideas, creating a multilingual form is a good idea. That manner, you’ll have the ability to make your website online available and user-friendly for a quite a lot of audience.

The following sections will duvet two methods for rising multilingual forms. You’ll have the ability to use the fast links underneath to jump to the method you need to use:

Ready? Let’s get started.

<h4 class=”wp-block-heading” id=”aioseo-method-1-creating-wordpress-multilingual-forms-using-wpforms”>Way 1: Creating wordpress Multilingual Forms The usage of WPForms (Truly useful)

One of the vital most straightforward tactics to create a wordpress multilingual form is by means of using WPForms and Weglot. The ones tools can mechanically translate your internet web page’s content material subject matter, along side forms, using a language switcher.

WPForms is the most efficient drag-and-drop form builder with 1000’s of pre-made templates. Its user-friendly interface moreover makes it easy to create a type in only a few minutes.

In reality, we use it all over our non-public internet websites for our contact form needs. For additonal details, you’ll have the ability to see our whole WPForms evaluate.

<img decoding=”async” loading=”lazy” width=”680″ height=”362″ src=”https://www.wpbeginner.com/wp-content/uploads/2021/03/wpforms-website-homepage.png” alt=”WPForms’ homepage” class=”wp-image-295961″/>

To translate your WPForms forms, you’ll wish to use the plugin along side a translation plugin.

Weglot is likely one of the perfect wordpress translation plugins for freshmen. This instrument uses instrument finding out to mechanically translate any content material subject matter on your site, along side pages, posts, and forms.

While we recommend getting the highest fee fashion, you’ll have the ability to take pleasure in its unfastened trial for up to 2,000 translated words on one internet web page.

Weglot's homepage

To get started, you’ll wish to arrange WPForms and Weglot on your wordpress internet web page. If you wish to have lend a hand, then please discuss with our knowledge on find out how to set up a wordpress plugin.

Upon activation, you’ll have the ability to get began rising forms by means of navigating to WPForms » Add New to create a type. For additonal details, you’ll have the ability to discuss with our knowledge on find out how to create a touch shape.

Once your contact form is in a position, let’s translate it using Weglot.

From your wordpress dashboard, cross ahead and click on at the Weglot menu products. Then, you’ll arrive inside the ‘Number one configuration’ atmosphere area.

Proper right here, you’ll first wish to fill for your Weglot API key. Must you don’t know what your key’s or where to go looking out it, simply visit Weglot’s dashboard and sign up for an account.

Weglot's sign up page

After signing up, you’ll find your API key for your Weglot account dashboard. Then, you’ll have the ability to copy and paste the vital factor to the ‘API Key’ field inside the ‘Number one configuration’ area.

Once verified, you’ll have the ability to get began opting on your holiday spot languages. Simply click on on on the ‘Holiday spot languages’ dropdown menu and scroll down the tick list to make a choice a language.

<img decoding=”async” loading=”lazy” width=”680″ height=”396″ src=”https://www.wpbeginner.com/wp-content/uploads/2024/06/wordpress-weglot.png” alt=”Weglot’s Main Configuration area with a Destination Languages field” class=”wp-image-283590″/>

If you want to have, you’ll have the ability to add a couple of language. Weglot supplies more than 100 languages, so be at liberty to find and choose holiday spot languages which will also be similar for your targets.

Once carried out, don’t omit to click on on ‘Save Changes’ in order that you don’t lose your enlargement.

After a few seconds, you should see a notification pop-up window that says, ‘Well carried out! Your site is now multilingual.’

<img decoding=”async” loading=”lazy” width=”680″ height=”225″ src=”https://www.wpbeginner.com/wp-content/uploads/2024/06/wordpress-weglot-successmessage.png” alt=”Weglot’s success message” class=”wp-image-283595″/>

Now, you’ll need to visit your site to see for those who’ll have the ability to translate your WPForms forms. Simply click on on on the ‘Transfer on my front internet web page’ notice from the notification.

From appropriate right here, you should see a dropdown menu at the bottom right kind corner of your visual display unit. You’ll have the ability to click on on on it to switch to Norsk (Norwegian). This may increasingly infrequently mechanically translate the internet web page, along side your form, to Norsk.

<img decoding=”async” loading=”lazy” width=”680″ height=”442″ src=”https://www.wpbeginner.com/wp-content/uploads/2024/06/livewebsite-weglot-languageswitch.png” alt=”Weglot’s language switch on a live website” class=”wp-image-283596″/>

That’s it! You’ve successfully translated your WPForms contact form with Weglot.

<h4 class=”wp-block-heading” id=”aioseo-method-2-creating-wordpress-multilingual-forms-using-formidable”>Way 2: Creating wordpress Multilingual Forms The usage of Daring Forms

Otherwise to create a multilingual form in wordpress is by means of using Daring Forms and its Polylang add-on. The program means that you can enter your own translations for your form and display them for every objective language.

Bold Bureaucracy is a great plugin for making wordpress forms, specifically further complicated forms like calculators, directories, quizzes, and further.

For more information, you’ll have the ability to see our Bold Bureaucracy evaluate.

Formidable forms

The Polylang add-on lets you pass into translations of your site content material subject matter, along side forms. With this add-on, you’ll have the ability to insert translations for as many languages as you wish to have.

To use the 2 tools together, you’ll first wish to arrange Bold Bureaucracy and Polylang. If you wish to have lend a hand, then you definately’ll have the ability to apply our step-by-step knowledge on find out how to set up a wordpress plugin.

Upon activation, you’ll have to first prepare Polylang by means of opting on your objective languages. Transfer ahead and enlarge the drop-down menu, choose your holiday spot language, and click on at the ‘Add new language’ button.

Polylang's setup process

After that, click on at the ‘Continue’ button underneath the ‘Language already defined’ segment.

The next step is to allow your media translations. This atmosphere lets you translate your media knowledge’ titles, selection text, captions, and descriptions.

To show in this atmosphere, simply switch on the ‘Allow Polylang to translate media’ slider. Then, you’ll have the ability to click on on ‘Continue’ to seek advice from the third step.

Polylang's media setup

Inside the next area, you’ll choose the primary language for your site content material subject matter.

You’ll have the ability to click on on on the drop-down menu and choose from the languages you’ve gotten registered on the first step. Proper right here, we decided on English as our number one language.

Polylang's main language setup

Should you’ve determined for your internet web page’s number one language, you’ll have the ability to click on on ‘Continue’. This may increasingly infrequently redirect you to the overall step.

From appropriate right here, you’ll see the ‘You’re in a position to translate your content material subject matter!’ notification, followed by means of some documentation ideas from the Polylang staff.

You’ll have the ability to take your time finding out those forms or scroll down the visual display unit in an instant and click on at the ‘Return to dashboard’ button.

The Return to dashboard button on Polylang's setup

Now, let’s navigate to Daring Forms » Add-Ons to show at the Polylang add-on.

To make it easy, you’ll have the ability to use the search bar and type in ‘Polylang’ to go looking out it. Once came upon, cross ahead and click on on ‘Arrange’.

Polylang's install button on Formidable Forms

As quickly because the arrange process is completed, you’ll see the status change to ‘Full of life’.

Now, you’ll have the ability to head over to Daring Forms » Forms from your wordpress dashboard. By means of default, the plugin will give you a development contact form, so that’s why you’ve gotten a type in a position inside the ‘My Forms’ tab.

Let’s take a look at translating the ‘Contact Us’ form.

To start out out translating the form, the first thing you’ll wish to do is hover over the form and click on on ‘Settings’.

Contact Us' settings button

This may increasingly infrequently redirect you to the form’s ‘Settings’ tab.

Proper right here, all you wish to have to do is scroll down the visual display unit and click on on ‘Translate Form’.

The Translate Form button on Contact Us' Settings tab

The plugin will then redirect you to a brand spanking new internet web page.

There, you’ll have the ability to manually enter your translations for all of the form elements into your holiday spot languages.

Polylang translating the contact form's elements

If you find yourself carried out, cross ahead and click on at the ‘Save Changes’ button at the bottom of the visual display unit.

Now, you’ll have the ability to put up the form.

You’ll have the ability to do this by means of going once more to the ‘Settings’ tab and clicking the ‘Embed’ button.

Formidable Forms' embed button

Then, you’ll have the ability to choose so to upload it to an provide internet web page or a brand spanking new internet web page. There’s moreover an strategy to use the shape shortcode so to upload it to the wordpress block editor.

We’re going to choose the ‘Choose provide internet web page’ for instance.

Select existing page option for embedding a Formidable Forms' contact form

The next step is to make a choice a internet web page from the dropdown field. For instance, appropriate right here, we’re going so to upload the form to our internet web page’s ‘Contact’ internet web page.

Should you’ve determined on the internet web page, cross ahead and click on on ‘Insert form’.

Inserting a form to a page

This may increasingly infrequently redirect you to the block editor. You’ll have the ability to scroll down the internet web page to go looking out your newly added ‘Contact Us’ form.

There, you’ll need to cross to the ‘Internet web page’ tab on the right-hand side and to find the ‘Languages’ menu products inside the bottom right kind corner.

Let’s click on on on the ‘+’ button so to upload the Norsk translation.

<img decoding=”async” loading=”lazy” width=”680″ height=”408″ src=”https://www.wpbeginner.com/wp-content/uploads/2024/06/wordpress-blockeditor-pagetab-languages.png” alt=”The Languages section on wordpress block editor” class=”wp-image-283661″/>

Upon clicking the button, wordpress will generate a brand spanking new internet web page.

At Internet web page » Languages, you’ll see that you just’re just lately improving a internet web page for the Norsk translation.

<img decoding=”async” loading=”lazy” width=”680″ height=”394″ src=”https://www.wpbeginner.com/wp-content/uploads/2024/06/wordpress-blockeditor-pagetab-languages-norsk.png” alt=”Editing a new page to display in Norsk” class=”wp-image-283662″/>

Don’t worry for those who’ll have the ability to’t see the translated fashion. Should you hit ‘Put up’, the form will also be displayed in Norsk.

And in addition you’re carried out!

You’ve translated your form using Daring Forms and Polylang. Proper right here’s what it would appear to be on your wordpress site:

The Contact Us form in Norsk

<h4 class=”wp-block-heading” id=”aioseo-bonus-how-to-add-multilingual-search-in-wordpress“>Bonus: How you can Add Multilingual Search in wordpress

Now that your wordpress internet web page supplies a multilingual form, we recommend taking it to the next level by means of together with multilingual search capacity.

Multilingual search lets in internet websites to care for and return similar results in different languages. Because of this shoppers can search and acquire results in their most well liked language.

Normal, offering a multilingual revel in can set your site apart from festival who may absolute best give a boost to a single language.

One of the vital most straightforward tactics so to upload multilingual search is with the SearchWP plugin.

This plugin can equip your wordpress internet web page with complicated search choices. Upon activation, WPSearch mechanically builds a search index and suits search keywords at the side of your internet web page content material subject matter, titles, tags, shortcodes, products, and much more.

Is SearchWP the right search plugin for you?

WPSearch moreover has pre-configured settings to artwork for plenty of internet websites, along side multilingual ones.

To be told further, merely see our step-by-step knowledge on find out how to upload multilingual seek in wordpress.

We hope this text has helped you learn to create multilingual forms in wordpress. Next, likelihood is that you’ll need to be informed our guides on find out how to customise and magnificence your wordpress paperwork and find out how to create extra interactive wordpress paperwork and building up conversions.

Must you preferred this text, then please subscribe to our YouTube Channel for wordpress video tutorials. You’ll have the ability to moreover find us on Twitter and Fb.

The publish How one can Create Multilingual Bureaucracy in wordpress (2 Strategies) first gave the impression on WPBeginner.

wordpress Maintenance

[ continue ]

wordpress Maintenance Plans | wordpress hosting

read more

<a href=”https://wpmountain.com/how-one-can-create-multilingual-bureaucracy-in-wordpress-2-strategies/”>Source link

See what others are saying about this...

Posted on Leave a comment

14 Gear for Growing and Promoting Virtual Merchandise (Knowledgeable Pick out)

Rising and selling digital products is an effective way to earn passive income and share your enjoy with a world audience. Then again you’ll need the best apparatus to make it happen. Differently, you could waste time and money on tricky systems that don’t send results.

At WPBeginner, we’ve been creating digital products for over a decade, and we’ve had a large number of excellent fortune the usage of Easy Digital Downloads to advertise our plugins and software. That being discussed, everyone knows that other firms can have different needs for their own online stores.

Since a large number of you will have asked about what the most efficient apparatus are, we’ve come up with this data that can assist you make a selection.

We’ll share our top choices for making and selling the whole thing from eBooks to online courses. The ones are apparatus we’ve tested ourselves, and we even use a couple of of them in our private business.

3 Should-Have Equipment for Rising and Selling Digital Products

No time to be informed? Listed here are our top 3 choices of the most efficient platforms to make and advertise digital products online:

1st Place

Beacon logo

Beacon

Easiest imaginable for: Rising lead magnets

Pricing: Free to $99/mo

Key choices: Drag-and-drop editor, templates, blog content material subject matter import

Learn extra

2nd Place

Easy Digital Downloads

Simple Virtual Downloads

Easiest imaginable for: Selling digital downloads

Pricing: Free to $349.65/yr

Key choices: Endless downloads, licensing, discounts

Learn extra

 3rd Place

MemberPress logo

MemberPress

Easiest imaginable for: Membership web pages and courses

Pricing: $179.50 to $399.50/yr

Key choices: Content material subject matter protection, drip content material subject matter, courses

Learn extra

How We Tested the Easiest imaginable Equipment to Advertise Digital Products

We take our tips severely, and our trying out process presentations that.

Initially, one of the vital the most important apparatus we’ve in reality useful are ones we use every day in our private business.

For example, we’ve been the usage of Easy Digital Downloads for years to advertise our wordpress plugins. This hands-on revel in provides us self belief in recommending this software, as everyone knows its strengths and limitations firsthand.

You moreover might remember the fact that we’ve featured a couple of of those apparatus in our other product overview articles. That’s because of we’ve came upon them consistently unswerving and environment friendly.

For various apparatus, our revel in comes from the usage of them for specific tutorials or tasks. Through this process, we’ve discovered their strengths for particular purposes.

We’ve moreover tested in taste possible choices to seem within the match that they’re dwelling up to their claims. Our process involved checking the software’s choices, trying out it to seem if it in truth works as promised, and evaluating its price for money. We’ve moreover assessed how blank the software is to use, specifically for newcomers.

In any case, we’ve paid close attention to purchaser evaluations, like the ones from WPBeginner Answer Middle. Everyone knows that sometimes we might overlook positive contexts or use circumstances, so the ones evaluations be in agreement complement our viewpoint. They’ve given us insights into how the apparatus perform in exact lifestyles.

With that all through ideas, let’s check out our list of apparatus to create and advertise digital products. We’ve divided this newsletter into two sections, and also you’ll be capable to skip for your preferred segment the usage of the short links underneath:

Why Imagine WPBeginner?

We’ve been serving to oldsters with wordpress and online firms for over 16 years. Our body of workers doesn’t merely read about the ones apparatus – we use them every day. Our objective is that can assist you to seek out the most efficient resolution to your needs, now not merely market it products. That’s why we take a look at each product primarily on our private internet pages to clutch what if truth be told works.

Want to know additional? Check out our detailed editorial procedure.

Easiest imaginable Equipment to Create Digital Products

Whether or not or now not you’re buying groceries to generate passive source of revenue or uncover new digital products to advertise online, the ones apparatus will let you create moderately a large number of types of digital products effectively and professionally.

We’ve made up our minds on a range of digital content material subject matter creation apparatus, at the side of some unfastened possible choices, that can assist you increase your digital product business.

1. Beacon (Lead Magnets)

beacon

Beacon is a freemium lead magnet device that we use ourselves to create moderately a large number of types of content material subject matter for email correspondence promoting campaigns. With its blank drag-and-drop interface, you’ll be capable to create digital products like eBooks, workbooks, checklists, and even video lookbooks.

What we like about Beacon is its simplicity. After signing up for a unfastened account, you’ll go through a very simple onboarding wizard. By means of answering a few questions to your goals, you’ll be capable to in brief make a selection a template and get began customizing it inside the drag-and-drop editor.

Select the ebook option in Beacon dashboard

Beacon is designed to be as blank to use as possible, making it to be had even though you’re new to creating lead magnets. Whether or not or now not you’re a seasoned marketer or just starting out, you’ll to seek out the process intuitive and smooth.

On the other hand, it’s worth noting that some consumers might to seek out the templates just a bit basic and now not as trendy as they’d like.

Beacon's interface

Additionally, all over our trying out, we from time to time encountered issues when browsing to delete positive pre-existing elements in templates. Keep this in ideas when customizing your lead magnets.

Execs of Beacon:

  • Easy setup and use for speedy lead magnet creation
  • Ability to import blog content material subject matter directly into lead magnets
  • Dozens of templates from moderately a large number of business categories and seasons
  • A few embedding possible choices like inline paperwork, horizontal bars, and content material upgrades

Cons of Beacon:

  • Templates would in all probability appear basic or a lot much less trendy in comparison to some possible choices
  • Some drawback in deleting pre-existing elements in templates

Pricing: Beacon supplies a unfastened plan that accommodates 1 lead magnet per month, 100 leads, 1 client account, 1,000 per 30 days pageviews, and 500MB file storage. Paid plans range from $19 to $99 per month, with higher tiers allowing for additional lead magnets and extra choices.

Why we decided on Beacon: We picked Beacon because it’s actually blank to use for making lead magnets, which has helped us with our private electronic mail advertising. It’s smooth, flexible, and has a unfastened risk, making it great for all kinds of businesses, even though you’ll be capable to’t customize designs a great deal of.

2. Canva (Beginner-Delightful Graphic Design)

Canva

Canva is a popular freemium software for graphic design that works well as a digital products maker. We’ve came upon Canva in particular useful for creating eye-catching social media posts and professional-looking eBooks. Many people have also used Canva to create customized templates and advertise them to fellow consumers.

Compared to Beacon, Canva’s designs are typically additional trendy and varied. It supplies moderately a large number of design possible choices, at the side of social media posts, presentations, bureaucracy, resumes, print products, internet pages, and flicks.

Web design ideas made with Canva AI image generator

Besides a drag-and-drop editor, the platform provides pre-made colour palettes, font devices, design elements, and further. You’ll be capable to moreover draw on your own designs.

That being discussed, Canva can sometimes be slow to use, specifically when running with additional difficult designs. And should you use Canva on mobile or tablet, you’ll have to be a lot more affected particular person with its potency.

Execs of Canva:

  • Easy to use while however producing professional designs
  • Huge design library with over 1 million templates, 1000 design varieties, and 3 million stock photos
  • Tough most sensible magnificence choices like AI equipment and body of workers collaboration choices
  • Video enhancing feature is also available for creating video products like online courses

Cons of Canva:

  • Can be slow to use every now and then, specifically with additional difficult designs
  • We noticed the mobile app is typically slightly laggy compared to the desktop style

Pricing: Canva supplies a unfastened plan with 5GB of cloud storage. Paid plans range from $15 to $30 per month, offering additional storage, most sensible magnificence stock photos/motion pictures, AI apparatus, and body of workers keep watch over choices. A 30-day unfastened trial is available for paid plans.

Why we decided on Canva: Canva’s ease of use and professional-quality designs make it highest for creating a wide variety of digital products to advertise. For numerous firms, it’s develop into an irreplaceable software for speedy, top of the range graphic design.

3. Google Workspace (Digital Belongings)

Google Workspace landing page

Google Workspace may not be necessarily probably the most design-friendly software compared to specialized platforms. That discussed, its in taste use makes it extraordinarily to be had. We use it all over our firms to give a boost to efficiency and dialog, alternatively the Workspace suite can be utilized to create digital products.

Many people already use the ones products in their day-to-day lives or artwork, alternatively they gained’t know how to maximize their possible. That’s the position you’ll be capable to step in and offer ready-to-use templates that improve their Google Workspace revel in.

Plus, with the brand new integration of Gemini, Google’s AI assistant, the usage of the platform for digital product creation has develop into much more simple. We’re a big fan of it ourselves proper right here at WPBeginner to speed up our workflow and dialog.

We’ve spotted a large number of excellent fortune stories with this manner. As an example, Luke Scarpino on TikTok shared a Google Sheets template for surroundings pleasant shuttle packing. His video went viral, and he now sells a certified packing template, showcasing the potential of monetizing the ones digital property.

Luke Scarpino's travel packing spreadsheet on TikTok

Execs of Google Workspace:

  • Free to get started
  • Gemini integration helps with AI content material advent
  • Out there and familiar to a big audience who already use the ones products
  • Easy collaboration choices for body of workers tasks

Cons of Google Workspace:

  • Will not be necessarily probably the most flexible for classy designs
  • Limited customization possible choices compared to specialized design apparatus

Pricing: Google Workspace is unfastened for basic use. For additonal choices like custom designed domains, difficult protection, and further storage, prices range from $3.60 to $ 18 consistent with client per month.

Why we decided on Google Workspace: Its huge client base provides a ready market to your digital products. With the Gemini AI integration, it’s an ideal platform for creators to advertise templates and property irrespective of some design limitations.

4. Adobe Illustrator (Emblems/Digital Illustrations)

When you occur to’re buying groceries to create and advertise approved digital paintings, Adobe Illustrator is an excellent software to believe.

Now we have now used it prior to now to create featured images and other graphics for our blog posts. It’s a popular vector graphics software used by pros to create digital illustrations.

While Adobe products are known for their higher worth stage, they’re frequently spotted as a successful investment, and we in reality really feel the identical method. There’s a learning curve, alternatively once mastered, Illustrator supplies great perks.

For one, designs made with Illustrator are extraordinarily scalable. This is great for creating logos, customized fonts, and other digital illustrations with income possible. Additionally, the designs you create in Illustrator are suitable for professional printing, which opens up additional monetization choices.

Execs of Adobe Illustrator:

  • Creates scalable designs, highest for logos and illustrations
  • Trade-standard, lending professional credibility for your artwork
  • Versatile for moderately a large number of tasks: web graphics, mobile apps, infographics, prints, logos
  • Integrates well with other Adobe products for professional artwork

Cons of Adobe Illustrator:

  • Can be overwhelming for newcomers
  • Dear subscription sort
  • Requires an excellent laptop for maximum potency

Pricing: Adobe Illustrator costs $22.99 per month. Then again, you’ll be capable to get the Adobe Inventive Cloud suite, which accommodates 20+ Adobe apps, for $59.99 per month. A 7-day unfastened trial is available.

Why we decided on Adobe Illustrator: Adobe Illustrator’s versatility makes it an excellent variety for artists buying groceries to create and promote top quality virtual artwork, irrespective of its steeper learning curve and worth.

<h4 class=”wp-block-heading” id=”aioseo-x-mpl-publisher-wordpress-ebook-audiobook-creator”>5. MPL-Writer (wordpress eBook/Audiobook Creator)

MPL-Publisher landing page

MPL-Writer is a wordpress plugin this is serving to you turn a couple of blog posts into an eBook or audiobook you’ll be capable to advertise. It makes creating and selling digital content material subject matter from your wordpress internet website more straightforward.

We downloaded and thoroughly tested this plugin to try all its choices. And our favorite issue in regards to the plugin is how well MPL-Creator works with wordpress.

Once installed, you’ll be capable to merely add your information details, make a cover, keep an eye on the design, and make a selection which posts to include.

Filtering Posts in MPL-Publisher

The process is gorgeous easy, which is why we discussed it in our knowledge on making eBooks in wordpress. We moreover favored with the ability to edit the content material subject matter to make it fit upper in an eBook construction and save the information as a MOBI, PDF, or audiobook file.

On the other hand, MPL-Creator’s templates aren’t as fancy as those in Beacon or Canva. If you want to make huge changes to how your eBook seems to be like, you could need to know some customized CSS.

Execs of MPL-Creator:

  • Works well with wordpress and easily imports posts
  • Supplies a couple of eBook obtain formats like ePub, audiobook, and PDF
  • Means that you can edit publish content material subject matter inside the plugin for upper eBooks

Cons of MPL-Creator:

  • Supplies fewer template possible choices than any other apparatus and would in all probability require CSS knowledge for classy customization
  • Book quilt editor highest available inside the paid style

Pricing: MPL-Creator has a unfastened style with 50 chapters consistent with information and a couple of information designs. The highest magnificence style costs $49 consistent with website and comprises no ads, endless books, and a information quilt maker.

Why we decided on MPL-Creator: This plugin is very good for turning wordpress blog posts into sellable eBooks or audiobooks. It’s user-friendly and gives moderately a large number of export possible choices, making it a good choice for wordpress consumers who wish to advertise digital content material subject matter.

6. Audacity (Track and Audio Products)

Do you will have a knack for sound and enjoy running with audio? If so, you’ll be capable to use Audacity as a digital products maker, turning your ability into money by the use of creating moderately a large number of audio pieces.

Audacity is a unfastened audio enhancing and recording app that works on House home windows, Mac, and Linux pc methods. While song manufacturing is an obtrusive variety, you don’t need to be musically talented to have the good thing about this software.

You’ll be capable to moreover make audiobooks, report guided meditations, snatch nature sounds for stress-free tracks, create podcast intros, or even design sound effects for video video games or motion pictures.

That discussed, we wish to admit that the usage of Audacity wasn’t always blank because of its structure seems to be like just a bit outdated. On the other hand, given that software is open-source, we discovered numerous helpful YouTube tutorials and a big group of consumers ready to be in agreement.

Execs of Audacity:

  • Free and open-source
  • Has an invaluable group of consumers
  • Comes with built-in effects and works with audio.com property
  • Works on more than a few types of pc methods

Cons of Audacity:

  • The interface seems to be like outdated
  • No longer the most efficient for multitrack music recording and enhancing

Pricing: Audacity is completely unfastened to use, and now not the use of a need to acquire a license.

Why we decided on Audacity: Even supposing apparently to be like just a bit earlier, Audacity is an excellent, unfastened software for making many types of audio products. Its open-source nature, supportive group, and flexibility make it a very good variety for newcomers in digital audio creation.

7. Adobe Photoshop (Image Improving)

Adobe Photoshop landing page

Now not like Illustrator, Adobe Photoshop focuses additional on enhancing photos and making graphics that don’t need to be as merely resized. Now we have now used it extensively all over our business to create and edit sexy and professional-looking images.

With Photoshop, you’ll be capable to edit photos to advertise as stock images, create mockups for moderately a large number of products, design custom designed brushes or image presets, and even make digital planners or bullet journals. The software’s flexibility makes it great for creating many more than a few digital products.

Everyone knows that Photoshop can also be hard to be told, specifically compared to simpler apparatus like Canva. Then again while you get used to it, you’ll be capable to do so much more. It’s dear, alternatively it can be worth it should you’re serious about making professional-quality digital products.

Execs of Adobe Photoshop:

  • Good for creating many types of visual digital products
  • Works with many file varieties like JPEG, PNG, GIF, TIFF, and PDF
  • Quite a few tutorials and courses are available that can assist you be told Adobe Photoshop
  • Many brushes and filters online you’ll be capable to download to boost creativity

Cons of Adobe Photoshop:

  • It’s dear, and a couple of further apparatus like brushes/filters worth additional
  • Takes time to learn how to use it well
  • Needs an excellent laptop to run simply

Pricing: Adobe Photoshop costs $22.99 per month. Or, you’ll be capable to get the Adobe Inventive Cloud package, which accommodates over 20 Adobe apps, for $59.99 per month.

Why we decided on Adobe Photoshop: Even supposing it’s now not blank to be told, Photoshop is terribly versatile and strong for top of the range digital product creation. Its huge number of choices and the best way well it in reality works with other Adobe products make it a very good variety for serious virtual creators.

<h4 class=”wp-block-heading” id=”aioseo-x-create-block-theme-wordpress-block-themes”>8. Create Block Theme (wordpress Block Subjects)

Create Block Theme plugin banner

wordpress block problems are becoming more popular, alternatively there aren’t as a large number of them as antique problems or problems made with web page developers. This means you will have an opportunity to create and advertise your personal block problems.

The good news is you’ll be capable to use the unfastened Create Block Theme plugin to make your problems. We’ve used it to change our block problems and make custom designed designs. It’s moreover great for making child block problems.

From our revel in, it’s an more straightforward way to create block issues, even though you’ve on no account finished it previous to. You’ll be capable to design your theme right kind in wordpress, which makes it a lot much less frightening should you’re new to personalized theme development.

Saving a child block theme's changes using the Create Block Theme plugin

On the other hand, understand that this plugin highest works for block problems. Nowadays, now not as many people use block problems, so your market could be small. Then again as additional other people get began the usage of the complete website online editor in wordpress, block problems will possibly develop into additional in taste.

Execs of Create Block Theme:

  • Works well with the full website editor
  • Easy to use and helps you design problems visually
  • Means that you can make new problems in step with problems you’re already the usage of

Cons of Create Block Theme:

  • You’ll be capable to highest use it to make block problems, now not different types

Pricing: Create Block Theme is unfastened to use.

Why we decided on Create Block Theme: This plugin makes it possible for added other people to create problems, even though they don’t know how to code. As block problems develop into additional now not bizarre, Create Block Theme is an effective way for wordpress consumers to start selling their own problems.

<h4 class=”wp-block-heading” id=”aioseo-x-divi-wordpress-themes-made-with-divi”>9. Divi (wordpress Subjects Made With Divi)

Divi landing page

When you occur to’ve been the usage of wordpress for a while, you most likely find out about Divi. It’s a popular software for development pages and problems, and we rank it Third in our theme builder overview.

Then again are you aware you’ll be capable to moreover make and advertise Divi child problems and layouts on their inventive marketplace?

Divi is extensively used, which means that that there are a large number of individuals who might wish to acquire your problems or layouts. We’ve moreover came upon the platform to be actually blank for newcomers to use, because of its drag-and-drop design, customizable parts, and dynamic content material subject matter choices.

Take a look at DiviFlash as an example. It’s a Divi plugin that’s been featured on HubSpot.

DiviFlash landing page

It’s very important to create something like this, too!

One thing to keep in mind is that the whole thing you set as much as the Divi marketplace is checked by the use of the Elegant Subjects body of workers. That is serving to make sure that top quality alternatively can also slow down how in brief your products or updates are that can be purchased.

Execs of Divi:

  • Easy to be told, so that you’ll be capable to make layouts or child problems in brief
  • You get 70% of each sale you’re making on the Divi Marketplace
  • Quite a few possible consumers because of Divi is so in taste

Cons of Divi:

  • The review process can slow down your product releases and updates
  • You need to stick updating your products to artwork with the newest style of Divi

Pricing: Yearly plans worth from $89 to $277 consistent with year, with a 30-day money-back make sure that. You’ll be capable to moreover pay once for lifetime get right of entry to, which costs $249 to $297.

Why we decided on Divi: Divi will give you a very good chance to advertise to numerous wordpress consumers who want custom designed problems and layouts. It’s blank to use and has a big marketplace, making it a great place for creators to design and advertise digital products that would possibly develop into very popular.

10. Camtasia (Video Digital Products)

Camtasia landing page

When you occur to’re comfortable being on virtual digicam, you could be excellent at creating video digital products like online courses. Camtasia is a great tool for this kind of artwork. It ranks second in our list of video modifying instrument.

We recommend Camtasia over other apparatus because it has a built-in computer screen recording feature. This means you’ll be capable to merely snatch what’s happening to your display screen when you’re teaching. It even information audio and mouse movements, which is actually helpful for step-by-step tutorials.

Camtasia isn’t just for recording. You’ll be capable to moreover edit your motion pictures the usage of its many choices like filters, transitions, on-screen text, animations, sound effects, and even royalty-free video clips. So, even though you don’t wish to be on virtual digicam, you’ll be capable to however use Camtasia to create motion pictures created from other clips.

Basic, Camtasia has worked well for us prior to now. On the other hand, some consumers have reported that it doesn’t always run simply on Mac pc methods.

Execs of Camtasia:

  • All-in-one resolution: computer screen recording, audio recording, and mouse recording
  • Quite a few enhancing property: 30 filters, 150 transitions, endless royalty-free music
  • AI detection for filler words like ‘um’ and ‘uh’
  • Easier to use compared to other platforms like Adobe Premiere Professional

Cons of Camtasia:

  • Some consumers report potency issues on Mac

Pricing: Camtasia costs between $134.91 and $375.25 consistent with year. You’ll be in a position to try it without charge for 7 days.

Why we decided on Camtasia: Its mixture of easy-to-use computer screen recording and whole enhancing apparatus makes it splendid for producing and promoting top quality movies, even for those new to video creation.

Easiest imaginable Platforms to Advertise Digital Products

Now that you just’ve created your digital products, the next step is finding the best position to promote and marketplace your virtual merchandise. The platforms we’re about to discuss will let you increase your online business and optimize your product sales process.

That you must perceive we don’t include digital product marketplaces on our list. That’s because of some long-term problems with the usage of them, which is outlined in reality neatly in this reputable quote:

Third-party marketplaces do make sign-up blank and have a low initial worth. On the other hand, you’ll in any case finally end up paying high transaction fees of up to 30% for each product you advertise. You moreover don’t private your personal wisdom; you merely rent it.

Your product listings, purchaser information, and purchase wisdom are all stored on someone else’s server. Migrating to any other platform later can also be extremely tough, if now not now not imaginable.

Chris KlosowskiChris Klosowski, Easy Digital Downloads founder

1. Simple Virtual Downloads (Digital Products Best)

The Easy Digital Downloads eCommerce and digital marketplace plugin

Simple Virtual Downloads (EDD) is the software we use to advertise our most sensible magnificence wordpress plugins and digital downloads. Over the years, it’s showed to be a reliable resolution that has helped increase our business and masses of others.

For additonal details, see our entire Simple Virtual Downloads overview.

As an example, EscapeRoomGeeks uses EDD to advertise printable Escape Room Kits, while SetSailStudios sells downloadable fonts via this platform.

Set Sail Studios Make Money Selling Unique Fonts

We love EDD because it makes it really easy to prepare an on-line retailer for digital products. The onboarding wizard guides you all through the setup process step by step, so it’s hard to get out of place.

Any other great feature is its automation purposes. The ones streamline our workflows by the use of collecting habitual subscription bills, offering content material subject matter upgrades, and managing renewals. This saves us a large number of time and effort in managing our digital products.

Setting up recurring payments using a digital eCommerce plugin

The only problem we can call to mind is that EDD doesn’t allow physically products. On the other hand, this focus on digital products method its choices are optimized for selling downloads.

Execs of Easy Digital Downloads:

  • Easy setup with guided onboarding
  • Routinely creates eCommerce pages like checkout and receipt
  • Endless file downloads and now not the use of a bandwidth charges
  • Tough software licensing give a boost to
  • Flexible cut price possible choices
  • You’ll be capable to upload a loose trial for your products

Cons of Easy Digital Downloads:

  • Limited to digital products highest, which isn’t splendid should you plan to make larger into physically products

Pricing: There’s a unfastened style available with basic choices like Stripe, PayPal, Apple/Google Pay integration, purchasing groceries cart, and basic eCommerce reporting.

Paid plans range from $89.55 to $349.65 consistent with year for added difficult choices, charge possible choices, and endless products. To get the most efficient deal out of your gain, you’ll be capable to use our Simple Virtual Downloads coupon code and claim a 50% cut price.

Why we decided on Easy Digital Downloads: As longtime consumers, we can vouch for EDD’s reliability and effectiveness in selling digital products. Its user-friendly setup and strong choices make it an excellent variety for anyone looking to start their digital download business.

We moreover counsel the usage of SiteGround’s EDD website hosting to verify your internet website is online all the time.

2. MemberPress (Memberships/Online Classes)

<img decoding=”async” loading=”lazy” width=”680″ height=”354″ src=”https://www.wpbeginner.com/wp-content/uploads/2020/07/memberpress-website.png” alt=”MemberPress” class=”wp-image-289723″/>

MemberPress sticks out as a top choice for creating subscription-based content material subject matter or online courses. We’ve for my part used this plugin for our WPBeginner video membership website, which has significantly helped us develop our electronic mail listing.

For more information, see our MemberPress overview.

MemberPress makes setting up a membership website easy. It mechanically creates crucial pages for pricing, login, account, and a thank you message to your consumers. This saves you time and promises a professional setup from the start.

What we love about MemberPress necessarily probably the most is its membership-specific choices. It supplies drip content material, a shopper portal, workforce memberships, and add-ons for specific types of services and products like on-line training. This way, you don’t need to arrange some other plugin to build your membership business.

Restricting content based on membership level

With MemberPress, you’ll be capable to merely prohibit get entry to to express content material in step with membership tiers, particular person individuals, or a mix of every. This means you’ll be capable to create tailored research for more than a few membership levels, ensuring your most sensible magnificence content material subject matter stays distinctive.

One critique we’ve were given for MemberPress is it doesn’t have any unfastened style. That being discussed, it’s a worthy investment, specifically making an allowance for the whole thing you’re transferring into just one platform.

Execs of MemberPress:

  • Flexible content material coverage laws for moderately a large number of eventualities
  • Optimized for memberships with choices like drip content material subject matter (freeing categories over time) and subscription billing
  • Easy setup process with automated internet web page creation for a membership internet website
  • Is helping endless membership levels
  • Suitable with number one charge gateways, at the side of PayPal, Stripe, and Authorize.web

Cons of MemberPress:

  • No unfastened style available

Pricing: MemberPress supplies annual plans starting from $179.50 and going up to $399.50 consistent with year. The basic plan we could in usage on one internet website and comprises endless individuals, endless courses, and no transaction fees. A 14-day money-back make sure that is available.

Moreover, be at liberty to use our MemberPress coupon code to save some up to 50% off of your plan.

Why we decided on MemberPress: It’s an excellent all-in-one resolution for anyone serious about creating a membership or online path platform. Our revel in with the plugin has confirmed us that it’s going to in all probability take care of even difficult membership constructions very simply.

Variety: No longer serious about MemberPress for online courses? Check out Thrive Apprentice, some other powerful platform.

3. WooCommerce (Physically + Digital Products)

WooCommerce

WooCommerce is the preferred wordpress eCommerce plugin and is used by tens of hundreds of thousands of online stores. We’ve used it ourselves and can see why it’s so extensively loved.

First off, WooCommerce is unfastened. You’ll be capable to get began selling instantly for free, the usage of charge possible choices like monetary establishment transfer, cash on provide, and PayPal.

We moreover like how it creates important store pages for you, comparable to checkout and product pages, which saves you hours of work.

<img decoding=”async” loading=”lazy” width=”680″ height=”373″ src=”https://www.wpbeginner.com/wp-content/uploads/2024/01/woocommerce-reports-analytics.png” alt=”eCommerce reports, in the wordpress dashboard” class=”wp-image-246657″/>

Any other great thing about WooCommerce is how flexible it’s. There are many WooCommerce extensions you’ll be capable to add to make your store do additional. This means you highest pay for extra choices you in truth need.

Our personal favorite is FunnelKit, which is a plugin this is serving to boost product sales by the use of optimizing your checkout, together with order bumps, and further.

One problem is that there are such a lot of WooCommerce extensions that it’s going to in all probability in reality really feel just a bit overwhelming at first. Plus, there’s no direct give a boost to. That being discussed, the WooCommerce group is also very huge, so it’s blank to go looking out property to be in agreement in conjunction with your issues.

Execs of WooCommerce:

  • Free and blank to prepare
  • Works for every digital and physically products (great should you advertise ebooks and printed books, for instance)
  • Quite a few unfastened and paid extensions to give a boost to your store and product sales
  • Built-in analytics to track how your store is doing

Cons of WooCommerce:

  • The large number of extensions can also be difficult
  • No original give a boost to body of workers (alternatively the group is also very helpful)

Pricing: WooCommerce itself is unfastened, alternatively plugins can worth anyplace from $1 to $299 consistent with year.

Why we decided on WooCommerce: We love how WooCommerce can take care of every digital and physically products and that you simply’ll be capable to customize it with plugins to fit exactly what you need. It’s unfastened first of all, and there’s a big group that can assist you out.

When you occur to’re serious about the usage of WoCoomerce, we recommend the usage of the Bluehost WooCommerce webhosting to get your online store up and dealing.

You’ll be capable to to determine additional in regards to the platform in our WooCommerce overview.

4. WP Easy Pay (Single-Product Online Store)

WP Simple Pay

WP Easy Pay is a superb variety for those buying groceries to promote a unmarried product or supplier without the complexity of a whole eCommerce platform. We’ve came upon it to be one of the vital easy Stripe charge plugins, making it highest for small firms merely starting out.

For additonal details, see our WP Easy Pay overview.

In our revel in, Stripe’s ease of use for every investors and consumers is unprecedented. The setup for firms isn’t so long as other platforms, so long as your entity is dependable. Plus, your consumers may make expenses directly to your website without having their own Stripe account.

We’ve tested a large number of Stripe plugins, and this one sticks out for its simplicity. You highest need to connect your internet website to Stripe and create a charge form, and that’s it. The 70+ form templates protective moderately a large number of business varieties save you time and ensure your charge form seems to be like professional.

Adding custom fields to a payment form

The drag-and-drop form builder moreover allows you to customize the associated fee form the usage of its built-in field possible choices. This way, the form can also be tailored to fully suit your charge form needs.

Unfortunately, Stripe isn’t available in all countries. So, if you need an alternative, it’s your decision to take a look at some other charge form like WPForms.

Execs of WP Simple Pay:

  • Free style available
  • No transaction fees, which helps to keep more money to your pocket
  • Easy setup and customization with form templates and drag-and-drop builder
  • Accepts 14+ charge methods, at the side of Apple Pay and Google Pay
  • Automatic tax calculation setup for right kind pricing

Cons of WP Simple Pay:

  • Some countries gained’t be capable of use Stripe

Pricing: WP Simple Pay supplies a unfastened style for basic needs. Paid plans get began from $49.50 and transfer up to $299.50 consistent with year. One of the most moderately priced plan we could in usage on one website, with endless charge paperwork/transactions and no transaction or per 30 days fees.

You’ll be capable to moreover use our WP Easy Pay coupon code to get 50% off of your first gain.

Why we decided on WP Simple Pay: We picked WP Simple Pay because it makes it extraordinarily blank to prepare Stripe expenses on wordpress. It’s smooth to use, extraordinarily customizable, and has excellent choices like automated tax calculation.

What Are the Easiest imaginable Platforms for Rising and Selling Digital Products?

In this list, we’ve reviewed a large number of different platforms for digital product creation, alternatively the most efficient one is determined by your needs.

If you want to make unfastened guides or eBooks to get additional email correspondence subscribers, Beacon is our top make a selection. We use it ourselves and actually like how blank it’s.

You’ll be capable to in brief make eBooks, workbooks, and checklists without any design talents. It’s great for newcomers and pros alike, with a unfastened plan and affordable paid possible choices if you need additional choices.

Next, we recommend Simple Virtual Downloads for anyone starting to advertise digital products. We’ve used it for years to advertise our wordpress plugins, and it in reality works actually well.

EDD makes it smooth to prepare your store, automate product sales, and offer discounts. Merely consider, it’s only for digital items, now not physically ones.

If you want to create a membership internet website or advertise online courses, transfer with MemberPress. We used it for our WPBeginner video categories, and it helped us get additional email correspondence subscribers. It has the whole thing you need, like drip content material subject matter and ways to keep an eye on different membership levels.

Rising and Selling Digital Products FAQs

Now that we’ve long gone via our list of the most efficient apparatus for creating and selling digital products online, let’s solution some steadily asked questions:

Which is the easiest digital product to create and advertise?

eBooks, printables, and templates are in taste types of digital products that newcomers can create and advertise in brief. The ones digital product ideas require minimal technical talents and can also be made the usage of apparatus like Beacon, Canva, or Google Clinical docs.

Merely you’ll need to create the ones products in step with your present knowledge or talents. For additonal inspiration, check out our list of the most well liked virtual merchandise you’ll be able to promote on-line.

How and where do I create digital products as a amateur?

As a amateur, you’ll be capable to get began creating digital products the usage of unfastened or affordable apparatus like Beacon, Canva, or Google Clinical docs. Make a selection a product sort that aligns in conjunction with your talents, and use platforms like Simple Virtual Downloads to start selling digital products online.

Can you actually transform successful selling digital products?

Certain, you’ll be capable to undoubtedly transform successful selling digital products. In truth, our founder, Syed Balkhi, is a smart example of this, as he’s been successfully selling digital products like freemium wordpress plugins for years. 

The name of the game is to create top of the range products that treatment exact problems to your audience. For additonal insights, check out this newsletter on key classes discovered by way of Chris Klosowski (Simple Virtual Downloads founder) after promoting virtual downloads for over a decade.

Additional A professional Tips to Get began a Digital Product Business

When you occur to’re in search of additional tips about starting a digital product business, you may additionally be serious about the ones articles:

We hope this newsletter has helped you to find the most efficient apparatus for creating and selling digital products. You might also want to try our reputable choices of the perfect wordpress jQuery plugins and our list of superb wordpress web site examples you will have to take a look at.

When you occur to favored this newsletter, then please subscribe to our YouTube Channel for wordpress video tutorials. You’ll be capable to moreover to seek out us on Twitter and Fb.

The publish 14 Gear for Growing and Promoting Virtual Merchandise (Knowledgeable Pick out) first appeared on WPBeginner.

wordpress Maintenance

[ continue ]

wordpress Maintenance Plans | wordpress hosting

read more

Source link

See what others are saying about this...

Posted on Leave a comment

Tips on how to Create WordPress Bureaucracy With Dropdown Fields (Simple Way)

Many internet web page homeowners struggle to collect shopper input without overwhelming those consumers with lengthy forms.

Dropdown fields make forms more effective via presenting a concise record of alternatives. This means that they could boost your form of completion value and reinforce the shopper experience.

In this article, we can show you how one can create a wordpress form with dropdown fields.

wordpress-forms-with-dropdown-fields-in-post.png” alt=”The Create wordpress Forms with Dropdown Fields in post image” class=”wp-image-281754″/>

What Are Dropdown Fields and Why Use Them?

A dropdown field lets consumers make a selection one risk from a set record of more than a few variations. Shoppers can simply click on on on the field to look all the dropdown imaginable alternatives.

As a internet web page owner, you’ll use dropdown fields to create web forms, very similar to e mail publication signups, contact forms, match registration forms, or product order forms.

Dropdown fields can reinforce your form’s effectiveness. Listed here are a few advantages:

  • Consistency. The set record of alternatives keeps the accumulated knowledge consistent and stops invalid entries. This makes knowledge analysis additional proper.
  • Dynamic fields. Dropdown fields make it easier to set conditional commonplace sense. The set record of alternatives signifies that you’ll show additional fields in line with shopper selection without unnecessary hurdles.
  • Lowered form length. Combining a lot of alternatives proper right into a compact dropdown menu makes your form look a lot much less intimidating. This can lead to a better shopper experience.

That being said, let’s take a look at how one can create forms with dropdown fields in wordpress. Right here’s a quick assessment of the steps we can cover in this tutorial:

Let’s get started!

Step 1: Putting in place WPForms

WPForms is the most efficient beginner-friendly, drag-and-drop wordpress plugin for rising forms. This sort builder has 1,800+ templates, which allow you to make a user-friendly form in just a few clicks.

It moreover signifies that you’ll mix third-party promoting and rate platforms, along side Consistent Touch and Stripe.

WPForms

Notes: WPForms Lite comes with the dropdown field serve as. That said, we recommend getting the highest magnificence type of the plugin so that you’ll set conditional commonplace sense and reinforce shopper experience on your form.

The good news is WPBeginner readers get a unique 50% off via using the WPForms coupon: SAVE50.

To position in and activate WPForms, you’ll be informed our knowledge on the way to set up a wordpress plugin.

Step 2: Creating a New Form

Upon activation, you’ll have to see a WPForms menu for your wordpress admin area like this:

<img decoding=”async” loading=”lazy” width=”680″ height=”250″ src=”https://www.wpbeginner.com/wp-content/uploads/2024/06/wordpress-wpforms.png” alt=”The WPForms menu in the wordpress admin area” class=”wp-image-281451″/>

Now, you’ll be capable to get right of entry to the WPForms builder interface and create forms with dropdown fields.

To start out building a brand spanking new form, hover over WPForms and click on on ‘Add New’.

<img decoding=”async” loading=”lazy” width=”680″ height=”308″ src=”https://www.wpbeginner.com/wp-content/uploads/2024/06/wordpress-wpforms-addnew.png” alt=”The Add New button under WPForms in the wordpress admin area” class=”wp-image-281452″/>

Alternatively, you’ll click on on WPForms. This will likely redirect you to the builder’s ‘Forms Overview’ section.

To get started, click on at the ‘+ Add New’ button.

<img decoding=”async” loading=”lazy” width=”680″ height=”307″ src=”https://www.wpbeginner.com/wp-content/uploads/2024/06/wordpress-wpforms-formsoverview-addnew.png” alt=”The + Add New button on WPForms’ Forms Overview” class=”wp-image-281453″/>

Now, you’ll see the ‘Setup’ panel within the WPForms form builder. In this panel, the first thing you’ll need to do is to name your form.

For example, you’ll type ‘Simple Contact Form’ or just ‘Contact Form’ into the ‘Name Your Form’ field.

<img decoding=”async” loading=”lazy” width=”680″ height=”239″ src=”https://www.wpbeginner.com/wp-content/uploads/2024/06/wordpress-wpforms-addnew-setup-nameyourform.png” alt=”The Contact Form copy in the Name Your Form field in WPForms’ Setup panel” class=”wp-image-281454″/>

Once that’s completed, it’s time to make a choice a template.

To use a kind template, all you wish to have to do is hover over the one you wish to have and click on on ‘Use Template’. In this example, we’re going to make use of ‘Simple Contact Form’.

<img decoding=”async” loading=”lazy” width=”680″ height=”365″ src=”https://www.wpbeginner.com/wp-content/uploads/2024/06/wordpress-wpforms-addnew-setup-selectatemplate-usetemplate.png” alt=”The Use Template button for Simple Contact Form in WPForm’s Setup panel” class=”wp-image-281561″/>

To learn additional about growing a slightly form, see our detailed knowledge on the way to create a touch shape in wordpress.

Step 3: Together with the Dropdown Field

After completing the setup process, you’ll be redirected to the form builder, where there’s an inventory of fields on the left and a are living preview at the right kind.

Edit contact form

Now, we wish to add a dropdown field to our contact form.

Simply click on on ‘Dropdown’ and drag it onto the right facet of the form.

<img decoding=”async” loading=”lazy” width=”680″ height=”427″ src=”https://www.wpbeginner.com/wp-content/uploads/2024/06/wordpress-wpforms-addnew-fields-dropdown-1.png” alt=”The Dropdown option in WPForm’s Fields panel” class=”wp-image-281563″/>

To the right of the panel, you’ll be capable to see a dropdown field on your contact form. You’ll hover over the field to get right of entry to its settings, which include:

  • A duplicate button
  • A delete button
  • A ‘Click on directly to Edit’ instruction
  • A ‘Drag to Reorder’ instruction
<img decoding=”async” loading=”lazy” width=”680″ height=”308″ src=”https://www.wpbeginner.com/wp-content/uploads/2024/06/wordpress-wpforms-fields-dropdownfield.png” alt=”The dropdown field on the live preview” class=”wp-image-281955″/>

Using the drag-and-drop serve as, let’s switch the dropdown field above ‘Statement or Message’.

Via having the ‘Statement or Message’ paragraph field right kind forward of the submit button, you offer a better flow for the form of completion process. It moreover makes your dropdown field additional visible so consumers don’t disregard it.

<img decoding=”async” loading=”lazy” width=”680″ height=”258″ src=”https://www.wpbeginner.com/wp-content/uploads/2024/06/wordpress-wpforms-fields-dropdownmoved.png” alt=”The dropdown field moved above Comment or Message” class=”wp-image-281954″/>

Step 4: Configuring the Dropdown Field

In this step, you’ll set your dropdown field’s label, alternatives, and description. Your record of alternatives must align at the side of your form type. Since we’re making a slightly form, let’s offer a newsletter subscription risk.

Click on on on your dropdown field and then cross to ‘Field Alternatives’.

<img decoding=”async” loading=”lazy” width=”680″ height=”403″ src=”https://www.wpbeginner.com/wp-content/uploads/2024/06/wordpress-wpforms-fields-dropdown-fieldoptions-1.png” alt=”The Dropdown field’s Field Options tab” class=”wp-image-281566″/>

On the ‘Fundamental’ tab, fill out the essential details:

  • Label. In dropdown fields, labels are usually questions. We’ll use ‘Do you need to subscribe to our newsletter?’ for example.
  • Imaginable alternatives. Let’s add ‘Positive, please.’ and ‘No, thank you.’
  • Description. You’ll leave ‘You’ll unsubscribe at any time.’ in this field.
  • Required. Toggle this way to require visitors to complete this field.
<img decoding=”async” loading=”lazy” width=”680″ height=”565″ src=”https://www.wpbeginner.com/wp-content/uploads/2024/06/wordpress-wpforms-fields-dropdown-fieldoptionsconfigured.png” alt=”The configured Dropdown field in the Field Options tab” class=”wp-image-281572″/>

Next, let’s set conditional commonplace sense.

Conditional commonplace sense way making alternatives with ‘if’ and ‘then’ statements. When used in forms, it decides what happens next in line with the answer {{that a}} shopper gives.

Putting in place conditional commonplace sense makes forms more uncomplicated to complete. Via showing perfect similar alternatives in line with previous alternatives, your form doesn’t overwhelm consumers with unnecessary imaginable alternatives.

In this example, let’s display an additional field if consumers make a selection the ‘Positive, please’ risk. We will allow the subscribers to make a choice how ceaselessly they need to download promotional emails.

Previous to that, you’ll need to get in a position a brand spanking new field. Go back to the ‘Add Fields’ tab and click on on ‘Dropdown’ or any other field type. Then, complete the new field’s details.

Proper right here’s an example:

<img decoding=”async” loading=”lazy” width=”680″ height=”461″ src=”https://www.wpbeginner.com/wp-content/uploads/2024/06/wordpress-wpforms-fields-seconddropdown-fieldoptions-optionsconfigured.png” alt=”The configured second dropdown field in the Field Options tab for setting up conditional logic” class=”wp-image-281569″/>

Now that the new field is able, click on on on it and navigate to the ‘Excellent Not unusual sense’ tab.

From proper right here, you’ll activate conditional commonplace sense via toggling the ‘Allow Conditional Not unusual sense’ risk.

<img decoding=”async” loading=”lazy” width=”680″ height=”383″ src=”https://www.wpbeginner.com/wp-content/uploads/2024/06/wordpress-wpforms-fields-seconddropdown-fieldoptions-optionsconfigured-enableconditionallogic.png” alt=”The Enable Conditional Logic toggle in the Smart Logic tab” class=”wp-image-281573″/>

Once activated, you’ll configure conditional commonplace sense in your new field.

Get began with choosing to ‘Show’ or ‘Duvet’ the new field. Then, make a choice an provide field and a client input.

Proper right here’s our configuration for reference: ‘Show’ this field if ‘Do you need to subscribe to our newsletter’ is ‘Positive, please’.

<img decoding=”async” loading=”lazy” width=”680″ height=”381″ src=”https://www.wpbeginner.com/wp-content/uploads/2024/06/wordpress-wpforms-fields-seconddropdown-fieldoptions-optionsconfigured-conditionallogicconfigured.png” alt=”The conditional logic for the second Dropdown field in the Smart Logic tab” class=”wp-image-281574″/>

Step 5: Personalizing Your Form

It’s time to personalize your new form.

You’ll get began via putting in place e-mail notifications each and every time a brand spanking new shopper submits a kind. Head to Settings » Notifications and toggle the ‘Allow Notifications’ risk.

<img decoding=”async” loading=”lazy” width=”680″ height=”244″ src=”https://www.wpbeginner.com/wp-content/uploads/2024/06/wordpress-wforms-settings-notifications-enablenotificationstoggle.png” alt=”The Enable Notifications toggle in WPForms’ Notifications section in the Settings panel” class=”wp-image-281962″/>

Then, go through your form’s default notification details below the toggle.

Some entries throughout the ‘Default Notification’ field have ‘Excellent Tag’. This tag assumes where to send form submission notifications, among others. That said, you’ll alter the settings in line with your needs.

For example, the ‘Sent To E-mail Handle’ field has the {admin_email} ‘Excellent Tag’. Via default, this may well be your wordpress site’s admin e-mail. So, any form submission notifications will cross to the admin e-mail’s inbox.

You’ll add additional recipients, very similar to your e-mail promoting specialist. Merely you will have to indisputably separate each e-mail with a comma.

If you want to learn how to send your form e-mail to a lot of other folks or different departments, be informed our knowledge on the way to create a touch shape with a number of recipients.

Next, the default copy in your ‘E-mail Matter Line’ is ‘New Get right of entry to: Your Form Name’. However, you’ll change the subject line for your liking as long as it’s easy to identify.

Shoppers who submit a kind must download a notification in their emails. The ‘From Name’ field lets consumers know who sends the notification e-mail.

<img decoding=”async” loading=”lazy” width=”680″ height=”182″ src=”https://www.wpbeginner.com/wp-content/uploads/2024/06/wordpress-wpforms-settings-notifications-defaultnotifications-top-1.png” alt=”WPForm’s Default Notifications settings for the first three fields” class=”wp-image-281964″/>

The next field is ‘From E-mail’, and the ‘Excellent Tag’ for this field is {admin_email}.

With this default surroundings, consumers will download notification emails from your site’s admin e-mail.

The highlighted section informs you that your site’s admin e-mail deal with is on a singular space, for example, @gmail.com. This can lead to deliverability issues, very similar to emails completing up throughout the ‘Junk mail’ box.

You’ll be informed our knowledge on putting in WP Mail SMTP to make sure that your emails in any case finally end up in readers’ inboxes.

<img decoding=”async” loading=”lazy” width=”680″ height=”280″ src=”https://www.wpbeginner.com/wp-content/uploads/2024/06/wordpress-wpforms-settings-notifications-defaultnotifications-middle.png” alt=”WPForm’s Default Notifications settings for the From Email field” class=”wp-image-281965″/>

For each notification e-mail sent, the recipient moreover has the selection to respond to it.

Inside the ‘Solution-To’ field, you’ll set which e-mail deal with will download shopper replies. This field’s ‘Excellent Tag’ is {field_id= “1”}. It implies that consumers’ replies will cross to the identical e-mail deal with as the one throughout the ‘From E-mail’ field.

After all, the ‘E-mail Message’ field has the {all_fields} ‘Excellent Tag’. So, your e-mail message will contain your form fields at the side of shopper responses.

<img decoding=”async” loading=”lazy” width=”680″ height=”218″ src=”https://www.wpbeginner.com/wp-content/uploads/2024/06/wordpress-wpforms-settings-notifications-defaultnotifications-bottom.png” alt=”WPForm’s Default Notifications settings for the last two fields” class=”wp-image-281966″/>

Whilst you’ve finished customizing your notifications, navigate to ‘Confirmations’. In this section, you’ll prepare how you’ll display confirmation after form submission.

First, you’ll make a selection ‘Messages’, ‘Show Internet web page’, or ‘Move to URL (Redirect)’ as your confirmation type.

<img decoding=”async” loading=”lazy” width=”680″ height=”258″ src=”https://www.wpbeginner.com/wp-content/uploads/2024/06/wordpress-wforms-settings-confirmationtype.png” alt=”The Confirmation Type field in WPForms’ Confirmations section in the Settings panel” class=”wp-image-281968″/>

If you choose ‘Message’ as your confirmation type, you’ll display a confirmation message to let consumers know you’ve won their form submissions.

With this confirmation type, you’ll edit the default message to fit your brand. Move to the ‘Confirmation Message’ field and type your custom designed message into the text box.

<img decoding=”async” loading=”lazy” width=”680″ height=”213″ src=”https://www.wpbeginner.com/wp-content/uploads/2024/06/wordpress-wforms-settings-confirmations-confirmationmessage.png” alt=”The Confirmation Message field in WPForms’ Confirmation section in the Settings panel” class=”wp-image-281969″/>

If you choose ‘Show Internet web page’, you’ll need to make a choice an provide internet web page on your wordpress internet web page. And for many who opt for ‘Move to URL (Redirect)’, you’ll insert a internet web page URL.

Previous to you move immediately to the next step, click on on ‘Save’ in order that you don’t lose your building.

<img decoding=”async” loading=”lazy” width=”680″ height=”363″ src=”https://www.wpbeginner.com/wp-content/uploads/2024/06/wordpress-wforms-settings-confirmations-save.png” alt=”The Save button on WPForms’ builder interface” class=”wp-image-281971″/>

Once that’s completed, you’re in a position to turn your new form on your wordpress site.

<h4 class=”wp-block-heading” id=”aioseo-step-6-embedding-your-form-in-wordpress“>Step 6: Embedding Your Form in wordpress

To turn your new form on your wordpress site, you’ll use the ‘Embed’ wizard within the WPForms form builder.

<img decoding=”async” loading=”lazy” width=”680″ height=”363″ src=”https://www.wpbeginner.com/wp-content/uploads/2024/06/wordpress-wforms-settings-confirmations-embedwizard.png” alt=”The Embed wizard on the WPForms form builder” class=”wp-image-281973″/>

This will likely motive the ‘Embed in a Internet web page’ pop-up window. On it, you’ll make a selection ‘Select Present Internet web page’ or ‘Create New Internet web page’, whichever is expounded to you.

In this example, let’s cross with ‘Selecting Present Internet web page’.

<img decoding=”async” loading=”lazy” width=”680″ height=”341″ src=”https://www.wpbeginner.com/wp-content/uploads/2024/06/wordpress-wforms-embedwizard-selectexistingpage.png” alt=”The Select Existing Page button when embedding a form from WPForms” class=”wp-image-281974″/>

The next move is to make a choice the internet web page where you wish to have to turn your new form.

Simply click on at the dropdown and make a selection an provide web internet web page. Whilst you do that, click on on ‘Let’s Move!’.

<img decoding=”async” loading=”lazy” width=”680″ height=”359″ src=”https://www.wpbeginner.com/wp-content/uploads/2024/06/wordpress-wpforms-embedwizard-selectexistingpage-about-letsgo.png” alt=”The About option when embedding a form in an existing page” class=”wp-image-281976″/>

Then, you’ll be redirected to the wordpress block editor with WPForms instructions.

You’ll click on at the ‘Finished’ button to hide the ones instructions.

<img decoding=”async” loading=”lazy” width=”680″ height=”388″ src=”https://www.wpbeginner.com/wp-content/uploads/2024/06/wordpress-blockeditor-wpformsinstructions.png” alt=”The + button for adding a new block on the wordpress block editor” class=”wp-image-281977″/>

From proper right here, you need to click on at the ‘+’ button so to upload a WPForms block.

Kind ‘WPForms’ into the hunt bar. Then, you’ll have to see the WPForms block on the search results. Click on on so to upload it.

<img decoding=”async” loading=”lazy” width=”680″ height=”392″ src=”https://www.wpbeginner.com/wp-content/uploads/2024/06/wordpress-blockeditor-addblock-wpformssearchresult.png” alt=”The WPForms block to add to the wordpress block editor” class=”wp-image-281978″/>

After together with the WPForms block, you’ll see a dropdown menu on your internet web page.

Simply click on on on the dropdown and make a selection a kind from the record. Let’s make a choice ‘Contact Form’ since that’s the form we merely made.

<img decoding=”async” loading=”lazy” width=”680″ height=”458″ src=”https://www.wpbeginner.com/wp-content/uploads/2024/06/wordpress-blockeditor-addblock-wpforms-selectformthedropdownfield.png” alt=”The Contact Form option in the WPForms’ block’s dropdown” class=”wp-image-281979″/>

Step 7: Publishing the Form

In this final stage, let’s preview the form forward of publishing to make sure the entire thing turns out perfect imaginable. Inside the wordpress block editor, click on on View » Preview in new tab.

<img decoding=”async” loading=”lazy” width=”680″ height=”381″ src=”https://www.wpbeginner.com/wp-content/uploads/2024/06/wordpress-blockeditor-view-previewinnewtab-1.png” alt=”The Preview in new tab button on the wordpress block editor” class=”wp-image-281980″/>

If you wish to have, you’ll moreover preview how the form turns out like on tablet and cell units. All you wish to have to do is click on on View » Tablet or Cellular » Preview in new tab.

Finally, if no further adjustments are sought after, hit ‘Exchange’.

<img decoding=”async” loading=”lazy” width=”680″ height=”417″ src=”https://www.wpbeginner.com/wp-content/uploads/2024/06/wordpress-blockeditor-update-1.png” alt=”The Update button on wordpress‘ block editor” class=”wp-image-281982″/>

Congratulations! You’ve successfully added your new contact form with dropdown fields on your wordpress internet web page.

Proper right here’s how it gave the impression on our demo internet web page:

<img decoding=”async” loading=”lazy” width=”680″ height=”445″ src=”https://www.wpbeginner.com/wp-content/uploads/2024/06/wordpress-live-website-formwithdropdownfield.png” alt=”A contact form with dropdown fields embedded on a wordpress website” class=”wp-image-281983″/>

We hope this data has helped you learn how to create wordpress forms with dropdown fields. Next, it’s worthwhile to wish to learn how to use a touch shape to develop your e mail listing and how one can arrange shape monitoring in Google Analytics to optimize your form’s potency.

For those who occur to preferred this article, then please subscribe to our YouTube Channel for wordpress video tutorials. You’ll moreover to search out us on Twitter and Fb.

The submit Tips on how to Create wordpress Bureaucracy With Dropdown Fields (Simple Way) first seemed on WPBeginner.

wordpress Maintenance

[ continue ]

wordpress Maintenance Plans | wordpress hosting

read more

<a href=”https://wpmountain.com/tips-on-how-to-create-wordpress-bureaucracy-with-dropdown-fields-simple-way/”>Source link

See what others are saying about this...

SOL Organics.

Sol Organics is a bedding and bath company that specializes in organic cotton sheets, pillows, duvet covers, towels, and other home textiles. They are committed to using 100% organic cotton and fair trade practices to create high-quality, eco-friendly products.

Here are some key points about Sol Organics:

1. Materials: All their products are made from 100% Global Organic Textile Standard (GOTS) certified cotton, ensuring that the cotton is grown without harmful chemicals and pesticides.

2. Fair Trade: Sol Organics partners with fair trade certified factories to ensure that workers are treated ethically and paid fair wages.

3. Product Range: They offer a variety of bedding products, including sheets, duvets, pillows, and mattress toppers, as well as bath towels and robes.

4. Certifications: Apart from GOTS, Sol Organics products are also OEKO-TEX Standard 100 certified, ensuring that they are free from harmful substances.

5. Giving Back: The company donates a portion of its profits to various charitable causes, including environmental conservation and community development projects.

Customer reviews for Sol Organics are generally positive, with many praising the softness, comfort, and durability of their bedding products.

Customers also appreciate the company’s commitment to sustainability and ethical practices.

Some popular Sol Organics products include:

– Organic Cotton Sheets
– Organic Cotton Duvet Covers
– Organic Cotton Pillows
– Organic Cotton Mattress Toppers
– Organic Cotton Bath Towels

Finally, Sol Organics is a reputable company offering high-quality, eco-friendly bedding and bath products for those looking to invest in sustainable and ethically-made home textiles.