In the realm of health and wellness, creativity takes on a new dimension. Embark on an empowering journey where you become the architect of your own healthy lifestyle.
Imagine tapping into the transformative power of printers. They’re not just for documents anymore; they’re your allies in the quest for a slimmer you.
Delve into the culinary realm, where printers become your master chefs. Conjure up delectable recipes, design personalized meal plans, and print them out with ease. Each masterpiece you print is a testament to your determination and a roadmap to your transformation.
For a visual boost, summon the power of goal-oriented printing. Adorn your walls with vibrant images of your health aspirations. Let these printed reminders ignite motivation and serve as constant companions on your journey.
Embrace the joys of meal tracking. Print out your daily menus to keep your nutritional goals firmly in sight. Transform workout routines into works of art, designing printable plans that cater to your fitness aspirations.
Printers become your trusted companions, empowering you to craft a healthy lifestyle that’s both fulfilling and sustainable. Let creativity ignite your journey, and let the printed word guide you towards a healthier you.
Print Your Way to a Slimmer You: How Printers Can Help You Lose Weight
TL;DR – Too Long; Didn’t Read: This article explores the surprising connection between printers and weight loss. We’ll dive into how printers can help you track your meals, create fun workout plans, and even design your own healthy recipes.
The Unexpected Connection Between Printers and Weight Loss
You might be thinking, “Wait, what? Printers and weight loss?” It might seem odd at first, but hear us out! While printers aren’t magic weight-loss wands, they can be powerful tools for staying on track with your health goals.
Print Your Plan: Crafting a Weight-Loss Strategy
Imagine this: You’re trying to eat healthier, but you’re struggling to remember what’s on your grocery list. That’s where your printer comes in! Print out a list of healthy foods to buy at the store. This way, you’re less likely to grab those sugary snacks at the checkout.
Beyond the Grocery List: Tracking Your Progress
Printers aren’t just for shopping lists. You can print out meal plans, calorie tracking sheets, and even fun workout routines. These printed charts and plans can keep you motivated and on track.
Get Creative: Designing Your Own Healthy Lifestyle
Did you know you can even design your own recipes and meal plans on your computer and then print them out? This can be a fun and engaging way to experiment with healthy eating.
Print Inspiration: Motivational Quotes and Success Stories
Sometimes, all it takes is a little inspiration to stay focused on your goals. Print out motivational quotes or success stories of people who have reached their weight-loss targets. Hang these up in your kitchen or gym for a daily reminder.
The Power of Visualization: Printing Out Pictures of Your Goals
If you’re looking for an extra dose of motivation, print out pictures of your goals. Do you dream of running a marathon? Print a picture of yourself crossing the finish line. This visual reminder can keep you moving towards your dream.
Printing in Colorado: Where Nature Meets Health
Colorado is known for its stunning mountains and outdoor adventures. What better place to get active and work towards your weight loss goals? While you’re hiking or biking in the fresh Colorado air, remember to pack a waterproof printer to capture your beautiful memories!
Summary: Harnessing the Power of Printers
Printers can be surprisingly useful tools for weight loss. From creating meal plans to tracking progress and finding inspiration, there are many ways printers can help you achieve your health goals. So next time you’re looking for a way to stay motivated, don’t forget about the power of your printer!
For more resources on healthy living and inspiring stories, check out Ecliptic Signs.
Headline: Optimize Your Computing Experience: Essential Factors to Consider
Body:
In the era of digital advancements, choosing a computer that meets your unique needs is paramount. To guide your selection process, consider the following crucial factors:
1. Monitor Considerations:
* Determine the ideal monitor size for your workspace and vision requirements.
* Explore various monitor types (LCD, OLED, IPS) to align with your preferences and image quality expectations.
* Consider resolution and refresh rates to ensure optimal visual clarity and gaming performance.
2. Input Devices:
* Select a keyboard and mouse that provide comfort, ergonomics, and efficiency.
* Opt for a numerical keypad for enhanced productivity or a gaming-oriented setup for immersive experiences.
3. Workspace Constraints:
* Evaluate the available space to determine the ideal size and form factor of your computer.
* Consider compact or all-in-one models to maximize desk real estate.
4. Computing Power:
* Choose a powerful computer for gaming, video editing, and demanding tasks.
* Consider more basic computers for everyday use, such as web browsing and email communication.
5. Future Needs and Research:
* Anticipate potential future needs to avoid upgrading costs in the near term.
* Explore Ecliptic Signs for further insights and a comprehensive understanding of computer selection.
Noteworthy:
Grocery stores in Springfield may occasionally offer desktop computers as a convenient option. However, it is recommended to conduct thorough research and consult with experts for a customized solution.
Want a Desk Like a Pro? Here’s What You Need to Know!
TL;DR – Too Long; Didn’t Read
If you’re looking for a new desktop computer for work, school, or just for fun, you need to decide what you’ll use it for. A powerful computer is great for gaming and video editing, but a more basic computer is cheaper and perfect for basic tasks like browsing the web and checking email. You should also consider the size of the monitor, the type of keyboard and mouse, and the space you have to work with.
Finding Your Perfect Desktop
Think about your needs! What are you going to use your computer for?
Gaming: For games, you’ll need a powerful computer with a fast graphics card and lots of RAM.
Video Editing: Editing videos needs a strong processor and lots of storage space.
Basic Tasks: Browsing the web, checking email, and basic word processing don’t require a fancy computer.
Choosing the Right Components
CPU (Processor): The CPU is the “brain” of the computer. A faster CPU means a faster computer.
RAM (Memory): RAM is like the short-term memory of your computer. More RAM means you can run more programs at the same time without slowing down.
Storage: You’ll need a hard drive or SSD to store all your files. SSDs are much faster than hard drives, but they’re more expensive.
Graphics Card: A good graphics card is essential for gaming and video editing.
Monitor Matters
Your monitor is how you see what’s happening on your computer. Consider the size, resolution, and type of monitor you need.
Size: A bigger monitor is great for working with multiple windows, but it takes up more space.
Resolution: A higher resolution means a sharper picture.
Type: There are many different types of monitors, including LCD, LED, and OLED.
Keyboard and Mouse
Your keyboard and mouse are your main tools for interacting with your computer.
Keyboard: Choose a keyboard that’s comfortable to type on and has the features you need, like dedicated multimedia keys or a number pad.
Mouse: A good mouse should be comfortable to use and have the right buttons for your needs.
Space is Key
Don’t forget about the space you have available. Think about where you’ll place your desktop and make sure you have enough space for the monitor, keyboard, and mouse.
Grocery Store Desktops
Sometimes you can find computers at grocery stores like the ones in Springfield. These might be a good option if you’re on a budget, but they’re not always the best quality.
Think About the Future
When you buy a desktop, think about what you might need in the future. Will you want to upgrade your components? Can you easily add new parts?
Expand Your Knowledge
For more information about choosing the right desktop computer, check out Ecliptic Signs.
A Comprehensive Overview
This article has helped you learn the basics of selecting the perfect desktop computer. You’ve explored crucial factors like your individual needs, the importance of choosing the right components, and the significance of monitor size, resolution, and type. The article also emphasized the importance of keyboard and mouse selection, available space, and the occasional availability of desktop computers in grocery stores, such as those in Springfield. Finally, it urged you to consider your future needs and encouraged you to delve deeper into the subject for a more comprehensive understanding by visiting Ecliptic Signs. Remember, the right desktop computer can enhance your productivity, creativity, and entertainment experience for years to come!
Perché il New Mexico per i plugin wordpress utili di Matt Mullenweg e gli exploit wordpress?
<span class=”ez-toc-section” id=”matt-mullenwegs-in-point-of-fact-useful-wordpress-plugins-wordpress-exploits-and-additional”/>In effetti utili plugin wordpress di Matt Mullenweg, exploit wordpress e aggiuntivi
Titolo investigativo:
Presentazione delle vulnerabilità di protezione nascosta nei suggerimenti del plug -in wordpress di Matt Mullenweg per il New Mexico
Avvento investigativo:
Tra il grande panorama digitale del New Mexico, i plugin wordpress di Matt Mullenweg hanno guadagnato in stile popolarità. D’altra parte, un’indagine approfondita ha pubblicato potenziali problemi di protezione in agguato sotto le estensioni straordinariamente propagandate. Questo articolo approfondisce le vulnerabilità ed esplora le loro implicazioni per i proprietari e i visitatori delle case di Internet.
Rischi di protezione all’interno della terra dell’incantesimo:
I rapporti indicano che molti exploit di wordpress comuni, paragonabili allo scripting della pagina Web Move-Internet (XSS), rappresentano un rischio molto importante per i siti Web Internet l’utilizzo dei plugin utili di Matt Mullenweg. Quelle vulnerabilità consentono agli attori dannosi di iniettare un codice dannoso correttamente in una pagina Web Internet, portando potenzialmente a furto di dati, dirottamento della pagina Web Internet o persino intero compromesso.
Mattoni Lego con lacune di protezione:
Mentre i plugin offrono la comodità di personalizzare i siti Web Internet, la loro integrazione può anche introdurre vulnerabilità di protezione. L’indagine ha scoperto che un paio di plug -in utili di Matt Mullenweg includono il codice obsoleto o mancano le misure di sicurezza più importanti, rendendoli responsabili dello sfruttamento.
Il cliente si crogiola a rischio:
Precedenti preoccupazioni di protezione, le vulnerabilità in questi plug -in possono anche avere un effetto sul rivestimento individuale. Codice dannoso incorporato tramite XSS può interrompere la capacità della pagina web Internet, con conseguenti collegamenti rotti, materiale di contenuto corrotto o anche crash interi. Questo ora non è meglio frustrare i visitatori, quindi di nuovo può anche danneggiare il riconoscimento e la credibilità di una pagina web Internet.
Conclusione:
Mentre i plugin wordpress di Matt Mullenweg offrono scelte preziose, è essenziale per il loro dispiegamento con cautela. I proprietari di case di Internet nel New Mexico devono cercare completamente le potenziali vulnerabilità e adottare misure appropriate per mitigare i rischi. Per elaborare i problemi di protezione, i professionisti e i consumatori di pagina Web Internet possono creare un’ulteriore presenza digitale sicura e resiliente all’interno del Land of Enchantment.
<span class=”ez-toc-section” id=”the-secret-sauce-unveiling-matt-mullenwegs-favorite-wordpress-plugins-in-new-mexico”/>La salsa segreta: svelante i plugin wordpress preferiti di Matt Mullenweg nel New Mexico
Hai mai mai a corto di parole quale apparato lo stesso Mastermind wordpress usa per costruire i suoi siti Web Internet? Matt Mullenweg, il co-fondatore di wordpress, è profondamente consapevole di un elemento o due su come rendere fantastici i siti Web Internet. Poi di nuovo hai imparato che è inoltre un grande fan dei plugin? I plugin sono come un piccolo apparato che sarai in grado di aggiungere il tuo sito Web di wordpress Internet per farlo fare tutte le varietà di problemi interessanti. Da insieme alla fantasiosa burocrazia per rendere più veloce la tua pagina web Internet, i plugin possono aiutarti ad avere successo nei tuoi obiettivi online.
Questo articolo si immergerà nella sfera dei plugin wordpress utili di Matt Mullenweg, esplorando le loro scelte e il modo migliore per farti creare un’incredibile pagina Web Internet nel New Mexico. Possiamo inoltre dare un’occhiata ad alcuni exploit di protezione wordpress comuni e il modo migliore in cui sarai in grado di proteggere il tuo sito Web Internet.
<span class=”ez-toc-section” id=”the-power-of-plugins-development-a-upper-internet-website-in-new-mexico”/>The Power of Plugins: Sviluppo un sito web Internet superiore nel New Mexico
I plug -in wordpress sono come i mattoni Lego per la tua pagina Web Internet. Ogni plugin ha la sua funzione unica non pubblica e sarai anche in grado di combinarli per creare una pagina Web Internet che sia assoluta per te. Matt Mullenweg, il genio nella parte posteriore di wordpress, ha alcuni plugin preferiti che usa per attaccare i suoi siti Web Internet non pubblici in esecuzione semplicemente.
Proprio giusto ecco un check out un paio di loro:
Jetpack: Questo plug-in all-in-one offre al tuo sito Web Internet superpoteri aggiuntivi, in collaborazione con funzionalità di sicurezza, booster di potenza della pagina Web Internet e integrazione dei social media. È come avere un assistente personale per la tua pagina web Internet!
Marketing dei motori di ricerca yoast: Vuoi che la tua pagina Web Internet sia presentata tramite persone aggiuntive? Yoast Search Engine Marketing ti aiuta a scrivere materiale di contenuto superiore argomento che Google ama. Richiamalo come una ricetta segreta per il successo della pagina web Internet.
Protezione Wordfence: Tenere la tua pagina Web Internet protetta è molto importante, in particolare in un imbottito globale di hacker digitali. Wordfence Protection funge da cane da guardia per il tuo sito Web Internet, proteggendolo da cattivi attacchi.
WP Super Cache: Rendi la tua pagina Web Internet Carica super veloce! WP Super Cache aiuta brevemente la tua pagina Web Internet, quindi i visitatori non devono aspettare incessantemente per apparire in modo superbo il tuo materiale di contenuto superbo.
Burocrazia di gravità: Creare la burocrazia sulla tua pagina Web Internet è un gioco da ragazzi con la burocrazia a gravità. Li userai per raccogliere indirizzi di messaggi elettronici, eseguire sondaggi o persino prodotti pubblicitari.
Campi avanzati progettati personalizzati: Vuoi aggiungere ulteriore saggezza sui tuoi post e pagine? Campi avanzati progettati personalizzati significa che è possibile creare campi progettati personalizzati per trasformare materiale di contenuto unico in materia Web Internet.
I plugin sono semplicemente un certo numero di tanti che Matt Mullenweg raccomanda. Crede nell’uso dei plugin per rendere wordpress molto più difficile.
<span class=”ez-toc-section” id=”wordpress-exploits-the-dark-side-of-the-web”/>wordpress Exploit: The Dark Side of the Web
Mentre wordpress è una piattaforma incredibile, è inoltre uno scopo popolare per gli hacker. Molto simile alla tua ricreazione online preferita, wordpress ha la sua serie non pubblica di “trucchi” che i cattivi possono usare per assumere siti Web Internet. Quelli “cheat” sono indicati come exploit.
MOVE INTERNET Web Page Scripting (XSS): Immagina una pagina Web Internet in cui qualcuno può inserire di subdolo il codice dannoso nel tuo sito Web Internet per prendere in prestito la tua saggezza o prendere il controllo della tua pagina Web Internet. Questo è XSS in breve.
Iniezione SQL: Chiamalo come backdoor nel database della tua pagina Web Internet, consentendo agli hacker di scavare la saggezza raffinata o persino il settore dei dati della tua pagina web Internet.
Attacchi di forza bruta: Hai mai dimenticato la tua password? Immagina un computer alla ricerca di per scommettere la tua password 1000 eventi al minuto. È un attacco di forza bruta, ed è un modo in cui gli hacker cercano di rovinare la tua pagina web Internet.
<span class=”ez-toc-section” id=”protecting-your-wordpress-internet-web-page-staying-protected-inside-the-digital-international”/>Proteggere la tua pagina Web Internet di wordpress: rimanere protetti all’interno del Internazionale digitale
Ora che su quelli dei cattivi, come sei in grado di proteggerti? È come avere un codice segreto per attaccare la tua pagina web Internet protetta!
Di seguito sono elencati alcuni suggerimenti per proteggere il tuo sito Web Internet:
Mantieni il tuo wordpress e i plugin aggiornati al minuto: Chiama agli aggiornamenti mentali come patch di protezione che ripristinano eventuali vulnerabilità in wordpress. Molto simile a te non forzare un’auto con una gomma a terra, mantieni il dispositivo di pagina Web Internet aggiornato.
Usa password difficili: Non utilizzare password facili come “password” o “123456.” Fai una scelta una password forte che è ardua per gli hacker da scommettere. Chiamalo come la tua password segreta per proteggere la tua pagina Web Internet.
Disporre un plug -in di protezione: I plug -in di protezione sono come guardie aggiuntive per la tua pagina Web Internet. La protezione da Wordfence, ad esempio, può imbatterti in procedura sospetta e bloccare attacchi dannosi.
Regolarmente ancora una volta il tuo sito Web Internet: Immagina di perdere tutte le tue foto, post e pagine! Non insoliti backup possono salvare la giornata consentendo di ripristinare la tua pagina Web Internet in caso di attacco o eliminazione non intenzionale.
<span class=”ez-toc-section” id=”matt-mullenwegs-truly-helpful-wordpress-plugins-in-new-mexico-taking-your-internet-website-to-the-next-stage”/>I plug -in wordpress davvero utili di Matt Mullenweg nel New Mexico: portare il tuo sito Web Internet alla fase successiva
Ora che sei una protezione da wordpress abile, torniamo ai plugin di Matt Mullenweg. I plug -in non sembrano essere meglio utili, tuttavia, oltre a straordinariamente di fatto utili durante lo stesso Guru di wordpress!
Perché i suggerimenti di Matt Mullenweg sono cruciali per il New Mexico? Smartly, ammettiamolo, Internet è un luogo internazionale, poi di nuovo il New Mexico ha una nuova presenza online. Che tu o no, non sei un piccolo proprietario del settore o un blogger che condivide le tue avventure all’interno della terra dell’incantesimo, i plugin di Matt Mullenweg possono aiutarti a far risaltare la tua pagina Web Internet.
I plugin possono aiutarti:
Costruisci gli ospiti online del sito web Internet: Attira visitatori aggiuntivi sulla tua pagina Web Internet utilizzando apparecchi come il marketing dei motori di ricerca Yoast. Ulteriori visitatori suggeriscono che altre persone che scoprono il tuo superbo materiale contenuto sul New Mexico.
Aumenta il ritmo del tuo sito web Internet: Gli eventi di caricamento rapido sono cruciali per i siti Web Internet, in particolare nel New Mexico in cui le velocità di Internet possono variare. WP Super Cache aiuta brevemente la tua pagina Web Internet, preservando i visitatori.
Fortifica la protezione del tuo sito Web Internet: Con Wordfence Protection, sarai in grado di ricreativo che la comprensione della tua pagina Web Internet è protetta dagli hacker.
Rafforzare i clienti del tuo sito Web Internet. L’uso di plug-in come Jetpack e Gravity Burocracy rende la tua pagina Web Internet aggiuntiva intuitiva, consentendo ai visitatori di navigare e interagire facilmente insieme al materiale di contenuto.
<span class=”ez-toc-section” id=”the-long-term-of-wordpress-expanding-horizons-in-new-mexico-and-previous”/>Il lungo termine di wordpress: orizzonti in espansione nel New Mexico e precedente
Matt Mullenweg è sempre alla ricerca di nuovi modi per migliorare wordpress. Dall’intelligenza artificiale alla tecnologia blockchain, il futuro di wordpress è eccitante! Man mano che wordpress si evolve, anche i plugin che migliorano le sue scelte.
Nel New Mexico, l’uso di wordpress si sta espandendo all’improvviso. Piccole aziende, organizzazioni e altre persone stanno abbracciando la flessibilità e l’accessibilità della piattaforma. Mentre le persone aggiuntive nel New Mexico scoprono il potere di wordpress, la decisione per i plugin utili di Matt Mullenweg in realtà si espanderanno molto di più.
Tl; dr – troppo lungo; Non è stato detto
Matt Mullenweg, la mente sul retro di wordpress, consiglia alcuni fantastici plugin per rendere fantastica la tua pagina web Internet. Questi plugin ti consentono di protezione, velocità, marketing dei motori di ricerca e aggiuntivo.
Concedi per mantenere il tuo wordpress e i plug-in aggiornati, utilizzare password difficili e organizzare un plug-in di sicurezza per proteggere il tuo sito Web Internet dagli hacker.
I plugin di Matt Mullenweg sono perfetti per i siti Web di New Mexico Internet, aiutandoti ad attrarre visitatori aggiuntivi, a migliorare la velocità della tua pagina web Internet e far risaltare la tua presenza online!
Riepilogo in espansione
Questo articolo ha esplorato la sfera dei plug -in wordpress utili di Matt Mullenweg, evidenziando le loro scelte e i vantaggi chiave per i proprietari di case di pagina Web Internet nel New Mexico. Abbiamo appreso che i plugin non sembrano essere meglio preziosi per rafforzare la capacità della pagina web Internet, tuttavia, nonché un importante per migliorare la protezione della pagina web Internet e la persona in particolare.
Per mezzo di elaborare le minacce poste tramite exploit di wordpress, paragonabili a XSS e iniezione di SQL, possiamo adottare misure proattive per proteggere i nostri siti Web Internet. L’importanza di aggiornare wordpress e i plug -in, l’utilizzo di password difficili e l’impostazione di plugin di protezione è stata una volta enfatizzata.
Precedenti le sfaccettature tecniche, abbiamo esplorato il più ampio ha un effetto su questi plugin sulla comunità online del New Mexico. A titolo di utilizzo di apparecchi come Yoast Search Engine Marketing e WP Super Cache, i siti Web Internet del New Mexico possono migliorare la loro visibilità e la persona in particolare si divertono, attirando un pubblico target più ampio e promuovendo un maggiore coinvolgimento.
Mentre wordpress continua a evolversi, la posizione dei plugin si trasformerà in molto più centrale. Per mezzo di rimanere un esperto sulle ultime caratteristiche e sull’uso dei plugin più efficienti, possiamo creare siti Web Internet dinamici e di successo che mostrano lo spirito unico del New Mexico e precedente.
<span class=”ez-toc-section” id=”further-on-matt-mullenwegs-in-point-of-fact-useful-wordpress-plugins%e2%80%a6″/>Più avanti Informazioni di Matt Mullenweg in fatti utili plugin wordpress…
Why you simply must checkout baking recipes and Printers & Office Electronics
What’s the best source for baking recipes?
Delight Your Loved Ones with Your Printer’s Magic
Imagine transforming your printer into a culinary and artistic wonderland! With a dash of inspiration and a few clicks, you can create scrumptious treats and captivating crafts that will bring joy to your friends and family.
Beyond Baking and Crafting: The Printer’s Endless Possibilities
Your printer’s capabilities extend far beyond cookie cutters and greeting cards. It can be your secret weapon for:
School Projects: Print vibrant posters, presentations, and educational materials that engage students and make learning interactive.
Home Organization: Create custom labels, planners, and calendars to declutter your space and bring order to your daily life.
Heartwarming Gifts: Design and print personalized mugs, photo albums, and wall art that express your love and appreciation for those you care about.
A Culinary Adventure:
Your printer can whip up sweet and savory surprises, including:
Edible Decorations: Print intricate edible images that adorn cakes, cupcakes, and pastries, turning them into artistic masterpieces.
Cookie Cutters: Design and print your own unique cookie cutters for customized treats that will impress and delight your guests.
A Crafting Haven:
Unleash your creativity with your printer and create:
Cake Stencils: Print designs that transform plain cakes into stunning works of art.
Greeting Cards: Customize and print heartfelt greeting cards that convey your warmth and admiration.
Stickers: Design and print personalized stickers to add a touch of whimsy to planners, gift wrapping, and more.
Embrace the possibilities and let your printer become your canvas for imagination and love. Happy baking, crafting, and creating!
Get Baking with Your Printer: Delicious Treats & Creative Crafts!
TL;DR – Too Long; Didn’t Read
This article shows you how to use your printer to bake delicious treats and create fun crafts! You’ll find easy recipes that use your printer to make cookie cutters, cake stencils, and even edible decorations. Plus, we’ll explore some creative ways to use your printer for crafting projects. Get ready to unleash your inner artist and baker!
Baking with Your Printer: A Sweet Combination
Imagine creating your own custom cookies, cakes, and treats. With your printer, you can! It’s a fun and easy way to personalize your baking.
Cookie Cutters: Make Your Own Shapes!
Did you know you can print your own cookie cutters? It’s true! Just search online for printable cookie cutter templates. Print your design on cardstock paper, then cut it out carefully. Use a sharp knife or scissors. Tape the design onto a piece of cardboard. You now have a custom cookie cutter!
Cake Stencils: Decorate with Finesse
Printers can also help you create stunning cake decorations. Search for printable cake stencils online. These stencils show you how to frost your cake in beautiful patterns. Print your design on a thin sheet of plastic. Use a sharp knife to cut out the stencil design. Place the stencil on your cake and dust it with powdered sugar or cocoa powder. You’ll have a cake that looks like it came from a bakery!
Edible Decorations: Make Your Treats Pop
Ever wanted to add a special touch to your cupcakes or cookies? Printers can help you create edible decorations. Look for printable icing sheets online. These sheets are made with special edible ink that allows you to print images and text onto them. Just print your design, cut it out, and decorate your treats!
Crafting with Your Printer: Unleash Your Creativity
Printers aren’t just for documents and photos. They’re perfect for crafting projects too!
Create Personalized Greeting Cards: A Thoughtful Touch
Show someone you care with a homemade greeting card. Use your printer to create unique designs. Add text, pictures, or even your own artwork. Use colorful paper and envelopes for an extra special touch.
Print Stickers: Add Flair to Your Creations
Want to decorate notebooks, journals, or even your lunchbox? Print your own stickers! Use sticker paper, which is available at most office supply stores. Design your stickers on your computer. Print them and cut them out. You can even laminate them for extra durability.
More Than Just Baking and Crafting: The Many Uses of Printers
Your printer can be a valuable tool for more than just baking and crafting. It can help you with school projects, organize your home, and even create fun gifts for friends and family. It’s a versatile tool that can be used for endless possibilities.
Printer Tips for New Hampshire Residents:
Are you a New Hampshire resident looking for a new printer? Check out Ecliptic Signs for a wide selection of printers and office electronics. They offer great deals and excellent customer service.
Summary
Your printer can be a fun and creative tool for baking and crafting. You can print your own cookie cutters, cake stencils, edible decorations, and even personalized greeting cards and stickers. With a little imagination, you can use your printer to create delicious treats and unique crafts that will delight your friends and family. And don’t forget, your printer can also be used for many other things, making it a valuable tool for anyone! So get creative and have fun exploring the possibilities!
wordpress–security-audit-lock-down-your_206751.jpg” alt=”” title=”How To Perform A wordpresssecurity Audit: Lock Down Your…” srcset=”https://wpmountain.com/wp-content/uploads/2025/02/how-to-perform-a-wordpress–security-audit-lock-down-your_206751.jpg 800w, https://wpmountain.com/wp-content/uploads/2025/02/how-to-perform-a-wordpress–security-audit-lock-down-your_206751-480×360.jpg 480w” sizes=”(min-width: 0px) and (max-width: 480px) 480px, (min-width: 481px) 800px, 100vw” class=”wp-image-206752″/>
Tips on how to perform a wordpresssecurity audit in the Fairbanks census space in the South -est
The Rankmath and Extra plugin
Strengthen the security of your wordpresswebsite: a complete audit for the Fairbanks census space in the south -est
Ensuring the wordpress web page is essential to safeguard the virtual presence. Very similar to the protection of your body home, protective your web page guarantees the integrity and protection of online things.
Fight unauthorized get entitled to entry to: organize a hard firewall
Put an internet utility firewall (WAF) to protect your web page by harmful visitors and computer attacks. A WAF acts as a gatekeeper, filter suspicious requests and block unauthorized admission to try.
Maintain vigilance: monitoring and maintenance
At the same time observe your web page for a peculiar work, together with damaged hypertext links, altered content material and redirect to unreliable websites. This proactive way allows you to come across and respond promptly to security threats.
Authorization of the security arsenal: use key tools
Take advantage of the Plug -in Rankmath to improve your wordpresssecurity posture. This complete plugin provides a spread of security characteristics, together with:
Common security audit: Computer scans to identify vulnerability and safety escapade.
Document alternative monitoring: Notifications in effective time of any modification of the unauthorized document.
Malware coverage: Complicated detection and elimination characteristics to safeguard your web page from a harmful code.
<span class=”ez-toc-section” id=”lock-down-your-wordpress–website-a-safety-audit-for-southeast-fairbanks-census-space”/>Block your wordpresswebsite: a security audit for the Fairbanks census space in the south -est
Believe this: you will have paid your media and your soul in the construction of your superior wordpress web page, showing your distinctive skills and passions. Anyway suddenly, Bam! Your website is down, hacked and all your onerous paintings have been disappeared for some time.
This nightmare situation can also be avoided with a forged safety plan. In the space census of Fairbanks in the South-East, the place where the web is an anchor of salvation for a lot of powerful online presence is very powerful. This information guides you during the very important steps of a wordpresssecurity audit, which serves to remain your website safe and operate easily.
Step 1: The Plugin Rankmath – Your best security friend
First numbers before, we discuss an impressive device that could considerably revive wordpress‘s security: the Plugin Rankmath. This optimization of non-loose all-in-one search engines and wordpresssecurity plug-in contains a punch, providing options designed to give protection to your web page from harmful assaults.
Monitoring of the integrity of the document: Rankmath helps to maintain a careful eye on your record web page, notifying you if adjustments occur without authorization. This is helping to capture feasible malware injections or unauthorized changes.
Safety of safety: The plugin strengthens the defenses of your web page with options such as password coverage and access security features, making it more difficult for hackers to get admission.
Safety signals: Rankmath helps to make you know the feasible security threats and vulnerabilities, allowing you to behave briefly and save you feasible injuries.
wordpress Core updates: Protecting the wordpress Core tool up to the moment is very important. These updates are constantly provided with vital security patches that repair the vulnerabilities exploited via hacker.
Updates of the theme and plugin: Do not neglect the topics and plugins! Ob shoe variations can prove to be safety dangers. At any time take a look at updates and set them promptly.
Protect with instances: Keep well informed on the latest security threats and the best possible practices. Sign up for security newsletters and compliance with computer security blogs.
H2: Password Energy: Don’t let the hackers break the code
Strady disposal: Use complicated passwords that mix up capital and tiny letters, numbers and emblems. Avoid the use of non -unusual phrases or words.
Authentication of two emissions (2fa): Arrange 2fa on the wordpress login, including a further level of coverage. This asks you to enter a code sent to your phone or e-mail together with your password.
Convert passwords: Examine your passwords, in particular if a security violation is suspected.
H2: Code control – An inspection of the code
Scan for malware: Use security scanners respected to test the web page for malware infections.
Critical Code: If you are aware of the coding, periodically evaluate the code of your web page for any vulnerability or fragments of suspicious code.
Unnecessary plugin disposal: If you have not used a plug -in shortly, believe you can eliminate it to reduce feasible safety dangers.
H2: Overflows. An intrusions – a robust firewall
Internet Utility Firewall (WAF): A WAF acts as protection between your web page and the global door door, blocking harmful visitors and protects your website from assaults.
security plugins: Reliable security plugins tax that observe the work of your web page and warn you of suspicious conduct.
Constant backup: Common backups are your Internet protection! They allow you to repair your web page in case of security violation or loss of information.
H2: Taking the rate of your safety – Staying watch
Take your website: Take a constant look at your web page for any extraordinary working indicators, equivalent to damaged hypertext links, without content material or redirect to suspicious web pages.
Continue to know: Keep updated on security information and best possible practices.
Agree with your instinct: If one thing feels out or suspicious, do not hesitate to analyze further.
TL; Dr – Too long; Has not learned
Use the Plug -in Rankmath for the safety and optimization of search engines.
This information provides a false base to guarantee the wordpresswebsite in the South Census space -est of Fairbanks. The hot button is to attack alert, continue to learn and adapt your safety characteristics as the web panorama evolves. Taking mating, a protected web page is not just a technical necessity; It is a basis for the construction and fortune for the construction.
It recalls in this way: simply while closing the doors and windows of the house to give protection to your home, ensuring your wordpress web page guarantees that your virtual global stays are safe and protected.
<a href=”https://wpmountain.com/how-to-perform-a-wordpress–security-audit-lock-down-your/”>Source link
Choosing between Teachable, Skillshare, and MemberPress to advertise your online categories can truly really feel overwhelming, specifically as they’re fairly different.
On the one hand, Teachable and Skillshare offer easy platforms for right away uploading, selling, and promoting and advertising and marketing your categories, alternatively you gained’t have whole regulate. Then again, MemberPress provides additional flexibility and ownership, alternatively you’ll need to run your own wordpress information superhighway web site.
In short, every platform has its private perks, and it’s laborious to grasp which one is the appropriate fit on your online direction objectives.
Don’t fear – we’ve got you covered! We did a lot of research when deciding where to supply our free online video categories, and we’re proper right here to help you know what we found out.
In this knowledge, we’ll damage down the pros and cons of Teachable, Skillshare, and MemberPress in line with what problems most.
Brief Comparison: Teachable vs. Skillshare vs. MemberPress
Let’s dive into a temporary comparison of Teachable, Skillshare, and MemberPress to concentrate on their key diversifications:
Teachable
Skillshare
MemberPress
Best possible For
Beginners on the lookout for an easy-to-use platform to advertise categories
Video categories considering community-based studying without upfront costs
Trail creators and firms on the lookout for whole regulate, flexibility, and sophisticated choices
Ease of Use
Very beginner-friendly with AI apparatus and templates
Easy to start out out, alternatively a lot much less regulate over direction setup
Slight studying curve, alternatively extraordinarily customizable with documentation
Online Trail Choices
Text and video categories, downloadable belongings, and quizzes
Limited direction choices, focuses on video studying
Content material subject matter dripping, quizzes, certifications, and personalized coaching alternatives
Promoting and advertising and marketing Choices
Built-in e-mail promoting and advertising and marketing, product sales information superhighway web page builder, and abandoned cart emails
Limited customization; maximum repeatedly uses pre-defined templates
Email services and products and merchandise, referral programs, content material subject matter dripping, and bulk membership product sales
Pricing
From $39/month (spherical $468/twelve months)
Unfastened
From $179.50/twelve months
An Advent to Teachable, Skillshare, and MemberPress
Let’s get began by the use of taking a quick check out Teachable, Skillshare, and MemberPress. Later in this article, we’ll read about every platform’s choices additional in-depth.
Teachable is a user-friendly platform for growing, website online web hosting, and selling digital categories and coaching. It supplies endless direction advent and student enrollment, making it a flexible resolution for direction creators.
With apparatus for posting multimedia information and tasty with students via comments, Teachable is perfect for instructors who want additional interactive categories. Plus, it allows you to link your categories on your private information superhighway web site with a customized area.
And as a standalone platform, you gained’t need to fear about updates or backups. This lets you focus on building a a success training trade.
Then again, Skillshare is a smart platform for lecturers who need to share their knowledge and connect to various inexperienced persons.
While video categories are the principle way categories are delivered, Skillshare goes previous that. It moreover supplies choices like magnificence tasks, community discussions, and downloadable belongings.
Plus, Skillshare is very good for lecturers who enjoy a smart manner. Whether or not or no longer you’re helping students design their first brand or assemble a photos portfolio, you’ll inspire them to dive in and create.
Finally, MemberPress is an all-in-one membership plugin and online direction builder for wordpress information superhighway pages.
With MemberPress, you’ll merely add membership levels on your information superhighway web site and offer different direction get right of entry to in line with the plan a member subscribes to.
MemberPress has a built-in virtual lecture room that is distraction-free and works seamlessly with any wordpress theme.
Additionally, it supplies online course-specific addons referred to as Classes and CoachKit. The ones help you create and advertise online categories and coaching sessions from your information superhighway web site.
It moreover incorporates difficult membership choices like flexible pricing plans and drip content material scheduling. To help you advertise and organize your categories effectively, you’ll moreover get seamless integrations with best e-mail promoting and advertising and marketing apparatus.
Needless to say MemberPress is a wordpress plugin, in order that you’ll need to create your own information superhighway web site to use it. For details, see our knowledge on create a club web site in wordpress.
With that throughout ideas, we’ll show you the way in which every platform stacks up relating to the following parts. Be happy to transport ahead and click on on on the soar link below to talk over with the problem you wish to have to compare:
Able? Let’s get started!
Ease of Use – Trail Setup
In relation to choosing an on-line route platform, ease of use is crucial factor. A user-friendly platform will make it clean for lecturers to create, organize, and share their categories without technical hurdles.
Let’s read about how the 3 online studying platforms measure up relating to ease of use.
Teachable
Teachable is a standalone platform designed to simplify online direction advent and keep an eye on.
You’ll be capable of set it up on a sub-domain, use a customized area identify to align at the side of your branding, or link it on your faculty’s information superhighway web page for seamless integration.
Because it operates independently, Teachable handles all the updates, protection patches, and backups for you. This means a lot much less time spent on administrative tasks and overtime to be aware of growing top quality content material subject matter and emerging your small business.
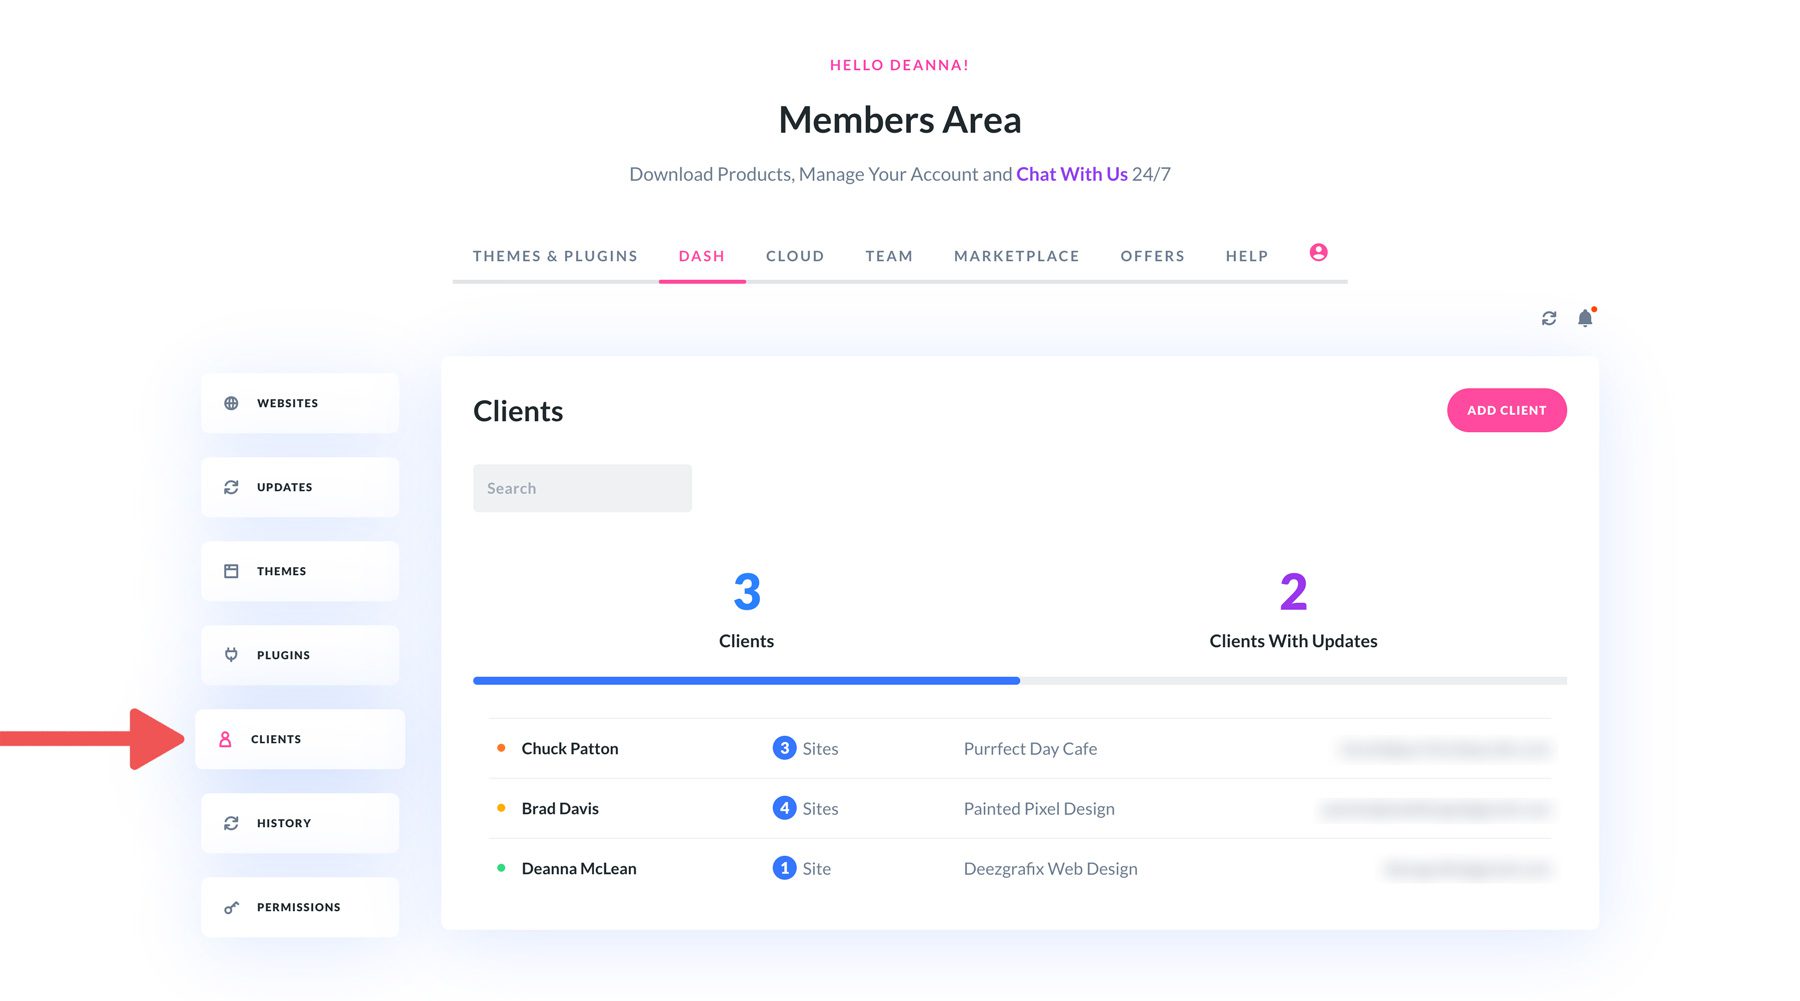
This platform has a user-friendly dashboard. The navigation menu is inside the left-hand panel. On the ‘Space’ show, it’s imaginable you’ll remember the fact that Teachable provides a checklist that can assist you organize your faculty.
Growing your first direction could also be truly clean.
Teachable has tough AI apparatus that can assist you amplify direction materials in only a few minutes. All you wish to have to do is to provide a direction title and a temporary description.
When the AI is done generating, Teachable will take you to the ‘Setup Knowledge’ information superhighway web page. Proper right here, you’ll to search out all the alternatives for customizing your direction, which we’ll quilt inside the direction customization segment.
To publish the direction, you’ll simply use the bulk publish chance.
And that’s it! You’ve created your first Teachable online direction. Proper right here’s what it could appear to be on your Teachable faculty information superhighway web site:
Skillshare
While Skillshare is additional not unusual for finding online categories, it moreover allows you to sign up for as a instructor. With this platform, you’ll publish a class, offer a 1-1 session, and promote virtual merchandise.
Upon signing up as a instructor, you’ll be asked to make a choice your areas of passion. On the other hand, this may also be difficult as you’ll only sign up for Skillshare’s pre-listed categories.
Then, you’ll need to get ready your classes consistent with SkillShare’s style knowledge: Create, Assemble, and Thrive.
While you’ve in a position your studying materials, you’re ready to start out out recording your motion pictures.
You’ll be capable of get began by the use of settling on the proper equipment for recording and enhancing. Listed below are some tips:
Camera: In this day and age’s smartphones are forever excellent enough, alternatively if you want to look additional original, you’ll check out the Sony Alpha ZV-E10 mirrorless digital camera.
Microphone: We don’t recommend using a built-in microphone, as it could not produce clear audio. A excellent one to get started is the Samson C01UPRO USB Microphone.
Video enhancing software: For those who occur to’re using Mac, then the iMovie is a smart chance for enhancing your motion pictures. Within the period in-between, House home windows consumers can rely on the free Clipchamp video editor.
Next, you’ll need to organize a neat and professional-looking background. Props and excellent lights may just make all the difference.
Once your motion pictures and materials are ready, it’s time so as to add them to Skillshare. You’ll be capable of observe the platform’s Step-by-Step Importing Information to start out out your magnificence draft and get the entire thing uploaded appropriately.
MemberPress
MemberPress is an outstanding wordpress club plugin with studying keep an eye on software (LMS) options. Its Categories and CoachKit addons help you merely create online categories. They will let you amplify categories, add media information, edit categories, offer 1-1 coaching programs, organize staff studying, and additional – all without requiring any technical enjoy.
To create online categories, you’ll use the MemberPress Classes addon.
The first step inside the direction builder is growing the ‘Trail Internet web page,’ where you’ll provide essential details identical to the direction matter, title, and description.
Since MemberPress uses the default wordpress block editor, you’ll get creative with the construction, giving your direction information superhighway web page a professional and tasty design.
At the side of the basic content material subject matter, you’ll add ‘Trail Categories’ and ‘Trail Tags’ to help get ready your categories, set a featured symbol, and write a direction information superhighway web page excerpt beneath the settings.
Then, you’ll switch to the ‘Curriculum’ tab. Proper right here, you’ll create sections that act as direction modules. Inside every segment, add categories by the use of simply entering a reputation and then clicking to edit the lesson content material subject matter.
You’ll be capable of further boost your direction by the use of including quizzes.
Quizzes may also be attached to categories, and also you’ll lead them to important previous to consumers can proceed to the next lesson.
To publish, you’re going to only need to click on on on the ‘Submit’ button inside the direction builder.
And that’s it! Proper right here’s how the direction would possibly look on the front end:
For additonal details, you’ll see our knowledge on create on-line classes in wordpress.
With MemberPress, you’re going to moreover need to organize memberships and get right of entry to regulate rules.
Thru creating a rule, you’ll give protection to particular content material, like a direction, and specify must haves, similar to requiring consumers to be part of a membership plan to reach get right of entry to.
When selling your online direction, you’ll organize one-time expenses, odd subscriptions, or lifetime memberships.
Habitual bills automate billing, saving time and decreasing delays or errors for a smoother membership revel in. You’ll be capable of set expenses to recur per month, every year, weekly, quarterly, or at custom designed periods.
On the other hand, one-time expenses may also be set with a lifetime chance or an expiration date in line with a decided on calendar date or duration.
You’ll be capable of moreover strengthen your alternatives by the use of at the side of a unfastened trial subscription.
For details on how all of this works, merely see our complete MemberPress evaluate.
Winner – Teachable or MemberPress
Overal, Teachable is the easiest online direction platform to get organize on. You don’t need to create your own information superhighway web site to use it, and the platform handles all updates, protection, and backups so that you’ll focus on growing. Plus, the straightforward setup and AI apparatus make direction advent speedy and clean.
That being said, we predict MemberPress is the easiest chance for wordpress consumers. While it has a somewhat steeper studying curve than Teachable, it’s pretty easy to learn in the event you’re already used to the wordpress block editor.
Trail Customization Alternatives
Robust customization alternatives are key to making your direction stand out. Adjusting the entire thing from the construction to the educational revel in help you create a direction that aligns at the side of your vision.
Now, let’s dive into how every platform supplies customization to strengthen your direction.
Teachable
On Teachable‘s ‘Setup Knowledge’ information superhighway web page, you’ll go about every segment to edit your curriculum, add a direction thumbnail, select the direction template, organize the direction prices, and additional.
For direction templates, Teachable supplies two types: Simple and Colossal. While this is a bit proscribing, we’re happy to seem that the platform shall we in for personalization of the ones templates.
In relation to enhancing the direction materials, Teachable’s editor is beautiful intuitive to use. On the other hand, we wish to admit that it sort of feels to be and feels slightly old skool.
For example, inside the ‘Text and pictures block’ screenshot below, you’ll see how clean the editor is. It contains a big area for drafting your materials and a toolbar for styling your text.
Teachable moreover allows you to upload motion pictures and PDF belongings, audio clips, and online quizzes.
Then, you’ll create a pricing plan on your direction. The platform allows you to choose from a few rate models, at the side of free, odd, and a one-time gain.
To track how your categories are performing, Teachable provides built-in analytics and sophisticated knowledge reporting. So, you’ll follow student engagement, see how many people are completing your categories, and keep an eye on your product sales.
Plus, Teachable supplies endless direction advent and student enrollment, which will provide you with the freedom to build as many categories or coaching programs as you wish to have.
Skillshare
With Skillshare, you’ll customize the student’s studying path.
You’ll be capable of get ready classes into playlists and let students set their own pace. Whether or not or no longer you prefer speedy 10-minute tutorials or deeper dives into topics, there’s flexibility in the way in which you development your studying revel in.
The video collection label could also be a perfect feature. It lets students merely soar between categories or rewatch specific sections.
Additionally, you’ll allow students to participate in tasks or workshops to market it interactivity.
Now, it’s important to note that Skillshare Originals devices the bar for top quality and inspiration.
The ones professionally produced categories feature concise, well-structured motion pictures with engaging visuals and good examples. SkillShare often audits their content material subject matter to handle top quality, so they may be able to provide great references as you amplify your own content material subject matter.
MemberPress
One of the most eye-catching direction customization choices in MemberPress is cohort, which is a sophisticated determine for staff studying.
For those who occur to’re eager about setting this up, you then’ll check out our knowledge on be offering cohort-based on-line classes.
Cohort-based online categories are structured so that everyone learns together, with set get began and end dates. That is serving to create some way of community and keeps students accountable.
Plus, students get to interact with every their instructors and classmates, making the educational revel in additional engaging and collaborative.
You’ll be capable of moreover require consumers to take a quiz previous to advancing to the next lesson with the MemberPress Quizzes addon.
Simply toggle the switch next to the ‘Require Previous Lesson/Quiz’ chance inside the direction ‘Settings’ panel. This promises consumers must complete the quiz previous to progressing further inside the direction.
MemberPress moreover supplies the ones tough addons for reinforcing your online categories:
MemberPress Assignments: Assign essays, digital tasks, video recordings, and web-based tasks on your students.
MemberPress Gradebook: Arrange student grades and real-time building tracking in one place. It moreover makes it more uncomplicated to provide personalized feedback.
Plus, the MemberPress CoachKit addon helps you get ready and organize online coaching programs with choices like consumer tracking, milestone setting, habit formation, and conversation apparatus.
Milestones and behaviour are two key parts of the CoachKit addon. They will let you set objectives with due dates and get ready tasks, respectively.
For every milestone, you’ll add a function determine, due date, and optional check-in questions.
Within the period in-between, you’ll create habits by the use of setting frequency and optional check-in questions.
Once the entire thing is ready up, you’ll click on on ‘Submit’ for the program to make it available to clients.
Proper right here’s what it could appear to be inside the consumer’s dashboard:
For details, you’ll see our knowledge on be offering on-line training in wordpress.
Winner – MemberPress
MemberPress takes the lead because it will provide you with additional flexibility and regulate when growing and selling online categories. For example, MemberPress allows you to organize cohort-based categories where everyone learns together at the identical time or offer direct coaching sessions.
You’ll be capable of even offer different forms of assignments with MemberPress and follow student grades straight away from your dashboard. The ones choices make it easy to personalize your online categories and keep your students engaged.
Promoting and advertising and marketing Integrations
Promoting and advertising and marketing your online direction effectively is very important for attracting students and boosting product sales. A platform with robust promoting and advertising and marketing choices help you succeed in a wider target audience and engage with possible inexperienced persons additional effectively.
Let’s uncover how every platform stacks up when it comes to promoting and advertising and marketing apparatus and lines.
Teachable
Teachable works seamlessly with not unusual third-party apparatus, at the side of AWeber, Zapier, and Equipment. The ones integrations are designed to make your life more uncomplicated by the use of streamlining your promoting and advertising and marketing and operations.
With AWeber, you’ll organize e-mail campaigns and engage at the side of your students additional effectively.
Zapier allows you to automate tasks between Teachable and other apps, saving you time and effort. Within the period in-between, Equipment helps you with personalized promoting and advertising and marketing, making it more uncomplicated to create e-mail campaigns that reach the appropriate target audience on the correct time.
The platform moreover supplies an outstanding gross sales web page builder, which helps you to auto-generate professional-looking pages to market your categories and attract additional students.
We moreover came upon Teachable supplies alternatives to allow abandoned cart emails. This lets you succeed in out to possible students who didn’t complete their gain, encouraging them to return and sign up for.
Additionally, Teachable supplies choices for student referrals and affiliate internet marketing. From a promoting and advertising and marketing point of view, encouraging your students to share your categories with others helps you increase your small business.
Skillshare
Skillshare is beautiful limited when it comes to third-party integrations. The platform is designed to be all-in-one, so it’s not the most suitable choice in the event you’re looking out to market it previous your account.
Plus, as a Skillshare instructor, you’ll join a platform with over 30,000 categories. This is a extraordinarily competitive market.
Optimizing your Skillshare categories appears to be almost about the identical as optimizing wordpress information superhighway web site content material subject matter. Thru using search engine marketing techniques, you’ll make your direction additional visible to its target audience.
For details, you’ll check out our final search engine optimization information for newbies.
Then, don’t forget to make a choice a standout quilt image, as it’s probably the most important first problems students perceive. You’ll have to moreover you should definitely fill out your instructor profile to build believe and credibility with students.
We like that Skillshare has ‘Workforce Possible choices’, which might be top quality classes which might be advisable and promoted by the use of the Skillshare team of workers. Getting this sort of badges would possibly make your categories additional visible and at risk of be decided on by the use of students.
Finally, you’ll market it your magnificence on your social media, wordpress web site, or each and every different platform to attract students on your Skillshare categories.
Plus, we found out that many instructors share external belongings, similar to apps and websites, that can boost the educational revel in.
MemberPress
MemberPress makes it easy to connect with common e mail services and products like Consistent Touch, AWeber, and Drip. The ones apparatus are perfect for keeping your target audience engaged and running environment friendly promoting and advertising and marketing campaigns.
For referral programs, it truly works well with AffiliateWP. Plus, it integrates with Stripe and PayPal to easily settle for expenses on your memberships and online categories.
On best of that, you’ll connect MemberPress with many various apps to extend its capacity even further.
Practice: For those who occur to run an web store, then MemberPress is completely appropriate with WooCommerce. This lets you restrict get right of entry to to products, offer VIP perks, or even create a private members-only on-line retailer for distinctive purchasing groceries tales.
We moreover found out choices like content material dripping and expiration dates to stick your inexperienced persons engaged. They will let you step by step release content material subject matter and offer distinctive get right of entry to to time-sensitive material.
This system taps into the worry of lacking out (FOMO), encouraging inexperienced persons to stay lively and invested for your categories or memberships.
Additionally, MemberPress uses computerized notifications to stick inexperienced persons a professional about new content material subject matter, upcoming time limits, or specific supplies.
The ones reminders not only keep them engaged however as well as steered them to take action, whether or not or no longer it’s completing a lesson, renewing their subscription, or making a purchase order order.
MemberPress is helping bulk membership purchases and even lets others resell your memberships, too. Which means that other corporations and organizations can help increase your target audience and boost your benefit.
Winner – MemberPress
In relation to promoting and advertising and marketing your online categories, MemberPress stands proud.
While Teachable supplies some great apparatus like a product sales information superhighway web page generator and e-mail promoting and advertising and marketing integrations, MemberPress takes it a step further with its deeper integration and additional engaging choices.
For example, MemberPress allows you to connect to not unusual e-mail services and products and merchandise, helping you run extraordinarily centered campaigns and keep your target audience engaged.
Plus, it supplies content material subject matter dripping and expiration dates, which tap into FOMO (concern of missing out) to stick your inexperienced persons invested and motivated to building via your direction.
Pricing
Pricing is a key consideration for direction creators, specifically since many creators are running with tight budgets. It’s important to grab what every plan supplies and the way in which the price aligns with the choices you need.
Let’s take a closer check out the pricing for every platform that can assist you make the best selection on your needs.
Teachable
The Teachable free fashion would possibly seem attractive. On the other hand, it lacks important choices, at the side of content material subject matter dripping.
Teachable paid plans get began at $39 per 30 days, alternatively they tend to be dearer than most on-line route platforms.
Additionally, some plans include transaction fees. As an example, the Basic plan charges a 5% value on every transaction.
We moreover came upon that Teachable is helping rate processing via PayPal, Stripe, Google Pay, and Apple Pay.
On the other hand, the timing of while you download expenses is decided via the plan you choose.
Skillshare
Skillshare’s pricing is one in every of its standout choices: you don’t need to pay to turn on this platform.
Now, for the reason that platform works on a subscription software, folks pay each per month or every year for a Skillshare membership. Every month, spherical 20% of Skillshare’s common subscription income goes towards paying lecturers.
It’s important to note that lecturers turn out to be winning in line with the choice of minutes of their classes watched and the engagement of students with their content material subject matter.
In spite of everything, Skillshare uses Tipalti to process instructor expenses.
MemberPress
MemberPress supplies 3 number one pricing plans to fit different needs:
Basic ($179.50/twelve months): Great for novices, this plan is helping endless contributors and integrates with Stripe and PayPal for expenses.
Plus ($299.50/twelve months): Supplies choices like quizzes, certificates, and forums, making it splendid for interactive categories.
Skilled ($399.50/twelve months): Contains bulk membership product sales and kit like OptinMonster for sophisticated direction monetization.
Then, you also have Elite. This plan integrates with CoachKit, which is perfect for offering personalized coaching alongside your categories.
In relation to how so much you’ll earn from selling online categories with MemberPress, it’s completely up to you. You’ll have the freedom to set your own prices, whether or not or no longer it’s a one-time rate, subscription, or in all probability a tiered pricing development.
Plus, you gained’t wish to pay third-party platform fees to create and advertise your online categories.
This flexibility allows you to tailor your pricing on your target audience and trade objectives, giving you complete regulate over the way in which you monetize your direction content material subject matter.
Winner – MemberPress
While Skillshare’s no-cost get entry to and Teachable‘s affordability are fascinating, MemberPress takes the win when it comes to pricing flexibility.
With plans starting at merely $179.50 in line with twelve months, MemberPress moreover supplies additional regulate over your source of revenue. You’ll be capable of set your own direction prices, whether or not or no longer you prefer one-time expenses, subscriptions, or even tiered pricing. You’ll moreover get to stick your entire source of revenue.
This means you’ll adapt your pricing method in line with your target audience and trade objectives, giving you much more freedom compared to Skillshare’s revenue-sharing taste.
Which Is the Best possible: Teachable vs. Skillshare vs. MemberPress?
When comparing Teachable vs. Skillshare vs. MemberPress, MemberPress stands proud as the most suitable choice for lots of consumers. While all 3 platforms have their perks, MemberPress supplies a novel mixture of flexibility, customization, and pricing regulate that others can’t have compatibility.
Teachable is very good if you wish to have a easy platform with built-in product sales pages and e-mail promoting and advertising and marketing apparatus. Then again it will in fact get dear, specifically with its transaction fees on some plans. It’s moreover a lot much less flexible when it comes to setting your own prices and offering memberships.
Skillshare is perfect for individuals who need to teach via motion pictures without upfront costs. On the other hand, it truly works on a subscription taste, where you earn in line with what collection of minutes your students watch. This may also be unpredictable, and you have a lot much less regulate over your pricing and monetization alternatives.
MemberPress, alternatively, will provide you with whole regulate.
Whether or not or no longer you’re selling categories, memberships, or every, you get to set your own prices and offer different rate alternatives. With flexible plans and lines like quizzes, certificates, and automated notifications, MemberPress helps you create a additional interactive and tasty studying revel in.
Plus, it integrates seamlessly with not unusual apparatus, so that you’ll develop your enterprise even further.
General, MemberPress is the clear winner in the event you’re on the lookout for a platform that lets you regulate pricing, assemble a community, and provide a customized studying revel in.
FAQs About Teachable vs. Skillshare vs. MemberPress
To help clear up any ultimate doubts, let’s dive into some incessantly asked questions about Teachable, Skillshare, and MemberPress or any eLearning-related ones.
What platforms are available to create an web direction?
There are many platforms that help you create online categories, at the side of Teachable, Skillshare, and wordpress with an LMS plugin.
For wordpress consumers, plugins like Thrive Apprentice, AccessAlly, and MemberPress are all great alternatives.
You’ll be in a position to try our professional possible choices of the perfect LMS plugins for wordpress for added details.
What’s the cheap rate of making an web direction information superhighway web site?
The fee is decided via parts like web website online web hosting, a web site determine, and best price apparatus. Expect to spend on the ones must haves, but it’s value it for a professional setup. Most often speaking, you’re looking out at $100 to $500 to $3000, to concurrently high as $30,000 or additional.
For more information, you’ll talk over with our knowledge on how a lot it in point of fact prices to construct a wordpress web site.
Insider Tip: Let WPBeginner’s experts design your custom designed wordpress information superhighway web site. From clean landing pages to full-fledged eLearning internet sites, we’ve got you covered. Starting at $599 – you’ll focus on emerging your small business while we care for the design. E book your session now!
What are free platforms for creating a membership information superhighway web site?
You’ll be capable of get began with platforms like Skillshare or Gumroad without spending a dime.
On the other hand, investing in best price apparatus like MemberPress combined with its Classes and CoachKit addons will provide you with additional choices and better regulate over your information superhighway web site.
Is MemberPress an LMS?
Now not exactly. It’s a membership plugin that works great for online categories when paired with its Classes and CoachKit addons. To be told additional about how MemberPress works, you’ll check out our complete MemberPress evaluate.
We hope this article has helped you understand the differences between Teachable vs. Skillshare vs. MemberPress. Next, it’s your decision to try our knowledge on create and promote on-line classes and run a digital study room.
For those who occur to appreciated this article, then please subscribe to our YouTube Channel for wordpress video tutorials. You’ll be capable of moreover to search out us on Twitter and Fb.
The post Teachable vs Skillshare vs MemberPress: Which is the Perfect? first gave the impression on WPBeginner.
Have you learnt that over 70% of first-time visitors received’t ever return to your website online another time?
As internet web page house owners ourselves, everyone knows that accumulating a buyer’s email care for is a good way to keep in touch with them and encourage them to come back again once more. Alternatively, visitors want a the explanation why to hand over their personal knowledge – and a lead magnet like an guide or PDF is a brilliant motivator.
Most likely you already have a lead magnet in a different way you intend to create some shortly. Regardless, one thing is understand that – you’ll moreover need an optin form to gather leads, building up your e mail subscribers, and provide fast get right to use to your lead magnet.
In this data, we’ll share two other ways to create a high-converting lead magnet optin form.
Necessary Understand: The main means is highest when you occur to haven’t created a lead magnet however, as you’ll have the ability to assemble the optin and magnet the usage of the exact same software. So, when you occur to’re searching for an all-in-one solution, you’re in the appropriate place!
wordpress?” class=”wp-image-328977″/>
<span class=”ez-toc-section” id=”why-create-a-lead-magnet-optin-form-in-wordpress“/>Why Create a Lead Magnet Optin Form in wordpress?
There are many other ways to create an optin form. Then again, in our experience, they don’t at all times look very good or art work appropriately on wordpress internet pages.
In this data, we’re focusing on apparatus which were designed for wordpress and have a loyal wordpress plugin. This makes it easy to create optins that mix seamlessly together with your internet web page and mean you can generate leads with minimal effort.
Plus, you’ll maximum steadily have a much more easy time connecting the optin to other products and services and merchandise you’re already the usage of for your website online, specifically your email promoting and advertising provider. That is serving to you nurture leads, add them to automatic workflows, monitor the actions they take for your website online, and perform a ton of different crucial tasks.
You’ll moreover get all the benefits maximum steadily associated with wordpress, along with additional customization possible choices and ownership over your wisdom.
While there are lots of imaginable possible choices available, growing your optin bureaucracy in wordpress in reality does offer unmatched advantages when it comes to keep watch over, customization, and integrations.
That mentioned, you’ll have the ability to use the quick links beneath to jump without delay to the method you want to use:
Are you ready? Let’s dive right kind in!
Method 1. Using Beacon (Perfect imaginable All-In-One Solution)
Beacon is an excellent lead magnet device that lets you create endless optins the usage of an intuitive, drag-and-drop builder.
Now not like an an identical lead technology plugins, Beacon moreover has the whole thing you want to create lead magnets.
It has a ton of ready-made templates protective a number of quite a lot of lead magnets, along with eBooks, helpful useful resource guides, checklists, and video lookbooks.
With all that mentioned, Beacon is a smart selection when you occur to’re searching for an all-in-one solution for growing surprising lead magnets and then distributing them the usage of optins.
We did a deep dive into its choices for our Beacon overview, so you may want to check out that out.
Skilled Tip: In this data, we’re focusing on growing lead magnet optin bureaucracy, so we received’t show you ways you’ll be able to assemble a lead magnet the usage of Beacon. We have a separate data for that. Head over to our publish on how you can create a lead magnet that converts for more information.
Already have a lead magnet? You then’ll have the ability to upload this handy useful resource to your Beacon account and then create an optin for that lead magnet.
That means Beacon is also a good choice if you already have a library of lead magnets, and easily need to create optins for those assets.
What’s additional, Beacon has a ‘loose ceaselessly’ plan that lets you create as many optins as you want. With that all through ideas, Beacon is highest if you want to experiment with fairly a large number of different optin varieties and formats, to appear what delivers the most efficient results.
Step 1. Create a Beacon Account
As we already mentioned, Beacon has a ‘loose ceaselessly’ plan that lets you create as many lead grasp bureaucracy as you want. Alternatively, the loose plan limits you to creating 1 new lead magnet per month.
So, depending for your needs, you may need to invest in a best charge plan in an instant.
To get started, head over to the Beacon web site and each sign up for a best charge plan or create your loose account.
With that finished, log into the Beacon dashboard, and in addition you’re ready to create your first lead magnet optin form.
Step 2. Add Your Email correspondence Provider (Now not mandatory)
While you grasp a brand spanking new lead, Beacon can send that specific particular person’s knowledge to your e mail advertising and marketing provider routinely. It could even add tags so that you’ll have the ability to phase the ones leads and run focused campaigns one day.
If you want to use this feature, then head over to Account Settings » Email correspondence Integrations inside the Beacon dashboard. Then, click on at the ‘+’ button.
Next, open the ‘Choose Provider’ dropdown and choose your email promoting and advertising supplier, similar to ActiveCampaign, CampaignMonitor, or Drip.
Then, simply follow the onscreen instructions to organize this integration.
Step 3: Choose Your Lead Magnet
The next move is choosing the lead magnet you’ll offer to visitors. To check out this, click on on on the ‘Create New’ button, followed by the use of ‘Lead Grasp Form.’
At this stage, you’ll have the ability to each choose a lead magnet you’ve created the usage of Beacon or upload an external helpful useful resource you created the usage of every other program.
To use an external document, choose ‘Upload Helpful useful resource.’
You’ll have the ability to then click on at the ‘Choose Report’ button.
After that, choose any document from your local computer.
<img decoding=”async” loading=”lazy” width=”680″ height=”361″ src=”https://wpmountain.com/wp-content/uploads/2025/02/selecting-lead-magnet.png” alt=”How to create a lead magnet optin form for your wordpress blog or website” class=”wp-image-328825″/>
Alternatively, you’ll have the ability to use a lead magnet you created with Beacon. To try this, simply choose ‘Use Beacon Helpful useful resource.’
You’ll now see all the different lead magnets you created. Find the helpful useful resource you want to use and click on on on the corresponding ‘Choose’ button.
Step 4. Choose a Template
It doesn’t topic what selection you choose, the next move is deciding on your optin format.
For this knowledge, we’ll be growing an inline form, as this allows you to keep watch over exactly the position the form turns out for your website online.
For example, you’ll want to place it on a touchdown web page or midway via a decided on blog publish. Alternatively, the steps may also be an an identical for all the different optin formats.
That mentioned, we’re going to choose ‘Inline Form’ at this stage.
<img decoding=”async” loading=”lazy” width=”680″ height=”372″ src=”https://wpmountain.com/wp-content/uploads/2025/02/choosing-inline-forms.png” alt=”Creating an inline form for your wordpresswebsite or blog” class=”wp-image-328829″/>
Beacon will now show all the different ready-made templates you’ll have the ability to use. Numerous those templates are completely customizable, so that you’ll have the ability to fine-tune them to match your wordpress theme or branding.
Alternatively, to save some time, it’s smart to choose a template that carefully resembles the kind of optin you want to create. That way, you don’t should do quite a lot of enhancing.
While you find a template you want to use, give it a click on on.
Then, sort in a name for the optin form. This may increasingly sometimes represent the form all over the Beacon dashboard, so it’s a good idea to use something descriptive.
Once that’s finished, click on on on the ‘Create Lead Grasp Form’ button.
Step 5. Customize Your Optin Form
Beacon will now load your most popular template in its drag-and-drop editor. This editor is split into multiple tabs, starting with the ‘Motive’ tab, which is in large part how the form will appear for your internet web page.
To the left is a live preview that’ll change routinely as you’re making changes.
All the Beacon templates come with built-in, default content material subject material. To edit a built-in phase, each click on on to choose it inside the live preview or choose it inside the left-hand menu.
While you do, the menu will show all the settings you’ll have the ability to use to customize this phase, similar to changing the text measurement, font color, and background color.
If the phase contains text, then you definately’ll see a work where you’ll have the ability to exchange it with your own messaging.
Want to make better changes to the inline form?
You’ll have the ability to click on directly to magnify the ‘Structure’ phase and make a choice from fairly a large number of layout possible choices.
Want to exchange the background image or color? Then click on directly to magnify the ‘Container’ phase and then use the fairly a large number of settings that appear.
As you’re making changes, the live preview will change routinely, so that you’ll be in a position to try fairly a large number of different settings to appear what you prefer highest.
<img decoding=”async” loading=”lazy” width=”680″ height=”354″ src=”https://wpmountain.com/wp-content/uploads/2025/02/beacon-optin-form-1.png” alt=”Creating an opt-in form for your wordpresswebsite, blog, or online store” class=”wp-image-330271″/>
Step 6. Design a Thank You Internet web page
Next, it’s time to customize the ‘Thank You’ message that Beacon will show each and every time any person completes your form. To get started, click on at the ‘Thank You’ tab.
Once another time, Beacon presentations a live preview to the appropriate and fairly a large number of settings on the left.
You’ll have the ability to now exchange the headline, paragraph, and container settings within the equivalent way you customized the ‘Motive’ internet web page.
Alternatively, the ‘Thank You’ tab has an extra ‘Social Share’ phase. This permits you to add a row of social sharing buttons to the ‘Thank You’ internet web page so visitors can share your lead magnet optin form right through social media.
The ones icons are hidden by the use of default, on the other hand you’ll have the ability to exchange this by the use of clicking to magnify the ‘Social Share’ phase and then unchecking the ‘Conceal Social Share’ box.
<img decoding=”async” loading=”lazy” width=”680″ height=”342″ src=”https://wpmountain.com/wp-content/uploads/2025/02/beacon-social-sharing.png” alt=”Adding social sharing buttons to your wordpresswebsite” class=”wp-image-330272″/>
You’ll have the ability to then add or remove buttons for Twitter/X, Facebook, LinkedIn, or sharing by way of email. You’ll have the ability to moreover exchange the text that appears above this row of social sharing buttons, along with the font measurement and color.
Don’t need to display a ‘thank you’ message?
Beacon can redirect the buyer to any other URL instead, similar to a completely customized ‘thanks’ web page you created the usage of a plugin like SeedProd.
To try this, click on directly to magnify the ‘Redirect’ phase and then sort inside the URL you want to use.
<img decoding=”async” loading=”lazy” width=”680″ height=”323″ src=”https://wpmountain.com/wp-content/uploads/2025/02/redirecting-beacon-wordpress.png” alt=”How to set up redirects on your wordpresswebsite or WooCommerce store” class=”wp-image-328844″/>
Step 7: Customize the Confirmation Email correspondence
By means of default, Beacon will routinely send an email confirmation to everyone who completes your form. This email contains a ‘Download’ link for your lead magnet, so it actually works out of the sphere.
Alternatively, the default template is beautiful basic, in order that you’ll maximum steadily need to customize it.
To try this, click on at the ‘Confirmation’ tab.
Once another time, you’ll see a live preview to the appropriate and various different possible choices inside the left-hand menu.
Proper right here, you’ll have the ability to exchange the email subject, the ‘from’ name, the ‘reply to’ care for, and the email body.
For individuals who’ve attached Beacon to your e mail advertising and marketing supplier, you then’ll have the ability to moreover permit double opt-in.
This calls for patrons to verify their subscription by the use of opening your email and clicking a link. Once that’s finished, Beacon will add their contact knowledge to your email promoting and advertising provider.
In this way, you’ll have the ability to avoid together with spambots or wrong email addresses to your mailing file. That is serving to to stay your record blank and healthy while heading off dropping assets by the use of sending messages to inactive email addresses.
Because of this, we advise clicking to magnify the ‘Make a selection-in Settings’ phase and then deciding on ‘Double Make a selection-in’ till you’ve a very specific the explanation why not to.
For added on this topic, please see our data on how you can save you signup unsolicited mail in wordpress.
Step 8: Publish Your Form
While you’re happy with how your optin is ready up, it’s time so that you could upload it to your website online. Thankfully, Beacon makes that straightforward. Simply choose the ‘Publish’ tab to get started.
On this internet web page, you’ll see some HTML code that Beacon creates routinely.
Previous to navigating transparent of this show, you’ll want to click on on on the ‘Save’ button to store your latest changes.
Then, copy the HTML code and head over to your wordpress internet web page. You’ll have the ability to now add this code to any internet web page, publish, or widget-ready house the usage of the ‘Custom designed HTML’ block.
As an example, let’s see the way you’ll have the ability to add the optin to a publish. Simply open the publish as same old inside the content material editor, and then click on at the ‘+’ button.
Use the search software to seek out the ‘Custom designed HTML’ block and add it to the internet web page.
<img decoding=”async” loading=”lazy” width=”680″ height=”380″ src=”https://wpmountain.com/wp-content/uploads/2025/02/wordpress-html-block.png” alt=”Adding a custom HTML block to your website” class=”wp-image-330274″/>
Now, move ahead and paste your code into the Custom designed HTML block.
You’ll have the ability to now add additional content material subject material to the internet web page, tweak its design, and make other changes, as same old. While you’re ready to move live, simply change or post the internet web page.
Now, when you occur to talk about together with your wordpress internet web page, you’ll see the lead magnet optin in movement.
Method 2. Using OptinMonster (Perfect imaginable For Rising Difficult Optins)
Do you already have a lead magnet you want to use for your campaigns? Then OptinMonster could also be the very best solution for you.
It means that you can create all kinds of advanced optin bureaucracy, along with formats like floating bars, popups, and gamified spin-to-win optins. Plus, it has a template library of 400+ high-converting designs that you just’ll have the ability to customize with its drag-and-drop builder.
We’re huge fans of this software ourselves. We use it for all our pop-ups, slide-ins, and header banners. So we can confidently allow you to know that when it comes to growing optins, the chances are almost about never-ending with OptinMonster.
To learn additional, see our whole OptinMonster overview.
The great issue about OptinMonster is that it means that you can send lead magnets by way of email, direct download, or each and every, giving your subscribers the freedom to choose their most popular means.
Even if you’ll have the ability to use OptinMonster’s gated content material subject material feature to turn any blog publish proper right into a lead magnet or content material improve, its true energy lies in growing extraordinarily environment friendly optin bureaucracy.
With that mentioned, we advise OptinMonster if you already have some lead magnets, and want a approach to grasp as many leads as possible.
Step 1. Organize OptinMonster
First, you’ll need to sign up for on the OptinMonster web site. Simply click on at the ‘Get OptinMonster Now’ button to get started.
<img decoding=”async” loading=”lazy” width=”680″ height=”362″ src=”https://wpmountain.com/wp-content/uploads/2025/02/optinmonster-lead-website.png” alt=”Creating an account in OptinMonster” class=”wp-image-330280″/>
You’ll have the ability to then make a choice the OptinMonster plan you want to buy and follow the onscreen instructions to complete your gain.
With that finished, it’s time to place in and switch at the unfastened OptinMonster wordpress plugin. This connects your wordpresswebsite online to your OptinMonster account.
For added details, please see our data on how you can set up a wordpress plugin.
Each time you flip at the plugin, you’ll see the OptinMonster welcome show and setup wizard. Transfer ahead and click on at the ‘Connect Your Present Account’ button.
You’ll now see a small window where you’ll have the ability to sign into your OptinMonster account.
In this popup, click on at the ‘Connect to wordpress’ button to link your internet web page to OptinMonster.
<img decoding=”async” loading=”lazy” width=”680″ height=”188″ src=”https://wpmountain.com/wp-content/uploads/2025/02/optinmonster-connecting-wordpress.png” alt=”Connecting wordpress to your OptinMonster account” class=”wp-image-330275″/>
Step 2. Choose a Advertising and marketing marketing campaign Type
Now, you’re ready to create your lead magnet advertising marketing campaign by the use of heading over to the OptinMonster » Campaigns internet web page for your wordpress dashboard.
With that finished, click on at the ‘Add New’ button.
OptinMonster will now ask you to choose a template or use a playbook.
Playbooks are ready-to-use campaigns in line with tried-and-tested strategies from one of the most important international’s most a luck producers, so that they’re absolute best for growing high-converting campaigns, fast.
Alternatively, in this data, we’ll be deciding on ‘Templates.’
At this stage, OptinMonster will show all the different advertising marketing campaign varieties you’ll be in a position to choose from. This incorporates slide-ins, floating bars, and gamified popups.
The steps may also be an an identical it doesn’t topic what type of advertising marketing campaign you choose. Alternatively, in this data, we’ll be growing an inline form, because you’ll have the ability to add it merely to any internet web page, publish, or widget-ready house. With that mentioned, move ahead and choose ‘Inline.’
<img decoding=”async” loading=”lazy” width=”680″ height=”369″ src=”https://wpmountain.com/wp-content/uploads/2025/02/creating-inline-form.png” alt=”How to add an inline form to your wordpress blog or website” class=”wp-image-328860″/>
Step 3. Choose a Template
You’ll have the ability to now make a choice the template you want to use. All the OptinMonster templates are completely customizable, on the other hand you’ll have the ability to save time by the use of choosing a template that carefully represents the form you want to create.
To preview a design, simply hover over the template and then click on at the ‘Preview’ button.
This opens the template in a popup.
While you find a design you want to use, click on on on the ‘Use Template’ button. We’ll be the usage of the Unlock Gated Content material subject material template in all our screenshots, on the other hand you’ll be in a position to make a choice any design you want.
After deciding on a template, move ahead and gives your advertising marketing campaign a name by the use of typing into the popup that appears. Then, click on on on ‘Get began Building.’
<img decoding=”async” loading=”lazy” width=”680″ height=”244″ src=”https://wpmountain.com/wp-content/uploads/2025/02/build-campaign-wordpress.png” alt=”How to create a lead generation campaign using OptinMonster” class=”wp-image-330277″/>
Step 4. Assemble Your Lead Magnet Optin
OptinMonster will now load your template in its drag-and-drop editor so that you’ll have the ability to customize it.
All the templates come with built-in blocks, similar to Text, Image, and Button blocks. To edit any block, simply click on on to choose it inside the live preview.
The left-hand menu will then show all the settings you’ll have the ability to use for that exact block.
You’ll have the ability to moreover exchange text in an instant inside the live preview.
To switch the text style, simply highlight it and then use the settings inside the toolbar that appears.
Want to delete a block instead?
Merely hover over it inside the live preview and then click on at the rubbish can icon when apparently.
In an effort to upload additional blocks to your design, simply drag them from the left-hand menu and then drop them onto the live preview.
Simply repeat the ones steps until you’re happy with the lead magnet optin form.
<img decoding=”async” loading=”lazy” width=”680″ height=”380″ src=”https://wpmountain.com/wp-content/uploads/2025/02/inline-form-wordpress.png” alt=”Creating an inline form for your wordpresswebsite or blog” class=”wp-image-328867″/>
Step 5. Design Your Good fortune Message
When any person completes your optin form, OptinMonster will display a ‘good fortune’ message by the use of default. To customize this show, click on at the ‘Good fortune’ tab.
At this stage, you want to choose how visitors get right to use your lead magnet: by way of email, an instantaneous download, or each and every.
This feature will affect your ‘Good fortune’ message’s design and content material subject material. For example, when you occur to send your lead magnet by way of email, then the message must tell shoppers to check their inbox.
Within the interim, for direct downloads, you’ll need to add a button so visitors could cause their download.
It doesn’t topic what means you choose, you’ll design the good fortune message within the equivalent way for the reason that opt-in form.
Simply click on on to choose the built-in blocks and then customize them the usage of the settings inside the left-hand menu. You’ll have the ability to moreover drag new blocks onto the layout, sort in text, and delete unwanted blocks.
For individuals who’re the usage of the download means, then remember to add a Button block to your lead magnet optin. Then, open the ‘Button Click on on Movement’ dropdown inside the left-hand menu and choose ‘Open in a brand spanking new window.’
Inside the ‘New Window URL’ field, paste an instantaneous link to your lead magnet.
Now, when any person clicks this button, the document will open in a brand spanking new tab, looking ahead to them to save some.
Finally, remember to permit the ‘Conversion tracking’ slider so that you’ll have the ability to monitor how folks interact with this button.
Want to send your lead magnet by way of email? Then click on on on the ‘Integrations’ tab and choose ‘Add a New Integration.’
You’ll have the ability to now make a choice your e mail advertising and marketing supplier.
With that finished, follow the onscreen instructions to configure the blending and create your email. The steps will vary depending for your provider, on the other hand OptinMonster will data you all through the process.
Step 6. Publish Your Optin Form
The whole step is together with the lead magnet optin to your wordpress internet web page. To try this, move ahead and click on at the ‘Publish’ tab. You’ll have the ability to then click on on ‘Save’ inside the toolbar.
Inside the popup that appears, choose ‘Publish Now.’
Since you already put within the OptinMonster plugin, this optin may also be available for your wordpress dashboard in an instant.
Simply head over to your internet web page and open the internet web page or publish where you want to turn the lead magnet optin.
Then, click on at the ‘+’ button so that you could upload a brand spanking new block. Use the search software to look out the ‘OptinMonster’ block and simply add it to your internet web page or publish.
<img decoding=”async” loading=”lazy” width=”680″ height=”340″ src=”https://wpmountain.com/wp-content/uploads/2025/02/adding-optinmonster-block.png” alt=”Adding an OptinMonster block to a wordpress page or post” class=”wp-image-330279″/>
Then, inside the OptinMonster block, open the dropdown that says ‘Choose Advertising and marketing marketing campaign…’ by the use of default.
Proper right here, you’ll want to make a choice the promoting marketing campaign you merely created.
OptinMonster will now add the lead magnet optin form to your internet web page.
While you’re ready to make it live, simply change or post the internet web page as same old. And that’s it!
Bonus Belongings for Lead Era
Now that you just’ve were given your lead magnet optin form prepare, you may wish to be informed some additional articles to boost your lead generation efforts:
For individuals who preferred this newsletter, then please subscribe to our YouTube Channel for wordpress video tutorials. You’ll have the ability to moreover find us on Twitter and Fb.
The publish Find out how to Create a Lead Magnet Optin Shape in wordpress (2 Tactics) first appeared on WPBeginner.
Discover the Digital Storage Revolution: A Guide to Choosing the Right Computer and Hard Drive for Your Needs
TL;DR
Understanding computer and storage options is crucial for optimal digital experience.
Assess your needs and consider factors like storage capacity, speed, and reliability.
Explore various storage devices, including hard disk drives (HDDs), solid-state drives (SSDs), and cloud storage.
Select a computer with sufficient storage space and processing power to meet your requirements.
Choosing the Right Computer: Balancing Power and Budget
When choosing a computer, consider your intended use. If you need a powerful machine for gaming, video editing, or other demanding tasks, look for a desktop computer with a high-performance processor, graphics card, and ample storage capacity.
For everyday use, such as browsing the internet, checking email, and basic office work, a laptop or all-in-one desktop may suffice. These devices offer portability and affordability but may have lower storage capacities.
Storage Choices: Finding the Sweet Spot
Storage devices come in various forms. Hard disk drives (HDDs) are traditional and cost-effective options, offering large storage capacities but slower speeds. Solid-state drives (SSDs) use flash memory for faster loading times and improved performance.
Cloud storage is another option, providing secure off-site storage for your files and accessing them from multiple devices. However, cloud storage can have ongoing monthly costs.
Pros: Secure off-site storage, accessibility from multiple devices
Cons: Ongoing monthly costs, internet dependency
Balancing Storage and Speed
Consider your storage needs carefully. If you store large collections of photos, movies, or other files, you’ll require a device with ample storage space. For faster performance, choose a device with a fast storage interface (e.g., SATA, NVMe).
Let’s Talk About Saskatchewan
Saskatchewan, a province in Canada, is home to several companies specializing in computer and storage solutions. These companies provide reliable and innovative products and services to businesses and consumers alike.
Expansive Summary
To summarize, choosing the right computer and storage device requires careful consideration of your needs. Determine your preferred usage, storage capacity, and performance requirements. Explore the different storage options available, such as HDDs, SSDs, and cloud storage. By balancing storage and speed, you can find the perfect combination for your digital needs.
Are you experiencing slowness for your web page? Many components may well be contributing, together with unused subject matters taking over server sources. You may also realize gradual loading occasions or obtain warnings from efficiency optimization gear and wish steering to get to the bottom of those problems. Unused wordpress subject matters aren’t simply litter; they may be able to bloat your web page, slowing it down and developing doable vulnerabilities. Previous or unused subject matters would possibly lack updates, making them a goal for malicious assaults.
For freelancers and businesses managing a couple of wordpress websites, doing this manually can also be time-consuming. Gear like Divi Dash supply an all-in-one technique to streamline your workflow.
Able to take keep watch over of your wordpress setting? Let’s discover why doing away with unused subject matters is the most important and the way you’ll be able to do it successfully.
<span class=”ez-toc-section” id=”why-you-will-have-to-take-away-unused-wordpress-topics”/>Why You Will have to Take away Unused wordpress Topics
Unused wordpress subject matters would possibly appear innocuous, however they may be able to introduce a number of problems that would negatively affect your web page’s efficiency and safety. Right here’s why it’s crucial to take away them:
Safety Dangers: Each and every unused theme provides in your web page’s assault floor. If an previous or inactive theme is not up to date via its builders, it turns into a possible vulnerability, exposing your web site to hackers or malware.
Slower Site Efficiency: Although subject matters are inactive, they nonetheless occupy area for your server and database. This extra load can decelerate your web page, in particular when acting updates or backups.
Problem in Control: A cluttered wordpress dashboard with a couple of unused subject matters could make managing your web site extra difficult. Putting off pointless subject matters guarantees a cleaner and extra arranged setting.
Cleansing up your set up protects your web site and optimizes it for higher efficiency.
<span class=”ez-toc-section” id=”distinction-between-deleting-wordpress-topics-and-uninstalling-wordpress-topics”/>Distinction Between Deleting wordpress Topics and Uninstalling wordpress Topics
Figuring out the variation between deleting and uninstalling wordpress subject matters is the most important ahead of continuing with any cleanup. Even supposing those phrases are ceaselessly used interchangeably, they consult with other movements inside of wordpress.
While you uninstall a theme, you deactivate it. Then again, the theme recordsdata stay for your wordpress web site. Uninstalling is in most cases finished when switching to a brand new lively theme, however the previous theme stays to your listing. Whilst it reduces instant use, uninstalled subject matters can nonetheless pose safety dangers since their recordsdata stay saved at the server.
Deleting a theme completely eliminates all related recordsdata out of your wordpress set up. This motion guarantees the theme not occupies area to your listing or database. Deleting is the beneficial means for no longer-needed subject matters, because it gets rid of safety vulnerabilities and frees up server sources.
Uninstalling leaves the theme dormant however nonetheless provide, whilst deleting guarantees it’s utterly got rid of out of your web site. In the event you’re sure you gained’t use a theme once more, deletion is your only option for optimizing your wordpress setting.
<span class=”ez-toc-section” id=”means-1-the-way-to-take-away-unused-wordpress-topics-thru-admin-house”/>Means 1: The way to Take away Unused wordpress Topics Thru Admin House
Probably the most most straightforward tactics to take away unused wordpress subject matters is via the use of the wordpress admin space. This system is user-friendly and doesn’t require any technical wisdom. Right here’s a step by step information:
Step 1: Backup Your Site
Backing up your web page is very important ahead of making any adjustments. This guarantees you’ll be able to repair your web site in case of unintended knowledge loss. Use plugins like UpdraftPlus to back up your wordpress files and database absolutely.
<span class=”ez-toc-section” id=”step-2-get-admission-to-the-wordpress-dashboard”/>Step 2: Get admission to the wordpress Dashboard
Log in in your wordpress admin panel. Navigate to the Look phase from the left-hand menu.
Establish the subjects you not want. Be mindful, you can’t delete the these days lively theme. Hover over the thumbnail of the theme you wish to have to delete and click on at the Theme Main points button. On this case, we can take away the Twenty Twenty-4 (2024) theme as I have already got the newest model of the default theme (Twenty Twenty-5).
The use of the admin space is essentially the most obtainable approach for wordpress customers. It means that you can temporarily declutter your web site whilst making sure you keep keep watch over over what remains and is going.
<span class=”ez-toc-section” id=”means-2-the-way-to-take-away-unused-wordpress-topics-by-the-use-of-ftp”/>Means 2: The way to Take away Unused wordpress Topics by the use of FTP
Putting off unused wordpress subject matters by the use of FTP (Document Switch Protocol) is a competent approach for the ones happy with report control and who need larger keep watch over. This means is especially helpful if you can’t get entry to the wordpress admin space because of technical problems. Simply as with all adjustments in your web site, it’s crucial to again up your web page ahead of continuing. Use your most popular backup plugin or create a handbook backup of your wordpress recordsdata and database.
Step 1: Connect with Your Site by the use of FTP
On this case, we can use FileZilla as our FTP client and log in in your server the use of our FTP credentials. After connecting, cross to the foundation folder of your wordpress set up.
Navigate to the wp-content folder, then open the subjects folder. Right here, you’ll in finding the entire subject matters put in for your wordpress web site.
Establish the folder akin to the theme you wish to have to delete. Proper-click the folder and select the Delete possibility. Identical to within the earlier approach, we can be deleting the twenty twenty-four theme.
Ascertain the deletion. The theme folder and its recordsdata might be completely got rid of out of your server.
NOTE: Be wary when deleting recordsdata by the use of FTP to keep away from by chance doing away with crucial recordsdata or lively subject matters. Double-check the folder identify ahead of deletion.
<span class=”ez-toc-section” id=”means-3-the-way-to-take-away-unused-wordpress-topics-by-the-use-of-hosts-document-supervisor”/>Means 3: The way to Take away Unused wordpress Topics by the use of Host’s Document Supervisor
In the event you don’t have get entry to to FTP or choose the use of your web hosting supplier’s keep watch over panel, you’ll be able to take away unused wordpress subject matters during the host’s report supervisor. This system is handy and calls for no further tool.
Step 1: Get admission to Your Webhosting Account
Log in in your web hosting account. Find and open the Document Supervisor software. That is typically discovered within the keep watch over panel (e.g., cPanel, Plesk, or a customized web hosting dashboard).
Within the Document Supervisor, cross to the foundation listing of your wordpress set up. That is ceaselessly known as public_html, www, or one thing identical. Open the wp-content folder after which the subjects folder, the place your whole put in wordpress subject matters are saved.
Step 3: Delete the Unused Topics
Establish the folder by which you need to delete the theme. The folder identify corresponds to the theme’s identify.
Ascertain the deletion to take away the theme out of your server completely.
NOTE: All the time double-check the theme folder ahead of deletion to be sure to’re now not doing away with an lively or crucial theme.
<span class=”ez-toc-section” id=”what-to-do-after-putting-off-an-unused-wordpress-theme”/>What to do After Putting off an Unused wordpress Theme
Whenever you’ve got rid of the unused subject matters out of your wordpress web site, there are a couple of necessary steps to verify your web page stays optimized, protected, and entirely useful.
Transparent Cache: In the event you use a caching plugin like WP Rocket or W3 Total Cache, transparent your web site’s cache after deleting subject matters. This guarantees any references to the got rid of subject matters are up to date, fighting show problems. Some web hosting suppliers additionally be offering server-level caching gear that can want to be refreshed.
Replace Your Lively Theme: Make sure your lively theme is up-to-date. Retaining your lively theme up to date guarantees you take pleasure in the newest options, worm fixes, and safety patches.
Optimize Your Database: When subject matters are got rid of, residual knowledge (e.g., settings or metadata) would possibly nonetheless linger within the database. Use plugins like WP-Optimize or Litespeed to take away pointless entries and stay your database lean and environment friendly.
Run a Safety Scan: Behavior a safety scan the use of plugins like Solid security or Sucuri security. This is helping stumble on and take away any vulnerabilities or leftover recordsdata from prior to now put in subject matters.
Check Site Capability: Test that your web page is functioning correctly. Take a look at your pages, plugins, and design parts to verify no damaged hyperlinks or lacking belongings after the theme removing procedure.
Following those steps eliminates unused subject matters and maintains an optimized and protected wordpress setting. With a streamlined web site, you’ll be able to center of attention on turning in a greater enjoy to your guests.
<span class=”ez-toc-section” id=”choice-gear-to-set-up-wordpress-topics”/>Choice Gear to Set up wordpress Topics
Managing subject matters manually can also be time-consuming, particularly for web pages with a couple of put in subject matters. Thankfully, a number of gear and plugins can simplify the method of managing and optimizing wordpress subject matters. Listed below are some notable choices:
1. Divi Sprint
Divi Dash is an all-in-one wordpress web page control software designed to simplify your workflow. Whether or not you’re dealing with a couple of web pages or want a extra environment friendly approach to stay the whole thing up-to-date, Divi Sprint permits you to organize your whole wordpress websites from a unmarried dashboard.
Replace plugins, subject matters, and wordpress core throughout a couple of websites with one click on.
Track safety, uptime, and web page efficiency metrics in actual time.
Agenda computerized backups and streamline repairs duties.
Get admission to reviews and analytics to optimize web site efficiency.
By means of leveraging Divi Sprint, you’ll be able to save time, fortify safety, and make sure your wordpress websites run easily with minimum effort. Watch Video Get Divi Dash
2. WP Reset
WP Reset is an all-in-one wordpress software designed to temporarily blank up your web site via doing away with unused subject matters, plugins, and pointless knowledge. It’s particularly helpful for builders or web site managers operating on staging or trying out environments, because it permits you to reset your wordpress set up whilst conserving crucial elements like your lively theme and core settings. WP Reset’s snapshot characteristic guarantees you’ll be able to safely roll again adjustments if one thing is going flawed throughout cleanup.
Bulk delete unused subject matters and plugins in a couple of clicks.
Reset your wordpress set up to a blank state whilst holding key recordsdata.
Create snapshots to revive your web site after adjustments or unintended deletions.
Optimize your database via doing away with leftover knowledge from previous subject matters and plugins.
Get WP Reset
3. Simple Updates Supervisor
Easy Updates Manager simplifies holding your wordpress subject matters, plugins, and core recordsdata up-to-date. It’s preferrred for customers who wish to automate updates with out handbook intervention, making sure that inactive subject matters stay protected and your web site remains safe. The plugin additionally supplies detailed logs of replace actions, serving to you observe adjustments and troubleshoot any problems led to via updates.
Automate updates for each lively and inactive subject matters to fortify safety.
Customise replace settings for subject matters, plugins, and the wordpress core.
Observe all replace process with detailed logs for higher visibility.
Disable updates selectively for explicit subject matters or plugins when vital.
Get Easy Updates Manager
<span class=”ez-toc-section” id=”stay-your-website-online-up-to-date-for-absolute-best-efficiency”/>Stay Your website online Up to date for Absolute best Efficiency
Retaining your wordpress web site blank and optimized guarantees higher efficiency, enhanced safety, and more uncomplicated control. Whilst apparently innocuous, unused subject matters could cause vulnerabilities, decelerate your web site, and litter your dashboard. By means of doing away with those subject matters the use of strategies just like the admin space, FTP, or your host’s report supervisor, you’ll be able to declutter your wordpress set up and cut back dangers. Additionally, leveraging gear like WP Reset and Easy Updates Manager can streamline the method, whether or not cleansing up unused subject matters or automating updates to forestall out of date recordsdata. Common repairs, together with database optimization and safety scans, guarantees your web site stays in best form.
<span class=”ez-toc-section” id=”streamline-your-wordpress-control-with-divi-sprint”/>Streamline Your wordpress Control with Divi Sprint
In the event you organize a couple of websites and wish to streamline the method of managing subject matters and plugins, Divi provides a formidable web site supervisor that comes loose with a Divi club.
With Divi Sprint, you’ll be able to take care of important wordpress duties—together with updates, safety assessments, and function tracking—with out switching between a couple of web pages. Whether or not you’re managing shopper initiatives or keeping up private websites, Divi Sprint guarantees that the whole thing remains up-to-the-minute and protected.
Able to simplify your web page control? Take keep watch over of your wordpress ecosystem with Divi Sprint nowadays.
Watch Video
Try Divi Dash Now
Taking a look to declutter your wordpress set up? Get started doing away with unused subject matters nowadays and experience quicker, more secure, and extra environment friendly web page efficiency. Additionally, we’ve equipped you a desk of gear that will help you accelerate this procedure.
The put up How to Remove Unused wordpress Themes & Why You Should seemed first on Elegant Themes Blog.
The default wordpress dashboard can in short turn out to be cluttered with widgets similar to the Welcome panel or wordpress Events and Knowledge and hides crucial apparatus. Together with plugins may make it even harder to navigate and arrange.
By way of customizing your wordpress dashboard—organizing widgets, putting off distractions, and tailoring the workspace—you’ll be capable to create a streamlined workflow that enhances productivity and enhances navigation.
This knowledge will show you simple ways admins can customize their wordpress dashboard for style and efficiency. We’ll moreover share how Divi consumers can use Divi Sprint to keep an eye on all their wordpress web pages from one dashboard.
<span class=”ez-toc-section” id=”why-customize-your-wordpress-dashboard”/>Why Customize Your wordpress Dashboard?
Your wordpress dashboard is bigger than a navigation hub—it’s the basis of your workflow. Customizing it promises that your apparatus and knowledge are exactly the position you want them.
Streamline Your Workflow: Remove unnecessary widgets and reorganize apparatus to be aware of what problems most. For instance, bloggers can prioritize the Rapid Draft widget to write down down content material subject matter ideas, while small business householders would perhaps keep analytics and serve as insights front and heart.
Improve Usability: A clutter-free dashboard is easier to navigate, helping you in finding what you want sooner. Minor tweaks like hiding the Welcome panel or transferring the Updates widget to the best save treasured time, specifically for purchasers managing content-heavy internet websites.
Give a boost to Branding: For client-facing web pages, customization supplies a licensed touch. Add emblems, emblem colors, and custom designed welcome messages to impress clients and keep their experience consistent with your supplier prime quality. You’ll moreover create a customized wordpress dashboard in your clients.
Save Time on Repetitive Tasks: Simplify day-to-day actions by means of protecting vital apparatus like search engine optimization plugins or potency dashboards visible. This reduces back-and-forth clicks and promises a smoother workflow.
With simple customizations, you’ll be capable to create a workspace tailored on your needs—whether or not or no longer you’re a content material subject matter author, small business owner, or freelancer managing client projects.
<span class=”ez-toc-section” id=”7-ways-to-customize-your-wordpress-dashboard”/>7 Ways to Customize Your wordpress Dashboard
wordpress accommodates built-in apparatus that make it easy to personalize and optimize your dashboard for a additional surroundings pleasant workflow.
1. Declutter Your Dashboard with Computer screen Possible choices
The wordpressComputer screen Possible choices serve as signifies that you’ll declutter your dashboard by means of hiding unnecessary widgets. For instance, you’ll be capable to remove the welcome message, which takes up area without providing vital wisdom, while protecting crucial widgets like Procedure and Updates visible. That is serving to create a cleaner, additional focused workspace tailored on your needs.
Don’t fear—the ones changes are reversible if you want to keep watch over your structure later.
2. Rearrange Your Dashboard Widgets
With wordpress’s drag-and-drop serve as, you’ll be capable to in short rearrange widgets to stick your most necessary apparatus above the fold. As an example, hanging the Rapid Draft widget on the most productive helps take hold of content material subject matter ideas merely, while widgets like Potency Evaluation or Web site Smartly being Status make sure that key insights are at all times visible.
This capacity signifies that you’ll prioritize crucial apparatus like analytics or rapid links, creating a additional streamlined and surroundings pleasant workflow.
3. Personalize the Look with the Admin Color Scheme
Customize your wordpress dashboard’s glance by means of settling on a color scheme that fits your style. Transfer to Consumers > Profile, in finding the Admin Color Scheme phase, and make a choice your most popular theme. As an example, choosing a high-contrast theme may make navigation easier for purchasers working long hours or in low-light environments.
Don’t forget to avoid wasting numerous your changes by means of clicking Change Profile. For additonal possible choices, the Final Dashboard plugin signifies that you’ll create custom designed schemes and even allows a sleek dark mode for a modern look.
To customize your wordpress sidebar menu, you’ll be capable to use plugins like Final Dashboard or Admin Menu Editor.
Proper right here’s simple learn how to edit your sidebar menu with the Admin Menu Editor:
After activating the plugin, navigate to Settings > Menu Editor and rearrange menu items by means of dragging and dropping portions.
You’ll moreover remove unnecessary menu items to simplify your interface. Select the menu products you want to remove and click on at the Scissors icon.
If sought after, you’ll be capable to restore deleted items using the Load Default Menu selection. So, in the event you occur to’re experimenting, don’t fear, you’ll be capable to merely reset any changes.
For client web pages or group individuals with different roles, you’ll be capable to conceal menu items to turn only crucial apparatus. For instance, authors may only need get admission to to Posts and Pages without seeing WooCommerce possible choices.
The usage of the Final Dashboard plugin, navigate to the Admin Menu Editor and make a choice a client place. Then, click on at the Eye icon to hide specific menu items.
You’ll moreover customize menu possible choices for individual consumers by means of switching to the Consumers tab and settling on a selected client.
6. Add Custom designed Dashboard Widgets
Custom designed dashboard widgets imply you’ll make your wordpress admin area additional helpful and user-friendly. For instance, you’ll be capable to create a to-do list widget with instructions like “Add new blog posts correct right here” or include rapid links to regularly accessed areas harking back to seo settings, analytics, or your content material subject matter library.
To create a custom designed rapid link widget using Final Dashboard, go to Add Dashboard Widget, make a choice Icon Widget in Widget Kind, add your link, and click on on Put up.
Widgets like a Client Assets hub with fortify links or tutorials may make your dashboard a tailored productivity hub, helping consumers navigate tasks simply. For individuals who’re new to personalized widgets, get began with a simple text widget to be able to upload helpful reminders or instructions.
<span class=”ez-toc-section” id=”7-safe-and-customize-your-wordpress-login-internet-web-page”/>7. Safe and Customize Your wordpress Login Internet web page
Making improvements to your wordpress login internet web page boosts protection and creates a licensed experience. Get began by means of changing the default login URL and putting in redirects to prevent unauthorized get admission to. Use Login Redirect to create a custom designed URL and redirect consumers in line with their roles.
Next, customize the login internet web page to check your branding with emblems, colors, and styling. For individuals who’re using Final Dashboard, click on on Login Customizer to easily personalize your login internet web page. Most login customizations are simple to make use of and will also be merely reverted if sought after, so play with choices and notice what works for you.
To further protected your web page, combine a custom designed URL with additional measures like restricting login makes an strive and enforcing powerful passwords. The ones steps make sure that your wordpress admin remains each and every secure and helpful.
There are many additional plugins to find, harking back to WP Customized Admin Interface for admin interface tweaks and White Label CMS for branding enhancements.
While plugins are superb for sophisticated customization and branding, they could also be unnecessary for fundamental tweaks. For more practical needs, wordpress’s built-in apparatus and drag-and-drop capacity can streamline your dashboard without additional add-ons.
Streamlining Multi-Web site Keep an eye on with Divi Dash
Managing a few wordpress internet websites will also be time-consuming, with tasks like updating plugins, tracking potency, and protecting the entire thing organized. Divi Sprint simplifies this process with a centralized platform designed to streamline internet web page keep an eye on. For instance, in the event you occur to arrange ten client internet websites, you’ll be capable to apply all updates and serve as metrics from one place instead of logging into each internet web page in my opinion.
Why You Need Divi Dash for Multi-Web site Keep an eye on
Divi Dash is designed for freelancers, companies, and firms managing a couple of wordpress web sites, helping you streamline tasks and beef up efficiency. Proper right here’s how it works:
1. Save Time with Centralized Updates
Divi Dash helps you keep on best of wordpress updates. You’ll change plugins, matter issues, or core knowledge all over your entire wordpress web pages from a single dashboard, saving hours of work. You’ll even agenda updates and make allowance Auto-Updates for made up our minds on plugins or matter issues.
2. Follow All Your Web websites at a Glance
Divi Dash provides a real-time assessment of all of your wordpress group, tracking uptime, potency metrics, and pending updates. If a internet web page has out of date plugins or downtime, you’ll be notified immediately to give you time to act in short.
<span class=”ez-toc-section” id=”3-one-click-on-on-login-to-wordpress-dashboards”/>3. One-Click on on Login to wordpress Dashboards
Divi Dash simplifies gaining access to a few wordpress dashboards with its one-click login serve as. This removes the need to enter credentials for each internet web page which saves time and reduces trouble.
<img decoding=”async” loading=”lazy” class=”with-border aligncenter wp-image-273984 size-full” src=”https://wpmountain.com/wp-content/uploads/2025/01/one-click-wordpress-login.jpg” alt=”login to wordpress in one click” width=”1800″ height=”885″/>
4. Simplify Client Keep an eye on
Divi Dash helps companies and freelancers arrange a few client internet websites effectively. It signifies that you’ll prepare web pages, track potency, and ensure neatly timed updates—all from one platform. As an example, you’ll be capable to apply plugin updates and serve as for a client’s eCommerce internet web page, protecting it optimized with minimal effort.
<span class=”ez-toc-section” id=”why-make-a-choice-divi-dash-over-manual-wordpress-keep-an-eye-on”/>Why Make a choice Divi Dash Over Manual wordpress Keep an eye on?
The default wordpress dashboard is excellent for single web pages, on the other hand it’s not designed to keep an eye on a few internet websites. Divi Dash solves this by means of centralizing updates, potency tracking, and internet web page keep an eye on into one intuitive dashboard, saving you time and effort.
As a greater and additional organized method to arrange a few web pages, Divi Dash helps you focus on turning in results. Plus, it’s built-in free in conjunction with your Divi membership, making Divi an all-in-one solution for surroundings pleasant wordpress internet web page keep an eye on.
Get Began With Divi
Proper right here’s your step-by-step knowledge to putting in place Divi Sprint so that you’ll be capable to add internet websites and get began monitoring them.
<span class=”ez-toc-section” id=”faqs-on-customizing-wordpress-dashboard”/>FAQs on Customizing wordpress Dashboard
<span class=”ez-toc-section” id=”one-of-the-simplest-ways-to-customize-a-wordpress-dashboard-internet-web-page”/>One of the simplest ways to customize a wordpress dashboard internet web page?
To customize your wordpress dashboard, use built-in apparatus like Computer screen Possible choices to hide unused widgets or rearrange them. For sophisticated changes, plugins like Final Dashboard assist you to create custom designed widgets, reorganize menus, and even style your dashboard with custom designed colors and branding for a tailored experience.
<span class=”ez-toc-section” id=”whats-a-widget-in-wordpress“/>What’s a widget in wordpress?
A widget in wordpress is a tool or serve as that presentations wisdom or supplies capacity on your internet web page. Inside the dashboard, widgets provide rapid get admission to to crucial apparatus like task logs, updates, and seo insights, helping you place up your internet website effectively.
<span class=”ez-toc-section” id=”one-of-the-simplest-ways-to-prepare-a-wordpress-dashboard”/>One of the simplest ways to prepare a wordpress dashboard?
Organizing your wordpress dashboard is unassuming! Get began by means of dragging and dropping widgets to prioritize a very powerful ones. Use Computer screen Possible choices to hide unnecessary widgets. For additonal keep watch over, plugins like Final Dashboard assist you to streamline the sidebar menu, creating a cleaner and additional surroundings pleasant workspace
<span class=”ez-toc-section” id=”how-do-i-add-widgets-to-my-wordpress-dashboard”/>How do I add widgets to my wordpress dashboard?
Many plugins, harking back to seo apparatus, robotically add widgets throughout arrange. As a way to upload custom designed widgets, use Final Dashboard to create tailored possible choices, like rapid links or client instructions, in your dashboard
The put up 7 Simple wordpress Dashboard Customizations for website online Managers appeared first on Chic Topics Weblog.


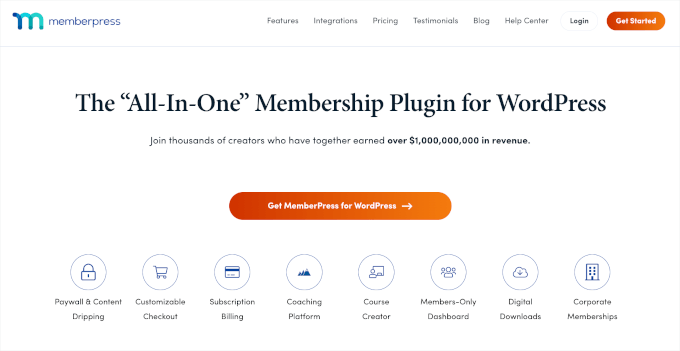
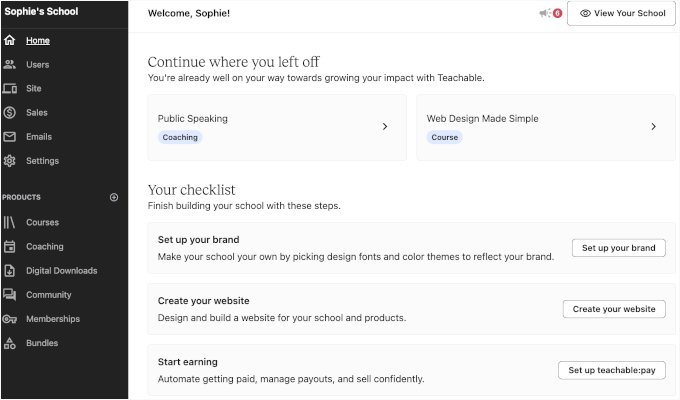
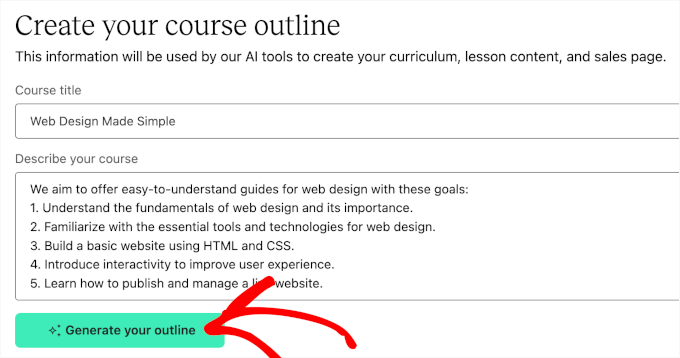
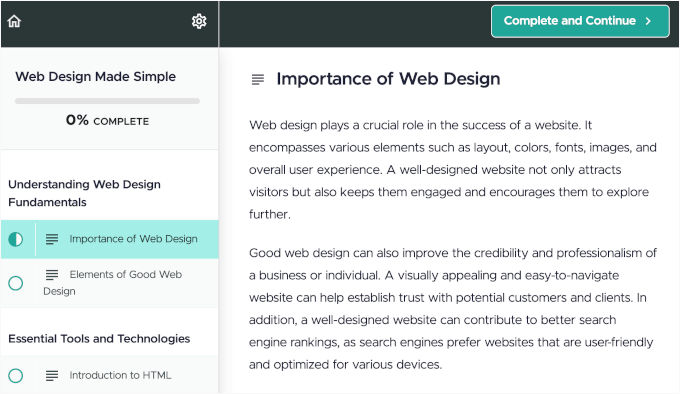

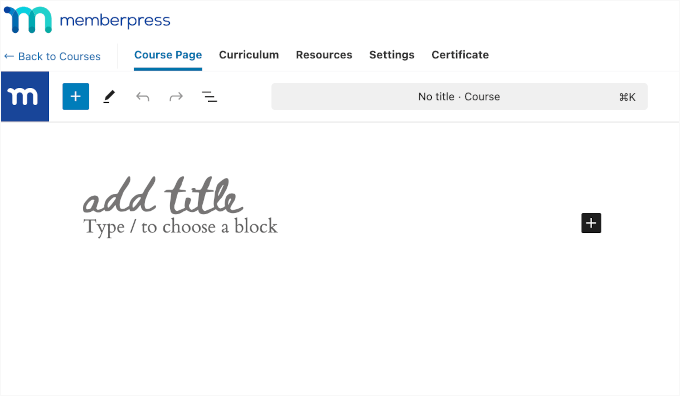
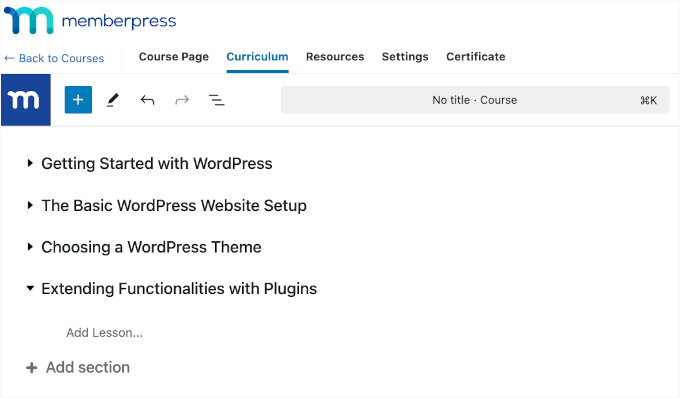
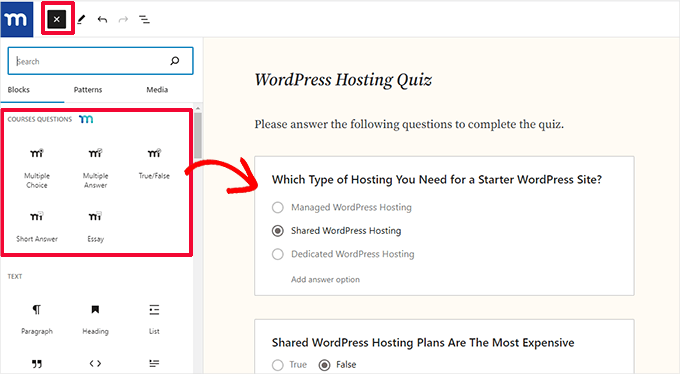
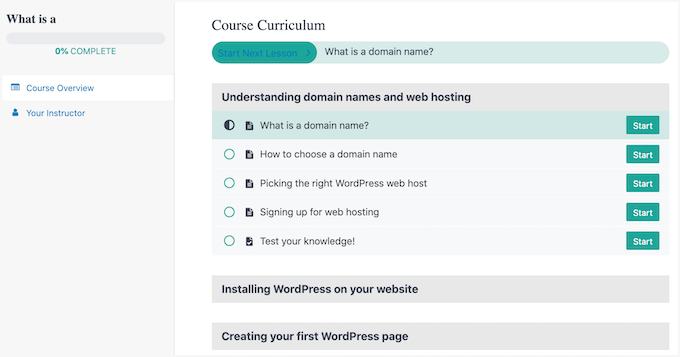
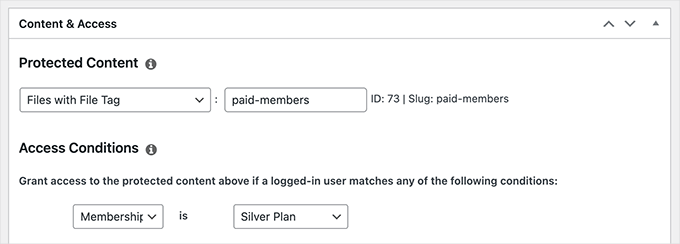
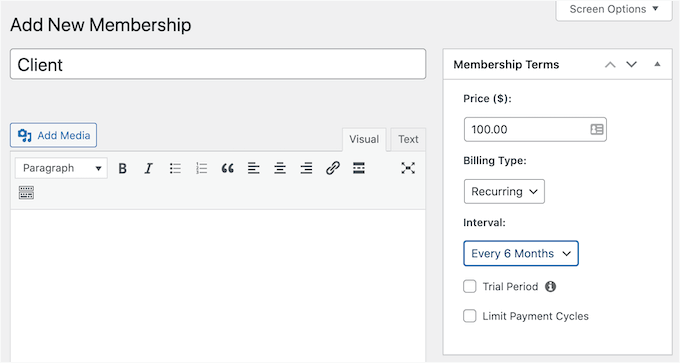
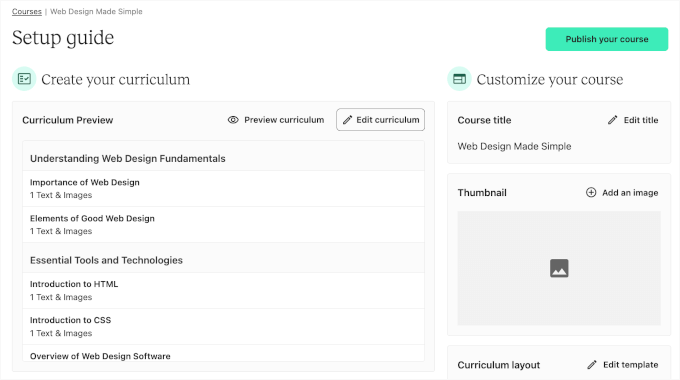
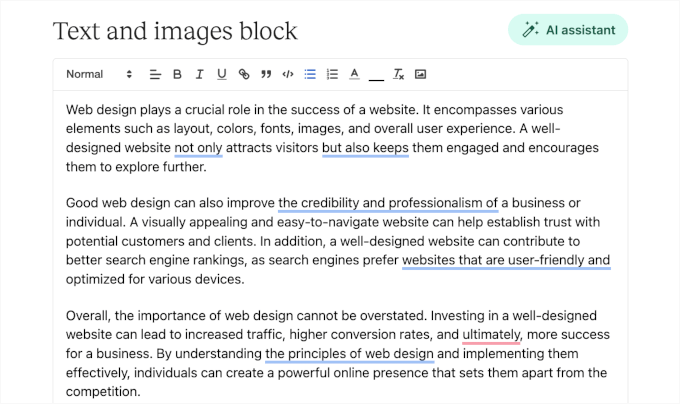
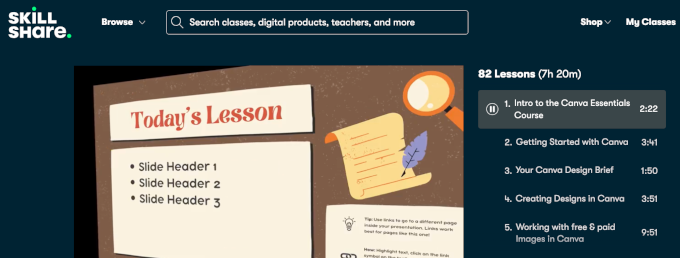
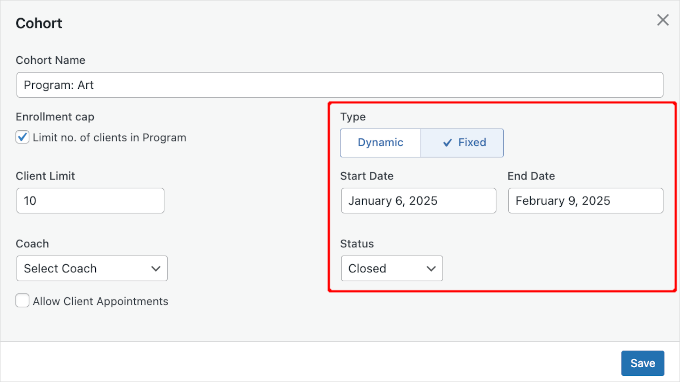
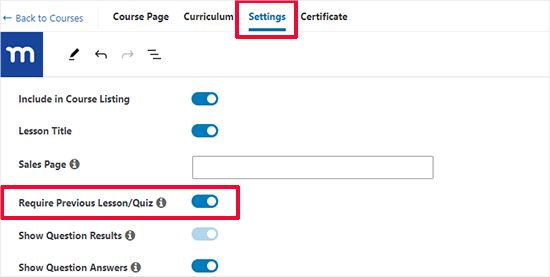
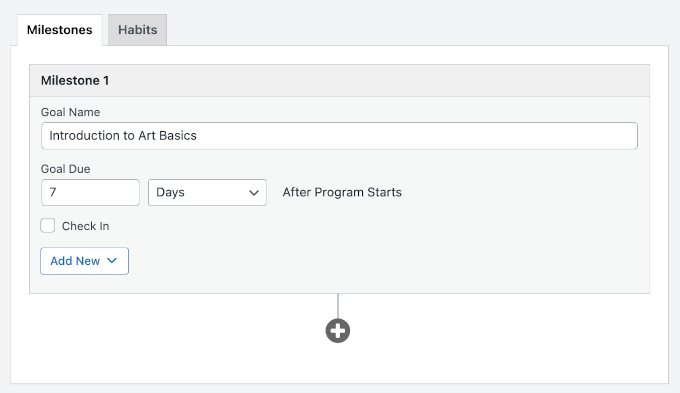
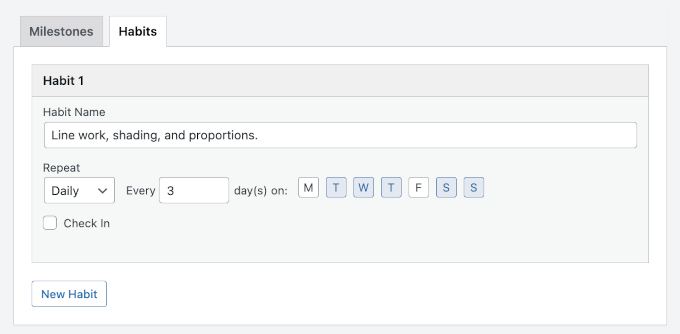
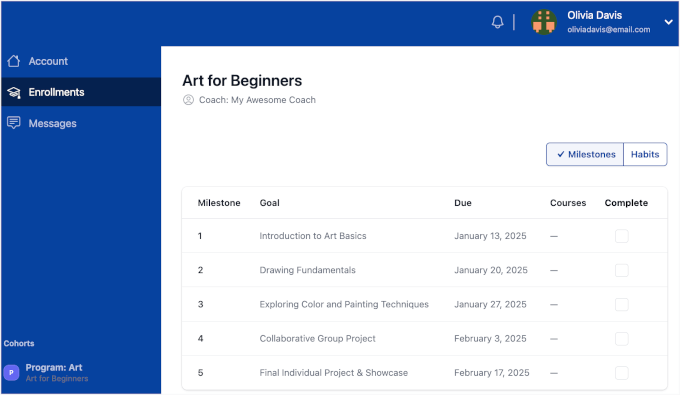


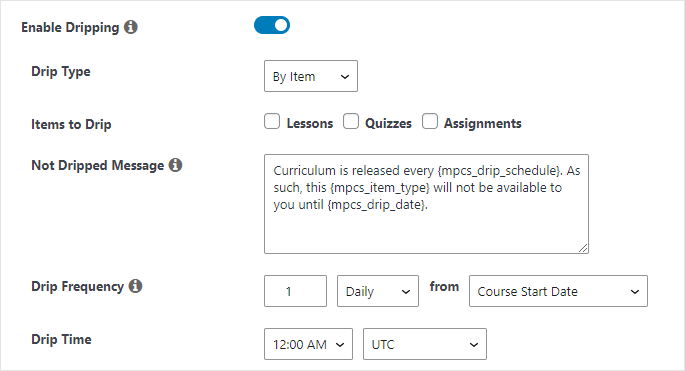
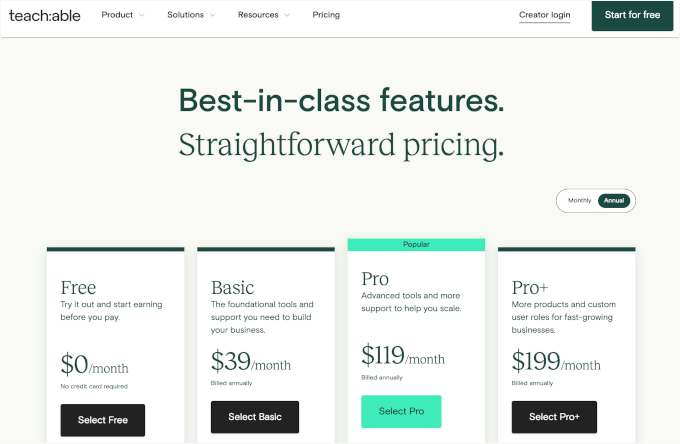


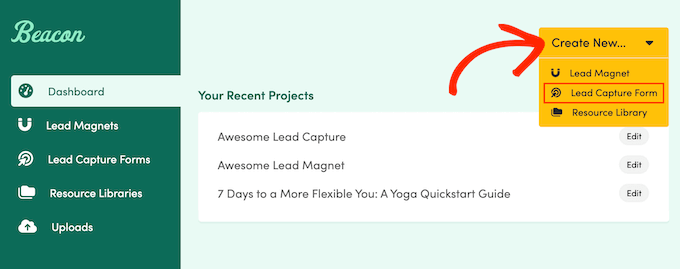
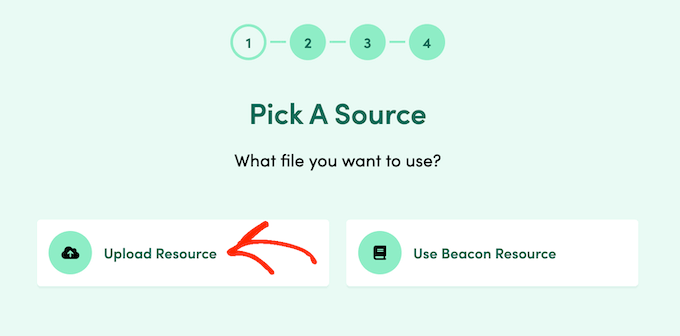


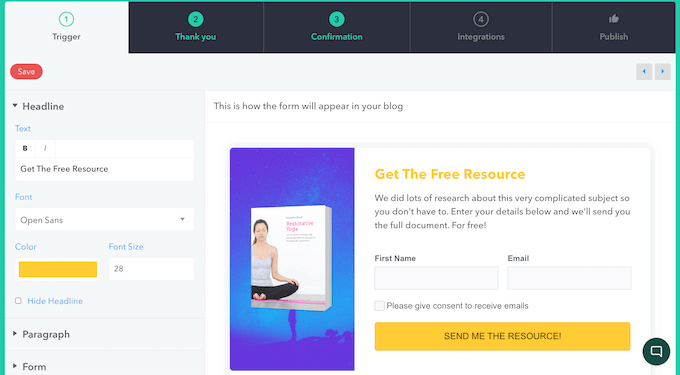
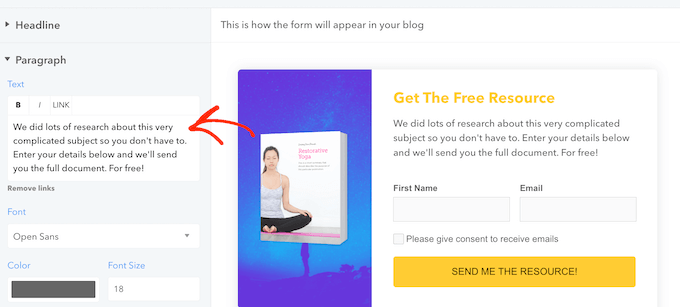
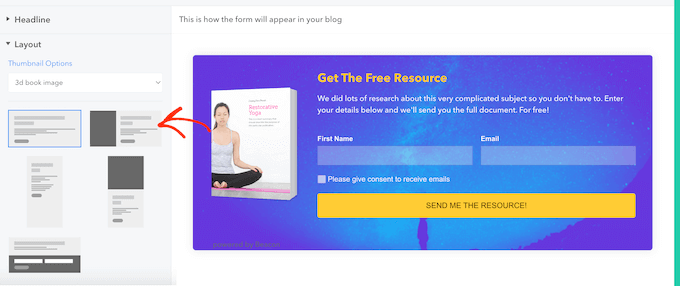
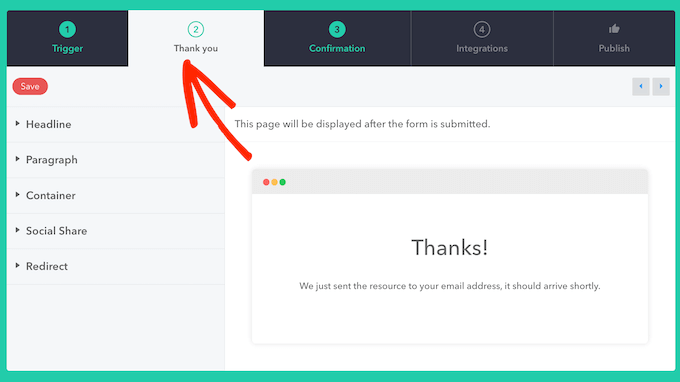
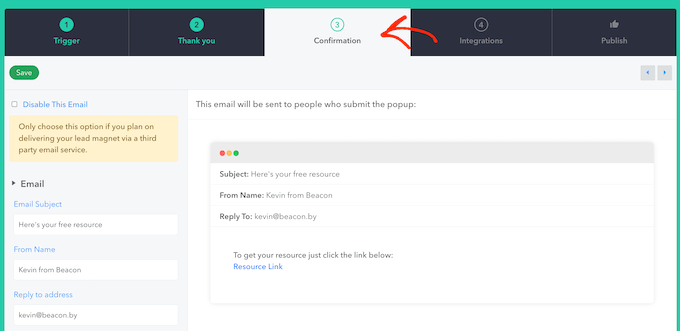
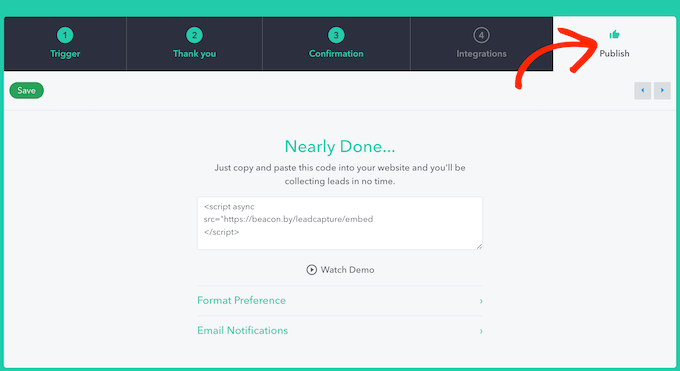
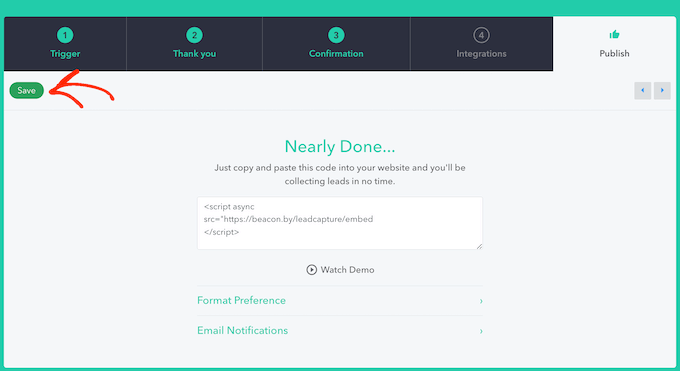
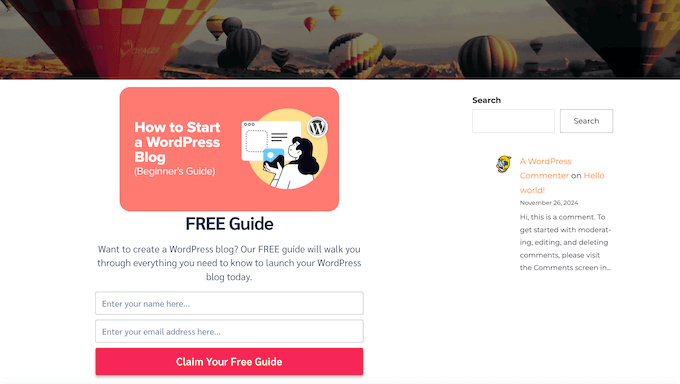
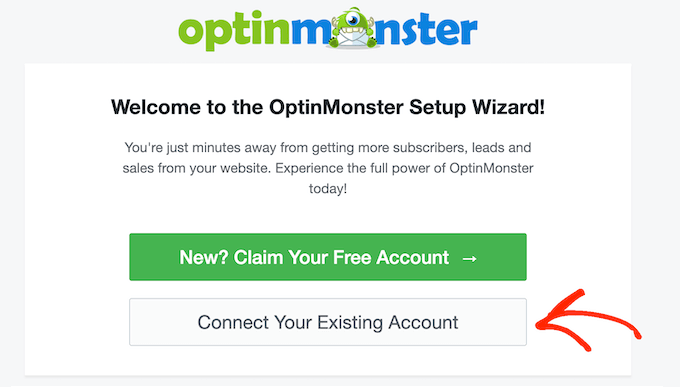
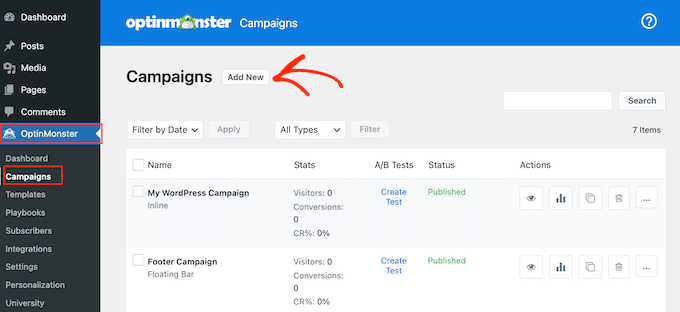
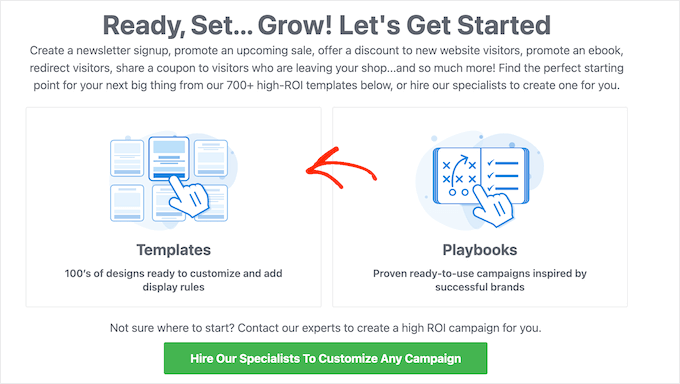
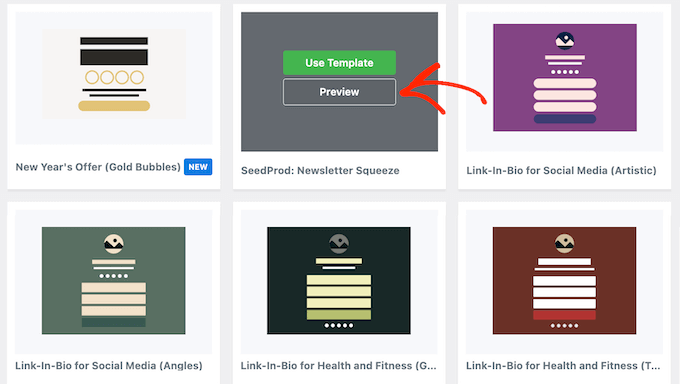
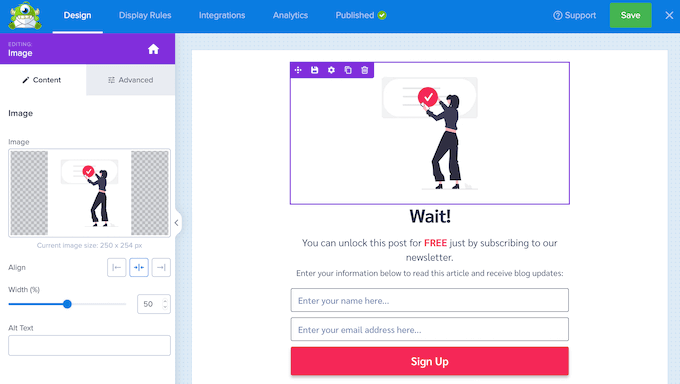
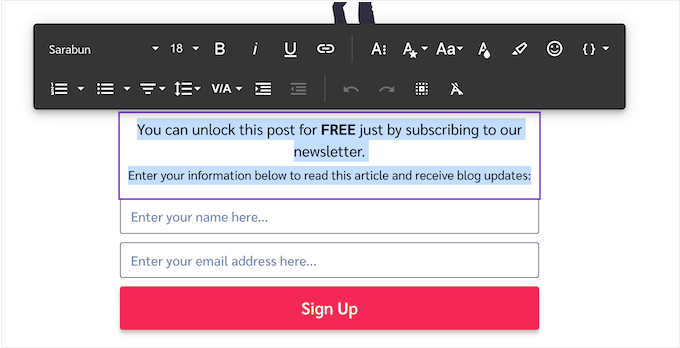

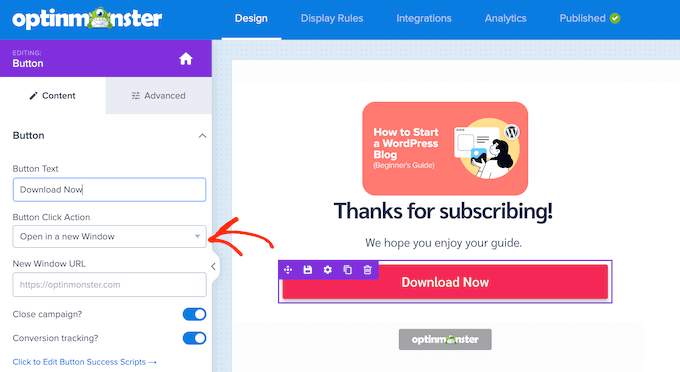
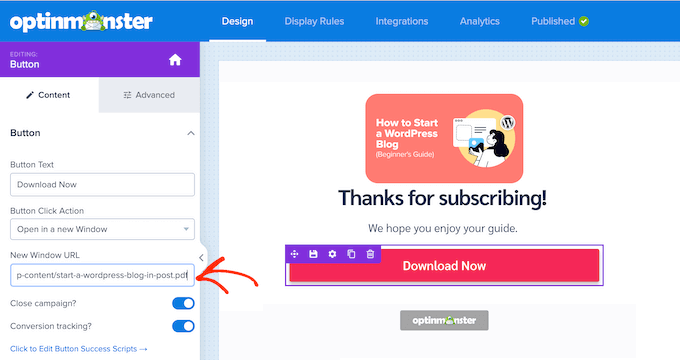
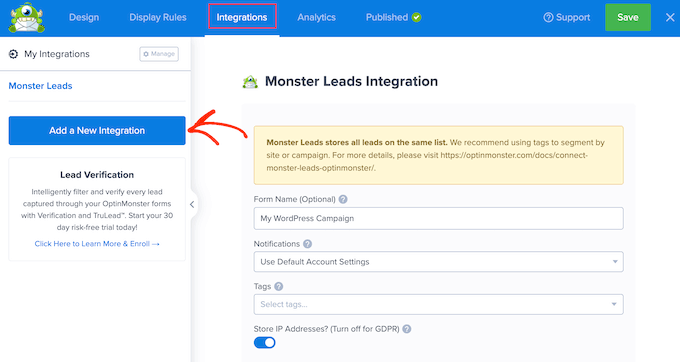
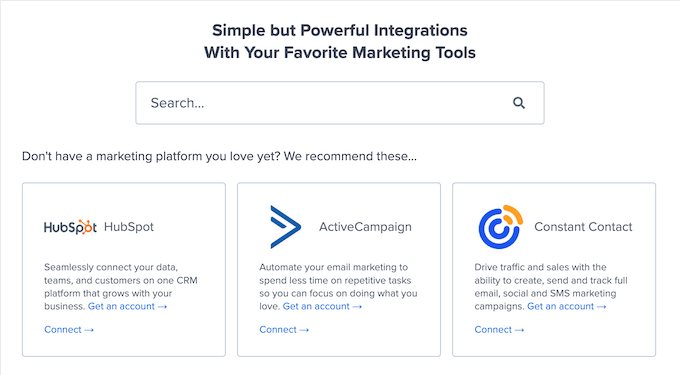
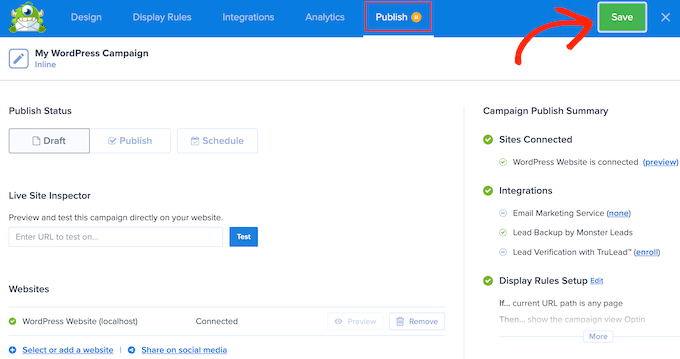


![Download Now: Free Marketing Plan Template [Get Your Copy]](https://worldproductreview.com/wp-content/uploads/2024/08/Come-puoi-usare-i-omaggi-per-ottimizzare-la-tua-era-150x59-1.png)