Posted on Leave a comment

Baking Ingredients – Get Grillin’ With The Perfect Pizza: A…

Why you simply must checkout baking ingredients and Grills

Grills, and more…

Grilling Gear for the Ultimate Pizza: From Beginner to Pro

Ready to take your pizza game to the next level? Grilling pizza offers a unique, smoky flavor and crispy crust that can’t be replicated in the oven. Here’s everything you need to know about setting up your grill for pizza perfection:

Choosing the Right Grill:

  • Gas or Charcoal: Both can work well for pizza, but consider your preferences. Gas grills offer precise temperature control, while charcoal grills deliver that classic smoky flavor.
  • Temperature Range: Look for a grill with a wide temperature range, so you can achieve the high heat needed for a crispy crust (around 500°F).

Essential Grilling Gear:

  • Pizza Stone or Steel: This will distribute heat evenly and help create a perfectly crisp crust.
  • Pizza Peel: Use this to easily slide your pizza onto and off the hot grill grates.
  • Grill Brush: Keep your grill grates clean and free of food particles for a smooth grilling experience.
  • Pizza Cutter: No pizza party is complete without a sharp pizza cutter for easy slicing.

Pre-heating is Key:

  • High Heat: Get your grill piping hot before adding the pizza. This ensures a quick cook time and a beautifully blistered crust.

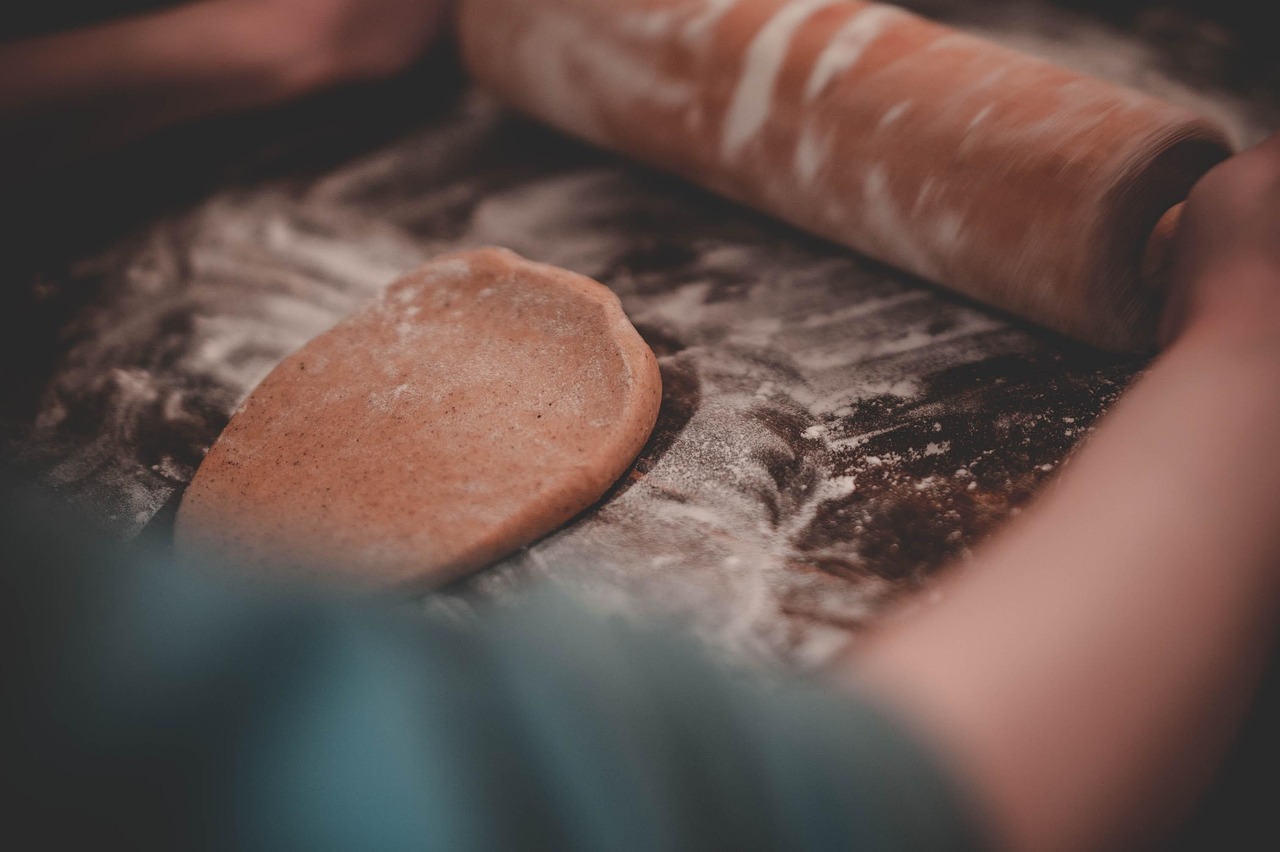
Pizza Dough Essentials:

  • Flour: The foundation of your pizza! Use a high-protein flour like bread flour for a chewy, resilient crust.
  • Yeast: Choose active dry yeast for a light and airy dough.
  • Water: Use warm water to activate the yeast and help the dough rise.

Get Grilling:

  • Evenly Spread Sauce & Toppings: Don’t overload the pizza with too much sauce or toppings, as this can make the crust soggy.
  • Cook Time: The pizza will cook relatively quickly, usually around 5-10 minutes, depending on your grill’s temperature and the thickness of the crust.
  • Check for Doneness: Look for a golden brown crust and melted cheese when your pizza is ready.

Enjoy! Savor the deliciousness of your homemade grilled pizza, complete with that irresistible smoky aroma.

Get Grillin’ with the Perfect Pizza: A Guide to Baking on Your BBQ

TL;DR: Want to make delicious pizza on your grill? This guide will teach you all about the ingredients and equipment needed to grill up some mouthwatering pies!

Why Grill Pizza?

Grilling pizza is an awesome way to enjoy a fun and flavorful meal with friends and family. It gives your pizza a smoky, crispy crust that you won’t find in an oven. Plus, it’s a great way to use your grill for more than just burgers and hot dogs!

Essential Ingredients for Pizza Perfection

The Dough

  • Flour: The foundation of your pizza! Use all-purpose flour for a classic crust.
  • Water: This hydrates the dough and helps it rise.
  • Yeast: This little guy is a magic ingredient that makes your dough rise and become fluffy.
  • Salt: Adds flavor and helps control the yeast.
  • Olive Oil: Gives the crust a nice flavor and helps it stay moist.

The Sauce

  • Tomato Paste: Gives your sauce a rich flavor.
  • Crushed Tomatoes: The main ingredient for a juicy, flavorful sauce.
  • Garlic: A must-have for a delicious sauce.
  • Oregano: Adds a classic Italian flavor.
  • Basil: Fresh basil is key for a truly amazing sauce!

The Cheese

  • Mozzarella: The go-to cheese for pizza! Its stretchy texture melts beautifully.
  • Provolone: Adds a sharp, nutty flavor.
  • Parmesan: A sprinkle of Parmesan gives your pizza that extra cheesy kick.

Grilling Gear for the Ultimate Pizza

  • Gas or Charcoal Grill: Choose a grill with a good temperature range, so you can get the heat you need for a perfect crust.
  • Pizza Stone: A pizza stone absorbs heat evenly, resulting in a crispy crust.
  • Pizza Peel: This tool helps you easily slide your pizza onto the grill and off again.
  • Grill Brush: Keeps your grill clean and ready for all your pizza-making adventures.

Tips for Grilling the Perfect Pizza

  1. Pre-heat your grill: Get your grill piping hot before putting the pizza on.
  2. Flour your pizza peel: This will prevent the dough from sticking.
  3. Don’t overcrowd the grill: Give each pizza enough space to cook evenly.
  4. Cook for a short time: Pizza cooks quickly on a hot grill. Keep an eye on it, and watch for the cheese to melt and bubble.
  5. Use a pizza cutter: A pizza cutter will help you slice your pizza with ease.

Pizza Inspiration: Aberdeen Style!

Aberdeen, a city in Scotland, is known for its delicious food. Try making a pizza with local Scottish ingredients like smoked salmon, haggis, or even some delicious Scottish cheeses!

Summary

Grilling pizza is a fun and flavorful way to enjoy a delicious meal. With the right ingredients, equipment, and a few tips, you can grill up some amazing pizzas in your own backyard.
So, fire up your grill, gather your ingredients, and get ready to create some pizza magic!

Want to learn more about the signs of the zodiac? Check out Ecliptic Signs for a fun and insightful look at astrology!


More on baking ingredients

Posted on Leave a comment

Ball Accessories ~ Unleash Your Inner Bookworm: Building The Ultimate…

Why Idaho Falls for ball accessories?

Found it! ball accessories in Idaho Falls

A Bookish Paradise: Where Stories Come Alive

Imagine stepping into a room where your passions are on display, not just in art or photos, but in the very books that have shaped you. A bookshelf isn’t just a storage space, it’s a vibrant tapestry of your personality. It reflects your adventures, your dreams, and the incredible journeys you’ve taken through the pages of each book.

Your Bookshelf Oasis: A haven for your imagination! Every volume, a portal to a different world, beckoning you to explore its secrets. From spine-tingling mysteries to heartwarming tales, your bookshelf becomes a personal library of possibilities, ready to be opened and devoured.

Creating Your Unique Bookish Sanctuary: Imagine it – a bookshelf that speaks to your soul! Find the perfect shelf, add your favorite quirky touches, and let the magic of Idaho Falls inspire you. Picture yourself by the Snake River Canyon, the rushing water mirroring the flow of your thoughts as you write a poem. Or, nestled under a tree in the park, your favorite novel unfolding in your hands.

Let your bookshelf be more than just a collection – let it be a celebration of your love for stories!

Unleash Your Inner Bookworm: Building the Ultimate Bookshelf Haven

TL;DR – Tired of your books piling up? This article will show you how to organize your books with style using a cool bookshelf and fun accessories. We’ll even talk about the magic of Idaho Falls and how it inspires book lovers.

Bookshelves: The Foundation of Your Reading Oasis

Imagine walking into a room with a stunning bookshelf filled with your favorite books, each one calling out to you with an adventure, a mystery, or a world waiting to be explored. That’s the power of a bookshelf! It’s not just a place to store books, it’s a window into your personality, a reflection of your passions, and a reminder of the amazing journeys you’ve taken through the pages of a book.

But how do you create that perfect bookshelf haven?

First, consider the size and style of your bookshelf. Do you need a large, freestanding bookcase or a smaller, wall-mounted shelf? Do you want a modern, minimalist design or something more rustic and traditional? There are so many choices out there, it’s exciting!

Adding Personality with Book Accessories

Once you have your bookshelf picked out, it’s time to have some fun! Book accessories are like the sprinkles on a cupcake – they add that extra something special to your reading space.

Here are some ideas to get you started:

  • Bookends: These handy helpers keep your books upright and add a touch of whimsy. Choose bookends shaped like your favorite animals, characters, or objects.
  • Book lights: These handy gadgets let you read comfortably in low light. Choose a lamp with a flexible arm for easy reading in any position.
  • Decorative boxes: Use these to store your favorite pens, bookmarks, or even small treasures from your travels.

Idaho Falls: A Bookworm’s Paradise

Idaho Falls is a place where nature and literature meet. Imagine exploring the stunning Snake River Canyon, its beauty inspiring you to write a poem, or enjoying a picnic in the park, reading your favorite novel. Idaho Falls is a city brimming with inspiration, and it’s no wonder that so many book lovers call it home.

**If you’re looking for a place to connect with other bookworms, Idaho Falls has a vibrant literary community. **

  • Visit the Idaho Falls Public Library, a hub for book lovers of all ages.
  • Check out the Idaho Falls Book Club, a group of passionate readers who meet regularly to discuss their favorite books.

Bringing it All Together: Creating Your Unique Bookshelf Oasis

From the perfect bookshelf to the right accessories, and the inspiration of Idaho Falls, you have everything you need to build a reading space you’ll love. Remember, it’s all about creating a place where you feel comfortable and inspired to explore the worlds waiting for you in the pages of your favorite books. Don’t forget to check out Ecliptic Signs, a website that can help you find the perfect bookends, lights, and more to make your bookshelf truly unique!

So, what are you waiting for? Start building your bookshelf haven today!


More on ball accessories

Posted on Leave a comment

Stuffedbear – Cozy Up With Your Stuffed Bear And Waffles!…

stuffedbear in Jersey City

Waffle Makers, stuffedbear, and more…

Make Your Stuffed Bear Feel Like Royalty: Fun Activities to Bond with Your Best Buddy 🧸

[City, State] – [Date] – Calling all teddy bear lovers! Is your furry friend feeling a little neglected? It’s time to show your stuffed bear some love with these fun and engaging activities.

Dress to Impress: Give your bear a glamorous makeover with a stylish outfit! From tiny hats and scarves to adorable dresses, let your imagination run wild.

A Literary Retreat: Create a cozy reading nook with a comfy chair and your favorite books. Settle in for some enchanting storytelling with your furry companion.

Picnic Perfection: Spread out a blanket on the floor and enjoy a pretend picnic with your bear. Pack a basket full of delicious treats and engage in delightful conversation.

Waffle Wonderland: Indulge your bear with a yummy waffle breakfast! Choose from a variety of sweet and savory toppings to create a culinary masterpiece.

Sweet Toppings: Syrup, whipped cream, fruit, chocolate chips, sprinkles
Savory Toppings: Butter, cheese, bacon, sausage, vegetables

Create a Cozy Haven: Make your bear feel right at home by building a cozy play space. Fill it with plush blankets, comfy cushions, and their favorite toys.

Remember, a stuffed bear is more than just a toy – it’s a loyal companion who deserves to be cherished. So, get creative and make your furry friend feel like royalty!

Cozy Up With Your Stuffed Bear and Waffles! 🥞🧸

TL;DR: This article is about the fun of having a stuffed bear and making waffles. We’ll talk about how to make a yummy waffle breakfast, how to decorate your stuffed bear, and how to create a cozy space for playing with your bear.

The Perfect Waffle Breakfast 🧇

Waffles are a delicious breakfast treat that everyone loves! They’re easy to make and can be customized with all kinds of toppings. Here’s a simple recipe:

Ingredients:

  • 1 cup all-purpose flour
  • 1 teaspoon baking powder
  • 1/2 teaspoon salt
  • 1 tablespoon sugar
  • 1 egg
  • 1 cup milk
  • 1/4 cup melted butter

Instructions:

  1. Mix it up: In a large bowl, whisk together the flour, baking powder, salt, and sugar.
  2. Add the wet stuff: In a separate bowl, whisk together the egg, milk, and melted butter.
  3. Combine: Pour the wet ingredients into the dry ingredients and stir until just combined. Don’t overmix!
  4. Cook it up: Heat your waffle iron according to the manufacturer’s instructions. Pour batter onto the hot waffle iron and cook until golden brown.

Waffle Toppings:

  • Sweet: Syrup, whipped cream, fruit, chocolate chips, sprinkles
  • Savory: Butter, cheese, bacon, sausage, vegetables

Make Your Bear Cozy 🧸

A stuffed bear is a great friend to have. You can play with your bear, take it on adventures, and even cuddle up with it at night. Here are some fun ways to make your bear feel special:

  • Dress up your bear: Put a cute outfit on your bear like a hat, scarf, or even a tiny dress.
  • Give it a new look: Use fabric markers or fabric paint to give your bear a new look!
  • Make it a friend: Create a whole family of stuffed animals for your bear to play with!

The Perfect Play Space

A cozy spot is a great place to play with your stuffed bear. Here are some ideas:

  • A fort: Use blankets, pillows, and chairs to build a comfy fort for your bear.
  • A reading nook: Make a cozy reading nook with a comfy chair and a pile of your favorite books.
  • A picnic area: Set up a picnic blanket on the floor and have a pretend picnic with your bear.

Jersey City Fun 🏙️

Jersey City is a fun place to visit with your stuffed bear! You can take your bear for a walk in the park, visit the Liberty State Park, or enjoy the waterfront views. There are also lots of great restaurants in Jersey City where you can share a delicious meal with your bear!

Want more ideas for fun with stuffed bears? Check out Ecliptic Signs!

Summary

This article was all about having fun with stuffed bears and waffles. We learned how to make delicious waffles with different toppings. We also explored ways to make your stuffed bear feel special with dressing it up, decorating it, and creating a cozy play space. Finally, we talked about the fun activities you can do with your stuffed bear in Jersey City.


More on stuffedbear

Posted on Leave a comment

Drives / Scooping Up Summer Fun: Your Guide To Making…

Why Portland for Drives?

Ice Cream Makers, Drives, and more…

Portland’s Ice Cream Paradise: From Quirky Shops to Homemade Delights

Portland, Oregon, is a city that knows its ice cream. From inventive, funky shops serving up crazy concoctions to classic parlors offering timeless favorites, there’s a scoop for every taste bud.

Dive into Portland’s Ice Cream Scene:

  • Explore the Quirky: Discover unique flavors and innovative creations at Portland’s eclectic ice cream shops.
  • Embrace the Classics: Indulge in the timeless charm of traditional ice cream parlors.

Bring the Ice Cream Home:

Hands-Free Fun with Electric Ice Cream Makers: Let the machine do the work while you create your dream flavors.

Embrace the Nostalgia of Hand-Cranked Ice Cream Makers: On a hot summer day, there’s nothing quite like the joy of churning your own delicious ice cream. Picture yourself, cranking the handle, enjoying the satisfying sound of the churn, and the anticipation of the creamy reward.

Get ready to cool off and experience Portland’s ice cream magic!

Scooping Up Summer Fun: Your Guide to Making Ice Cream at Home!

TL;DR – Too Long; Didn’t Read
Want to make delicious ice cream at home? This article is your guide! We’ll cover the basics of ice cream makers, from manual hand-cranked models to automatic electric ones. We’ll also explore some fun facts about Portland, Oregon, a city known for its ice cream scene. Get ready to scoop up some fun!

The Scoop on Ice Cream Makers

Have you ever dreamed of making your own ice cream? It’s easier than you think, thanks to ice cream makers! These handy appliances come in a few different types, each with its own set of pros and cons.

Hand-Cranked Ice Cream Makers

Imagine yourself on a hot summer day, cranking a handle to churn up delicious ice cream. That’s what hand-cranked ice cream makers are all about! They’re simple to use, require no electricity, and can be a fun activity for the whole family. Plus, you get a great workout! But they do take some effort and time.

Electric Ice Cream Makers

If you’re looking for a more hands-off approach, electric ice cream makers are the way to go. These machines do the churning for you, letting you relax while your ice cream gets made. Some electric models even have built-in timers and automatic shut-off features, so you can be sure your ice cream won’t over-churn. However, they do require electricity to operate.

From Portland’s Ice Cream Scene to Your Kitchen

Portland, Oregon, is a city famous for its vibrant food scene, including its love of ice cream! From quirky ice cream shops with unique flavors to classic ice cream parlors, there’s something for everyone in Portland’s ice cream world. So, why not bring some of that Portland ice cream magic to your own kitchen?

Crafting Your Frozen Delights

No matter which type of ice cream maker you choose, you’ll be able to create a wide range of delicious flavors. From classic vanilla to exotic fruit sorbets, the possibilities are endless! You can even experiment with different toppings and mix-ins, like chocolate chips, nuts, or even cookies.

Tips for Success

Here are a few tips to help you make the best ice cream at home:

  • Use fresh, high-quality ingredients. The better the ingredients, the better your ice cream will taste.
  • Chill your ingredients before churning. This will help your ice cream freeze faster and prevent ice crystals from forming.
  • Don’t over-churn your ice cream. Over-churning can make your ice cream icy and grainy.
  • Let your ice cream harden in the freezer before serving. This will ensure that it’s nice and firm.

Expanding Your Flavor Horizons

Once you’ve mastered the basics, you can get creative with your ice cream making. Try adding different flavorings, like coffee, chocolate, or peppermint. You can also use different types of milk, like almond milk or coconut milk, to create dairy-free ice cream. And don’t forget to experiment with toppings! Fruit, nuts, sauces, and sprinkles are all delicious options.

Summary: Your Ice Cream Journey Starts Here!

Now that you’ve got the scoop on ice cream makers, it’s time to get creative! Choose your favorite type of ice cream maker, gather your ingredients, and get ready to enjoy some homemade frozen treats. Whether you’re craving classic vanilla or something more adventurous, making your own ice cream is a fun and rewarding experience. Who knows, maybe you’ll even be the next Portland ice cream legend! For inspiration and unique designs, check out Ecliptic Signs.


More on Drives

Posted on Leave a comment

Baking Brands – Ready To Bake And Print Like A…

baking brands and Printers & Office Electronics explained

Baking brands, etc…

Unleash Your Inner Baker & Printer: Get Equipped!

Get ready to create delicious treats and stunning prints with the province’s vibrant retail scene!

Baking Bliss Awaits:

You’ll find everything you need to whip up culinary masterpieces, from basic tools to state-of-the-art equipment.

Essential Baking Equipment:

No matter what you bake, these are the tools that will make your kitchen a haven for deliciousness:

  • Measuring Cups and Spoons: Precision is key to baking success! Get the perfect measurements every time.
  • [Add other essential baking tools here, e.g., mixing bowls, whisks, spatulas, etc.]

Print Your Way to Success:

For printing projects big or small, the province’s retailers offer a wide range of printers and accessories to meet your needs.

  • Top Brands: Find high-quality products from trusted brands like Cuisinart, KitchenAid, Canon, and Epson.
  • HP: A popular choice for home and business, HP offers a diverse selection of printers with features and prices to suit every need.
  • Essential Accessories: Don’t forget the crucial elements like measuring cups, ink cartridges, and paper.

Ready to get started? Head to your local retailers and browse the amazing selection of baking and printing equipment. You’ll be amazed at what you can achieve!

Ready to Bake and Print Like a Pro? Get the Gear You Need!

TL;DR: This article is all about finding the right baking and printing equipment for your needs! We’ll cover top brands, essential tools, and even mention some fun facts about British Columbia.

Baking: Sweet Success Starts with the Right Tools

Want to bake delicious cookies, cakes, and bread like a pro? You need the right tools! Here are some of the best brands to look for:

  • Cuisinart: This brand makes fantastic stand mixers that are powerful and easy to use. They also have blenders, food processors, and other kitchen appliances.
  • KitchenAid: You can’t talk about baking without mentioning KitchenAid! Their stand mixers are iconic, and they come in a wide range of colors.
  • Wilton: This brand is known for its cake decorating supplies, like frosting tips, sprinkles, and molds. They also make excellent baking pans and cookie cutters.
  • Nordic Ware: If you love making bundt cakes, this is the brand for you! They make beautiful and durable bundt pans in a variety of shapes.

Essential Baking Equipment

No matter what you bake, there are some essential tools you need to have in your kitchen:

  • Measuring cups and spoons: Accurate measurements are key to baking success.
  • Mixing bowls: You’ll need different sizes for mixing batter, frosting, and storing ingredients.
  • Whisk: This tool is perfect for mixing dry ingredients and incorporating air into batter.
  • Spatula: A spatula is essential for scraping batter from bowls and frosting cakes.
  • Baking sheets: These are used for baking cookies, pastries, and other treats.

Printing: Unleash Your Creativity!

Printing isn’t just for homework anymore! You can print out photos, create flyers, design your own greeting cards, and even print 3D objects.

Top Printer Brands

  • Canon: This brand offers a wide range of printers, from affordable models for home use to professional-grade printers for businesses.
  • Epson: Known for their high-quality inkjets, Epson printers are great for photo printing and document printing.
  • HP: This is a popular choice for home and business users, offering a wide range of printers with different features and price points.
  • Brother: Brother printers are known for their reliability and durability. They are a great option for users who need a printer that can handle heavy use.

Essential Printing Accessories

  • Ink cartridges: Don’t run out of ink in the middle of a big printing project!
  • Paper: You can find paper in different sizes, weights, and finishes to suit your printing needs.
  • Scanning software: You can use scanning software to convert physical documents into digital files.

British Columbia: More Than Just Beautiful Scenery

Did you know that British Columbia is a great place to find high-quality baking and printing supplies? The province has a thriving retail scene, and you can find all the equipment you need to get your baking and printing projects going.

Don’t forget to check out Ecliptic Signs, a company based in British Columbia, for all your sign-making needs! They have a wide selection of signs, banners, and other printed materials. Click here to learn more about their products and services.

Summary: Gear Up for Baking and Printing Success

Whether you’re a baking enthusiast or a printing pro, having the right equipment makes all the difference. From stand mixers to 3D printers, there’s a wide range of tools available to help you create your best work.

Remember to consider top brands like Cuisinart, KitchenAid, Canon, and Epson, and don’t forget about the essential accessories like measuring cups, ink cartridges, and paper. And if you’re in British Columbia, be sure to check out the province’s diverse retail scene and explore companies like Ecliptic Signs for your sign-making needs! With the right equipment and a little creativity, you can achieve baking and printing success!


More on baking brands

Posted on Leave a comment

Waffle Makers » Waffle Up Your Breakfast Game: The Ultimate…

You’ll love Waffle Makers and Utensils & Tools in Winnipeg

Utensils & Tools, and more

Indulge in a Symphony of Waffle Delights

Awaken your taste buds to the tantalizing possibilities of waffles adorned with a captivating symphony of toppings. Savor the delectable sweetness of cascading maple syrup, vibrant fruit, airy whipped cream, decadent chocolate chips, and playful sprinkles. For a savory escapade, embark on a culinary journey with the rich creaminess of cheese, the smoky crunch of bacon, the hearty warmth of sausage, crisp vegetables, and fluffy eggs.

Transform Your Waffle Dreams into Reality

Unleash your creativity with our waffle transformer, the humble waffle maker. Conjure up delectable waffle sandwiches that envelop your favorite fillings, creating a culinary masterpiece in every bite. Dip into the world of waffle sticks with our wizardry of a waffle stick maker, perfect for delighting parties or satisfying dipping whims.

Master Your Waffle Art

Elevate your waffle artistry with our arsenal of must-have tools. At the helm lies the indispensable waffle iron, your maestro in the creation of fluffy, golden discs. Unveil your secret weapons: waffle tools that endow you with the power to shape and style your waffles with precision and panache.

Winnipeg: A Waffle Haven

Amidst the wintry embrace of Winnipeg, find solace in the warmth of a freshly made waffle. This culinary haven provides the ideal ambiance to savor this beloved breakfast staple, where the aroma of waffles mingles with the gentle caress of a cozy morning.

Waffle Up Your Breakfast Game: The Ultimate Guide to Waffle Makers & Tools

TL;DR: Waffles are awesome! This article will guide you through the world of waffle makers and tools, from choosing the right machine to whipping up delicious toppings. Get ready to make amazing waffles, even if you’re in Winnipeg!

Waffle Makers: The Heart of Your Breakfast

Let’s face it, waffles are way more fun than boring toast. And the secret to amazing waffles starts with your waffle maker. But with so many options out there, how do you choose the right one?

Types of Waffle Makers:

  • Round Waffles: The classic, perfect for traditional Belgian waffles.
  • Square Waffles: Great for making thicker waffles or for cutting into fun shapes.
  • Mini Waffles: Ideal for breakfast bites or for making waffle pops.
  • Heart-Shaped or Other Shapes: Add a little fun to your breakfast with creative designs.

Features to Consider:

  • Non-Stick Coating: Makes cleaning a breeze.
  • Temperature Control: Allows you to adjust the browning level of your waffles.
  • Power: More power means faster cooking.
  • Size: Think about how many people you usually cook for.

Waffle Tools: Your Secret Weapons

Once you’ve got your waffle maker, you’ll need a few tools to make the most of it. These essential items will take your waffle game to the next level:

Must-Have Tools:

  • Waffle Iron: This is your main tool for making delicious waffles.
  • Waffle Spatula: A must-have for lifting waffles out of the maker without breaking them.
  • Waffle Batter Dispenser: Helps you make evenly distributed batter for perfect waffles.
  • Measuring Cups and Spoons: Essential for accurately measuring ingredients.

Optional Tools:

  • Waffle Maker Brush: For cleaning your waffle maker quickly and easily.
  • Waffle Cone Maker: For creating waffle cones for ice cream or other treats.
  • Waffle Stick Maker: Great for making waffle sticks for dipping or for making fun waffle pops.

Waffles Beyond the Basics:

Don’t just stop at plain waffles! Experiment with different toppings, fillings, and even waffle recipes.

Delicious Waffle Toppings:

  • Sweet: Maple syrup, fruit, whipped cream, chocolate chips, sprinkles
  • Savory: Cheese, bacon, sausage, vegetables, eggs

Creative Waffle Ideas:

  • Waffle Sandwiches: Use your waffle maker to create delicious sandwich bread!
  • Waffle Pops: Make waffle sticks and dip them in melted chocolate or frosting.
  • Waffle Cakes: Use waffle batter to make small cakes that are perfect for parties.

Waffle Making in Winnipeg

Winnipeg, known for its chilly winters, is the perfect place to cozy up with a warm waffle breakfast. Whether you’re enjoying a classic waffle with maple syrup or a fun waffle creation, you’re sure to be satisfied.

Summary:

Waffles are a fun and delicious breakfast option. Choosing the right waffle maker and tools can help you make perfect waffles every time. Don’t be afraid to experiment with different toppings and recipes to find your perfect waffle combination. And remember, even in Winnipeg, a warm waffle can brighten your day!

Learn more about the signs and symbols that shape our lives! https://eclipticsigns.com/


More on Waffle Makers

Posted on Leave a comment

Baking Tips: Get Your Bake On: Delicious Tips For Baking…

Why you simply must checkout baking tips in Georgia

Subwoofers, baking tips, and more

Headline: Unleash Your Inner Baker: Master the Art with Pro-Level Tips

Introduction:

Step into the sweet-scented world of baking and embark on a delectable journey where every morsel is a masterpiece. Whether you’re a seasoned professional or an aspiring novice, this comprehensive guide will equip you with the secrets to becoming a baking extraordinaire.

Essential Baking Hacks:

1. Measuring with Precision:

As the adage goes, “Measure twice, bake once.” Use accurate measuring cups and spoons to ensure that every ingredient is incorporated in the perfect proportion. Avoid eyeballing measurements, as even a slight deviation can alter the outcome of your baked goods.

2. Preheat to Perfection:

A preheated oven is crucial for creating an evenly baked masterpiece. Allow your oven to reach the desired temperature before placing your creations inside. This ensures that your baked goods rise properly and develop a golden-brown exterior.

3. Decoding the Doneness Enigma:

Mastering the art of determining when a cake is perfectly baked is an essential skill. Arm yourself with the following techniques:

4. The Toothpick Test: Insert a toothpick into the center. If it emerges clean, your cake is ready.

5. The Springback Test: Gently press the top of the cake. If it springs back, it’s done.

6. Unleash Your Culinary Creativity:

Break free from traditional flavors and experiment with diverse ingredients. Infuse your sweet treats with the aromatic essence of herbs, the tangy zest of citrus, or the decadent richness of chocolate. Combine unexpected flavors to create unique and delectable masterpieces.

7. Elevate Your Baking Experience:

– Invest in Quality Tools: Upgrade to sturdy spatulas, precise piping nozzles, and high-quality baking dishes.

– Enhance Your Abilities: Attend baking workshops, read cookbooks, and seek guidance from experienced bakers to expand your culinary knowledge and techniques.

– Master the Art of Timing: Baking is an exercise in patience. Allow ample time for each step, from preparing the batter and baking to cooling and decorating, to ensure optimal results.

Get Your Bake On: Delicious Tips for Baking Like a Pro

TL;DR – Too Long; Didn’t Read: This article has tips for baking like a pro, including measuring ingredients, using the right oven temperature, and knowing how to tell when a cake is done. It also talks about how subwoofers can improve your listening experience for music like the tunes you might listen to while baking.

Want to bake a cake that’s so good, it’s a masterpiece?

You’re in the right place! Baking is a fun and rewarding activity, but it can seem a little tricky at first. Don’t worry, with a few simple tips, you can be a baking star in no time.

Measuring Up

Let’s start with the basics. Measuring ingredients is key to getting your recipe right. For dry ingredients, like flour and sugar, use a measuring cup and level it off with a straight edge. For wet ingredients, like milk and oil, use a liquid measuring cup and place it on a flat surface to get an accurate reading.

Temperature is Key

Once you’ve measured your ingredients, it’s time to get baking. Make sure your oven is preheated to the right temperature. A thermometer is a great tool for checking if your oven is actually at the temperature you want.

Knowing When It’s Done

Each recipe is different, but here are some general tips for telling if your cake is ready:

  • The toothpick test: Stick a toothpick into the center of your cake. If it comes out clean, it’s done!
  • The bounce test: Gently press the center of your cake. It should spring back slightly.

Let It Cool

Once your cake is out of the oven, let it cool on a wire rack. This helps it cool evenly and prevents it from getting soggy.

Subwoofers and Sweet Sounds

While you’re baking, you might want to play some tunes. Subwoofers can take your listening experience to the next level, adding a deep, powerful bass that can make your favorite songs even more enjoyable. Think of it like the icing on the cake!

Sweeten Up Your Music

If you’re looking for a great place to get a subwoofer to enhance your music listening experience, check out Ecliptic Signs. They have a wide selection of subwoofers to choose from, so you can find the perfect one for your needs.

Taking It to the Next Level

Here are some extra tips that can make your baking even more fun:

  • Experiment with flavors: Don’t be afraid to try new ingredients and combinations.
  • Decorate your creations: Get creative with frosting, sprinkles, and other toppings.
  • Share your treats: Baking is a great way to show your loved ones you care!

Expanding Summary

This article provided a variety of tips for baking, including the importance of measuring ingredients accurately, preheating the oven to the correct temperature, and understanding how to tell when your cake is done. It emphasized the importance of letting baked goods cool on a wire rack for even cooling and preventing sogginess. Beyond baking, the article discussed how subwoofers can enhance your listening experience, making your favorite music even more enjoyable. The article also mentioned Ecliptic Signs, a source for subwoofers and other audio equipment. Finally, the article encouraged readers to experiment with flavors, decorate their baked goods, and share their treats with others.


More on baking tips

Posted on Leave a comment

Self-helpguide ~ Ready To Bake Like A Pro? Your Hand…

self-helpguide, Hand & Stand Mixers, Tacoma, etc.

Self-helpguide near Tacoma

Selecting Your Joy-Inducing Stand Mixer

With a rainbow of stand mixers available, let’s explore the delightful options that await:

Tilt-Head Mixers: A Chef’s Delight

These mixers boast bowls that tilt forward, inviting you to effortlessly add ingredients and smooth out the sides. Imagine the joy of creating perfect batters and fluffy doughs without breaking a sweat!

Safety First: Your Mixer’s Best Friend

To keep your culinary adventures accident-free, follow these cheerful tips:

Instruction Oasis: Embrace the Manual

Before embarking on your culinary creations, embrace the wisdom of the instruction manual. It’s the “know-how” guide for your mixer’s perfect performance.

Sparkling Clean: A Well-Kept Mixer

Care for your mixer like a precious piece of art. Use a soft cloth or sponge to gently clean the bowl and attachments, ensuring its continued sparkle.

Anchor Away: Securing the Bowl

Before the mixer’s whirring begins, double-check that the bowl is firmly attached to the base. This ensures that your ingredients stay in place, preventing any unwanted messes.

Ready to Bake Like a Pro? Your Hand Mixer’s Best Friend!

TL;DR – Tired of hand-mixing batter for hours? A stand mixer can be a game-changer, especially if you love baking. Learn about different types of stand mixers, how to use them safely, and even find tips for cleaning and storing them. Plus, discover a fun baking tradition from Tacoma!

What’s a Stand Mixer?

A stand mixer is like a superhero in the kitchen. It’s a powerful machine that does the hard work of mixing for you, so you can focus on creating delicious treats. Imagine a bowl sitting on a sturdy base with a powerful arm that rotates and mixes ingredients. That’s a stand mixer!

Why Choose a Stand Mixer?

Stand mixers are awesome for several reasons:

  • Time-Saver: Say goodbye to hand-cramping! Stand mixers mix ingredients quickly and efficiently, leaving you more time to focus on other things.
  • Consistent Results: Stand mixers create perfectly blended batters and doughs, ensuring consistent results every time.
  • More Options: Stand mixers can do more than just mix! You can use them to whip cream, knead bread dough, and even make homemade pasta.

Choosing the Right Stand Mixer for You

There are lots of different stand mixers out there, but here are some of the main types:

Tilt-Head Mixers:

These mixers have a bowl that tilts forward, making it easy to add ingredients and scrape the sides. They are great for beginners and smaller kitchens.

Bowl-Lift Mixers:

These mixers have a bowl that lifts up, making it easier to remove and replace the bowl. They are great for heavier doughs and bigger batches.

Tips for Using Your Stand Mixer Safely

Before you dive in, here are some safety tips to remember:

  • Read the Manual: Before you start mixing, read the instruction manual for your specific stand mixer. It will explain all the safety features and how to use it properly.
  • Secure the Bowl: Make sure the bowl is securely attached to the base before you turn on the mixer.
  • Use the Right Attachments: Use the appropriate attachments for the task at hand. For example, use a dough hook for bread dough and a whisk for whipping cream.
  • Keep Your Hands Away: Don’t put your hands or fingers near the moving parts of the mixer.

Cleaning and Storing Your Stand Mixer

Taking care of your stand mixer is important to keep it working like a champ. Here’s what to do:

  • Clean It Right Away: Clean your stand mixer right after you use it to prevent food from drying and sticking.
  • Use the Right Tools: Use a soft cloth or a sponge to clean the bowl and attachments. Avoid using abrasive cleaners that could damage the mixer.
  • Store It Properly: Store your stand mixer in a cool, dry place to prevent rust and damage.

Tacoma’s Baking Tradition: The “Dough-Nuts” of Tacoma

Tacoma, Washington, has a unique baking tradition – the “Dough-Nuts” of Tacoma. It’s a giant doughnut-shaped cake that’s typically made for special occasions, like birthday parties and community gatherings. Imagine a giant doughnut filled with delicious cake batter, icing, and colorful sprinkles!

If you’re ever in Tacoma, make sure to check out the local bakeries to see if they have a “Dough-Nut” to try!

Summary

A stand mixer is a kitchen hero that can make baking fun and efficient. There are different types of stand mixers, each with its own advantages. By choosing the right mixer and using it safely, you can unlock a world of delicious possibilities! Don’t forget to take care of your mixer, and maybe even try making Tacoma’s “Dough-Nuts” next time you bake!

To learn more about stand mixers and baking tools, visit Ecliptic Signs.


More on self-helpguide

Posted on Leave a comment

Childrensmeal / Capture Those Precious Moments: Fun Food Ideas For…

childrensmeal near Georgia

Camera & Photo, etc

Immerse Yourself in the Culinary Throne with a Photo Shoot Fit for Royalty

Prepare to embark on an extraordinary photographic journey where every meal becomes a masterpiece worthy of a royal court. Capture the delightful moments of your little prince or princess savoring their delectable treats.

Elevate the Ordinary with Playful Accents

Transform a simple chalkboard into a canvas for wit, penning whimsical messages that add a touch of humor to your shots. Unleash your creativity with witty signage adorned with amusing quotes.

Harness the Magic of Produce

Witness the whimsical transformation of a banana into a sunny-faced companion. Utilize blueberries as expressive eyes and strawberries as a vibrant nose. The possibilities are endless as you weave edible elements into your captivating compositions.

Capture the Culinary Symphony

From vibrant snacks that serve as stunning backdrops to messy dinners that reflect the joy of family gatherings, the dining table presents a symphony of photographic opportunities. Embrace the chaos and capture the true spirit of mealtime.

Unleash Creativity with Boundless Ideas

Let your imagination soar as you turn your kitchen into a playground of culinary art. Utilize everyday items to create props, from ribbons and bows to colorful plates and utensils. The key is to have fun and let the laughter and joy of the moment infuse your photographs.

Capture Those Precious Moments: Fun Food Ideas for Kids’ Photos!

TL;DR – Too Long; Didn’t Read: Want to make your kids’ photos extra special? Try using food as props! From silly faces with fruit to colorful snacks that make awesome backgrounds, there are tons of creative ways to turn mealtime into a photo opportunity. We’ve got ideas for kids of all ages, even those who love to play with their food!

Food & Fun: Making Memories with Your Camera

Do you love taking pictures of your kids? Ever wish you could get more creative with your photos? Food can be a super fun way to add personality and excitement to your pictures. Think about it – kids love food, and they love being silly!

Easy Ideas for Small Fry Photographers

Fruit Faces:

Forget the filters! Turn a banana into a smiling face, or use blueberries for eyes and strawberries for a nose! You can even use a fork as a tongue!

Snack-tastic Backdrops:

Imagine colorful sprinkles or colorful candies scattered around your kid’s favorite toy. Or how about a plate piled high with pasta, looking like a mountain range? These make great backgrounds for photos.

Hands-On Fun:

Let your kids help you make the food designs. They’ll love the process, and you’ll get to capture their excited faces!

Getting Fancy with Your Foodie Photos

Themed Meals:

Pick a theme, like farm animals or pirates, and make food that matches! You can find tons of ideas online – just search for “themed food for kids.”

Food Art:

This is where you can really get creative! Use vegetables to make flowers, or use breadsticks to build a castle. You could even use a cookie cutter to cut sandwiches into fun shapes.

Photo Props:

Think beyond the plate! Use a chalkboard to write a funny message, or a fun sign with a silly quote.

Don’t Forget the Details

Lighting: Natural light is best for photos. Find a spot near a window, or take pictures outside.

Composition: Think about where you place your food and your kids in the picture. Experiment with different angles and perspectives.

Have Fun! Relax and let your kids enjoy the process. The best photos are often the ones that are spontaneous and playful.

Extra Tip: Check out Ecliptic Signs for unique and cool photo props!

A Photo Shoot Fit for a King or Queen

Whether you’re capturing a sweet snack time or a messy, chaotic dinner, food makes a great photo opportunity. So grab your camera, gather your ingredients, and get ready to capture those priceless moments! From fruit faces to themed meals, the possibilities are endless when it comes to using food as a photo prop. Don’t be afraid to get creative and let your imagination run wild. And remember, the most important thing is to have fun and enjoy the time with your kids!


More on childrensmeal