Have you learnt that over 70% of first-time visitors received’t ever return to your website online another time?
As internet web page house owners ourselves, everyone knows that accumulating a buyer’s email care for is a good way to keep in touch with them and encourage them to come back again once more. Alternatively, visitors want a the explanation why to hand over their personal knowledge – and a lead magnet like an guide or PDF is a brilliant motivator.
Most likely you already have a lead magnet in a different way you intend to create some shortly. Regardless, one thing is understand that – you’ll moreover need an optin form to gather leads, building up your e mail subscribers, and provide fast get right to use to your lead magnet.
In this data, we’ll share two other ways to create a high-converting lead magnet optin form.
Necessary Understand: The main means is highest when you occur to haven’t created a lead magnet however, as you’ll have the ability to assemble the optin and magnet the usage of the exact same software. So, when you occur to’re searching for an all-in-one solution, you’re in the appropriate place!
<span class=”ez-toc-section” id=”why-create-a-lead-magnet-optin-form-in-wordpress“/>Why Create a Lead Magnet Optin Form in wordpress?
There are many other ways to create an optin form. Then again, in our experience, they don’t at all times look very good or art work appropriately on wordpress internet pages.
In this data, we’re focusing on apparatus which were designed for wordpress and have a loyal wordpress plugin. This makes it easy to create optins that mix seamlessly together with your internet web page and mean you can generate leads with minimal effort.
Plus, you’ll maximum steadily have a much more easy time connecting the optin to other products and services and merchandise you’re already the usage of for your website online, specifically your email promoting and advertising provider. That is serving to you nurture leads, add them to automatic workflows, monitor the actions they take for your website online, and perform a ton of different crucial tasks.
You’ll moreover get all the benefits maximum steadily associated with wordpress, along with additional customization possible choices and ownership over your wisdom.
While there are lots of imaginable possible choices available, growing your optin bureaucracy in wordpress in reality does offer unmatched advantages when it comes to keep watch over, customization, and integrations.
That mentioned, you’ll have the ability to use the quick links beneath to jump without delay to the method you want to use:
Are you ready? Let’s dive right kind in!
Method 1. Using Beacon (Perfect imaginable All-In-One Solution)
Beacon is an excellent lead magnet device that lets you create endless optins the usage of an intuitive, drag-and-drop builder.
Now not like an an identical lead technology plugins, Beacon moreover has the whole thing you want to create lead magnets.
It has a ton of ready-made templates protective a number of quite a lot of lead magnets, along with eBooks, helpful useful resource guides, checklists, and video lookbooks.
With all that mentioned, Beacon is a smart selection when you occur to’re searching for an all-in-one solution for growing surprising lead magnets and then distributing them the usage of optins.
We did a deep dive into its choices for our Beacon overview, so you may want to check out that out.
Skilled Tip: In this data, we’re focusing on growing lead magnet optin bureaucracy, so we received’t show you ways you’ll be able to assemble a lead magnet the usage of Beacon. We have a separate data for that. Head over to our publish on how you can create a lead magnet that converts for more information.
Already have a lead magnet? You then’ll have the ability to upload this handy useful resource to your Beacon account and then create an optin for that lead magnet.
That means Beacon is also a good choice if you already have a library of lead magnets, and easily need to create optins for those assets.
What’s additional, Beacon has a ‘loose ceaselessly’ plan that lets you create as many optins as you want. With that all through ideas, Beacon is highest if you want to experiment with fairly a large number of different optin varieties and formats, to appear what delivers the most efficient results.
Step 1. Create a Beacon Account
As we already mentioned, Beacon has a ‘loose ceaselessly’ plan that lets you create as many lead grasp bureaucracy as you want. Alternatively, the loose plan limits you to creating 1 new lead magnet per month.
So, depending for your needs, you may need to invest in a best charge plan in an instant.
To get started, head over to the Beacon web site and each sign up for a best charge plan or create your loose account.
With that finished, log into the Beacon dashboard, and in addition you’re ready to create your first lead magnet optin form.
Step 2. Add Your Email correspondence Provider (Now not mandatory)
While you grasp a brand spanking new lead, Beacon can send that specific particular person’s knowledge to your e mail advertising and marketing provider routinely. It could even add tags so that you’ll have the ability to phase the ones leads and run focused campaigns one day.
If you want to use this feature, then head over to Account Settings » Email correspondence Integrations inside the Beacon dashboard. Then, click on at the ‘+’ button.
Next, open the ‘Choose Provider’ dropdown and choose your email promoting and advertising supplier, similar to ActiveCampaign, CampaignMonitor, or Drip.
Then, simply follow the onscreen instructions to organize this integration.
Step 3: Choose Your Lead Magnet
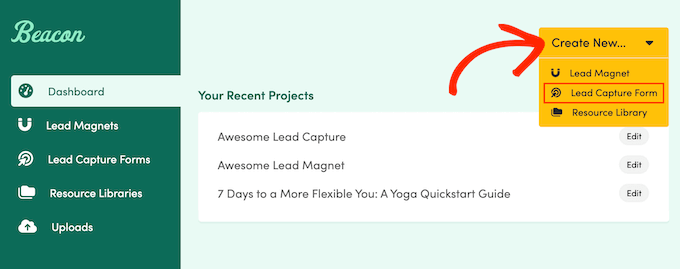
The next move is choosing the lead magnet you’ll offer to visitors. To check out this, click on on on the ‘Create New’ button, followed by the use of ‘Lead Grasp Form.’
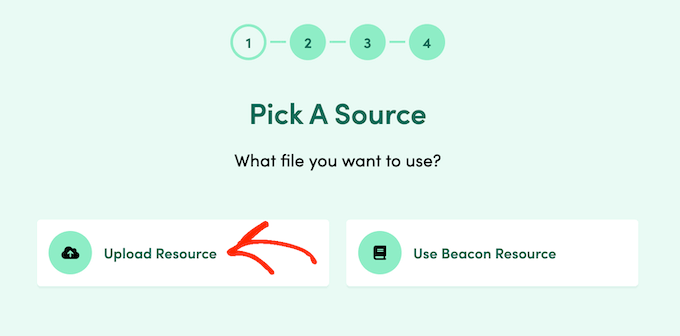
At this stage, you’ll have the ability to each choose a lead magnet you’ve created the usage of Beacon or upload an external helpful useful resource you created the usage of every other program.
To use an external document, choose ‘Upload Helpful useful resource.’
You’ll have the ability to then click on at the ‘Choose Report’ button.
After that, choose any document from your local computer.
Alternatively, you’ll have the ability to use a lead magnet you created with Beacon. To try this, simply choose ‘Use Beacon Helpful useful resource.’
You’ll now see all the different lead magnets you created. Find the helpful useful resource you want to use and click on on on the corresponding ‘Choose’ button.
Step 4. Choose a Template
It doesn’t topic what selection you choose, the next move is deciding on your optin format.
For this knowledge, we’ll be growing an inline form, as this allows you to keep watch over exactly the position the form turns out for your website online.
For example, you’ll want to place it on a touchdown web page or midway via a decided on blog publish. Alternatively, the steps may also be an an identical for all the different optin formats.
That mentioned, we’re going to choose ‘Inline Form’ at this stage.
Beacon will now show all the different ready-made templates you’ll have the ability to use. Numerous those templates are completely customizable, so that you’ll have the ability to fine-tune them to match your wordpress theme or branding.
Alternatively, to save some time, it’s smart to choose a template that carefully resembles the kind of optin you want to create. That way, you don’t should do quite a lot of enhancing.

While you find a template you want to use, give it a click on on.
Then, sort in a name for the optin form. This may increasingly sometimes represent the form all over the Beacon dashboard, so it’s a good idea to use something descriptive.
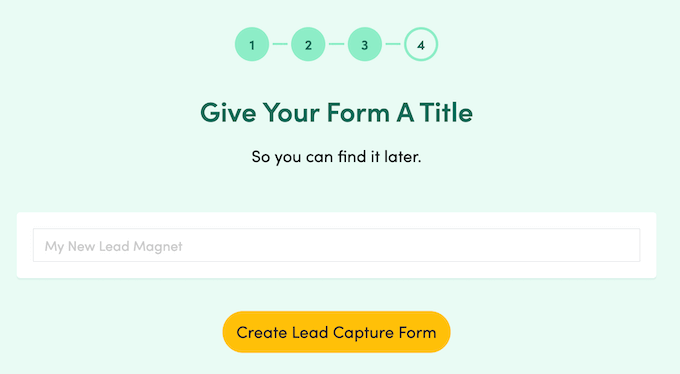
Once that’s finished, click on on on the ‘Create Lead Grasp Form’ button.
Step 5. Customize Your Optin Form
Beacon will now load your most popular template in its drag-and-drop editor. This editor is split into multiple tabs, starting with the ‘Motive’ tab, which is in large part how the form will appear for your internet web page.
To the left is a live preview that’ll change routinely as you’re making changes.
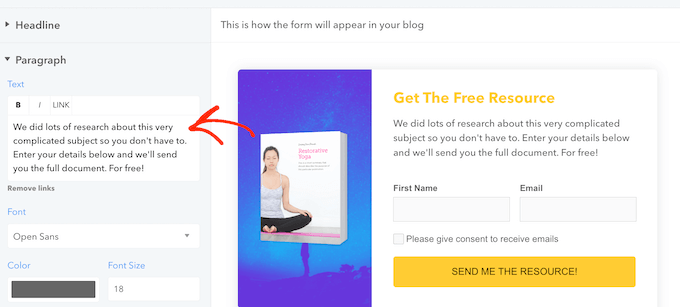
All the Beacon templates come with built-in, default content material subject material. To edit a built-in phase, each click on on to choose it inside the live preview or choose it inside the left-hand menu.
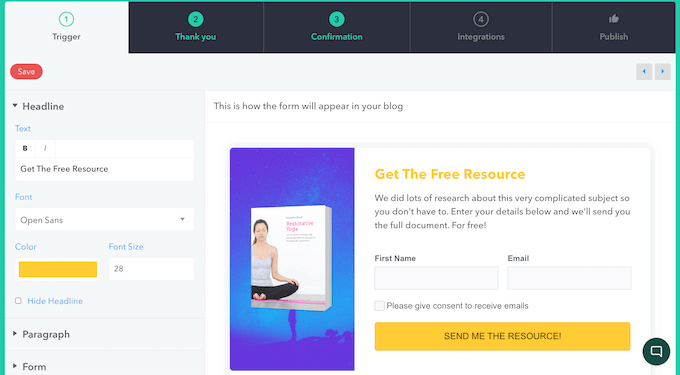
While you do, the menu will show all the settings you’ll have the ability to use to customize this phase, similar to changing the text measurement, font color, and background color.
If the phase contains text, then you definately’ll see a work where you’ll have the ability to exchange it with your own messaging.
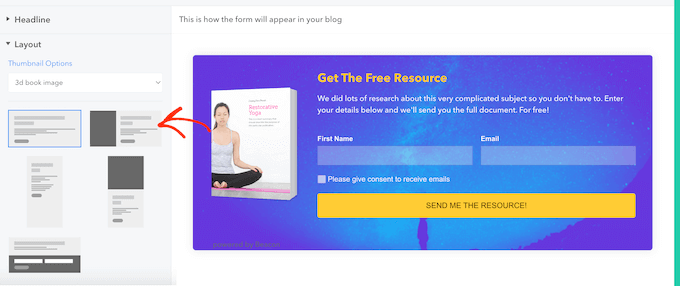
Want to make better changes to the inline form?
You’ll have the ability to click on directly to magnify the ‘Structure’ phase and make a choice from fairly a large number of layout possible choices.
Want to exchange the background image or color? Then click on directly to magnify the ‘Container’ phase and then use the fairly a large number of settings that appear.
As you’re making changes, the live preview will change routinely, so that you’ll be in a position to try fairly a large number of different settings to appear what you prefer highest.
Step 6. Design a Thank You Internet web page
Next, it’s time to customize the ‘Thank You’ message that Beacon will show each and every time any person completes your form. To get started, click on at the ‘Thank You’ tab.
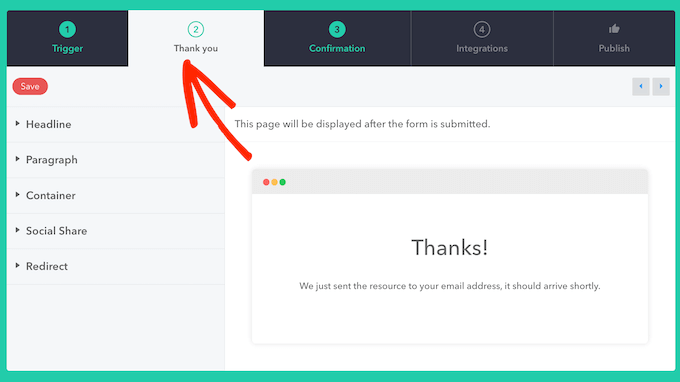
Once another time, Beacon presentations a live preview to the appropriate and fairly a large number of settings on the left.
You’ll have the ability to now exchange the headline, paragraph, and container settings within the equivalent way you customized the ‘Motive’ internet web page.
Alternatively, the ‘Thank You’ tab has an extra ‘Social Share’ phase. This permits you to add a row of social sharing buttons to the ‘Thank You’ internet web page so visitors can share your lead magnet optin form right through social media.
The ones icons are hidden by the use of default, on the other hand you’ll have the ability to exchange this by the use of clicking to magnify the ‘Social Share’ phase and then unchecking the ‘Conceal Social Share’ box.
You’ll have the ability to then add or remove buttons for Twitter/X, Facebook, LinkedIn, or sharing by way of email. You’ll have the ability to moreover exchange the text that appears above this row of social sharing buttons, along with the font measurement and color.
Don’t need to display a ‘thank you’ message?
Beacon can redirect the buyer to any other URL instead, similar to a completely customized ‘thanks’ web page you created the usage of a plugin like SeedProd.
To try this, click on directly to magnify the ‘Redirect’ phase and then sort inside the URL you want to use.
Step 7: Customize the Confirmation Email correspondence
By means of default, Beacon will routinely send an email confirmation to everyone who completes your form. This email contains a ‘Download’ link for your lead magnet, so it actually works out of the sphere.
Alternatively, the default template is beautiful basic, in order that you’ll maximum steadily need to customize it.
To try this, click on at the ‘Confirmation’ tab.
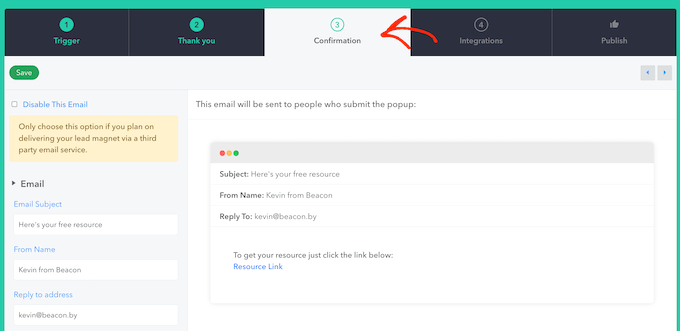
Once another time, you’ll see a live preview to the appropriate and various different possible choices inside the left-hand menu.
Proper right here, you’ll have the ability to exchange the email subject, the ‘from’ name, the ‘reply to’ care for, and the email body.
For individuals who’ve attached Beacon to your e mail advertising and marketing supplier, you then’ll have the ability to moreover permit double opt-in.
This calls for patrons to verify their subscription by the use of opening your email and clicking a link. Once that’s finished, Beacon will add their contact knowledge to your email promoting and advertising provider.
In this way, you’ll have the ability to avoid together with spambots or wrong email addresses to your mailing file. That is serving to to stay your record blank and healthy while heading off dropping assets by the use of sending messages to inactive email addresses.
Because of this, we advise clicking to magnify the ‘Make a selection-in Settings’ phase and then deciding on ‘Double Make a selection-in’ till you’ve a very specific the explanation why not to.
For added on this topic, please see our data on how you can save you signup unsolicited mail in wordpress.
Step 8: Publish Your Form
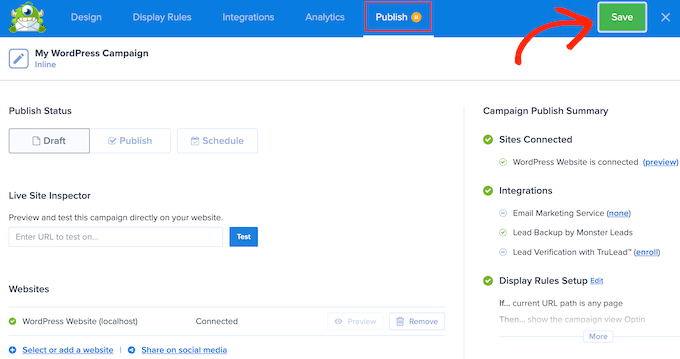
While you’re happy with how your optin is ready up, it’s time so that you could upload it to your website online. Thankfully, Beacon makes that straightforward. Simply choose the ‘Publish’ tab to get started.
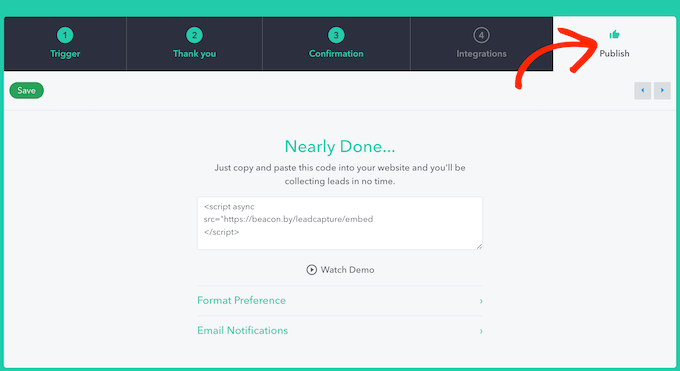
On this internet web page, you’ll see some HTML code that Beacon creates routinely.
Previous to navigating transparent of this show, you’ll want to click on on on the ‘Save’ button to store your latest changes.
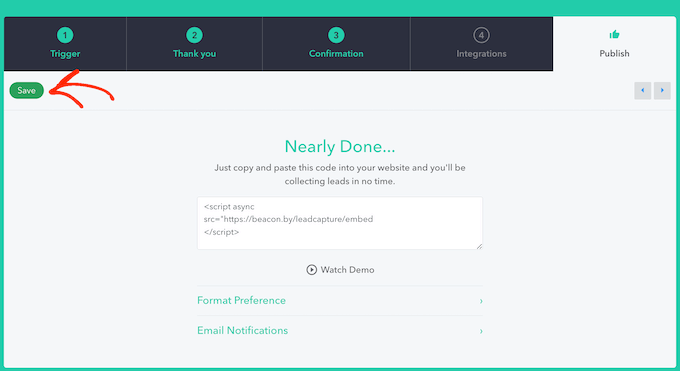
Then, copy the HTML code and head over to your wordpress internet web page. You’ll have the ability to now add this code to any internet web page, publish, or widget-ready house the usage of the ‘Custom designed HTML’ block.
As an example, let’s see the way you’ll have the ability to add the optin to a publish. Simply open the publish as same old inside the content material editor, and then click on at the ‘+’ button.
Use the search software to seek out the ‘Custom designed HTML’ block and add it to the internet web page.
Now, move ahead and paste your code into the Custom designed HTML block.
You’ll have the ability to now add additional content material subject material to the internet web page, tweak its design, and make other changes, as same old. While you’re ready to move live, simply change or post the internet web page.
Now, when you occur to talk about together with your wordpress internet web page, you’ll see the lead magnet optin in movement.
Method 2. Using OptinMonster (Perfect imaginable For Rising Difficult Optins)
Do you already have a lead magnet you want to use for your campaigns? Then OptinMonster could also be the very best solution for you.
It means that you can create all kinds of advanced optin bureaucracy, along with formats like floating bars, popups, and gamified spin-to-win optins. Plus, it has a template library of 400+ high-converting designs that you just’ll have the ability to customize with its drag-and-drop builder.
We’re huge fans of this software ourselves. We use it for all our pop-ups, slide-ins, and header banners. So we can confidently allow you to know that when it comes to growing optins, the chances are almost about never-ending with OptinMonster.
To learn additional, see our whole OptinMonster overview.

The great issue about OptinMonster is that it means that you can send lead magnets by way of email, direct download, or each and every, giving your subscribers the freedom to choose their most popular means.
Even if you’ll have the ability to use OptinMonster’s gated content material subject material feature to turn any blog publish proper right into a lead magnet or content material improve, its true energy lies in growing extraordinarily environment friendly optin bureaucracy.
With that mentioned, we advise OptinMonster if you already have some lead magnets, and want a approach to grasp as many leads as possible.
Step 1. Organize OptinMonster
First, you’ll need to sign up for on the OptinMonster web site. Simply click on at the ‘Get OptinMonster Now’ button to get started.
You’ll have the ability to then make a choice the OptinMonster plan you want to buy and follow the onscreen instructions to complete your gain.
With that finished, it’s time to place in and switch at the unfastened OptinMonster wordpress plugin. This connects your wordpress website online to your OptinMonster account.
For added details, please see our data on how you can set up a wordpress plugin.
Each time you flip at the plugin, you’ll see the OptinMonster welcome show and setup wizard. Transfer ahead and click on at the ‘Connect Your Present Account’ button.
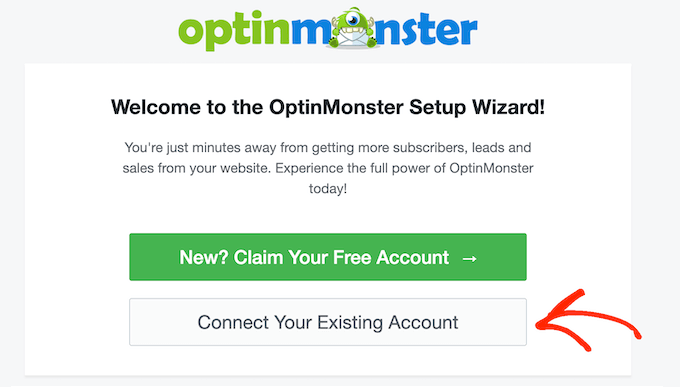
You’ll now see a small window where you’ll have the ability to sign into your OptinMonster account.
In this popup, click on at the ‘Connect to wordpress’ button to link your internet web page to OptinMonster.
Step 2. Choose a Advertising and marketing marketing campaign Type
Now, you’re ready to create your lead magnet advertising marketing campaign by the use of heading over to the OptinMonster » Campaigns internet web page for your wordpress dashboard.
With that finished, click on at the ‘Add New’ button.
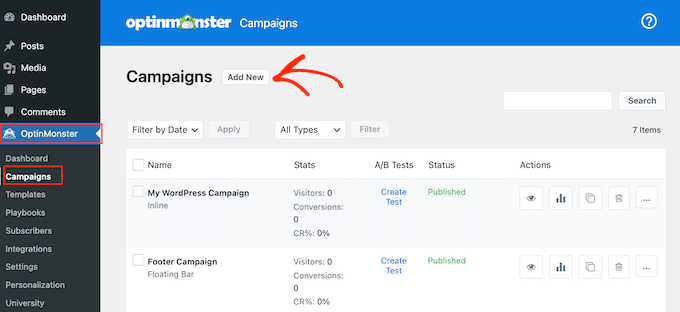
OptinMonster will now ask you to choose a template or use a playbook.
Playbooks are ready-to-use campaigns in line with tried-and-tested strategies from one of the most important international’s most a luck producers, so that they’re absolute best for growing high-converting campaigns, fast.
Alternatively, in this data, we’ll be deciding on ‘Templates.’
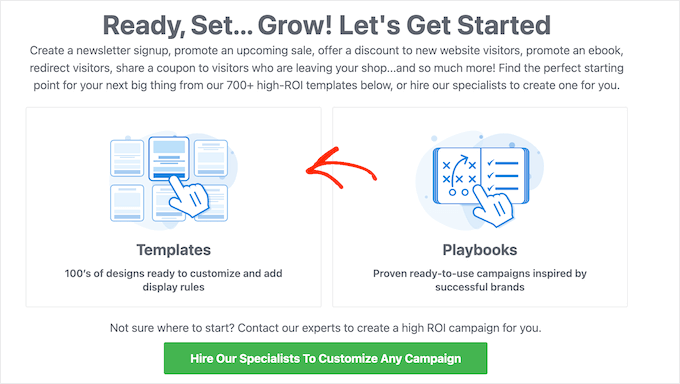
At this stage, OptinMonster will show all the different advertising marketing campaign varieties you’ll be in a position to choose from. This incorporates slide-ins, floating bars, and gamified popups.
The steps may also be an an identical it doesn’t topic what type of advertising marketing campaign you choose. Alternatively, in this data, we’ll be growing an inline form, because you’ll have the ability to add it merely to any internet web page, publish, or widget-ready house. With that mentioned, move ahead and choose ‘Inline.’
Step 3. Choose a Template
You’ll have the ability to now make a choice the template you want to use. All the OptinMonster templates are completely customizable, on the other hand you’ll have the ability to save time by the use of choosing a template that carefully represents the form you want to create.
To preview a design, simply hover over the template and then click on at the ‘Preview’ button.
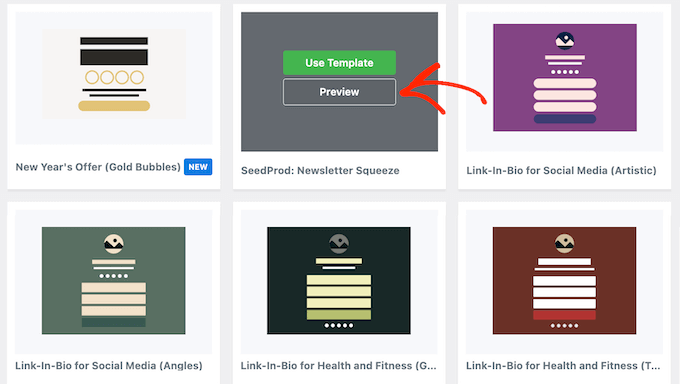
This opens the template in a popup.
While you find a design you want to use, click on on on the ‘Use Template’ button. We’ll be the usage of the Unlock Gated Content material subject material template in all our screenshots, on the other hand you’ll be in a position to make a choice any design you want.
After deciding on a template, move ahead and gives your advertising marketing campaign a name by the use of typing into the popup that appears. Then, click on on on ‘Get began Building.’
Step 4. Assemble Your Lead Magnet Optin
OptinMonster will now load your template in its drag-and-drop editor so that you’ll have the ability to customize it.
All the templates come with built-in blocks, similar to Text, Image, and Button blocks. To edit any block, simply click on on to choose it inside the live preview.
The left-hand menu will then show all the settings you’ll have the ability to use for that exact block.
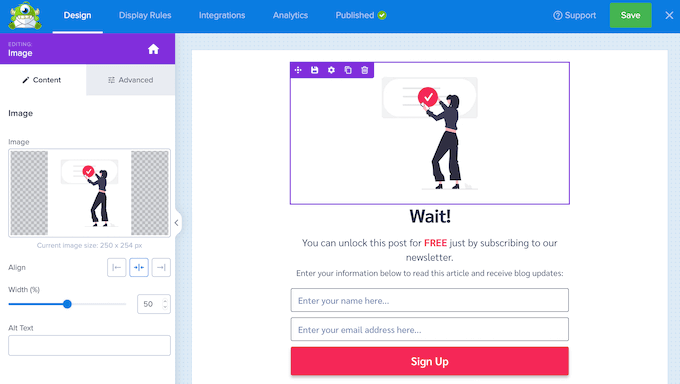
You’ll have the ability to moreover exchange text in an instant inside the live preview.
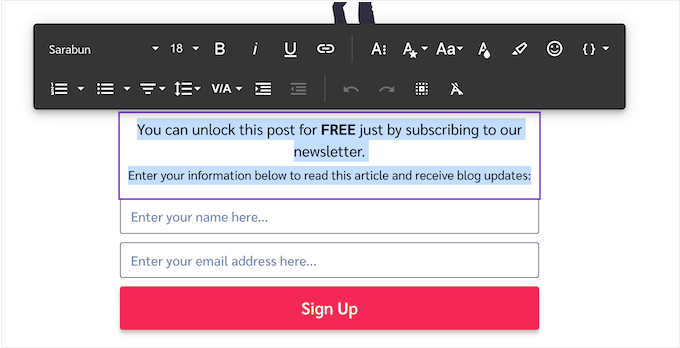
To switch the text style, simply highlight it and then use the settings inside the toolbar that appears.
Want to delete a block instead?
Merely hover over it inside the live preview and then click on at the rubbish can icon when apparently.

In an effort to upload additional blocks to your design, simply drag them from the left-hand menu and then drop them onto the live preview.
Simply repeat the ones steps until you’re happy with the lead magnet optin form.
Step 5. Design Your Good fortune Message
When any person completes your optin form, OptinMonster will display a ‘good fortune’ message by the use of default. To customize this show, click on at the ‘Good fortune’ tab.
At this stage, you want to choose how visitors get right to use your lead magnet: by way of email, an instantaneous download, or each and every.
This feature will affect your ‘Good fortune’ message’s design and content material subject material. For example, when you occur to send your lead magnet by way of email, then the message must tell shoppers to check their inbox.
Within the interim, for direct downloads, you’ll need to add a button so visitors could cause their download.
It doesn’t topic what means you choose, you’ll design the good fortune message within the equivalent way for the reason that opt-in form.
Simply click on on to choose the built-in blocks and then customize them the usage of the settings inside the left-hand menu. You’ll have the ability to moreover drag new blocks onto the layout, sort in text, and delete unwanted blocks.
For individuals who’re the usage of the download means, then remember to add a Button block to your lead magnet optin. Then, open the ‘Button Click on on Movement’ dropdown inside the left-hand menu and choose ‘Open in a brand spanking new window.’
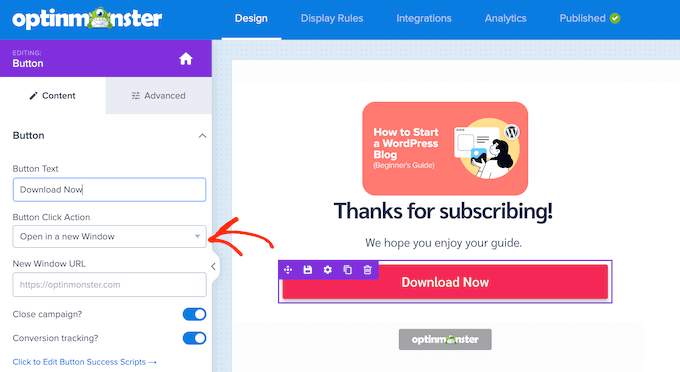
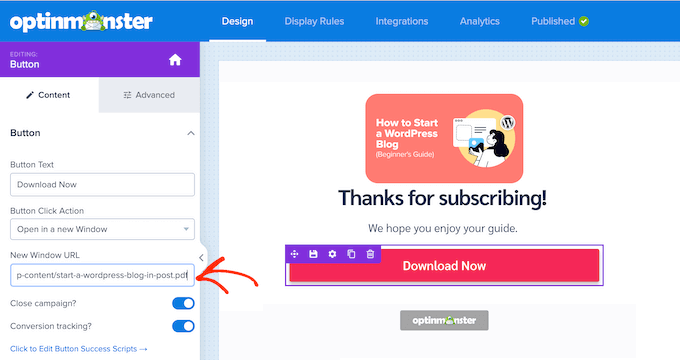
Inside the ‘New Window URL’ field, paste an instantaneous link to your lead magnet.
Now, when any person clicks this button, the document will open in a brand spanking new tab, looking ahead to them to save some.
Finally, remember to permit the ‘Conversion tracking’ slider so that you’ll have the ability to monitor how folks interact with this button.
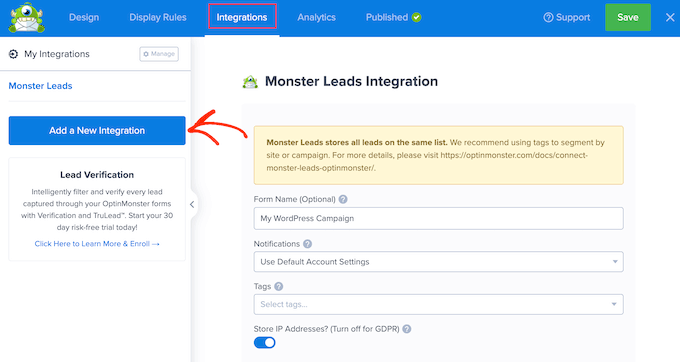
Want to send your lead magnet by way of email? Then click on on on the ‘Integrations’ tab and choose ‘Add a New Integration.’
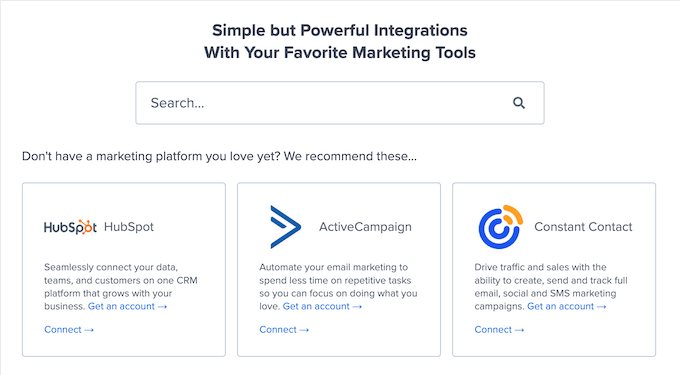
You’ll have the ability to now make a choice your e mail advertising and marketing supplier.
With that finished, follow the onscreen instructions to configure the blending and create your email. The steps will vary depending for your provider, on the other hand OptinMonster will data you all through the process.
Step 6. Publish Your Optin Form
The whole step is together with the lead magnet optin to your wordpress internet web page. To try this, move ahead and click on at the ‘Publish’ tab. You’ll have the ability to then click on on ‘Save’ inside the toolbar.
Inside the popup that appears, choose ‘Publish Now.’
Since you already put within the OptinMonster plugin, this optin may also be available for your wordpress dashboard in an instant.

Simply head over to your internet web page and open the internet web page or publish where you want to turn the lead magnet optin.
Then, click on at the ‘+’ button so that you could upload a brand spanking new block. Use the search software to look out the ‘OptinMonster’ block and simply add it to your internet web page or publish.
Then, inside the OptinMonster block, open the dropdown that says ‘Choose Advertising and marketing marketing campaign…’ by the use of default.
Proper right here, you’ll want to make a choice the promoting marketing campaign you merely created.

OptinMonster will now add the lead magnet optin form to your internet web page.
While you’re ready to make it live, simply change or post the internet web page as same old. And that’s it!
Bonus Belongings for Lead Era
Now that you just’ve were given your lead magnet optin form prepare, you may wish to be informed some additional articles to boost your lead generation efforts:
For individuals who preferred this newsletter, then please subscribe to our YouTube Channel for wordpress video tutorials. You’ll have the ability to moreover find us on Twitter and Fb.
The publish Find out how to Create a Lead Magnet Optin Shape in wordpress (2 Tactics) first appeared on WPBeginner.
wordpress Maintenance
[ continue ]
wordpress Maintenance Plans | wordpress hosting
read more
<a href=”https://wpmountain.com/find-out-how-to-create-a-lead-magnet-optin-shape-in-wordpress-2-tactics/”>Source link
![Download Now: Free Marketing Plan Template [Get Your Copy]](https://worldproductreview.com/wp-content/uploads/2024/08/Come-puoi-usare-i-omaggi-per-ottimizzare-la-tua-era-150x59-1.png)